Alto's Adventure: Tips, tricks, and pointers to get you past the triple backflip and more

As anyone who follows me on Twitter can attest, I became a teensy bit obsessed with Alto's Adventure. The endlessly-charming endless runner for iOS and Apple TV combines llamas, snowboarding tricks, beautiful landscapes, and devilishly hard goals to keep you coming back time and time again. I've spent awhile with Alto's twisting slopes and precipitous chasms, but news of upcoming sequel Alto's Odyssey had me pulling the game back out for more fun on the slopes. Here are a few of my top tips for acing each one of those 60 levels and beating your friends' high scores.
Just the basics
Grinding is key
When you start out on the slopes with Alto, you can score points by performing a number of tricks, including backflips (by tapping and holding anywhere on the screen), jumping on rocks or campfires, and grinding on flag lines or rooftops.

Single backflips, though fun to do, score a paltry 10 points per flip; rock bounces are a bit better, offering 80 points. Grinds, though, stack depending on how long you stay on the line or roof: They start at 10 points, then add 5 points every 2 meters.
As such, grinds are your best bet for initial point values. Even better, you can combine grinds with other tricks to multiply your score. Every trick you do adds a multiplier value: For example, a backflip onto a grind with a backflip in-between or at the end of the grind will net you 3x your initial point value collection. There are even sections of the game where you can jump from line grind to roof grind to increase both your initial point value and your multiplier.
You'll only get those points if you land your trick, however, so make sure to stick the landing and avoid crashing into the snow.
Use your cast of characters
The game may be called Alto's Adventure, but Alto isn't the only playable character in your arsenal. As you play through the game, you'll unlock a total of six mountain-dwellers, each with their own unique abilities.
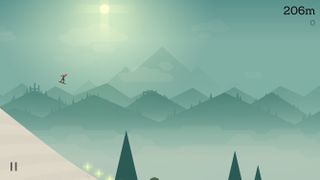
Alto is the protagonist, and as such sports all-around decent snowboarding abilities.
Master your iPhone in minutes
iMore offers spot-on advice and guidance from our team of experts, with decades of Apple device experience to lean on. Learn more with iMore!

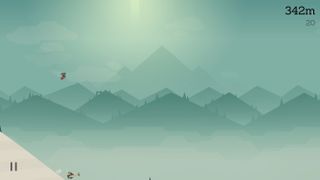
Maya (one of my three favorites) is spry and light and can make quick work of backflips, but has trouble with speed and chasms if she's not coming off a trick boost. She's great fun for doing long runs and scoring crazy combos, however.


Paz is a smasher: He's big and not really a backflip kind of guy, but will pick up some serious speed on downhill runs, ice slides, and grinds. And when he's riding a speed boost off a trick, he can demolish all manner of items for a much longer period of time than Alto or Maya.


Izel is reputedly responsible for all the fancy gadgets you can pick up in the workshop. She's a faster backflipper than Alto or Paz, and gets extra speed boosts off tricks thanks to some fancy rocket-powered snowboard technology. I love using Izel to travel many meters quickly, though that speed sometimes means she can run into unpredictable chasms and snowbanks.


Felipe is my secret favorite character: a llama who snuck out of Alto's home and has learned how to snowboard. Being a llama, Felipe has a bit more jumping ability than his human friends, and can double-jump to get some extra airtime. You can time Felipe's jumps by either double-tapping instantly to get some initial big air, or tapping once and then tapping a second time to stall Felipe's snowboard and give him a little extra time to land his jump.


Tupa is the eldest and wisest of Alto's cast of characters, and by virtue of being the level 50 character unlock, he has skills stolen from each prior character. He has Maya's quick flipping, Paz's extra speed boost time, Izel's rocket snowboard, and Felipe's double-jump capability. Moreover, he has an extra-special power as it relates to chasms, which I won't spoil for those who haven't yet unlocked him.
Find order in the randomized maps
In true endless runner fashion, Alto's maps are randomized, so you'll take a slightly different snowboarding run each time you head down the mountain. That said, there are a few features that routinely and regularly appear, and if you pay attention, you can plan for them.
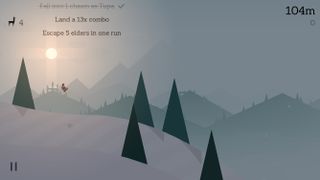
You'll always have two minor hills at the top of each run, which I like to use to calibrate how quickly it takes your character to do a backflip. From there, you can expect to see one to two chasm jumps before your first elder (who usually appears around 2500m), then one to three chasm jumps in-between each subsequent elder.
Each elder you encounter will be slightly faster at chasing you than the last, and do expect to see more rocks pop up in your terrain as time goes on.
Look out for chasms
Chasms can be the bane of an otherwise awesome Alto run, in part because they feel so unpredictable and have a variety of different designs and styles. There are easy chasms that offer a ramp up to a flag line you can grind; there are multiple tiny chasm jumps; and there are downright scary chasms that require you to jump 15m upwards to land on the other side.
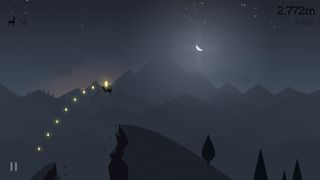
In general, the easiest way to get over a chasm is to ensure you're riding on a speed boost from a recent trick, though if you have Alto's Wingsuit, you can occasionally cheat and fly over a chasm rather than having to jump it.
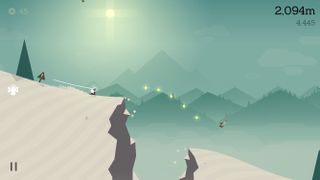
There are two ways you can stay vigilant for chasm jumps: look out for the chasm signs, and pay attention to the map ceiling. The signs are fairly easy to spot: little triangle hazard wedges planted anywhere from 10 to 100 meters before a jump, depending on the chasm's severity.
The latter is for speed runs: When you're going speedily down the mountains in Alto's Adventure, the map zooms out to let you see more of your run.
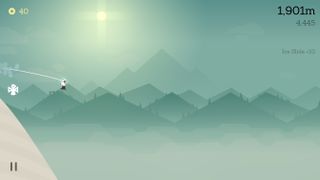
Chasms, however, have a fixed zoom, and as a result, if you're going fast and suddenly the map starts to zoom in, you'll probably want to start doing a backflip or activate the wingsuit to avoid accidentally dropping into a gap within the mountain, never to be seen or heard from again.
Escape pesky elders
On Alto's mountain snore many a tired elder, and they don't particularly like enterprising young snowboarders, llamas, or fellow elders doing backflips above their head. If you wake an elder, you want to stay ahead of him at all times, lest he fell you with a whack from his riding stick.

The easiest way to do this? Backflips and grinds. Lots and lots of backflips and grinds, and if you have the wingsuit, combo those up for even more speed. Every little boost helps. Even if it looks like an elder is catching up with you while you're in the air, the speed boost you'll get from landing your combo will help you run far off down the mountain while he and his llama remain behind.
(Just make sure you don't accidentally land on a rock after executing your combo—the slow bounce off the rock let the elder whack me with his riding crop, ending a particularly long run.)
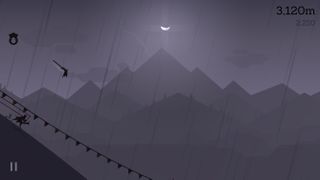
You can finally ditch an elder by escaping over a chasm, as pet llamas turn out not to be very good about chasm-jumping (unless they're on a snowboard).
Lengthen your scarf by performing trick combos
Each of Alto's characters sport a bright red scarf, which grows as they perform tricks and combos while speeding down the mountain. Stop doing tricks, and the scarf shortens.

You can use the scarf as a benchmark for your speed boosts, as well as measuring how close you are to activating the wingsuit (after you've purchased it from the Workshop).
The easiest way to quickly lengthen your scarf is to try for proximity backflips—these are backflips you do close to the ground. I mention later in the guide on best places to do these, most of which are early-on in your run; chain these with a few grinds, and you'll get your wingsuit before the first chasm.
Boost your screen brightness for nighttime and weather events
One of Alto's charms is that the game has ever-changing weather, time, and scenery, but that can also be frustrating when you're, say, trying to backflip through a dark, stormy night.

My solution: Pump up the brightness on your iPhone or iPad screen.
Buy the magnet timer from the Workshop first
There are three items in the Workshop: The Magnet timer, Hover timer, and Wingsuit, all of which can be purchased with the in-game coins you pick up along your runs. Though it may be tempting to buy the Wingsuit off the bat, I suggest investing in the five Magnet timer levels first: The Magnet automatically picks up coins for you, and the longer it runs, the more coins you can pick up without having to manually backflip or snowboard through them.

More automatic coin pickup means more money quickly, which gives you a faster path to buying the Wingsuit and the extended Hover timer.
Master tricky combos
Smash rocks and campfires with ice and combos
You can score bonus points (and avoid tripping over rocks) by smashing rocks and campfires using a post-combo speed burst: Any time your character has what looks like a force shield in front of them, they can break rocks and explode campfires.

Just be careful — that force shield only lasts for so long, and you don't want to accidentally trip over a rock you wanted to destroy.
Master double and triple backflips
There are a couple of devilishly evil level goals within the game, one of which is "land two triple backflips in one run." Though undoubtably hard, this goal is definitely achievable with Maya and some careful timing. Getting the top speed boost from a trick and jumping off one of the giant hill dropoffs is the best way I found to accomplish this, though you can also do a double backflip off a ramp or grind and use a rock bounce to achieve that third flip. (If you do a double backflip and hit the top of a rock, you're still considered to be "mid-flip" and can complete an additional rotation to count as your third.)
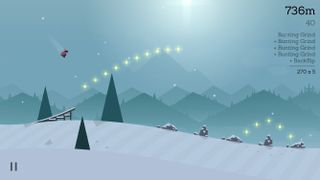
I also suggest practicing your flips with a Hover feather: If you see a blue feather in the course, you can pick it up and flip to your heart's content — if you land on your head, the hover timer will reorient you upwards and continue your route.
How to rock bounce to grind
I spent an ungodly amount of time trying to master rock bounces after running up against the goal "Rock bounce to grind twice in one run." And, spoiler: Even with a lot of time and practice, this is a hard goal to achieve. In part, this is because rock bounces are tricky beasts: Most characters have high horizontal jump speed, so timing your jumps to land on a rock — especially a rock before a grind — is a difficult proposition.
I found a few different ways to finally achieve this goal: repeatedly jump with Maya to slow myself down before a field of rocks; activate Felipe's double jump to jump early and use the second jump to stall over the rock; and use the wingsuit to fly over a rock, then deactivate it to drop right on top of the rock.
How to kiss the rail
The 250-point "kiss the rail" bonus happens when you land on the last two meters of a grind and then hop off again; it's also the subject of a few different goals. The easiest way to do this is to backflip off the second-to-last chain on a flag line, then let go of the backflip to clip the very end of the line. You can also accomplish this by having Felipe or Tupa jump, then tap again to stall over the end of the line.
The best place to do a proximity backflip
Like kissing the rail, a proximity backflip — essentially, a backflip where your head rotates close to the ground — nets you some sweet bonus points. You'll also need to perform a few of them for goals throughout the game. Luckily, there's a great place to do a proximity backflip right at the start of the game using Maya: After the very first hill, jump right at the flat before the second bend.

If you miss out on a proximity backflip here, you might also try backflipping a lot with the Hover feather: If you land, you'll get the points and the goal; if you don't land it, you'll get to continue your run.
Backflip over sleeping elders (with a wingsuit assist)
Generally, you should be able to backflip over a sleeping elder using Maya with little difficulty — the game's randomized hills are almost always designed in such a way to make it a landable trick.
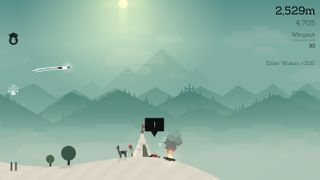
If you keep waking the elder up, however, you can always use my cheaty-mc-cheaterson way: Time your wingsuit flights and fly over the elder, then backflip before you hit the ground.
On catching llamas and scaring birds
The game's length goals are often the most frustrating, but can be achieved if you focus on a trick-conservative, play-it-safe run. Especially when it comes to collecting scared birds, I found using Felipe and his double jump saved me from a lot of precarious situations — like coming into a chasm with no speed. Whoops.
Stock up on helmets and chasm rescue pickaxes
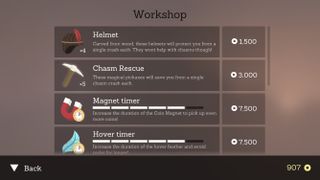
In the 1.1 update, Alto's Workshop gets a few awesome new items: namely, the chasm rescue pickaxe and the anti-crash helmet. Yes, helmets now protect you both in the real world and on Alto's icy slopes; purchase one for 1500 coins and you'll survive the next crash you encounter on a run. Like most real-world helmets, however, Alto's concoctions are one-and-done—you'll get through your first crash unscathed, but you won't be so lucky your second time around. Same goes for the pickaxe, which for a paltry 3000 coins, will save your snowboarder from a run-ending chasm fall.
Helmets are especially useful when you're practicing double- and triple-backflips, or when trying to best your current run length; pickaxes can save your snowboarder's bacon early-on when you're still collecting characters and need to get over especially tricky chasms; after you've gotten Tupa, you can also use it to have a third chance at chasm recovery.
Get all the llamas you need with the Llama Horn
Can't seem to collect the right number of llamas for a particular goal? Purchase the Llama Horn from the Workshop to have a chance at seeing it during a run; if you pick it up, you'll get a stampede of llamas coming your way, ready for the collecting. (Horns show up once about every 5000-7500 meters, so don't panic if you miss the first one on a run.) You can increase the horn's strength five times with more coins: Each level will call more and more llamas as you put more in-game currency into the strength meter.
Advanced combos and wingsuit tricks
How to use the wingsuit to boost your score and keep grinding
Once you pay your in-game currency to unlock the wingsuit, you don't get it as an immediate option — because, really, would you really want to snowboard down the mountain when you could fly?
Instead, you activate the wingsuit's controls once you've performed a certain number of tricks in a row and grown your character's scarf accordingly. A white Wingsuit button appears along the left side of the screen; tap it, and your character sheds their skis and takes to the sky.
Tap to fly upwards with the Wingsuit, just as you would jump, and release to lower to the ground; if you tap and hold with enough speed, your character may even pull off a loop-de-loop. (Tip: Do this right after you've flown down a hill for maximum loopage.)
The wingsuit power lasts for approximately 10 seconds, though if you land a trick before the wingsuit timer runs out, you can reboost its power back to full. If you run the wingsuit all the way down and haven't paired together at least a 6x combo, however, you'll have to build everything back up.
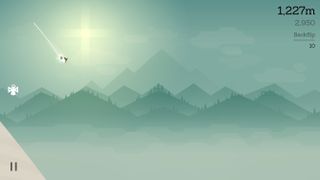
That said, it's pretty easy to build crazy-long combo chains with the wingsuit: Flying from grind to grind can let you chain together two long grind combos; you can fly straight upwards and attempt a 40-point loop-de-loop or get the air needed for double, triple, and quadruple backflips; you can fly and drop out on a rock to bounce; and flying through an archway nets you a 240-point "thread the needle" bonus.

I particularly like using the wingsuit to try and rack up multipliers: Backflip to grind to wingsuit loop to grind to backflip to grind to wingsuit loop to rock bounce to grind may sound insane, but it's doable if you time your flights just right.
A tip for the frustration that is proximity flying
One of the level goals towards the end of your adventure has to do with proximity flying, or as I like to call it, "the bane of my snowboard-flying existence." Proximity flying essentially requires you to activate your wingsuit and fly low and parallel to the ground for a certain amount of time; you're doing it right if you kick up a cloud of snow dust.
Don't give up!
Having played through most of the game's 60 levels, there were points where I felt irrevocably stuck, only to walk away for a few hours and come back to beat it with ease. If you're feeling like you can't achieve a goal, don't be afraid to take a break and come back to it, or try focusing on your energy solely on that goal for the run. I only managed my rock-bounce-to-grind-twice-in-one-run goal after about 300 failed runs; some goals will be similar. But each run lets you practice and get better at potential yet-to-be-discovered goals.

I also recommend pausing the game if you've completed one half of the goal, but feel too shaky to finish — you'll get a three-count to come back into the game, and it can help reset your frame of mind and get you a bigger overall score.
Your tips?
So there you have it — all my top tips, collected into one strategy guide for Alto's Adventure. Anything I missed? Anything you need help with or answered? Sound off in the comments.
Serenity was formerly the Managing Editor at iMore, and now works for Apple. She's been talking, writing about, and tinkering with Apple products since she was old enough to double-click. In her spare time, she sketches, sings, and in her secret superhero life, plays roller derby. Follow her on Twitter @settern.
Most Popular


