How to get great Night mode photos on your iPhone 11: iPhone Photography Tips & Tricks
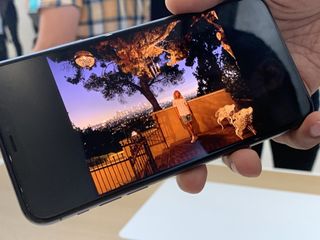
Before the iPhone 11 series, while the iPhone didn't take terrible photos overall, it was incredibly difficult to get decent images in low-light scenarios and pretty much impossible in darkness without flash. But now we have the iPhone 11, iPhone 11 Pro, and iPhone 11 Pro Max with the incredible Night mode feature. With Night mode, our low-light images come out looking bright, clear, but you can definitely still tell that it's night, or fairly dark.
While the iPhone's Night mode feature kicks in automatically when it detects that there isn't enough light, sometimes you may want to enable it manually, or even tweak the exposure time. Here are some tips on getting great Night mode photos!
Keep your hand steady
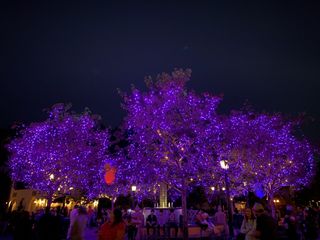
In order for Night mode to achieve its amazing magic, it needs to keep the shutter open for a longer amount of time in order to pull in extra light from the scene and take several consecutive shots. The exposure time can range from one second to 10 seconds (the max). All of the images that are captured during that time frame are blended into a single, high-quality photo.
Since the shutter needs to be open longer, you want to keep your hand as steady as possible during this process. If your hand is not steady and moves, then the resulting image will be blurry. If there was slight movement, then the camera software can still try to correct it through computational photography by aligning the images properly (blurred shots are discarded, so the blended image only uses the sharpest parts of each picture).
What's changing in iOS 14
Apple occasionally offers updates to iOS, iPadOS, watchOS, tvOS, and macOS as closed developer previews or public betas. While the betas contain new features, they also contain pre-release bugs that can prevent the normal use of your iPhone, iPad, Apple Watch, Apple TV, or Mac, and are not intended for everyday use on a primary device. That's why we strongly recommend staying away from developer previews unless you need them for software development, and using the public betas with caution. If you depend on your devices, wait for the final release.
In iOS 14, Apple uses the built-in gyroscope on your iPhone 11 device to help keep your hand steady during a Night mode shot. It basically detects any shaking and will have a message on the screen letting you know to keep your hand steady. This also means that you can interrupt a Night mode photo, so make sure that hand is still!
Try to keep the subject still if possible

The same rule of thumb of as little movement as possible also applies to the subject you're photographing, if any. If the subject moves while the shutter is open, then you'll end up with blur on the parts that moved during the shot.
Master your iPhone in minutes
iMore offers spot-on advice and guidance from our team of experts, with decades of Apple device experience to lean on. Learn more with iMore!
However, if you're photographing a low-light scene with people in the background, those people aren't your main focus, so the rest of the photo should be fine. But if you want a perfect photo, then you may need to take the same photo multiple times, depending on how busy it is (think Disneyland), in order to get the right one.
Use a tripod for best results
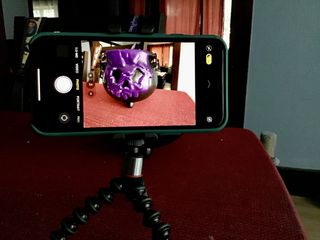
Night mode on the iPhone was designed to make it possible for everyone to take a gorgeous low-light photo using just their hands. However, sometimes it can be difficult to keep your hand perfectly still for more than a few seconds, so that's when a tripod comes in handy.
Using a tripod is not only great for keeping the phone completely still, but it means it's also easier to use the longer exposure time. Since Night mode can go up to 10 seconds, having a tripod lets you capture more light and detail than just using your hands for the same amount of time.
The iPhone can also detect when it's on a tripod (no shaking), and can automatically adjust the exposure time to be the longest possible.
When you use a tripod, your Night mode photos will be the sharpest possible, despite the conditions you're shooting in. So while it's not mandatory for Night mode, it's still a good idea if you can get your hands on one.
Always have some kind of light source
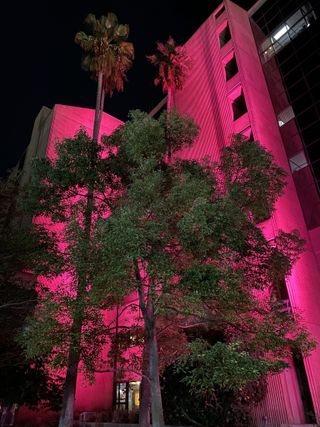
As amazing as Night mode is, it isn't complete magic. So no, you can't just point your iPhone 11 into complete and total darkness to take a photo of something even you can't see. In order for Night mode to work, there needs to be at least some light source.
And when I say "some" light source, it's a very broad and general term. Any light source, as long as it emits some kind of light, will work and help you get a great photo. This includes lamps, candles, street lights, illuminated windows and doors, decorative lights for the holidays, or even just moonlight.
You can change Night mode's exposure length
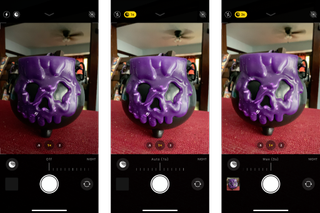
Night mode is intelligent enough to automatically kick in when it detects that there isn't enough light. When the amount of light falls below a certain threshold, you'll see the Night mode icon appear at the top of the screen. Just tap it until the Night mode icon turns yellow to turn it on. If you're shooting in a darker scene, it turns on automatically.
Usually, the darker the scene is that you're trying to photograph, the longer the exposure time will be so that the shutter can capture more light. The iPhone does a pretty good job of determining how long the exposure should be for what you're shooting, but you can also change it manually.
To adjust the exposure time yourself, make sure that Night mode is on first, and then swipe up from the mode selection (where you choose Photo, Video, etc.) Then tap on Night mode (crescent moon icon), and drag the Exposure Time slider to the right to increase the time. The maximum amount of time that you can set it is determined by your current lighting conditions and how steady the camera is.
A good rule of thumb is a shorter exposure time has less chance of coming out blurry. While a longer time could produce an even better result, there's more risk of some parts coming out blurry. But if you use a tripod, you'll have nothing to worry about.
Only shoot Night mode with Wide or Telephoto

Unfortunately, Night mode only works with the rear-facing cameras, and only with the Wide and Telephoto lenses. This means you won't be able to take Night mode photos with the Ultra Wide lens since it lacks optical image stabilization and focus pixels.
There also isn't a Night mode with the front-facing selfie camera either, so your selfies still need to use that screen flash feature to get proper lighting in the dark.
Take the best photos anywhere, anytime
With the iPhone 11 and iPhone 11 Pro Night mode, you can now take amazing photos anywhere, at any time, regardless of lighting. I love taking photos with Night mode, and I hope that these tips help you get the best shots possible.
Updated August 2020: Updated with information on iOS 14 (in beta).
Christine Romero-Chan was formerly a Senior Editor for iMore. She has been writing about technology, specifically Apple, for over a decade at a variety of websites. She is currently part of the Digital Trends team, and has been using Apple’s smartphone since the original iPhone back in 2007. While her main speciality is the iPhone, she also covers Apple Watch, iPad, and Mac when needed.
When she isn’t writing about Apple, Christine can often be found at Disneyland in Anaheim, California, as she is a passholder and obsessed with all things Disney, especially Star Wars. Christine also enjoys coffee, food, photography, mechanical keyboards, and spending as much time with her new daughter as possible.
Most Popular


