Shooting late at night can be a bit tricky, especially with an iPhone, but you don't need a 7 Plus to capture stunning pictures.
While shooting in the dark isn't the most ideal, and things like portraits can be pretty gosh-darn difficult in low-light situations, there are a couple of things you can keep in mind that'll make your late-night iPhoneography really pop.
Here are some of the best ways you can shoot photographs at night with your iPhone!
- A lil' light goes a long way
- #Lenses4life
- Color, color, color!
- Bye-bye flash
- Play with different (typically ugly) light
A lil' light goes a long way

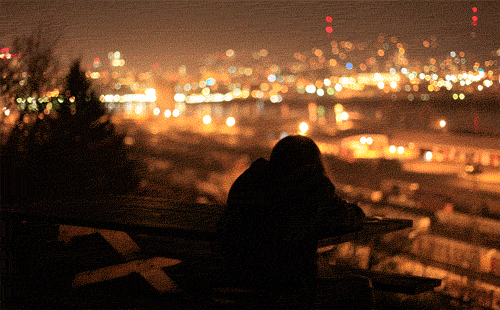
There is a crack, a crack in everything. That's how the light gets in. (Leonard Cohen)
While there are plenty of beautiful photographs of cityscapes and nature scenes that are taken in the middle of the day with bright, vivid lightning, there's something quite intimate and intriguing about a photograph with just a little crack of light in it.
Whether the light is coming from the tip of a lighter, through a crack in a door, from the flicker of a fading light bulb, or the distant glow of a dying fire, using just a bit of light against the stark darkness can draw the eye in and bring intricate little details to life – something the eye might have missed otherwise if there whole photograph was flooded with light.
Pro tip: Change your distance in between shots when you're shooting a smaller lightning subject to play with angles and see what works best with the dark, shadowy contrast enveloping its edges.
#Lenses4life

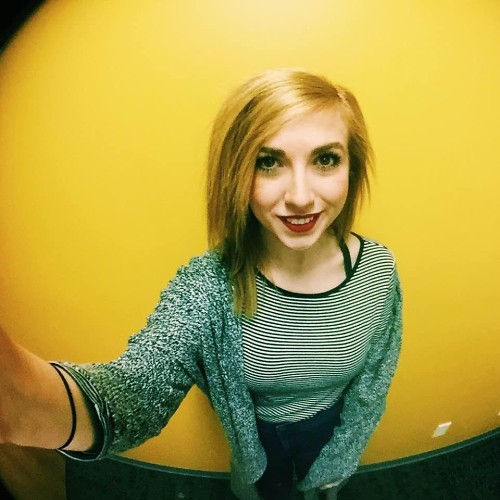
Depending on the type of iPhone you have, your camera quality is going to differ a bit. But regardless of whether you're shooting on an iPhone 6, an iPhone SE, or an iPhone 7 Plus, an external lens is always going to bump up your image quality and change your boring ol' iPhone pics into something really fun to look at!
By attaching a wide-angle, macro, fisheye – or any kind of external lens, really – you can take your iPhone to a whole new level of versatility. Not only will your photos come out looking super crisp and clear, but depending on the type of lens you buy, you might actually capture more detail from your subject or environment in a low-lighting situation.
Lenses also add a unique look and feel that an iPhone normally can't capture until editing. For example, using a macro lens up-close-and-personal with a Christmas light in the middle of the dark makes for a heck of a lot more interesting midnight photo than a string of lights 4-feet away from you, blowing in the wind #beentheredonethat
Color, color, color!

Shooting in the dark can be a pain in the ass for a number of reasons, but one big one is making color pop or even look half-decent on camera. That's why when you're shooting at night with your iPhone, it's always good to look for colorful subjects, places, or things that'll really stand out against the darkness.
While it's typically hard to make color in the dark look bright and vivid, try and make it work (unless you're going for some stark-contrast black and white stuff, in which case just ignore me) in little ways. This may seem easier said than done, but you just need to think outside of the box!
Get your subject to wear a glittery neon-pink hoodie and try and catch a glistening sliver of a streetlamp. Reflect the high beams of one car off that vintage turquoise Ford Thunderbird. Snap a photo of a crowd waiting in front of a 30-foot high rainbow, kaleidoscope of a mural:
Try to contrast the dark against the vivid.
Bye-bye flash
While it's kind of instinct to instantly want to light up and illuminate something we can't see in the shadows, flash needs to be thrown into a barrel and gently ushered over Niagara falls immediately, even when you're shooting photographs at night with your iPhone.
On-camera flash should be use sparingly because of the flat, harsh light it produces (thelightmachines)
While a flash will certainly illuminate your image, it will also bring out details and expose bits of the photo you probably didn't want to see in the first place. Plus, flash on an iPhone can be hard to control, and unlike a DSLR, it's quite difficult to diffuse and soften your flash.
Luckily your iPhone makes it really easy to adjust the exposure and the amount of light that you let into your image. After locking the focus on the photo, you can use your finger to slowly swipe up or down to adjust the exposure and make sure thing's aren't too-too dark or too-too washed out and disgustingly bright.
Play with different (typically ugly) light

Okay, so when we say ugly, we don't mean ugly – we mean light that in a daytime situation might not be the most ideal to capture on camera. This includes fluorescent bulbs, neon signs, candlelight, and so, so much more!
During the day, that flashing neon sign at the end of your street at the corner store may look odd, dull, and weirdly-off putting, but at night, it's vibrant patterns and blinking could make for a super cool boomerang for Instagram, or a really interesting hyperlapse video.
Try looking for light sources that you typically wouldn't pay attention to, like the burners on your stove, or your light-up panda keychain. If you keep your eye open, you're bound to see something interesting to light up your night.
What are your tips for shooting at night?
Are you a seasoned night-time photographer? Or do you prefer to use some good ol' fashioned natural lighting? Let us know how you shoot in the comments below (and we'll be sure to try out your tactics)!