Tips and tricks to get the perfect photos at Disneyland with your iPhone
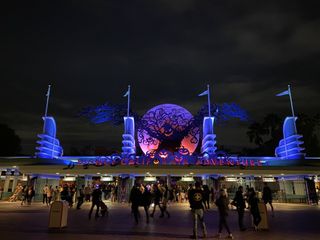
Disneyland and Walt Disney World (as well as the other global Disney parks) are big vacation destinations for most people. If you're going to one of the Disney parks, you're going to be taking pictures — this is definitely something that you want to remember for a lifetime. You'll be making picture-perfect memories you'll want to treasure forever and share with family and friends. So you'll want to take good photos that perfectly capture those memories!
Most people will likely take with them an iPhone (or other smart phones) on their Disneyland adventure, whether it's an older device or the shiny new iPhone 11 (I wrote up my experience using an iPhone 11 Pro). Remember, "the best camera is the one you have with you." Not all of us want to lug around an expensive DSLR rig.
Unless you have an Annual Pass or connections (you know, cast members), then you don't want to waste your visit with bad iPhone photos. Lucky for you, I'm an annual passholder and live close enough to Disneyland that I'm able to visit regularly. I've got plenty of tips and tricks I've learned through my many visits to the parks to help you get the best photos possible. After all, you are visiting "the happiest place on Earth!"
Think outside the box
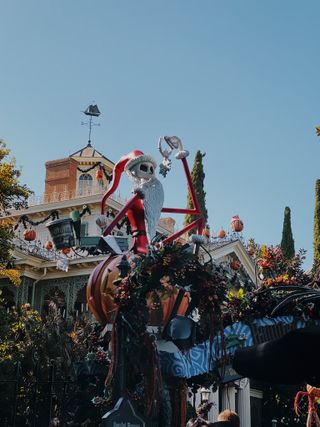
My biggest and most important tip for you is to get creative. Don't go to Disneyland and think that every shot needs to be "postcard-perfect," like in front of Sleeping Beauty's Castle or in front of the Mickey pumpkin or Christmas Tree during the holidays, or in front of the Disneyland entrance. These are the typical shots that everyone expects from someone who visits the parks, and honestly, they get a little boring after a while.
I mean, if it's your first time, then by all means, take those typical shots. They are important scrapbook memories, to be sure. But if you want to make your images stand out, you'll need to look for different angles and perspectives.
For example, why get a photo of just the front of the castle, when you can go off to the side for a more interesting angle and maybe even catch the reflection in the water? Or instead of just getting the usual shot of Pixar Pier with the Mickey Ferris wheel, go off to the side a bit (towards the Pier entrance) at night to capture the reflection of the Ferris wheel and colored lights in the water.
This applies to photography in general. Even the most mundane of subjects can be interesting if you find a unique angle or perspective. So take a look around and experiment with those unique views.
Take a moment to observe everything around you
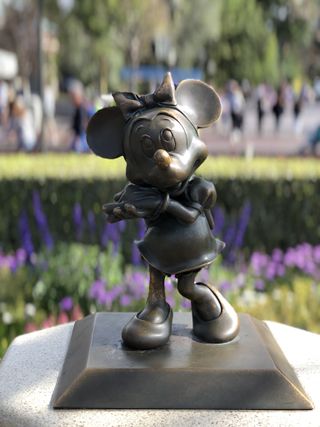
There are also a ton of decorations around the parks that aren't always so obvious. That's the best thing about Disney—everything in the park was put there for a reason, and it is such an immersive experience that you just forget all about reality while you're there.
If it's your first time going to a Disney park, just take a moment to observe all of your surroundings while you're there. Though there are always obvious decorations and themes, make sure to look for the smaller details, as well. Sometimes, these make for very interesting photo opportunities. You'll also probably get people saying things like "Oh wow, I never knew that was there!" or "Where was this? I've never seen it!"
And even if you're a veteran of Disney parks, it doesn't hurt to slow down and still just take it all in. After all, I go pretty much every week and still notice things that are new to me and didn't see just a few days before. There's always something new to see at Disneyland (or Walt Disney World) if you just look closely.
Pro tip: While on the hunt for unique photo spots, keep an eye out for Hidden Mickeys. Some are easy to spot, but some are well hidden by the designers and architects of the park!
Look for the characters
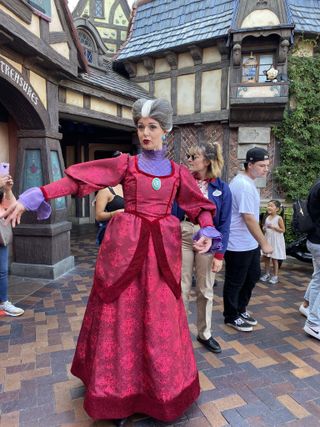
One of my favorite things to do while at Disneyland is get photos with the characters, either roaming around the parks or during their scheduled appearances. If you're interested in knowing when specific characters make an appearance, make sure to check the schedule in the Disneyland app.
Sometimes you'll get the best images when a character isn't posing specifically for a photo. These images are raw and help capture the magic that you'll find at a place like Disneyland. I often like to just capture photos of a character (especially rare ones, like the villains during Halloween) interacting with others, because it shows them in their natural environment.
But if you do attend scheduled character meet-and-greets for yourself or your kids, these can lead to some of the most precious moments of your trip. I would recommend doing the usual poses, of course, but try spicing things up with some variety in your pose and even different angles.
Pro tip: There are always professional Disney photographers taking pics at scheduled character meet and greets, but you don't have to pay for a PhotoPass to get those precious moments. If you ask the photographer nicely, they'll be more than happy to use your phone to take those perfect pics!
Food and merchandise can be great for photos too
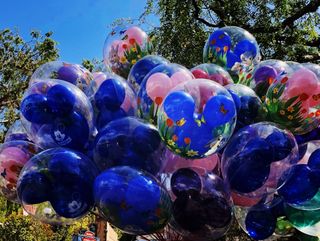
If you're going to Disneyland, or any Disney park for that matter, you're bound to spend some money on food and drinks (especially specialties around the holidays) and merchandise.
Honestly, every time I go to Disneyland, I always walk out with some kind of merchandise or cute dessert or drink. It's a fact. While you may dislike those who often take pictures of their food anywhere else, a lot of the offerings at Disney are meant for photos. So why not show it off by capturing it in a photograph? I often like to try to capture the essence of Disneyland in the background of the photo, with the food, drink, or merchandise in the foreground. This also lets you get creative with how to show off your awesome treats to friends and family.
Pro tip: Follow The Disney Food Blog for details on the new season's dishes and specialty holiday noms.
Use light to your advantage
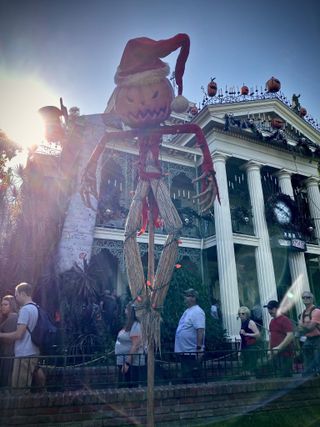
It goes without saying, but lighting is one of the most important things to consider when taking a photo anywhere of anything. The best images happen when the sun or lighting source is behind you, lighting up the subject matter and giving you vivid and bright colors without too much noise.
However, sometimes that is impossible due to the time of day you're taking the photo or it's nighttime without a lot of light on your subject. Sometimes, shooting into the sun can create some cool effects, such as rays of light shining into the photo from the edges.
Something else to consider when framing your composition is how shadows can create unique pictures. When the sun is low, it can create longer shadows than when the sun is directly overhead. The result can result in more moody and unusual photos. If that's what you're going for, then make sure to try to get these shots early in the morning or right before sunset.
Think about the composition of the photo you want before you take it
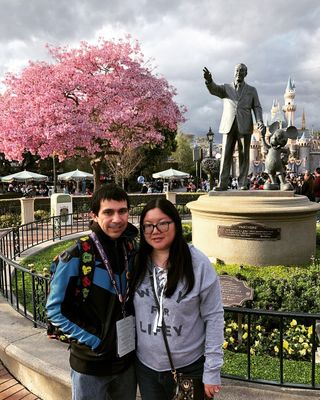
All of the Disney parks are popular places to visit, so you're bound to have seen some photos from people you follow on social media. This is a great way to get inspiration for your own trip and helps you think about the composition of the photos that you want to take.
When it comes to composition, think of the final result you're trying to aim for, including post-processing. This includes things like juxtaposition — how the attraction you're taking a photo of contrasts with a bright, blue sky or overcast clouds.
It's easier to plan out what photos you want to take and what you're trying to accomplish before you head out to take them, rather than just shooting a bunch of random pics and seeing what filters and angles work after you've left the park.
Scout out the good viewing areas for the parades and fireworks
Disney always has several different forms of entertainment throughout the day, including scheduled parades and fireworks. These shows are spectacular to watch, but if you want good photos, you'll need to know exactly where to go and when to be there.
When it comes to Disneyland, you may think that Main Street is the best place to grab a spot, but so does everyone else. It ends up becoming one of the most crowded, and unless you just camp out hours ahead of the parades, it's hard to get a good spot. Here are a few alternatives.
Disneyland parade spots
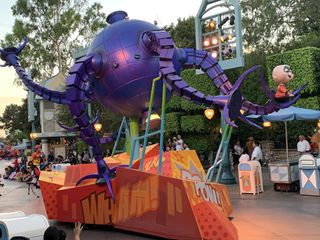
For the parade route at Disneyland, you'll want to go closer to "it's a small world", which is less crowded and has some shady spots, as well as, a raised platform area. Just make sure you're in the front (or tall) if you want to get those amazing photos.
Another nice spot is around the side of Alice in Wonderland. This particular spot is very near drinking fountains and restrooms in case you need them, and it can provide shade on sunny days (depending on time). This is one area where there is no room for people to sit on the opposite side, so characters in the parades are more likely to interact with you, giving you ample photo opportunities.
One more option to try is the Disneyland Hub. Usually, Cast Members begin putting up a rope to prevent other guests from entering the parade route. About an hour before the parade, these ropes are taken down. If you stay in that area and wait patiently for those ropes to drop, you'll be getting a fantastic front row seat. Be warned though—this is a small area.
Pro tip: If you're watching one of the nighttime parades at Disneyland on Main Street, don't leave after it's over. You can stay for the fireworks because they'll start right after! Check the daily schedule for parade and fireworks showtimes.
Disney California Adventure parade spots
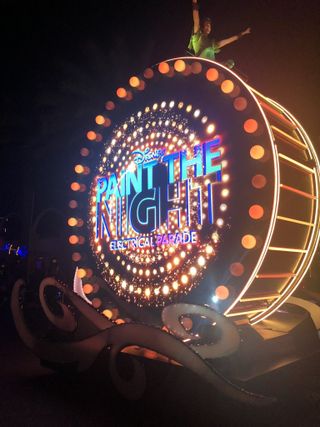
While most of the parades are in Disneyland, every now and then there's a parade at Disney California Adventure, which is just right across from Disneyland.
One of the best viewing spots for DCA parades is near Goofy's Sky School. It fills up last, making it easy to get a good spot without the stress. You still get a pretty good view of the park too.
A popular spot is along Hollywood Land due to convenience and comfort since there are plenty of curb spots and benches to sit at while you wait. Because of this, it's the first area to fill up, so you will need to get here several hours before the parade starts and just wait it out.
Lastly, if you spot any opening along the parade route with walls to lean on, benches, or curbs, just grab it! These spots are not too common, so if you see an opportunity, seize it.
As far as when to grab a spot, 2.5 hours before the parade is a good rule of thumb if you want the best view. Cast Members will let people start getting spots about 2 hours prior to a parade. If you aren't too picky, then 1.5-2 hours before is a general timeline of when to get a spot. If you're looking for a spot about 30 minutes before the parade, well, good luck with that (you'll need it). If you're ever not sure about something, feel free to ask a Cast Member for some guidance as well.
Pro tip: There are Dining Packages that offer a guaranteed spot along the parade route, but can be expensive if you're in a larger group. You can book a dining package reservation on the Disneyland website.
Ohhh, pretty fireworks!
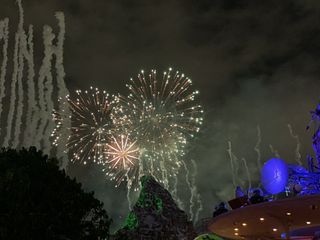
Disney is probably single-handedly keeping the fireworks business alive because there are usually firework displays every single night at Disneyland. But there's more to this nighttime entertainment than just explosions in the sky — Disney projects animated images all along the Main Street buildings, on "it's a small world and across Sleeping Beauty's castle. Quite frankly, this is what makes the show.
While you can see the fireworks from almost anywhere in the area (just look up), if you want photos, you'll need to be in the right spots to capture both the fireworks and the projections.
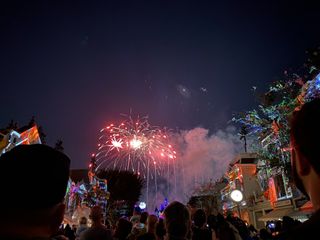
If you want to capture the magic, you'll want to be in one of these locations: in front of Sleeping Beauty's Castle, on Main Street, or in front of "it's a small world." The projection technology that Disneyland appears on the castle itself, on the buildings on Main Street, and on the front facade of "it's a small world."
It's usually pretty hard to capture fireworks at the very right moment, so you could try to record the show and snap still photos along the way, or use Burst Mode to snap a lot of photos at once. If you have an iPhone 11, the Night mode is excellent for the fireworks and projections, because everything is lit up nicely.
Stay until the park closes
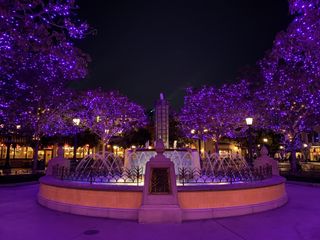
If you want to have photos with hardly any people in them, then you best stay until after the park closes. Check the hours in the Disneyland app, and then plan to stay until then or later.
For some of my recent shots, we got in line for Guardians of the Galaxy: Breakout minutes before Disney California Adventure closed (at 10 pm). It took about 30-45 minutes for us to get through the queue because there were still quite a lot of people in line. Once we were done with the ride, the park was virtually empty on the way out. I was able to snap some amazing photos along the way to exit, something I don't usually end up doing because I never stay until close.
It can definitely be a long day if you've been there since the early morning, but if you want those ghost-town like pictures, then this is one of the few ways to do so.
Pro Tip: Disney keeps the attraction lines open until the park closes. They don't make you leave if you haven't gotten on the ride yet. Hit up one of the rides with a long line if you want to see the park nearly abandoned.
Trust the iPhone camera
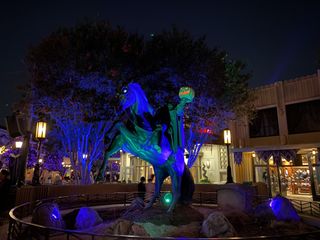
Honestly, I mostly just use the native Camera app on my iPhone to take all of my photos when I'm at the parks. It's super fast to access from the Lock screen, which means you're ready to snap away quicker.
I also find that the iPhone Camera's automatic focus and exposure are usually good enough for the images I want to take. If it isn't, then I simply tap where I want it to focus and slide the exposure up or down until I am satisfied with it, then snap, snap!
Need something more? Then check out Halide Camera
But if you want a third-party camera app that will give you many more features, then I highly recommend Halide Camera. This app lets you shoot manually, so you can adjust things like ISO, AWB, depth capture, and more. It even supports RAW format, so you can get really serious. The app is very customizable and packed with a ton of professional features if you need more than just the basics.
I've been using Halide Camera for years, and it's the camera app that I turn to when I need something feature-rich for serious photo sessions.
For post-process editing, check out Darkroom
If you need some apps for post-process edits, I highly recommend Darkroom - Photo Editor. It loads up with your Photo Library instantly, so you don't even need to import your photos one-by-one, which is a tedious process with other apps. You can apply a ton of professional-looking filters and effects, and manually adjust individual elements like brightness, contrast, saturation, vibrance, crop, straighten, and more. Darkroom also has manual curve adjustments and supports RAW editing. Any changes you make can be saved as a copy, so the original photo can be reverted back if need be.
Darkroom has been my go-to editor for a few years now. The interface is smooth and intuitive, and it has all of the tools I would need. Plus, the filters aren't too tacky.
Get the most out of your iPhone 11 or iPhone 11 Pro
For those of you with an iPhone 11 or iPhone 11 Pro, there's a lot of new possibilities for shots thanks to that Ultra-Wide camera and Night mode.
Go Ultra-Wide!
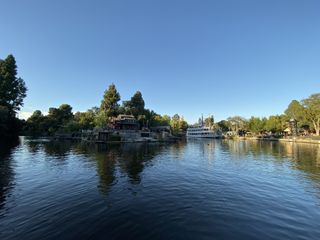
With the Ultra Wide, you are getting a 120-degree field of view. This creates pseudo-panos and is a great way to capture more of the scene at Disneyland. Since it is super easy to switch between the normal Wide and Ultra-Wide, I highly recommend capturing the scene with both, but you can also just check the Ultra Wide to see if it helps capture more of what you want in the photo. If you find any nice, open space in Disneyland, try taking a photo with the Ultra-Wide camera—the results may surprise you!
I found the Ultra Wide to be great for capturing scenic views of Rivers of America, the water and boats in front of "it's a small world, the fountain in Pixie's Hollow with Tomorrowland behind it, and even the small body of water adjacent to the Royal Theater as you enter Frontierland. It's not the best to use for every situation, but the Ultra-Wide lens does have room for experimentation that wasn't possible with your iPhone before.
I can see the light with Night mode
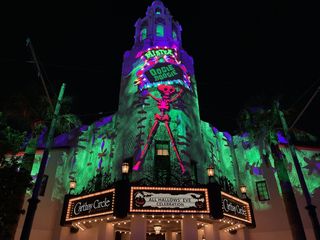
Now, one of my favorite new features of my iPhone 11 Pro's camera is the Night mode, which is downright glorious. I found it amazing to use in a place like Disneyland since there are so many sights to see at night.
The key to a successful Night mode shot is to hold still while snapping the photo. Since Night mode requires having the shutter open for a few seconds to work successfully, you're going to have some trouble with subjects in motion, or even yourself if you're not perfectly still (think nighttime shows like Fantastic! and dark rides).
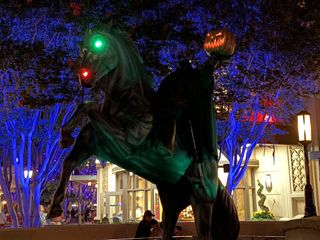
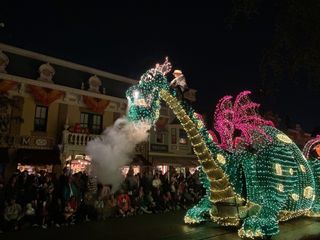
However, if you manage to get a great seat for a nighttime parade (using the tips above), then it may be easier to get good angles for photo ops with Night mode since the floats move relatively slow. I was able to get a pretty good angled shot of Elliott the Dragon during the Main Street Electrical Parade on Main Street.
It's also possible to get some nice shots in dark rides like Haunted Mansion (Holiday), Peter Pan's Flight, Alice in Wonderland, Pirates of the Caribbean, and more, as long as you either are stopped in front of a good spot (Haunted Mansion) or are moving relatively slow.
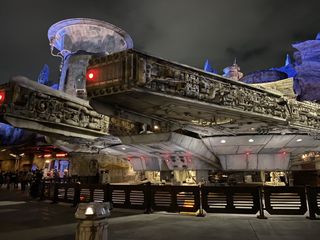
If you're looking for great Night mode opportunities around the parks that aren't in rides or shows, just take a look all around you. Disneyland and Disney California Adventure light up nicely, especially right now during the holiday season, so there are plenty of photo opportunities with Night mode. Take Night mode photos of the castle from the side, Carthay Circle with the Oogie Boogie projection, Main Street with the Mickey Pumpkin at the end, the various fountains, lights in the trees, and more.
Night mode opens up a whole new world of possibilities as far as iPhone photography at Disneyland is concerned.
I took my iPhone 11 Pro to Disneyland and shot the best photos in my life!
Just have fun and experiment
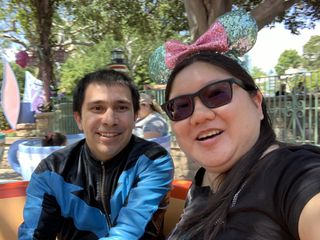
One final tip I have for you all is to just go have fun and experiment with the photos you take. You're in Disneyland (or Walt Disney World or another Disney park)! The tips I've provided in this guide are what I've learned after numerous visits to the park since I'm an Annual Passholder.
While these are pretty good tips to help you get some good photos, not every photo you take will end up perfect (I still end up with some blurry photos, especially in dark rides if I'm not stopped), but it's still a memory to have and cherish at the happiest place on Earth.


Master your iPhone in minutes
iMore offers spot-on advice and guidance from our team of experts, with decades of Apple device experience to lean on. Learn more with iMore!
Christine Romero-Chan was formerly a Senior Editor for iMore. She has been writing about technology, specifically Apple, for over a decade at a variety of websites. She is currently part of the Digital Trends team, and has been using Apple’s smartphone since the original iPhone back in 2007. While her main speciality is the iPhone, she also covers Apple Watch, iPad, and Mac when needed. When she isn’t writing about Apple, Christine can often be found at Disneyland in Anaheim, California, as she is a passholder and obsessed with all things Disney, especially Star Wars. Christine also enjoys coffee, food, photography, mechanical keyboards, and spending as much time with her new daughter as possible.
