How to get started with OmniFocus
iMore offers spot-on advice and guidance from our team of experts, with decades of Apple device experience to lean on. Learn more with iMore!
You are now subscribed
Your newsletter sign-up was successful
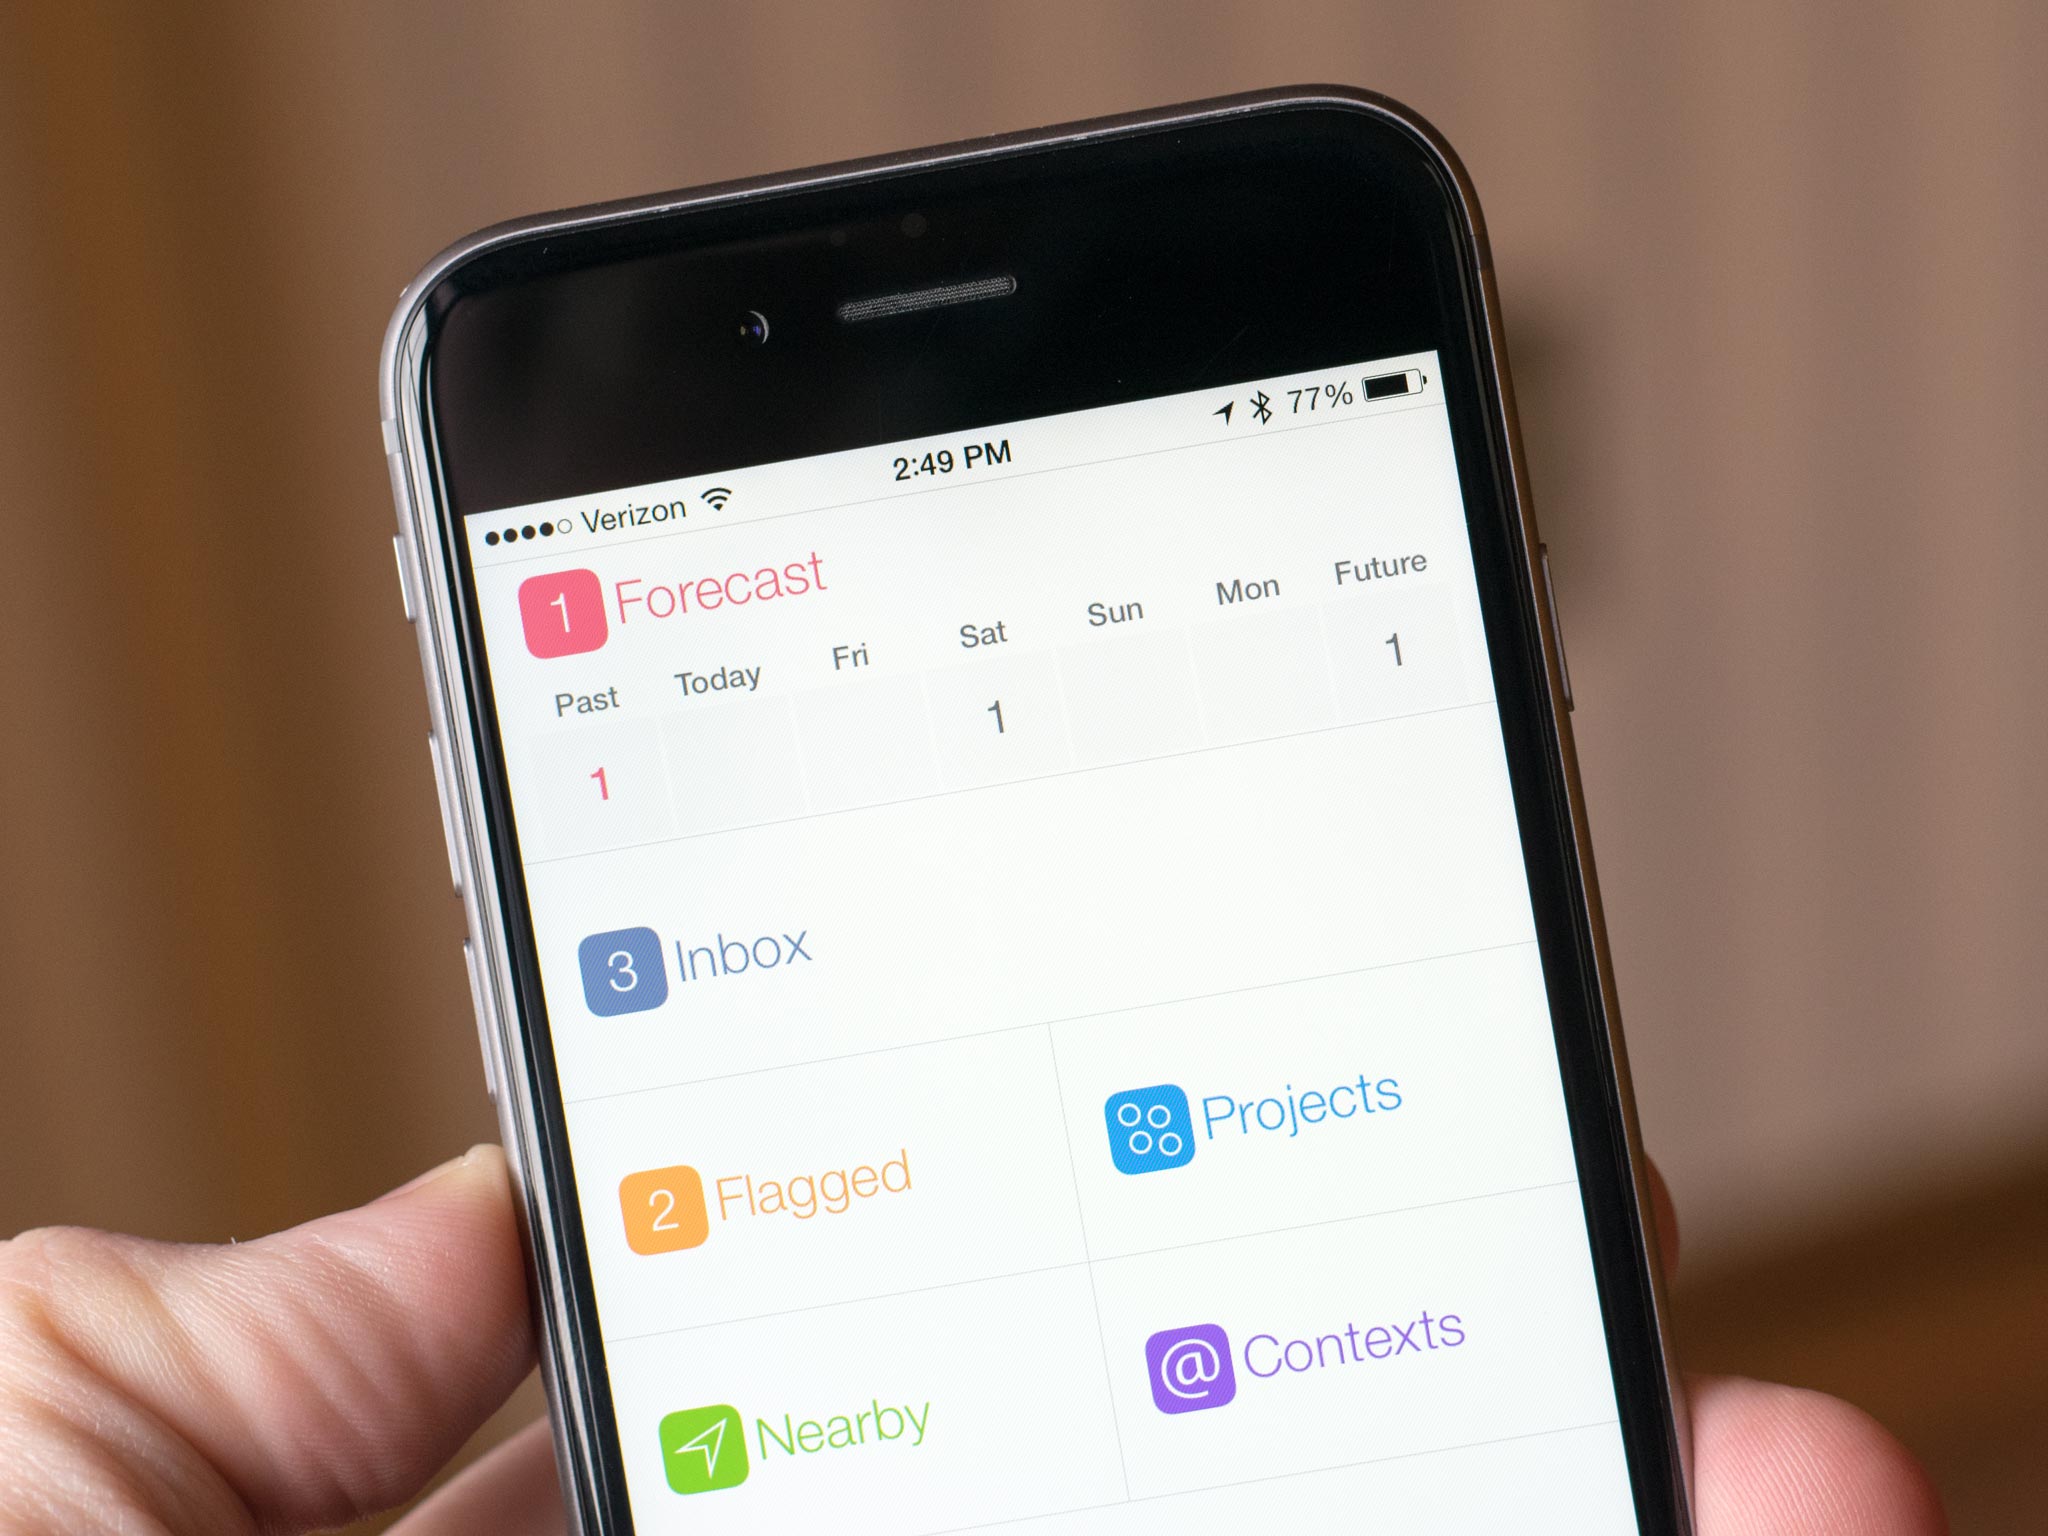
When it comes to productivity, one of the best apps to help you accomplish that is OmniFocus. However, it's also one of the more complicated options out there, especially since it strictly follows David Allen's "Getting Things Done" (GTD) methodology.
If you're not familiar with GTD, it's a five-step process:
- Capture everything that you must do.
- Clarify your ideas and figure out what's truly important.
- Organize your tasks by grouping together similar items to do at once, or group them together in your own workflow.
- Reflect on your tasks, reviewing your projects, tasks, and making sure you didn't forget something.
- Engage and do the tasks.
OmniFocus is the leader when it comes to following the GTD structure, but overall, it's pretty daunting. I know, because that's how I felt when I first started using OmniFocus many years ago. But I've learned over time and picked up a basic formula that works well for me, and I'm here to help show you the ropes!
- Set Up Your OmniFocus
- Fine-Tune Your Settings
- Create Your Folders and Projects
- Creating Tasks in OmniFocus
- Understanding Defer and Due Dates
- Create Repeating Tasks If Needed
Set Up Your OmniFocus
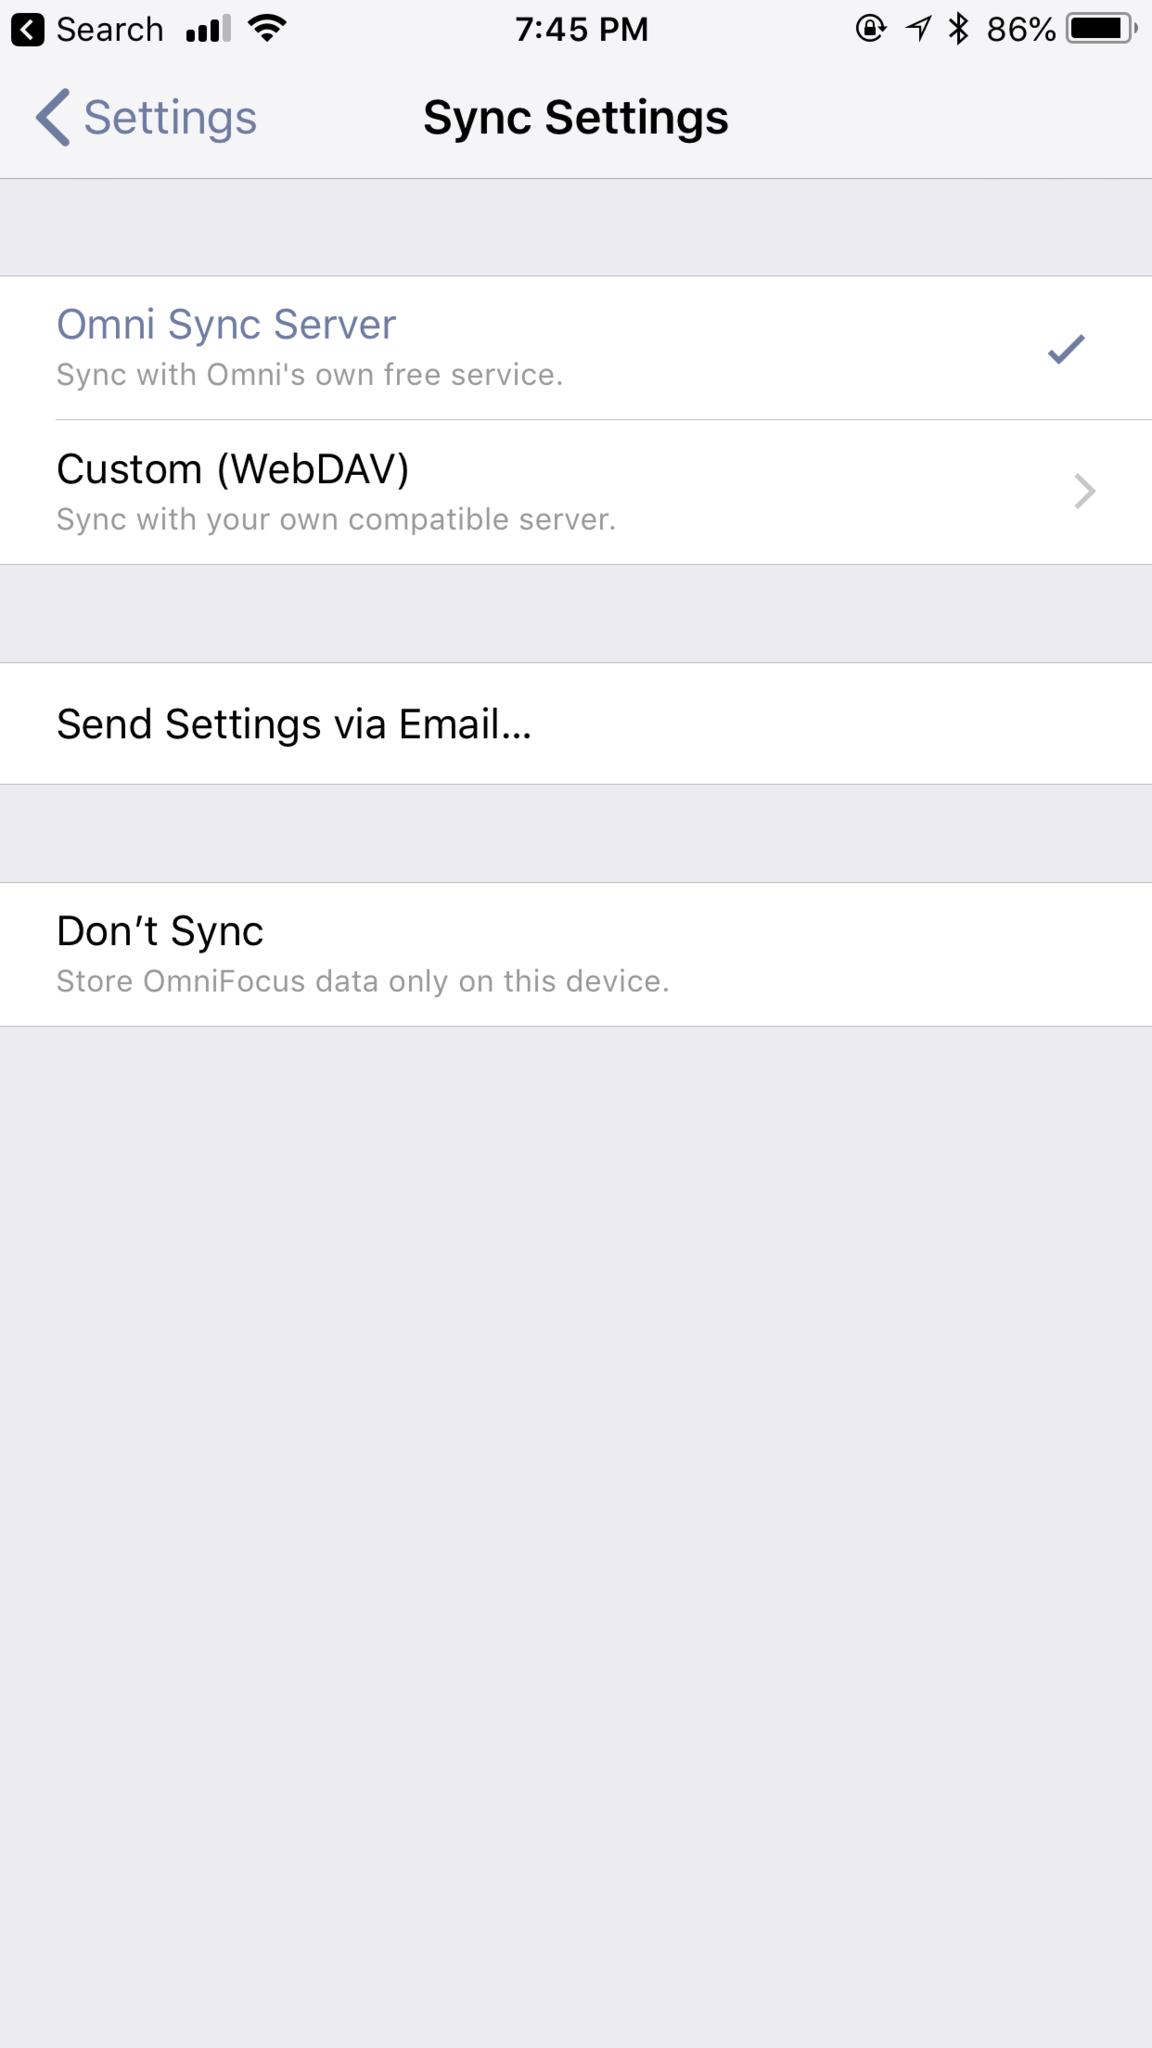
On the initial launch of OmniFocus, you're prompted to choose how you want to back up and sync your tasks across multiple platforms. We're discussing the iPhone version in this guide, but OmniFocus is available for the iPad as well (universal app) and Mac.
If you plan on using multiple devices with OmniFocus, the easiest solution is Omni Sync Server. This is OmniGroup's free service, and you sign up on its website. If you'd rather not sign up for an account, the only other syncing option is Custom WebDAV with your own compatible server. Or you can choose to not sync at all, and have all of your tasks and projects locally on one device.
Fine-Tune Your Settings
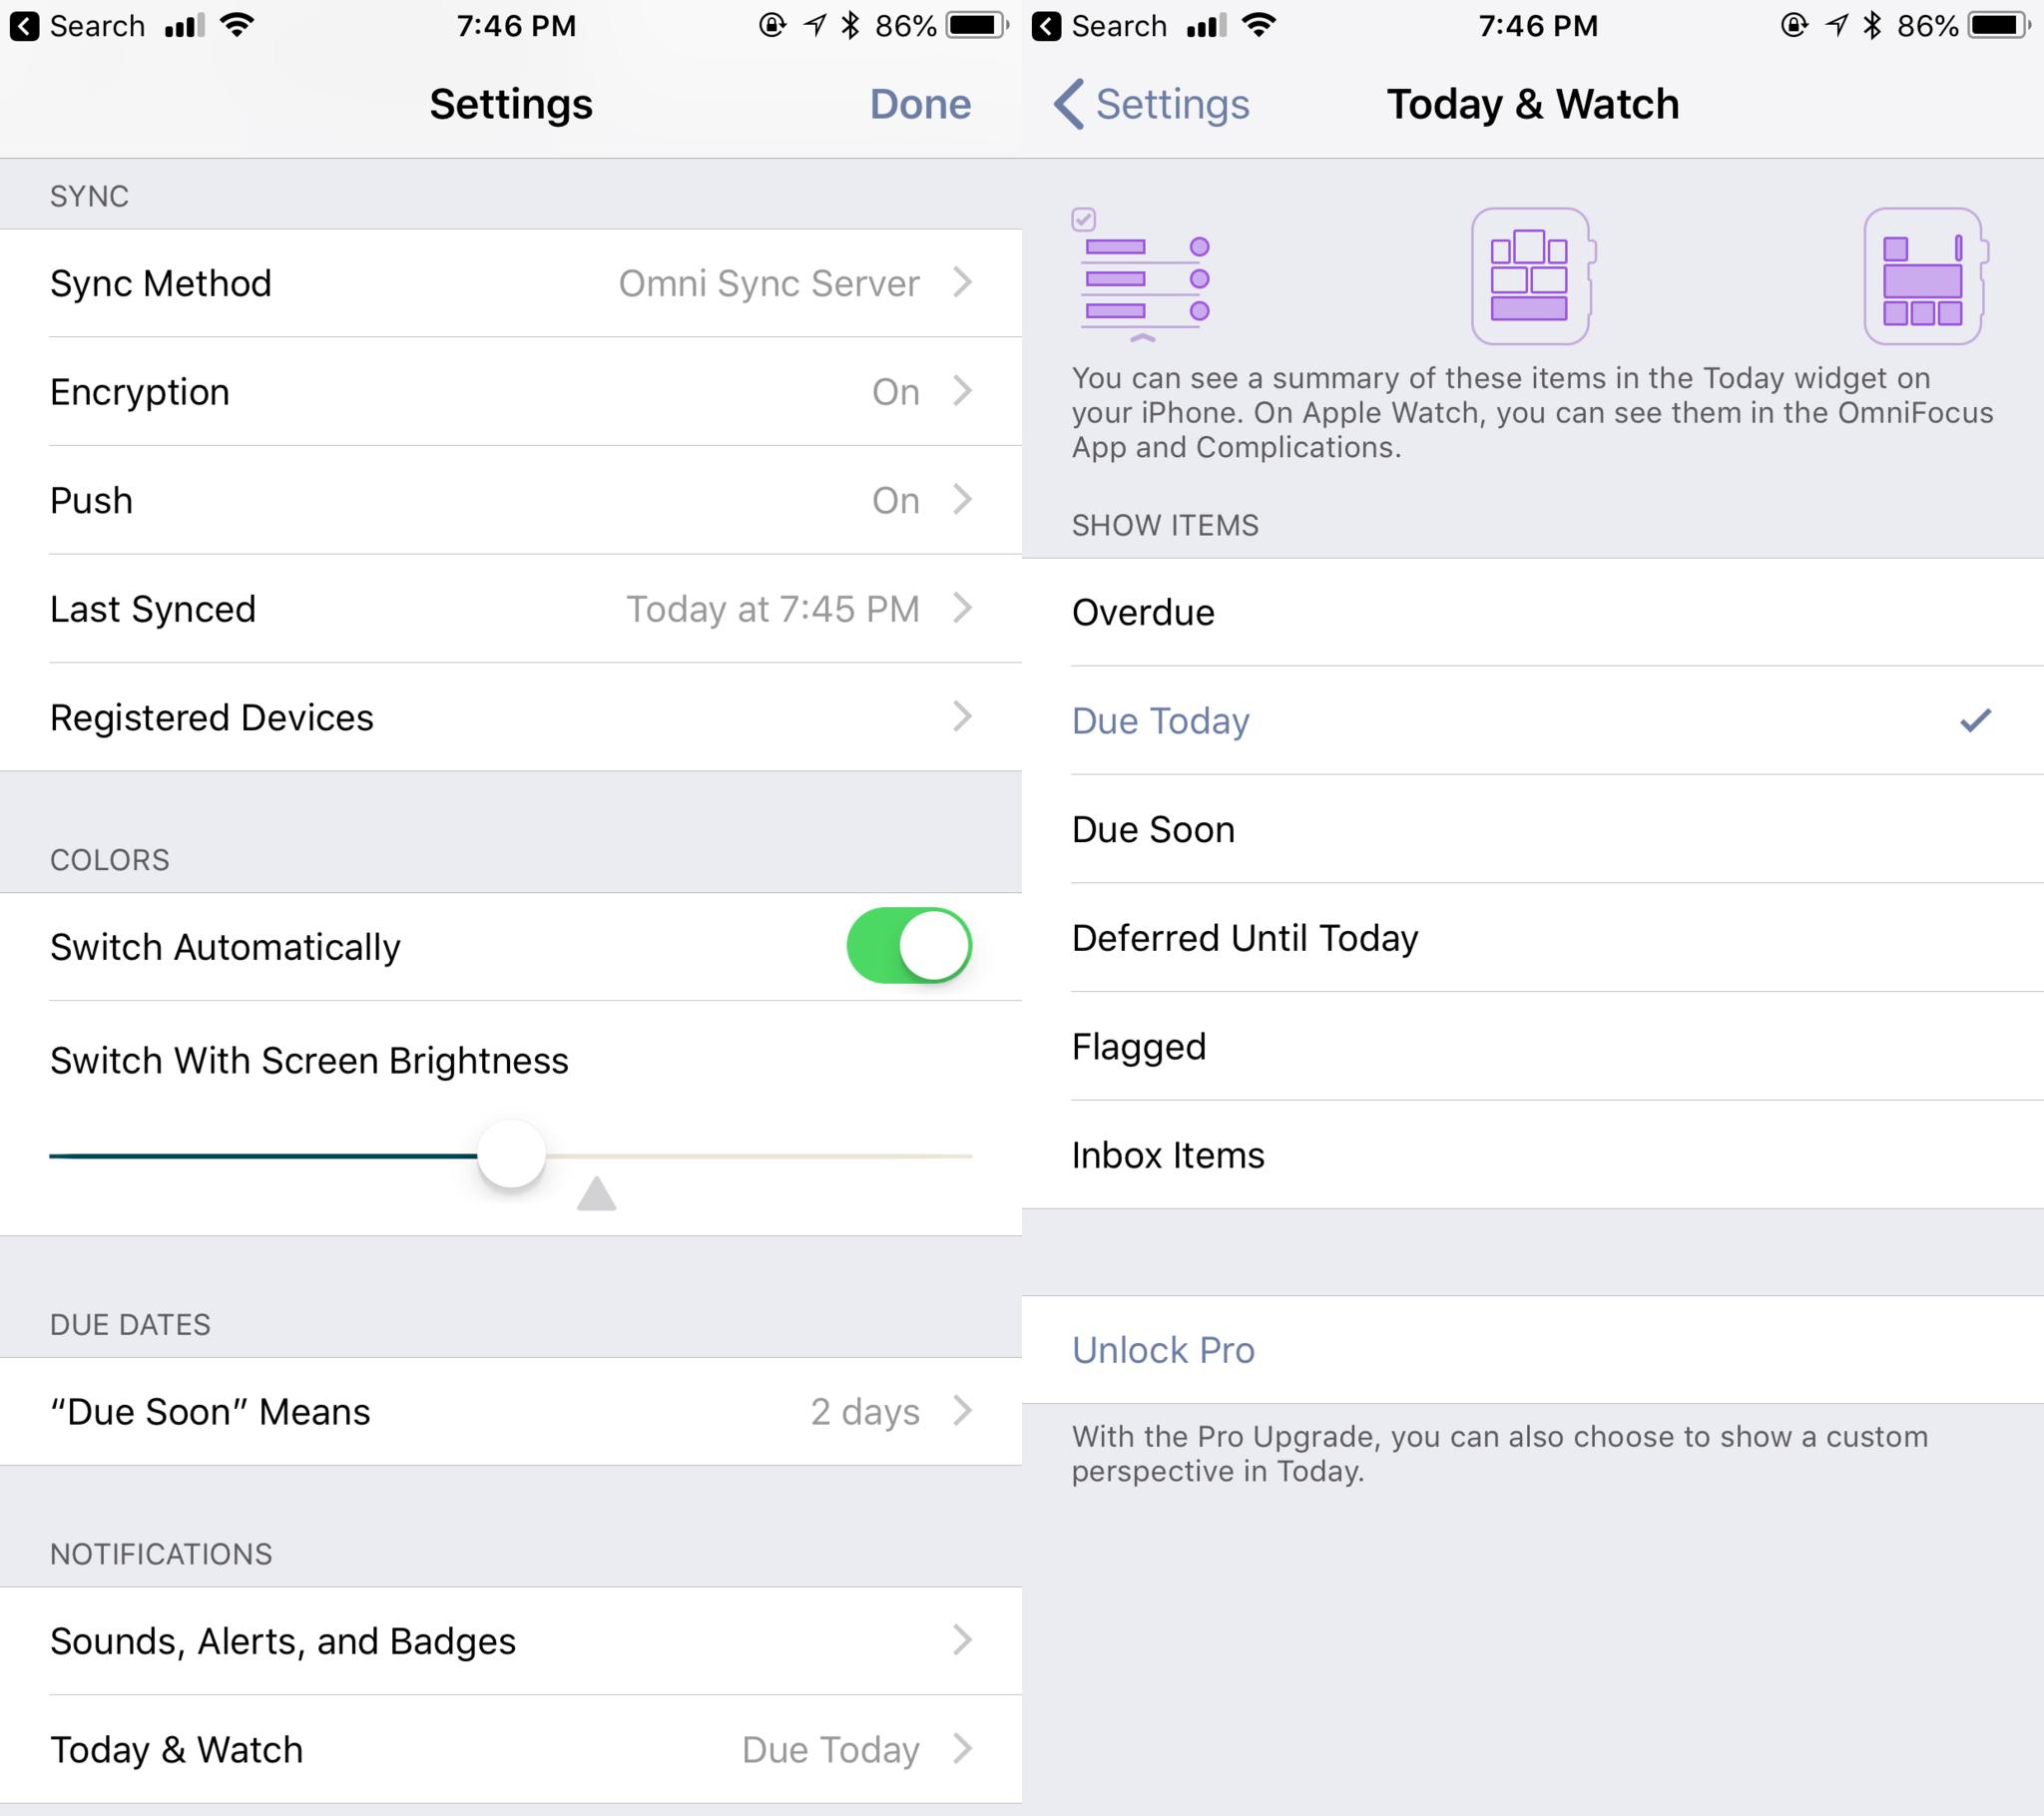
Now that you set up your syncing method, you'll want to make sure the settings for OmniFocus are to your liking before you start using it.
When it comes to "Due Soon", everyone may have a different definition of it. For example, I tend to think of items due soon as due within three days. Someone else may think of it as tomorrow.
iMore offers spot-on advice and guidance from our team of experts, with decades of Apple device experience to lean on. Learn more with iMore!
You can change the definition of "Due Soon" items in OmniFocus, and they can range from "Today" to "1 Week." Pick what you like in the settings, and items that are due within the time frame end up with a yellow circle. If they're overdue, they're in the red. It's just a way to help you stay on top of your tasks.
OmniFocus includes a useful Today widget and companion Apple Watch app. With these tools, you're able to show specific items, such as "Due Today," or you can select "Overdue," "Due Soon," "Flagged" items, and more. This is useful for getting a glance of what you need to complete without launching the app.
One of my favorite features of OmniFocus is the ability to set due dates and times. If you're like me, then you'll want to make sure that notifications are on. Just go to Sounds, Alerts, and Badges in the settings.
If you plan to use OmniFocus with multiple devices, ensure the Push option's turned on. This means any changes made on another device are automatically pushed and synced to other devices in the background.
You may import your Reminders items into OmniFocus, so it's more of an all-in-one solution. And if you can get Siri to work without issues, OmniFocus' Siri Capture provides added convenience.
Create Your Folders and Projects
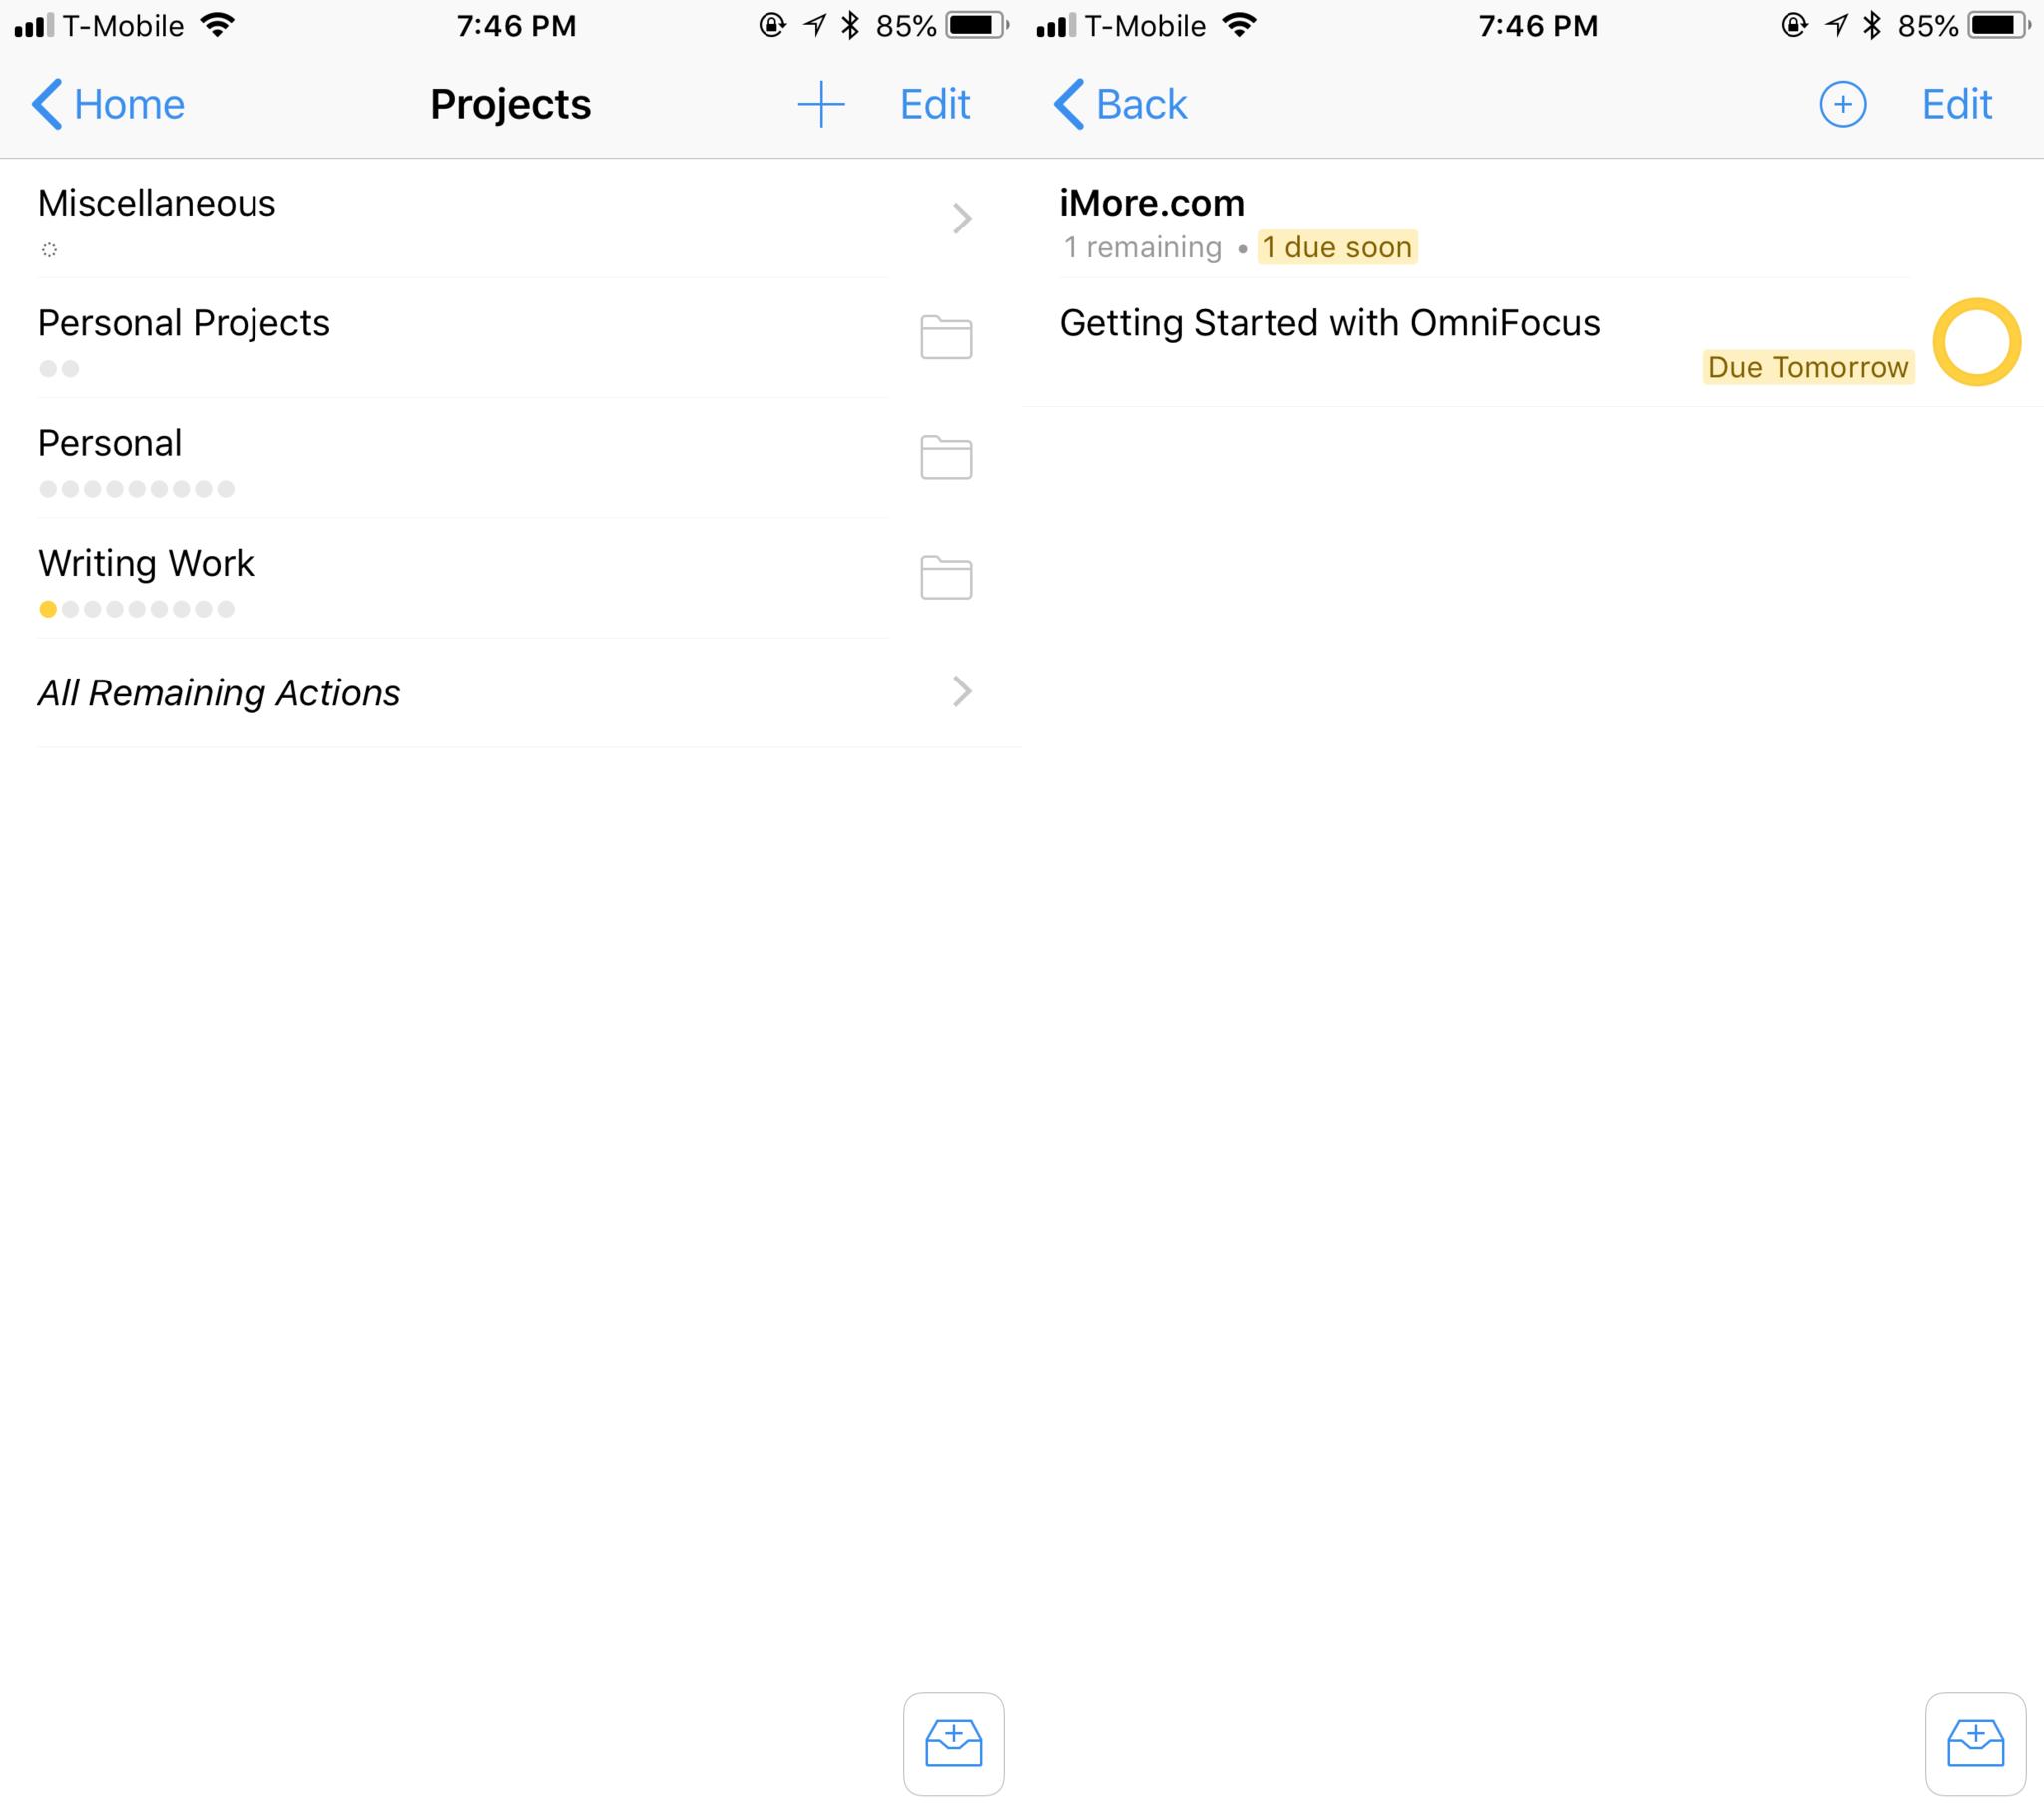
When it comes to staying organized in OmniFocus, Folders and Projects are your best friends, though they can get a little complicated. But we're looking at these from a basic perspective today.
For Folders, think of them as your areas of responsibility, or non-actionable containers that may hold other folders or Projects. And Projects, in this context, are technically actionable goals.
For example, I have a folder set up for "Writing Work," and it houses projects for each website that I write for. I keep my tasks in the appropriate project and check them off as I finish them.
Of course, your method of organizing tasks may be different from mine. Perhaps you want to start off with a Project at the top level, and then group together smaller areas of responsibility in other folders or projects. It's entirely up to you to find the workflow that suits your needs, but utilizing Folders and Projects proves incredibly useful for making sure everything remains organized.
Creating Tasks in OmniFocus
OmniFocus has a few ways for quickly capturing tasks when you need them.
The Traditional Method
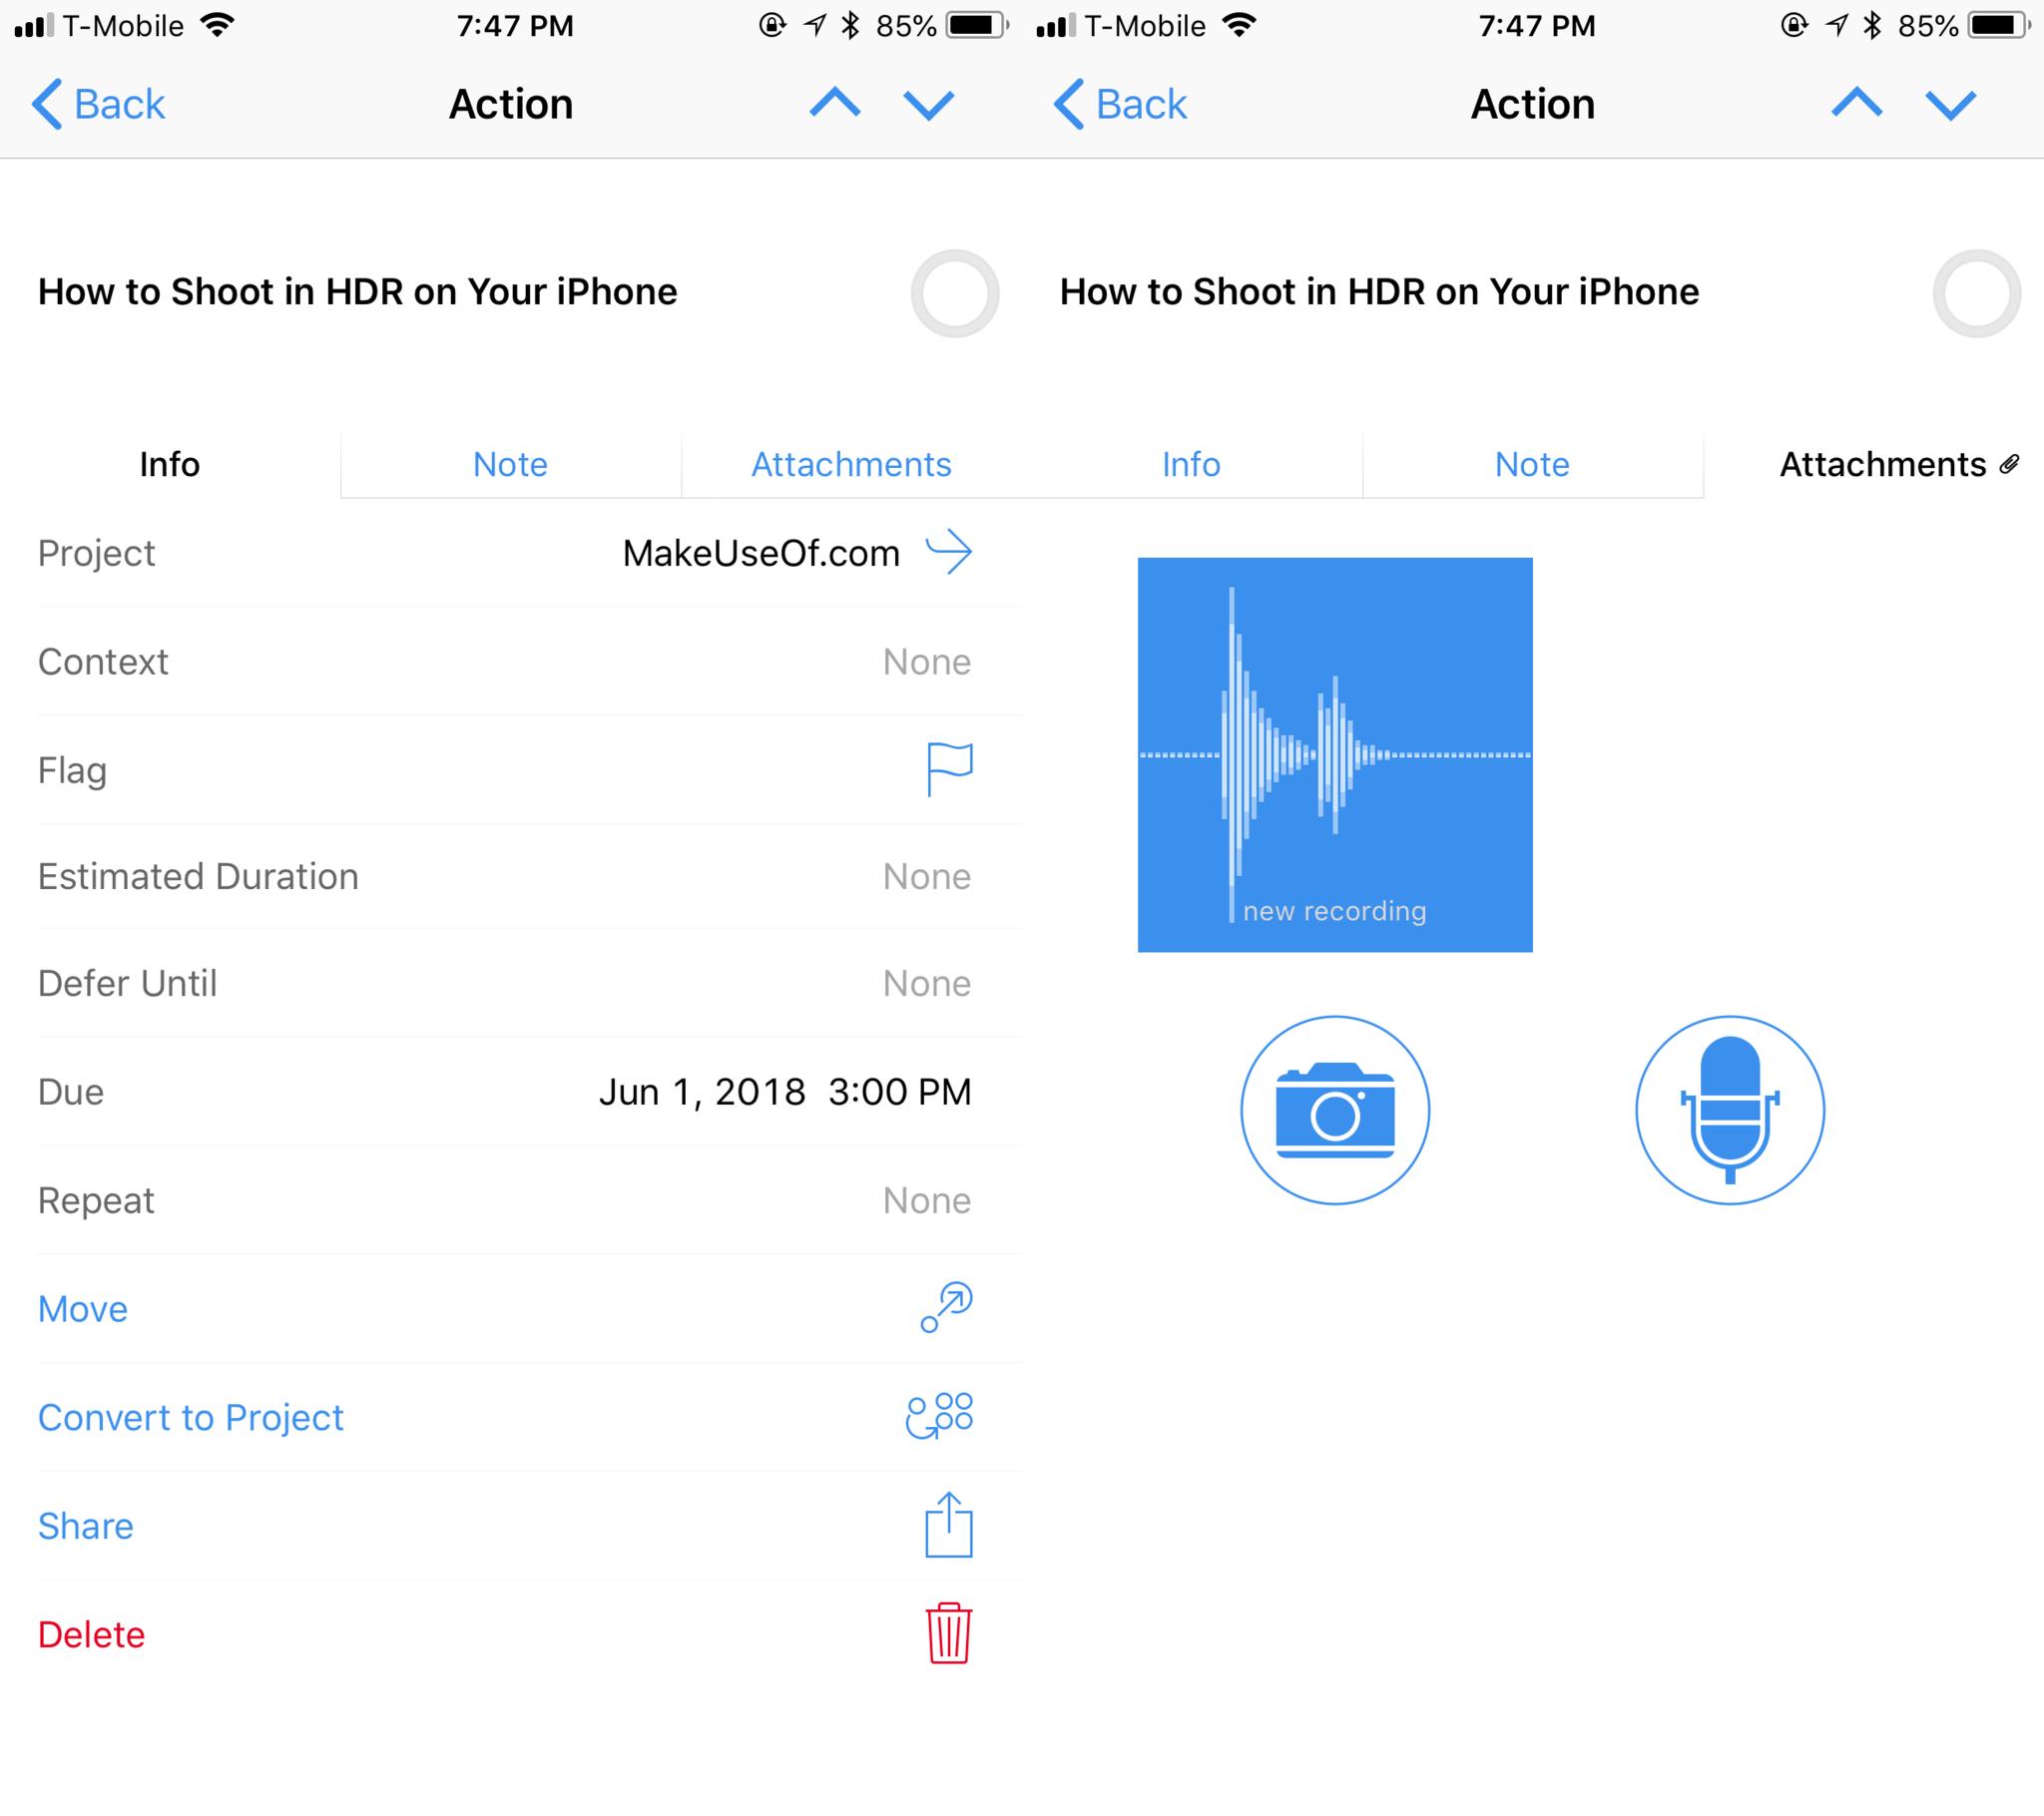
The most obvious method is the "New Item" button that's always present in the bottom right corner, no matter what view you're in. Tapping this brings up a screen that's full of options for customizing your task. This button also shows up in the OmniFocus widget view.
The first step is to give your item a title that describes the task. Then you may assign it to projects, contexts (simply put, they're tags), flag it for importance, defer it, a due date and time, and make it a recurring task. The Note section lets you add text notes that you may need when working on the task, and Attachments include images and audio recordings.
Use the Share Sheet
If you're not in the OmniFocus app and need to capture a new task from another app, just utilize the iOS Share Sheet. To do this, just tap on the "Share" button in the app you're in, and then look for OmniFocus in your sharing options (turn it on by tapping "More" and then toggling the switch on OmniFocus). Select OmniFocus, then name your task. Doing it this way includes a link to the original source in the notes for easy reference later.
Siri Capture
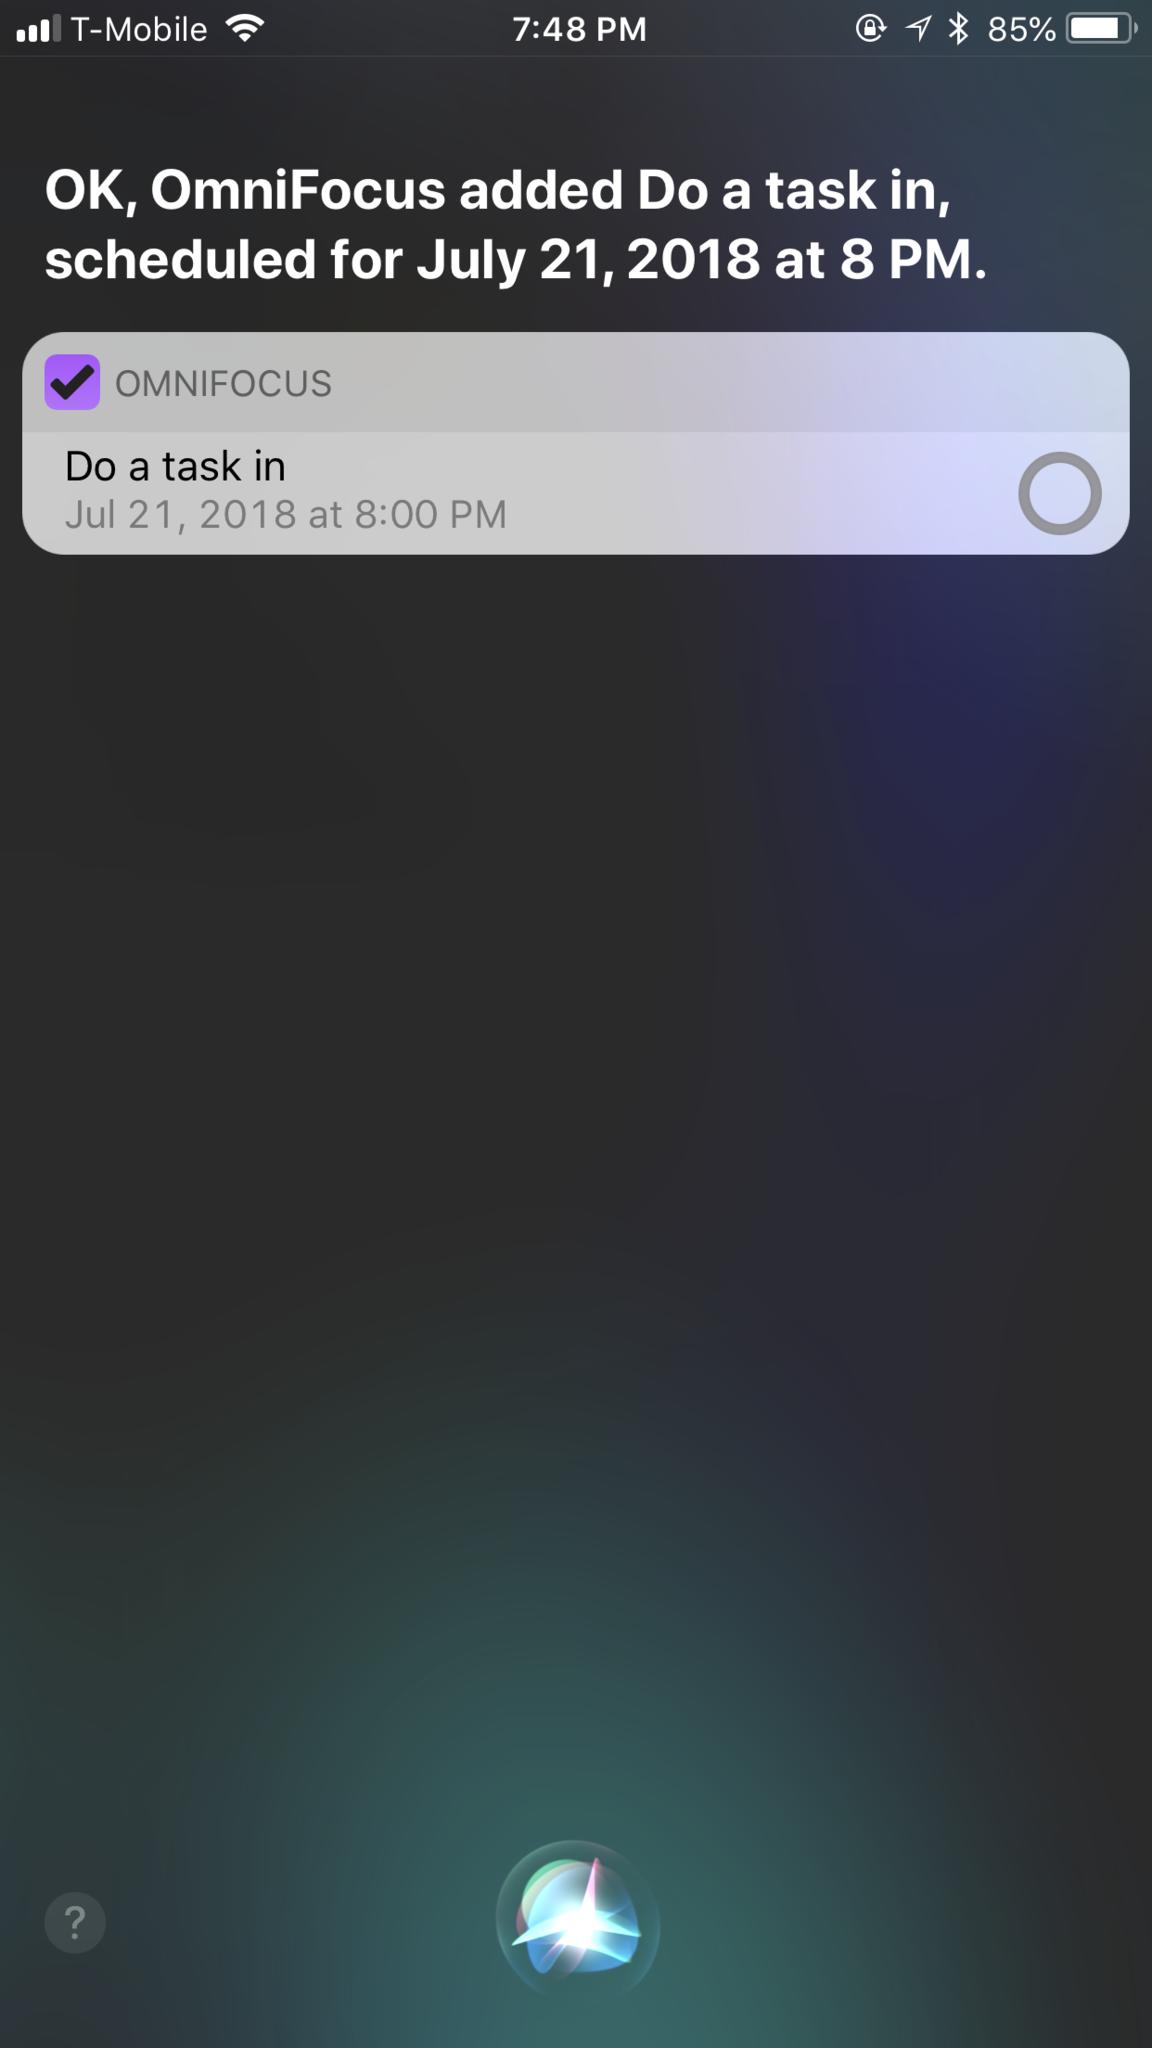
There's also Siri capture, though this needs to have Reminders integrated into OmnIFocus, as we discussed earlier. Then when you do your normal "Hey, Siri" spiel, say something using the template, "Remind me to do your task on the time it's due." If it's set up properly, Siri should capture it without issue and it'll show up in OmniFocus correctly.
OmniFocus Mail Drop
If you signed up for Omni Sync Server, you're able to set up your own secret OmniFocus Mail Drop address. With this, you can forward any email to your OmniFocus Mail Drop address and turn the message into a new task in your inbox.
Getting this is easy. Just head on over to your Omni Sync Server account page, and select Add an address under the Mail Drop settings section. The email is randomly generated with your username in it, and you can have multiple ones set up at the same time if needed.
Tasks sent to OmniFocus from the Mail Drop method get added to the Inbox by default and have the subject line as the task name, and the body of the message as the note. This includes basic attachments and formatting.
Understanding Defer and Due Dates
Most of us understand what the due date is — the day when the item should be completed by. Sometimes, that also includes a specific time, which you can also set. But what's with the "Defer" date?
The Defer date can be important, as they are when you should start working on the task at hand. Say you have to renew your driver's license on June 15. Technically, it would be due on June 15, but you should think about renewing it ahead of time to avoid complications. Therefore, you may set a Defer date of June 1. OmniFocus can then remind you of the task on both June 1 and June 15.
Create Repeating Tasks If Needed
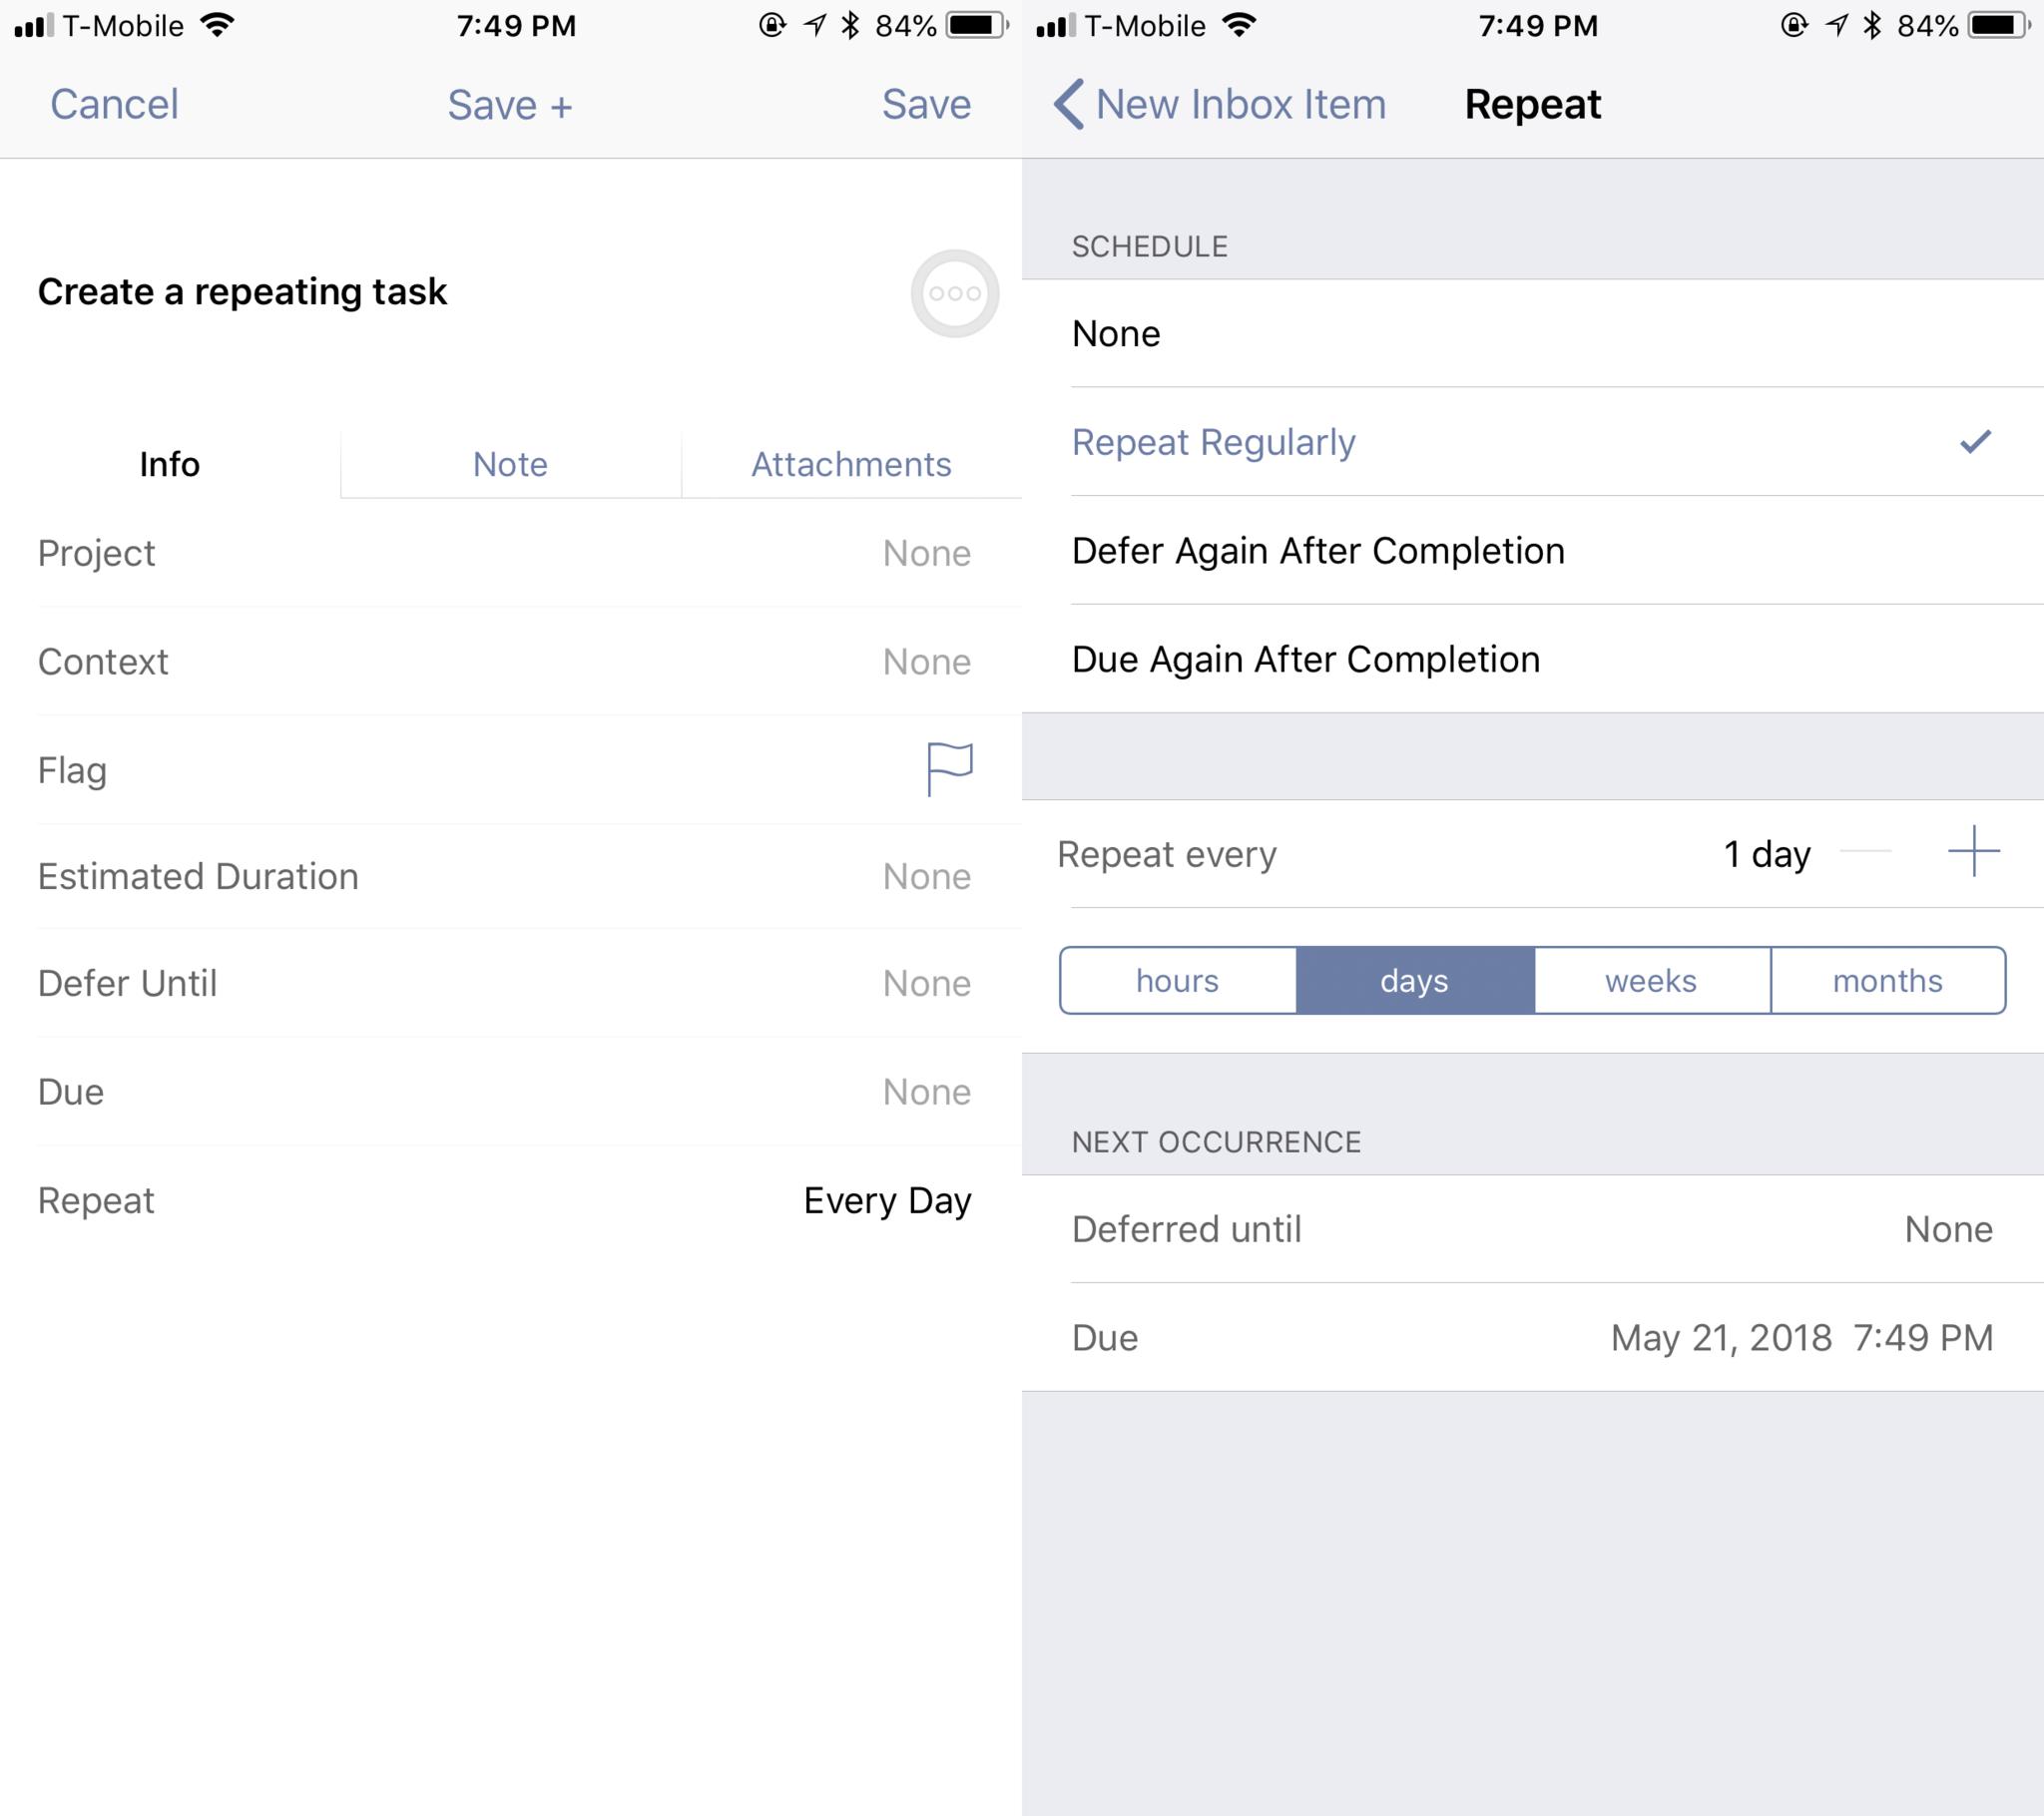
We all may have some tasks that need to be completed on a regular basis. Instead of always creating a new task for it, set it up as a Repeating task so you only need to input it once.
To make a task repeating, just choose your repeat option when adding the item. You can repeat it regularly in selected intervals, or make it to defer again or due again after completion. OmniFocus is fairly flexible, so you can always change your repeating settings later if need be.
It's Time to Get Things Done!
OmniFocus can appear a bit overwhelming if you've never used it before. However, it's a powerful task management solution that ends up moldable and adaptable to your own needs.
I've only covered the basics of getting started with OmniFocus in this guide. Once you start using it, the more intricate and complex parts of the program reveal themselves naturally.
OmniFocus is a free download on the App Store, but to get the most from it, you'll need the Pro Upgrade, sold as an in-app purchase.

Christine Romero-Chan was formerly a Senior Editor for iMore. She has been writing about technology, specifically Apple, for over a decade at a variety of websites. She is currently part of the Digital Trends team, and has been using Apple’s smartphone since the original iPhone back in 2007. While her main speciality is the iPhone, she also covers Apple Watch, iPad, and Mac when needed.
When she isn’t writing about Apple, Christine can often be found at Disneyland in Anaheim, California, as she is a passholder and obsessed with all things Disney, especially Star Wars. Christine also enjoys coffee, food, photography, mechanical keyboards, and spending as much time with her new daughter as possible.
