How to create and password protect a zip file on macOS
Your files are important. Here's how to protect them better.

It's always a good time to protect your important files. Today, securing your private data is essential. Here's how you can create a compressed zip file with your sensitive data and password-protect it on natively macOS.
Prep your files
Since we'll be using the Terminal application native to macOS, including macOS 13 Ventura, you'll want to make the compression of your files as simple as possible to avoid long strings of commands. So if you have multiple files for compressing and protecting, you can organize them into a single folder using Finder.
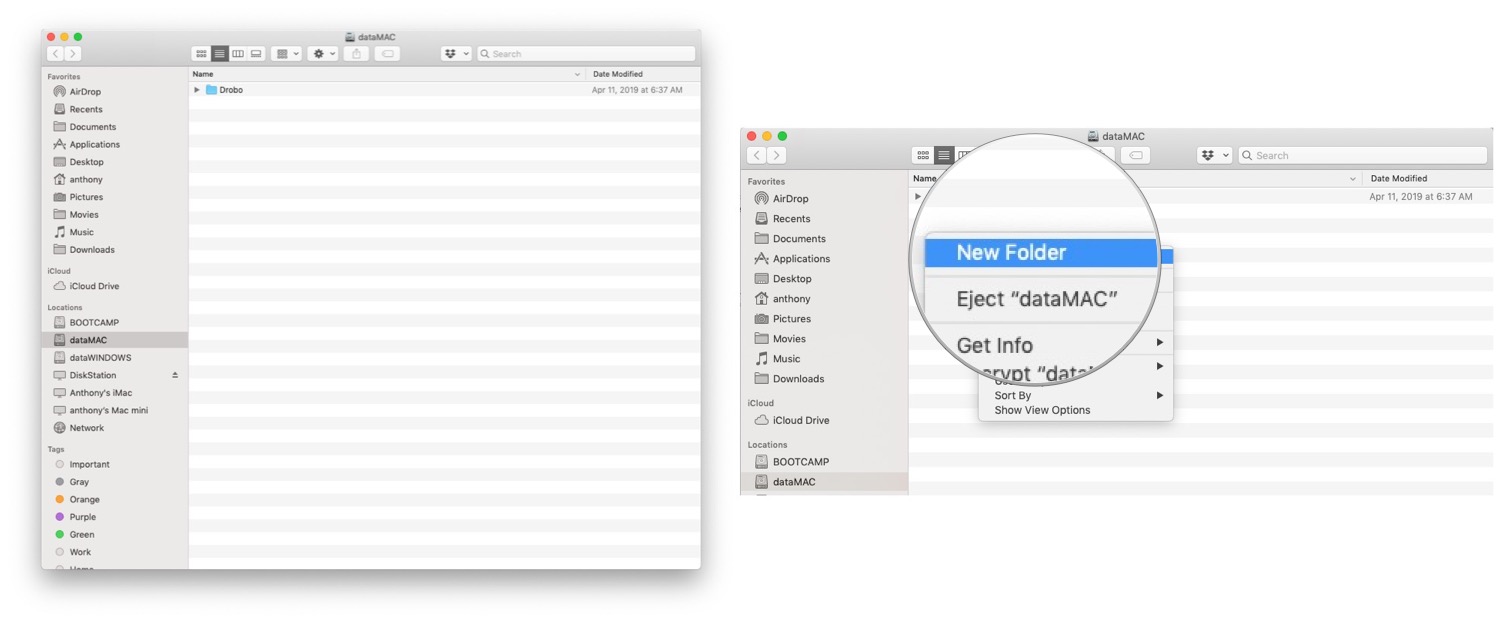
- Open Finder.
- Option-click the Finder window and create a New Folder.
- Next, rename the folder, preferably something without spaces as this will make terminal commands simpler for you.
- Drag and drop your sensitive files into the new folder.
Once you have your files in the generated folder, you can now go on to the business of compressing and password-protecting the files. First, note that if you are e-mailing files, most e-mail providers have a limit on attachment sizes. Secondly, some companies disallow the reception of compressed files via e-mail because people unknowingly open malware. As such, your attachment may get stripped and the e-mail server. Finally, you'll need another method to transfer your files, such as via Dropbox.
The Terminal
Since Finder doesn't have a native password protection option, we'll have to go deeper under the skin of macOS and straight up a Terminal window.
- Using Spotlight, type in Terminal.
- Change your directory to the location of your folder. For example, in my instance, I would type cd /Volumes/dataMAC and hit enter.
- Type in ls to make sure you see your folder.
- Now type in the command that will simultaneously compress and password protect the files in the form of zip -er FILENAME.zip FILESorFOLDERStoCOMPRESS.
- In my example, that would be zip -er Mytaxes.zip ForTaxes/.
- Hit return/enter.
- Next, you'll be prompted with a password prompt—type in the password you want to use to protect the files. Enter the password twice.
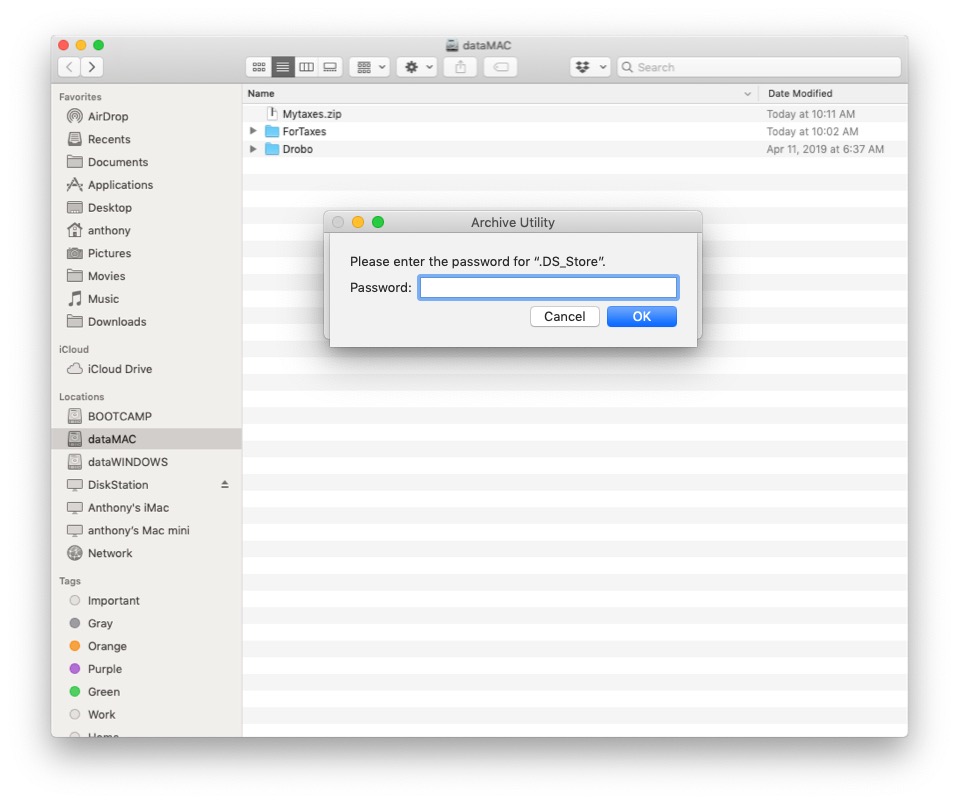
- You should now see your compressed and password-protected zip file in Finder.
- You can test the protection by double-clicking the file.
- Enter your password. The file will be uncompressed into the same directory.
Get going and protect your files
This compression and password protection is agnostic to the desktop operating system so that you can send it to Windows users, Linux users, and Mac users. These directions work on all the best Macs, including the 2022 MacBook Air.
iMore offers spot-on advice and guidance from our team of experts, with decades of Apple device experience to lean on. Learn more with iMore!
- Bryan M WolfeStaff Writer


