The Mac does have a universal emoji keyboard. You can access it by hitting command + control + space on your keyboard. You can also set a shortcut to it on your Menu bar. But it doesn't come easy. You can't simply start typing a word and get an emoji suggestion.
Rocket is an accessibility tool for the Mac that makes it possible for you to get emoji recommendations in any text field. So you can add a smiley face to your college thesis or resume without having to jump through hoops to find it.
Step 1: Download and install Rocket
Rocket is not in the Mac App Store, but you can download it for free directly from the developer, Matthew Palmer. Visit his website and click the Download for macOS link. I can confirm that it works on OS X (incidentally, it is not yet compatible with macOS Sierra).
Once you've downloaded and installed Rocket, you'll be asked to let it access Accessibility settings through Security and Privacy.
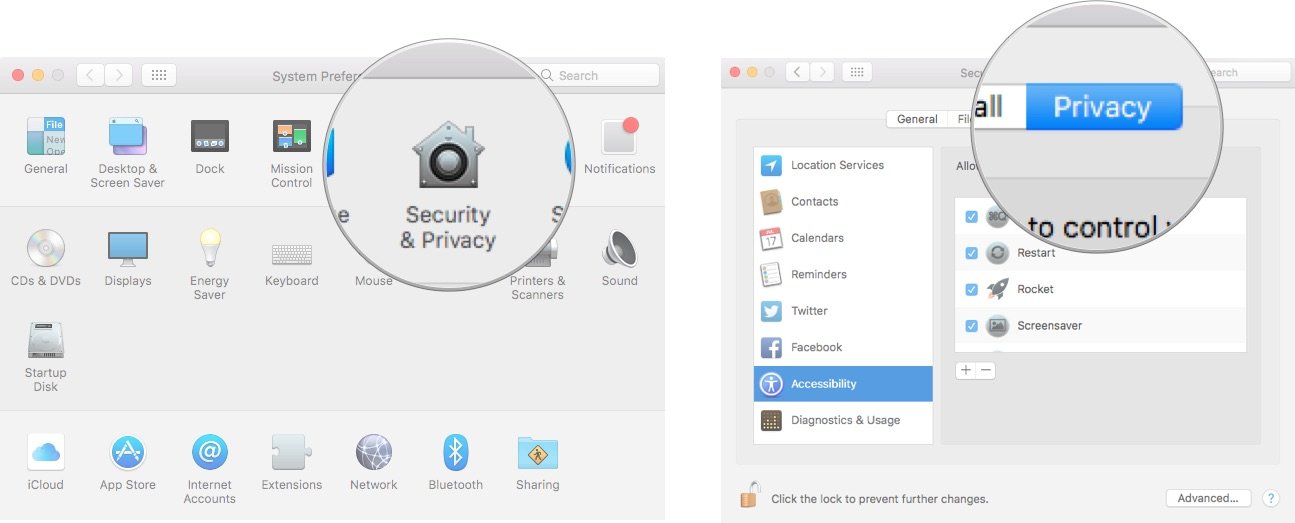
- Open System Preferences...
- Click on Security & Privacy.
- Click the Privacy tab.
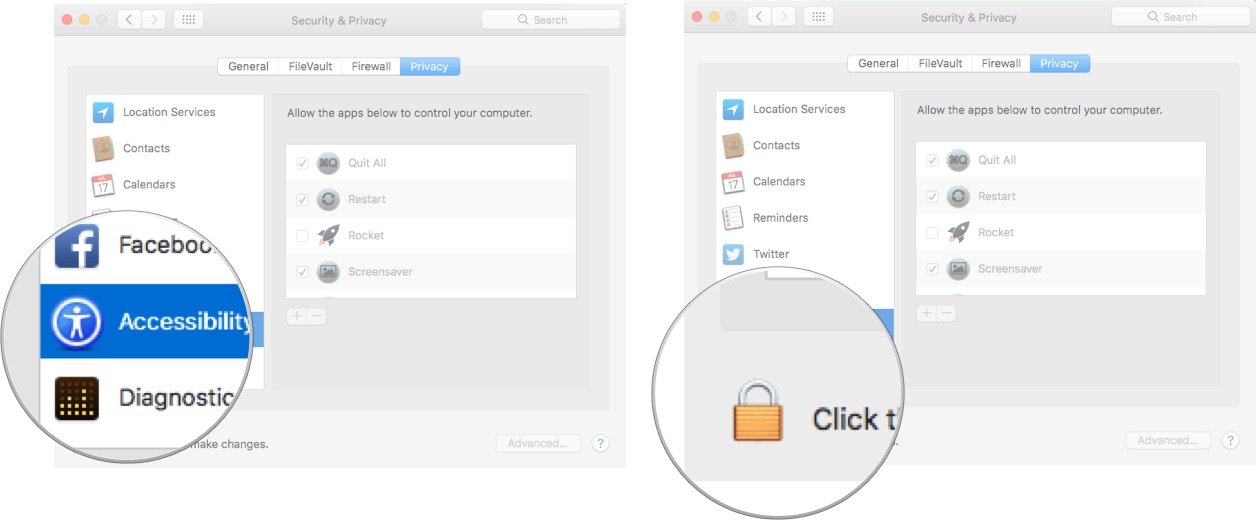
- Select Accessibility from the list.
- Click the lock in the lower left corner of the window to make changes.
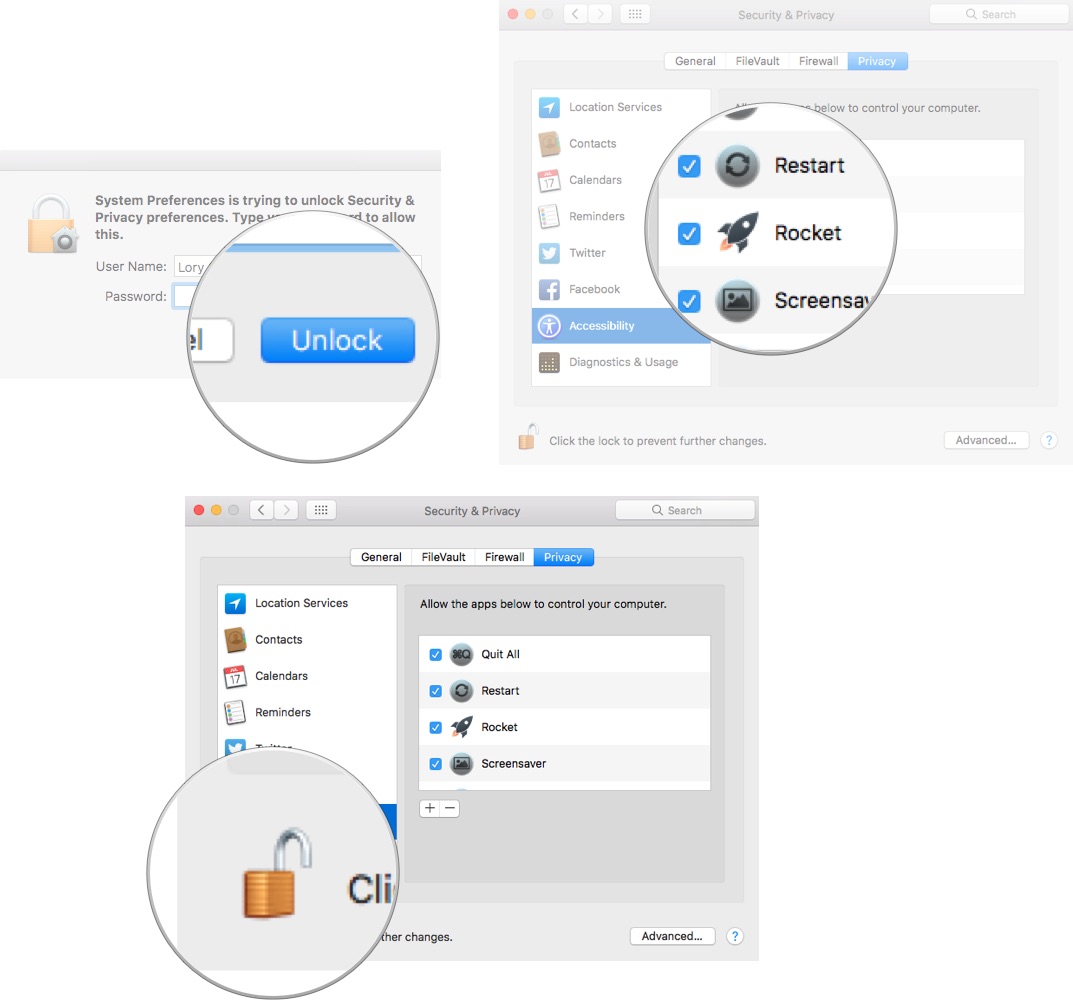
- Enter your Mac's password.
- Click Unlock.
- Scroll down and tick the box next to Rocket.
- Click the lock in the lower left corner of the window to prevent further changes.
- Close the window.
Step 2: Upgrade for custom GIFs and images
Rocket was recently updated to version 1.1.2, which includes some important added features, like dark mode, the ability to change the emoji trigger key, and additional content that you can purchase for a mere $3.99. The package includes more than 150 GIFs, images, and memes that you can add to your collection. Plus, you can upload your own personal images. The profits will also go to help Matthew Palmer, who is an independent developer providing an otherwise free, super cool tool for us to use. So, if you have it in your heart, upgrade Rocket.
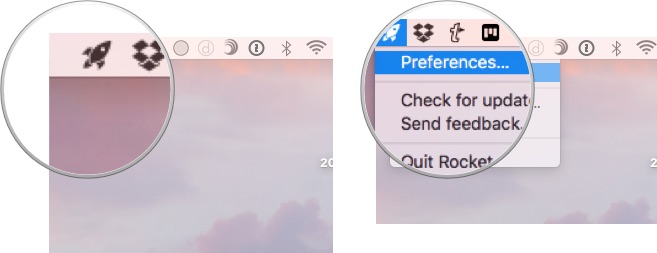
- Click on the Rocket icon in your Mac's Menu bar.
Note: If you don't see the Rocket icon, you either need to open the app or download the newest version. The first version did not have a Menu bar icon.
- Select Preferences from the dropdown menu.
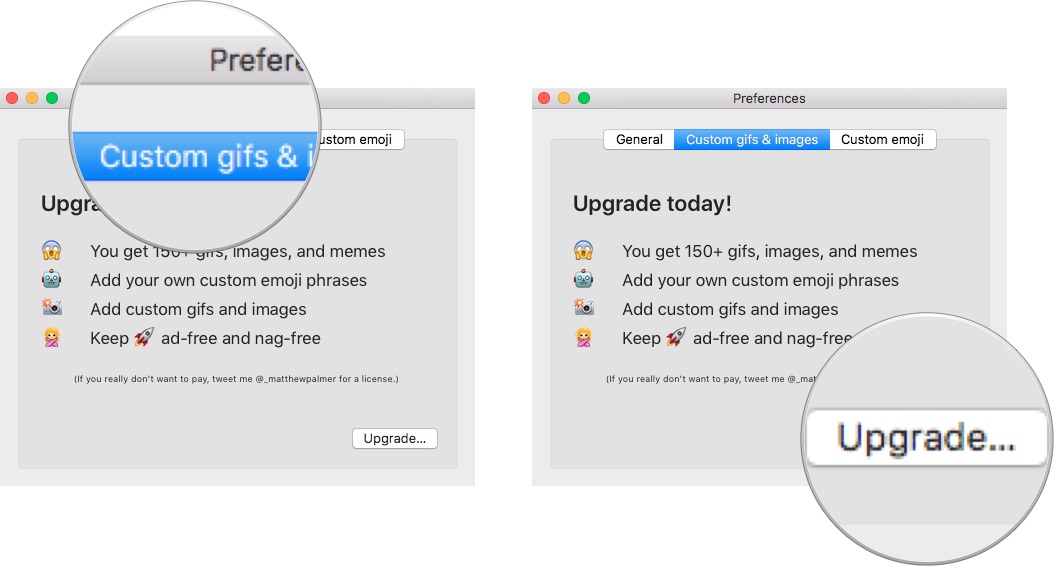
- Click on the Custom gifs & images tab.
- Click Upgrade....
- Follow the instructions on the website to purchase, download, and install the additional content (it's worth it).
Step 3: Start typing
Rocket lets you add emoji in any text field (except passwords) by using the same trigger that Slack uses in its chat app. If you don't use Slack, you may not know about its emojification feature or how it works. You might download Rocket and think it's broken. It's not. (unless you are running a macOS Sierra beta, in which case, you'll have to wait a bit longer before Rocket will work).
iMore offers spot-on advice and guidance from our team of experts, with decades of Apple device experience to lean on. Learn more with iMore!
Here's how to use it.
- Type a colon by hitting shift and ; at the same time. A colon looks like this :
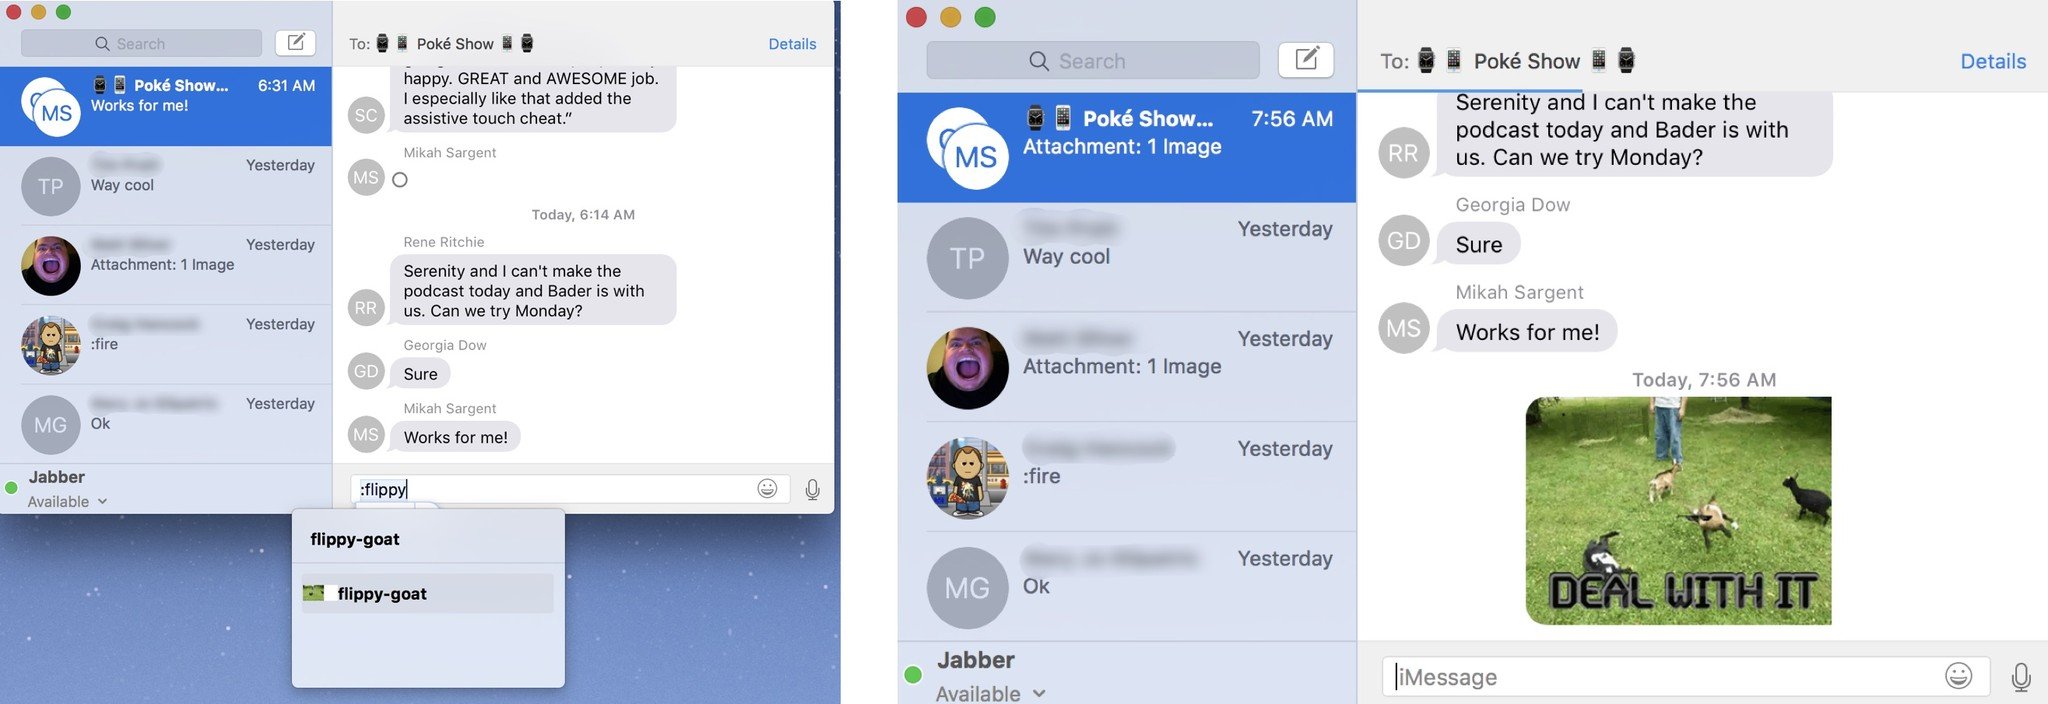
- Type in a word that you want to emojify, like :kiss: or :dancer:.
- Hit the Return key or the Tab key.
The emoji will populate into the text field you are typing in. This works universally across the Mac and all applications in it.
By default, the app is disabled for HipChat, Slack, Xcode, and Terminal. However, you can add or remove applications from the disabled list in the preferences section.
You can also change the shortcut key that triggers Rocket. For example, instead of a colon, you could use an ampersand. Just remember that Rocket doesn't recognize the Command or Options keys so don't use them as part of your key trigger.
Now that your Mac is emojified, show us your favorite emoticon in the comments!
Lory is a renaissance woman, writing news, reviews, and how-to guides for iMore. She also fancies herself a bit of a rock star in her town and spends too much time reading comic books. If she's not typing away at her keyboard, you can probably find her at Disneyland or watching Star Wars (or both).
