How to permanently delete your Nintendo account

While we personally love Nintendo, it's may not particularly be everyone's cup of tea. Maybe you just don't have the time for Switch games, perhaps you created one too many Nintendo accounts (ahem), or you may even want to get rid of a child's account so that they can start their own. Whatever the case may be, it's possible to permanently delete your Nintendo account, and we're going to walk you through the steps right here.
You do not need to delete an account if you're moving to a new Switch, you simply need to transfer your Nintendo Switch Save data instead.
What you lose by deleting your Nintendo account
Before you contemplate deleting your Nintendo account, make sure that it is definitely something that you want to do. This is because all data that is associated with it will be gone, and you can't recover it. If you also have children accounts that are linked to your standard account (acting as a parent/guardian account), they will also be deleted along with your account.
The data you lose by deleting your Nintendo account include, but are not limited to:
- Mission status, points, and rewards in the My Nintendo rewards program
- Digital content that you purchased or acquired and that is linked to your Nintendo Account, including in-app content and coins
- Save data of apps linked to your Nintendo Account
- Discounts such as Just for You offers
There is a grace period of four weeks after deleting to reactivate the account if you choose to. But after that four weeks is over, the account is permanently deleted and cannot be restored. So think carefully before doing this.
If you are deleting your account in order to make a new one with a specific email address, or want to change nickname or other info, consider updating your Nintendo Account, instead of deleting.
How to delete a Standard Nintendo Account
- Go to https://accounts.nintendo.com/ in your web browser of choice.
- Log in with your Nintendo account credentials.
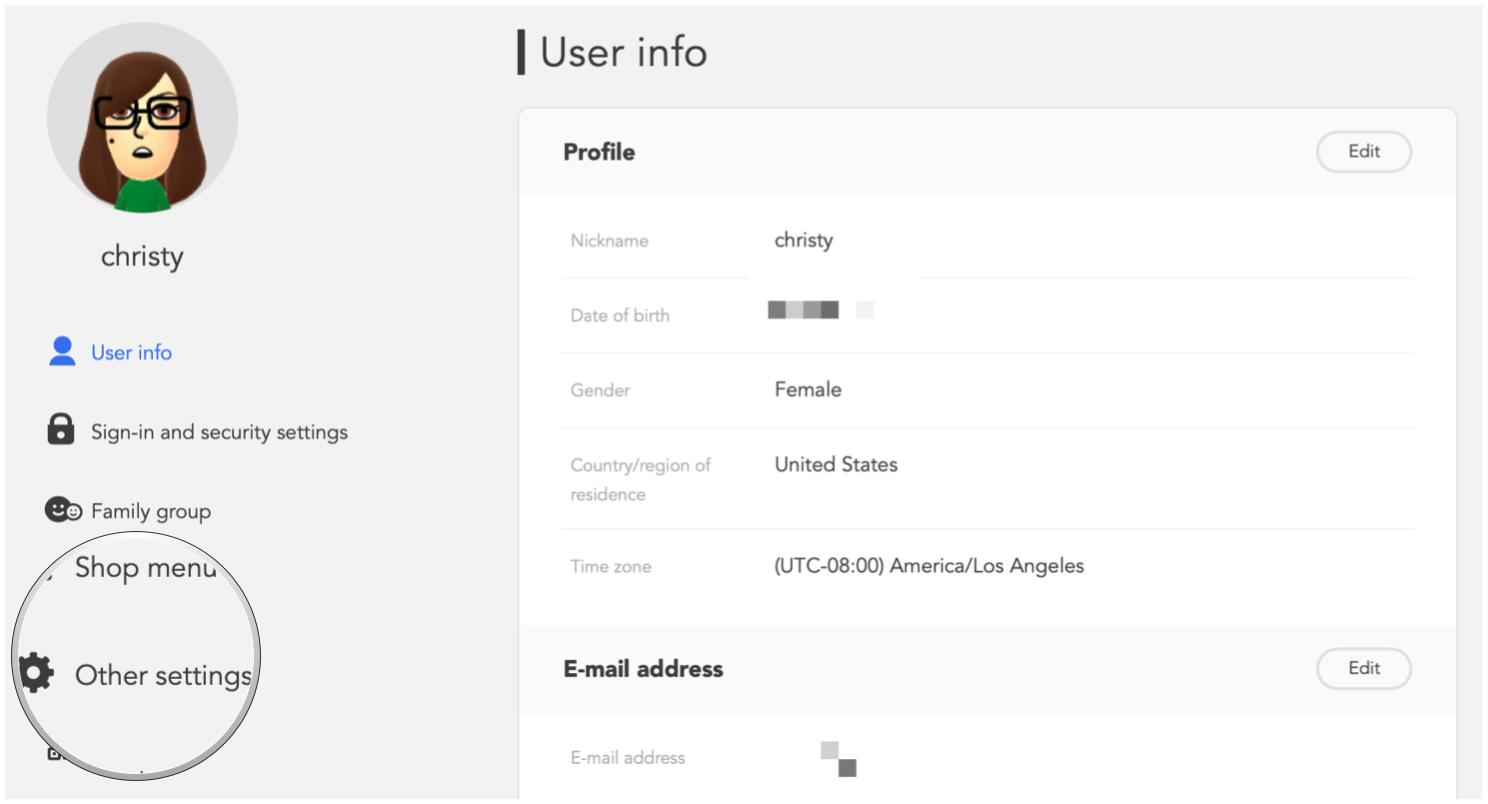
- Click Other Settings in the side menu.
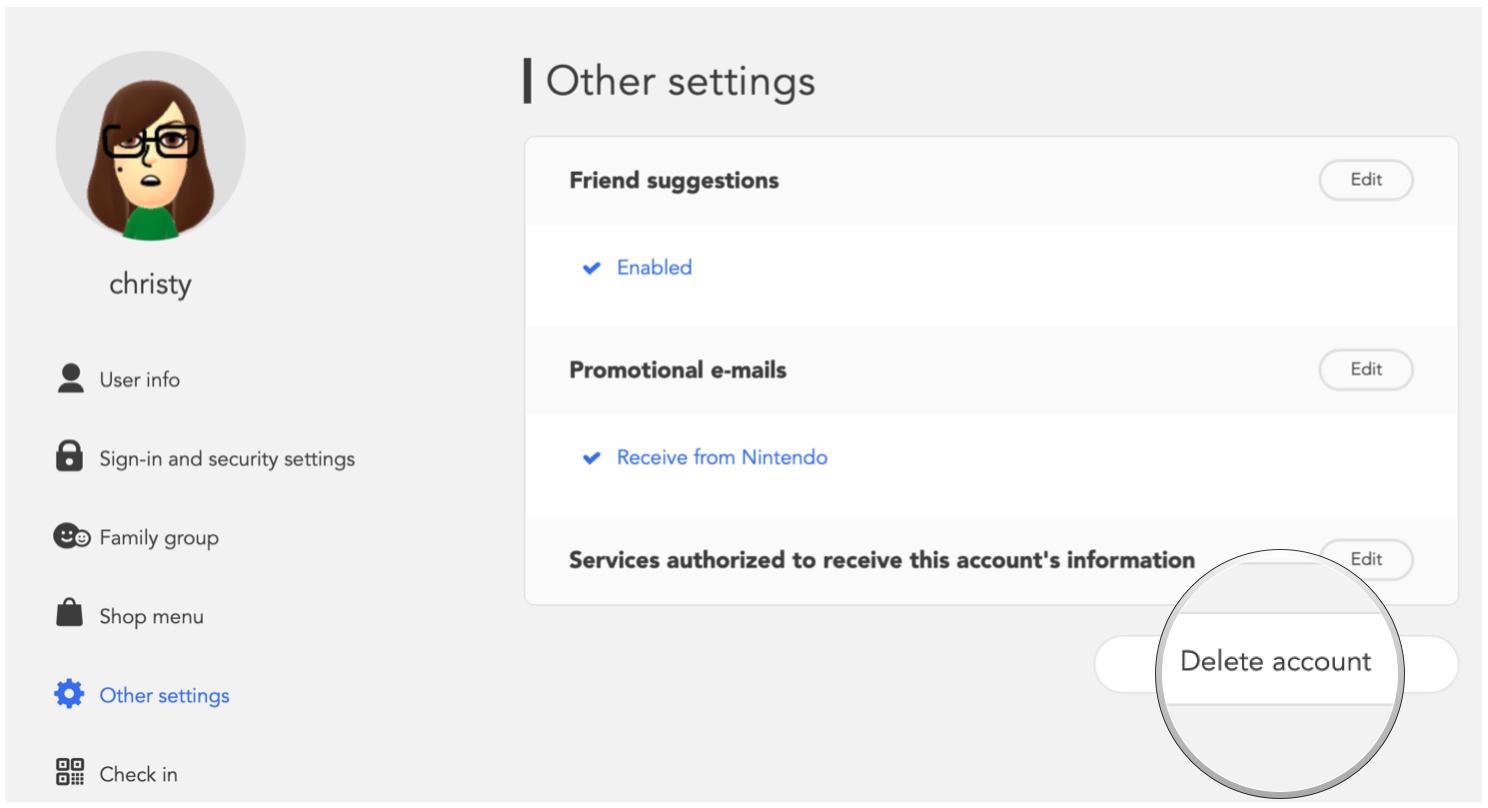
- Click Delete account in the bottom right.
- Read through the on-screen information regarding deleting.
- If you're still going to go through with it, click Deactivate and Delete.
- Click Confirm Account Deletion to proceed.
If you choose to reactivate in the next four weeks, just log in to the Nintendo Account website with your sign-in information. Then just click the Reactivate button to restore the account. Be warned that they cannot guarantee all data is recoverable through this process.
iMore offers spot-on advice and guidance from our team of experts, with decades of Apple device experience to lean on. Learn more with iMore!
How to delete a Nintendo Account for a Child
Please keep in mind that if an account is a Supervised Child Account (for 0-17 years old), then the only way to delete the account is through a Parent/Guardian Nintendo Account in a Family Group.
- Go to https://accounts.nintendo.com/ in your web browser of choice.
- Log in with the Nintendo account credentials of the Parent/Guardian account in a Family Group.
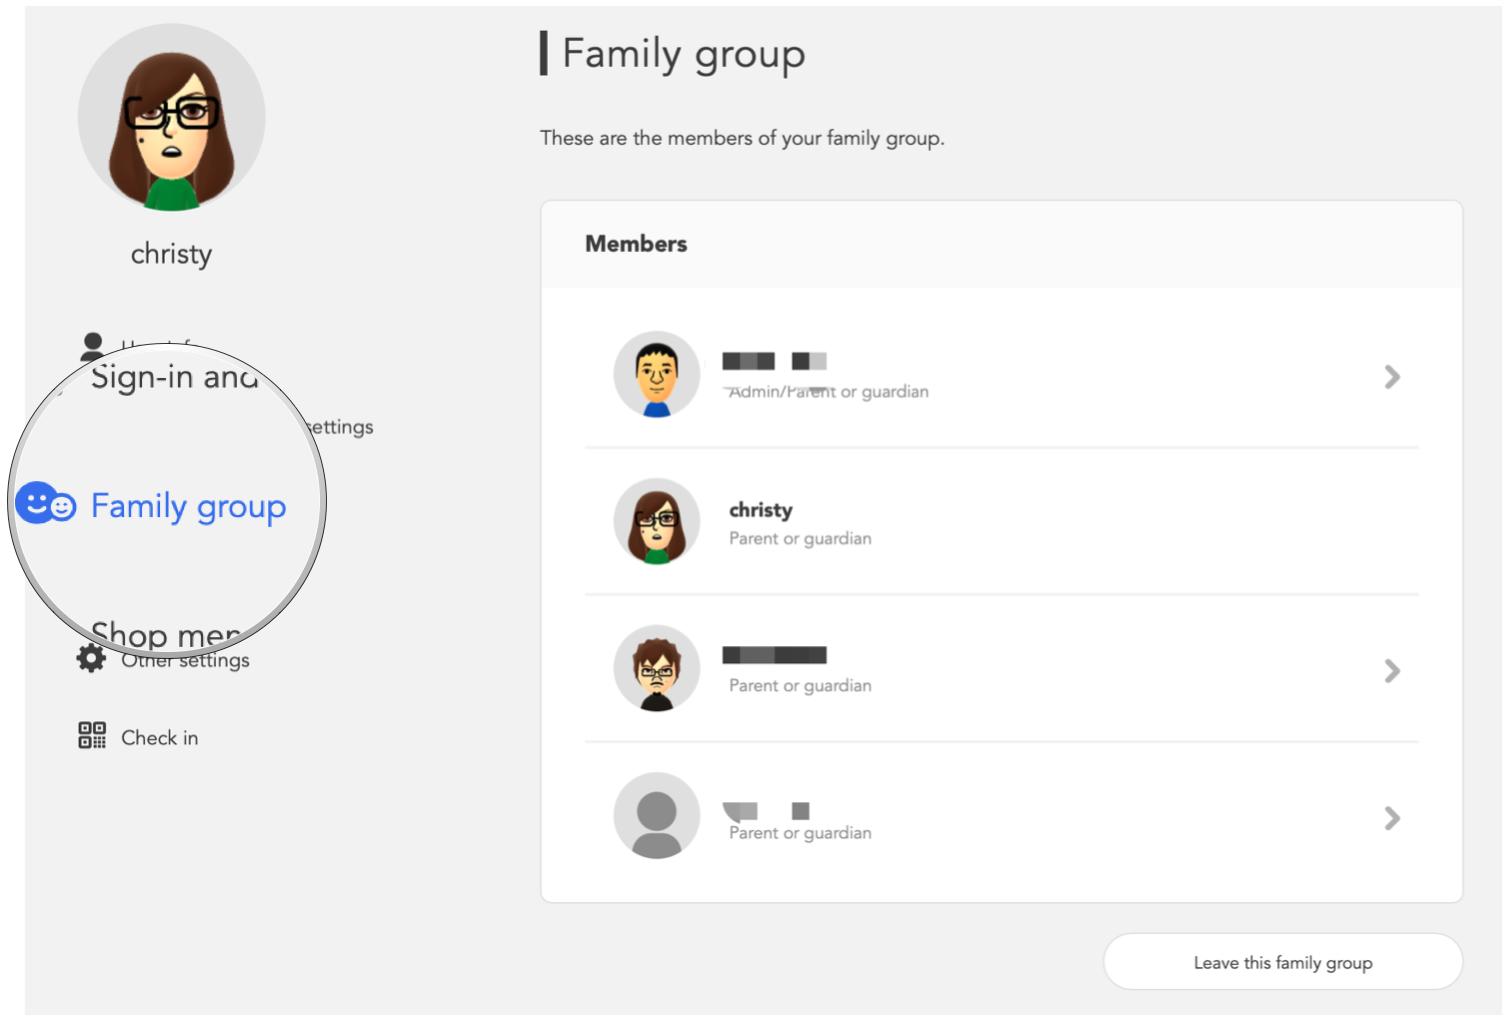
- Click Family Group.
- Click on the child's account that you want to delete.
- Click Other Settings.
- Click Delete child account.
- Read through the on-screen information regarding account deletion.
- When you're done reading, click Deactivate and Delete.
- Click Confirm Account Deletion.
A supervised child's account can be reactivated within 30 days of deactivation. Just go to the Childs accounts section of your account, locate the account you want to restore, and click Reactivate. Once again, restored data isn't guaranteed.
That's all there is to it
It's pretty easy to go in and delete your Nintendo accounts when necessary. Nintendo is also pretty generous with that 30-day or 4-week grace period for reactivation too, just in case you have regrets.

Christine Romero-Chan was formerly a Senior Editor for iMore. She has been writing about technology, specifically Apple, for over a decade at a variety of websites. She is currently part of the Digital Trends team, and has been using Apple’s smartphone since the original iPhone back in 2007. While her main speciality is the iPhone, she also covers Apple Watch, iPad, and Mac when needed.
When she isn’t writing about Apple, Christine can often be found at Disneyland in Anaheim, California, as she is a passholder and obsessed with all things Disney, especially Star Wars. Christine also enjoys coffee, food, photography, mechanical keyboards, and spending as much time with her new daughter as possible.


