How to write a screenplay in Scrivener for Mac

iMore offers spot-on advice and guidance from our team of experts, with decades of Apple device experience to lean on. Learn more with iMore!
You are now subscribed
Your newsletter sign-up was successful
We've discussed how to use Scrivener for short stories or novels. But the program's many templates also include a fairly sturdy screenplay mode. If you've ever wanted to write a movie, Scrivener's automatic formatting and other useful tools can help. It's not quite a replacement for Final Draft, the industry standard — but then, Scrivener doesn't carry Final Draft's $200 price tag either.
To create a new screenplay, select the Screenplay template under Scriptwriting when you create a new document, or hit command-8 in a blank document to enter Screenplay Mode.
Corkboard: Rise of the index cards
Suppose you want to write a gripping cinematic masterpiece about, oh, let's say Dominic Toretto and the Fast & Furious crew battling the Universal Monsters with the power of street racing and FAMILY. Before you begin, you'll want to make sure that your epic's plot has the kind of sturdy, logical consistency for which the other Fast & Furious films are so justly famed.
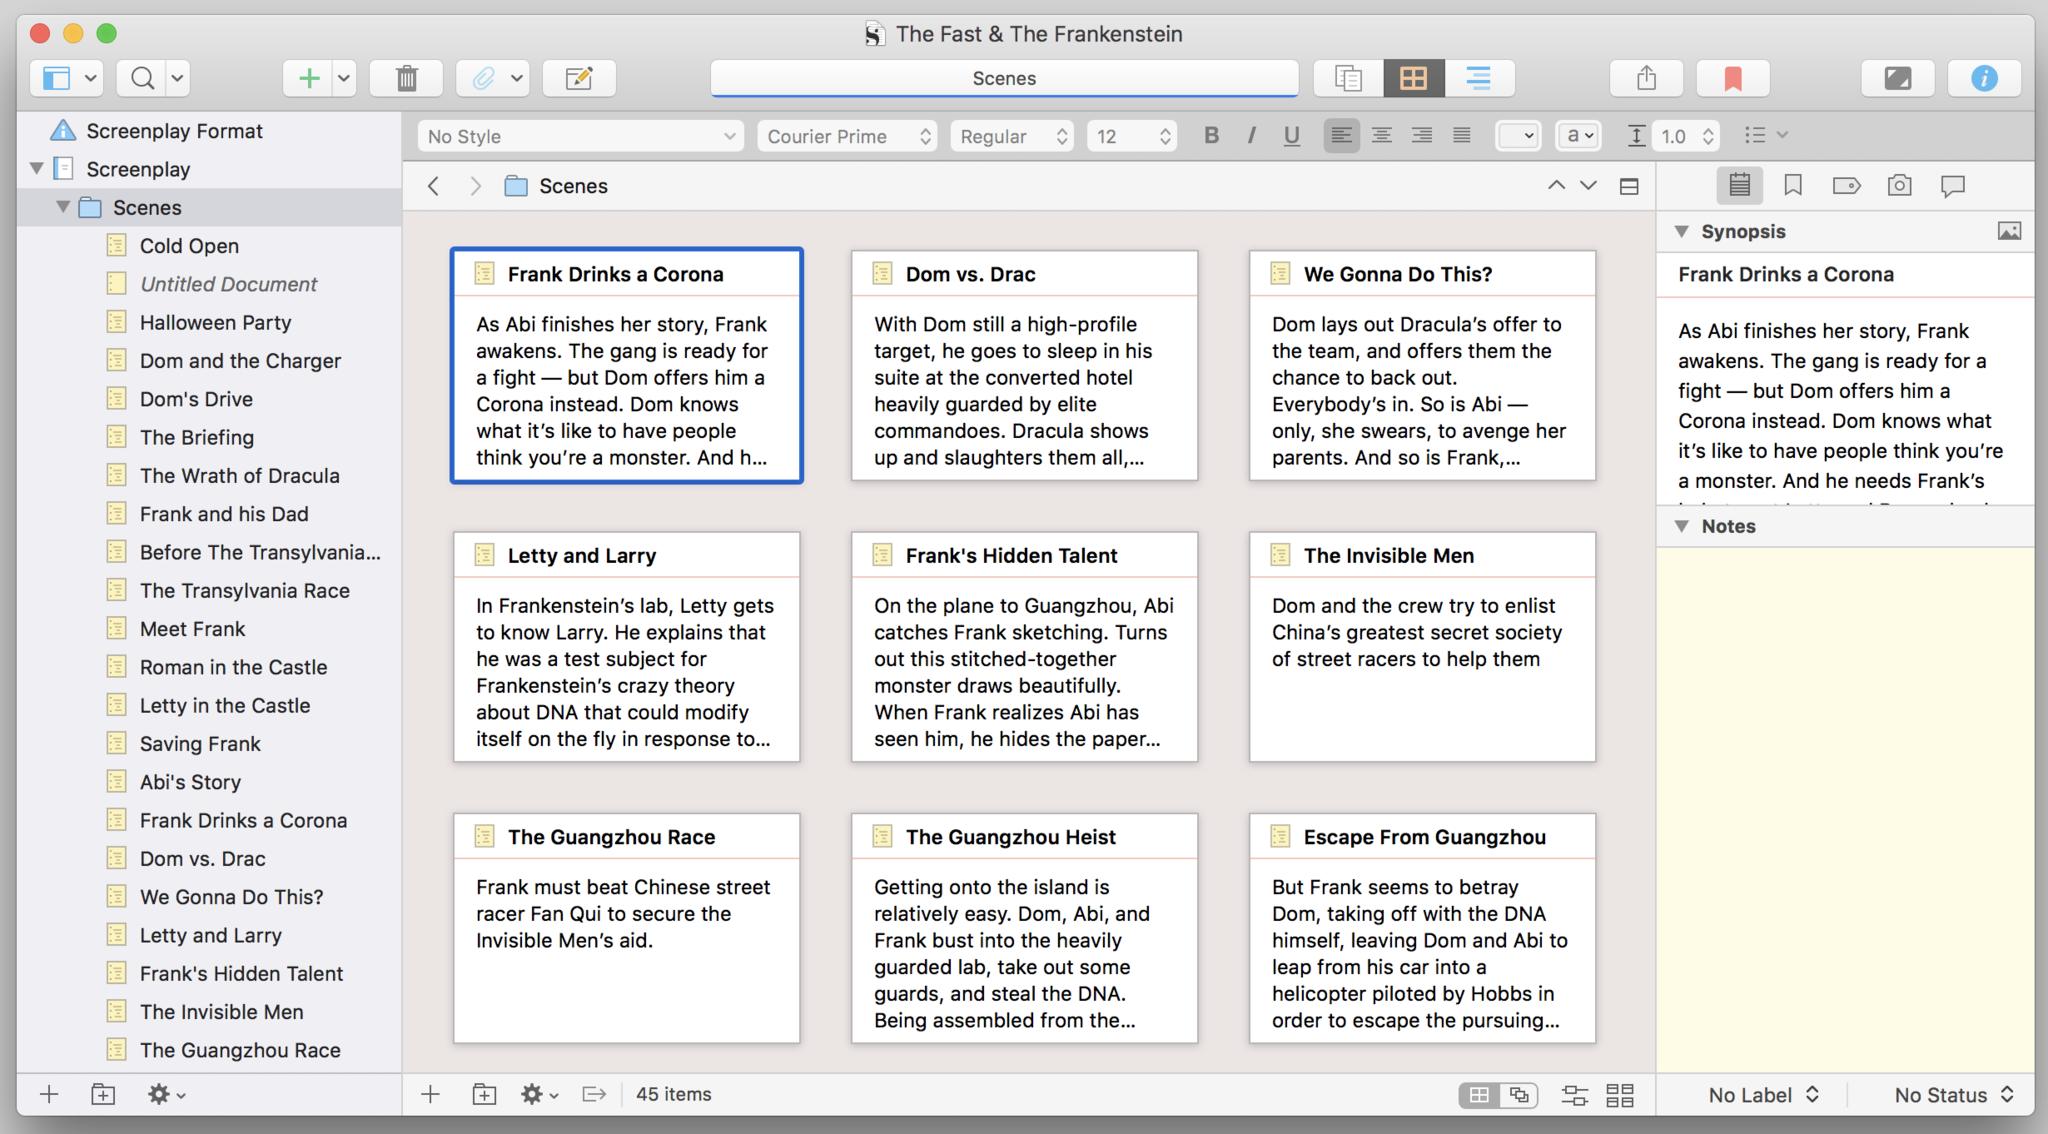
Scrivener's Corkboard view can help. Start by hitting command-2, or clicking the icon that looks like a square divided into fourths in the top icon bar, just to the right of center.

Corkboard view turns every document in your project into a virtual index card. You can quickly add new scenes with cmd-N, then add titles and brief synopses directly on the cards. As they appear on the cork board, they'll also show up as documents in your Screenplay folder in the Binder on the left side of the window.
Corkboard view is a great way to quickly rough out the skeleton of your story. By looking at the entire plot from above, as it were, you can easily spot gaps and inconsistencies that you might miss if you just started writing blind. Novels can meander however they like, but most screenplays need this kind of strong structure, if only to satisfy the expectations moviegoers bring with them to the theater.
If you realize that your story flows better if Roman Pearce meets the Brides of Dracula before Letty Ortiz gets interrogated by Dr. Frankenstein, Corkboard view also lets you drag and drop cards to reorder them.
iMore offers spot-on advice and guidance from our team of experts, with decades of Apple device experience to lean on. Learn more with iMore!
The formatting supremacy
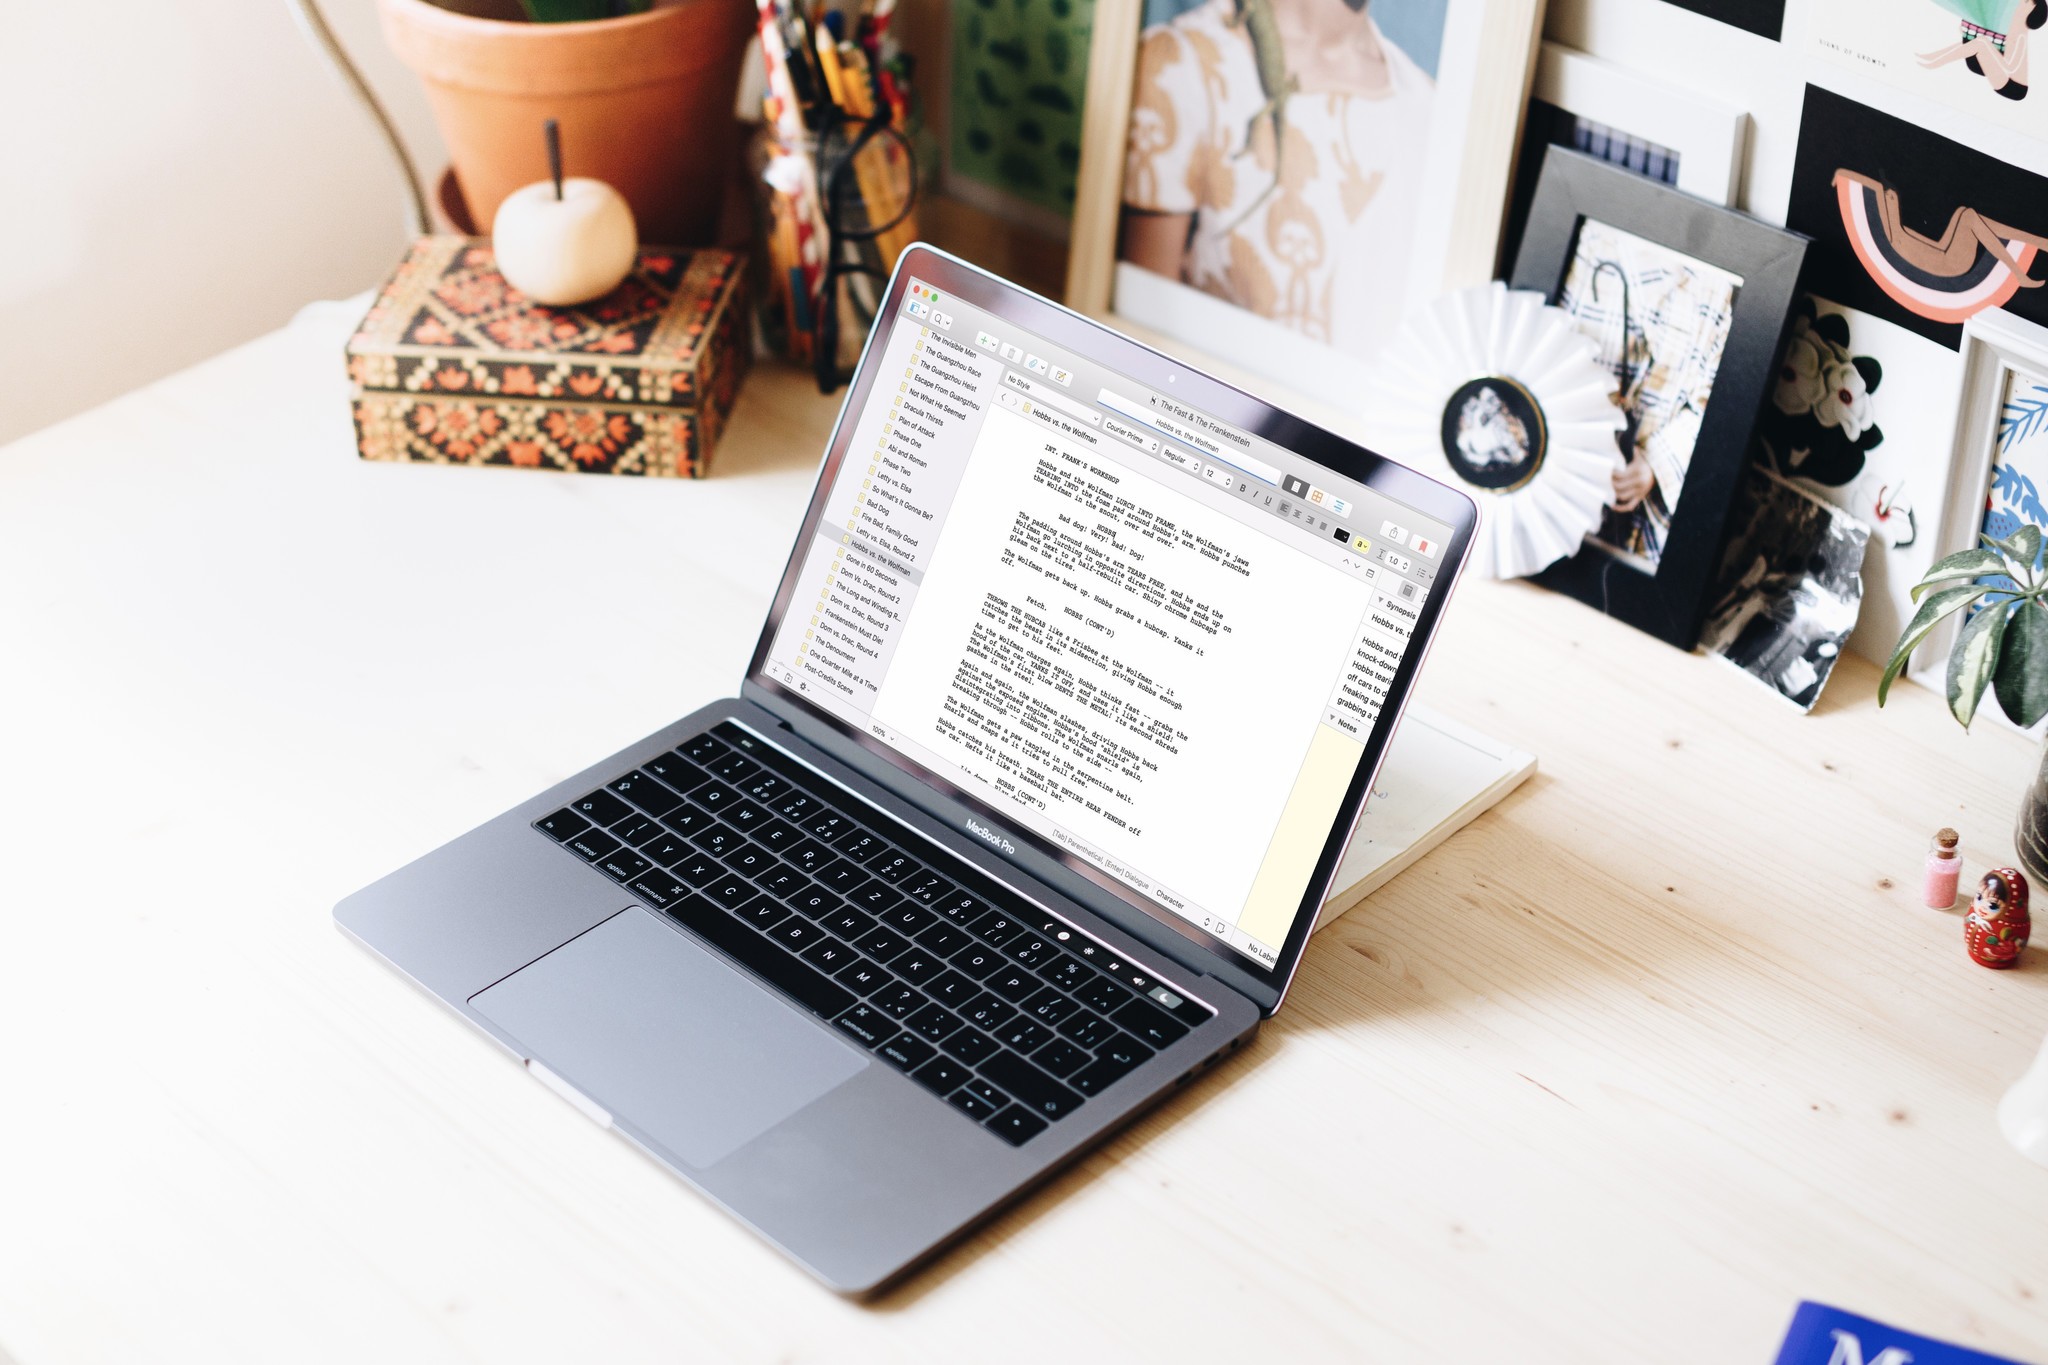
Once you've broken your story, you're ready to start writing scenes. Professional screenplays must follow strict formatting rules, often involving a lot of tedious setting and re-setting of margins. Luckily, Scrivener takes care of all of that for you — whether you know how to format a screenplay or not.
Keep an eye on the lower right area of the writing pane. In black, you'll see how Scrivener's formatting the current bit of text you're writing.

For blank scenes, Scrivener always starts with a scene heading:
INT. FRANK'S WORKSHOP - NIGHT
Just to the left of the current formatting, you'll see your options for next steps in gray.

Depending on what kind of formatting block you're in, pressing Tab or Return can invoke the next logical type of formatting. For example, hitting either key at the end of a scene heading shifts you into the Action format:
Hobbs and the Wolfman LURCH INTO FRAME, the Wolfman's jaws TEARING INTO the foam pad around Hobbs's arm. Hobbs punches the Wolfman in the snout, over and over.
From there, hitting Tab twice gets you a character name, with a subsequent Return setting up that character's dialogue:
HOBBSBad dog! Very! Bad! Dog!… while hitting Tab three times instead gets you a transition:
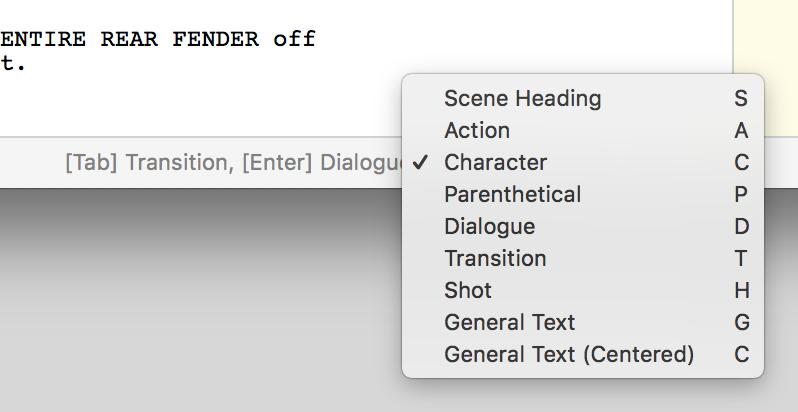
DISSOLVE TO:The gray suggestions can help guide you through each page of your script. And if the formatting goes awry — as it more than occasionally does, in my experience — just select the mis-formatted text, then choose the right format from the same pulldown menu that tells you the current format.

The write stuff
Once your peerless achievement in screenwriting is complete, you can easily format it for print or PDF publication — or export it as a Final Draft or Fountain document for further polishing. We'll explain how to compile your finished work in the last part of this series. But next, we'll explore some of the lesser-known features that really help Scrivener shine.

Nathan Alderman is an iMore contributor. He’s been using Apple computers since his first Apple IIe in 1985, and writing professionally about Macs and their software since 2005. During his 12 years freelancing for Macworld, he covered email clients, web browsers, web design programs, writing apps, and games, and he’s continued to follow those interests at iMore since 2017. An editor and writing coach in his full-time career, he spends his dwindling spare time writing fiction for fun, volunteering for democracy, and contributing to podcasts on The Incomparable Network. Nathan adores his wife and wrangles his alarmingly large children in bucolic Crozet, VA.

