Speed up app installs and iCloud access on your Apple devices!
iMore offers spot-on advice and guidance from our team of experts, with decades of Apple device experience to lean on. Learn more with iMore!
You are now subscribed
Your newsletter sign-up was successful
Do you have a lot of Apple hardware to maintain? Perhaps you are a small office that manages numerous similar Apple devices? You can speed up the updating of your Macs, the downloading of your apps, and access to your iCloud data while at the same time reducing your internet bandwidth usage by installing the macOS Server Caching Service!
What does the Caching service do?
In my household, we have (in their various forms): 4 iPads, 4 iPhones, 3 AppleTVs, 3 MacBook Pros, 2 MacBook Airs, 1 MacBook, and 1 iMac. That's a lot of downloading to do for iCloud synchronization and system updates across all of those devices. You may have a metered internet package or you might need to make certain your Apple-related downloads don't use up all of the bandwidth.
The Caching service helps by keeping a local network copy of app downloads, system updates, iCloud data, iBooks purchases and the like. Once one iPhone downloads a newly purchased app or goes on to synchronize documents in iCloud, the caching service will automatically save a copy of the file on its hard drive and the rest of your devices can look to the local macOS Server running the caching service to download it rather than downloading it from the internet. This speeds up installation and synchronization on all subsequent devices by many times!
Install macOS Server on one of your Macs
If you haven't already done so, you'll need to install macOS Server on one of your network Macs. You can follow our detailed guide if you need a little more help, but here is the express version.
- Launch the App Store application.
- Search for macOS Server in the search bar at the top right of the app.
- Click Buy next to macOS Server or if already purchased, you'll be notified that you can download it for free.
- Click Install.
- Agree to the User Agreement.
How to set up the caching service
- Launch the Server App
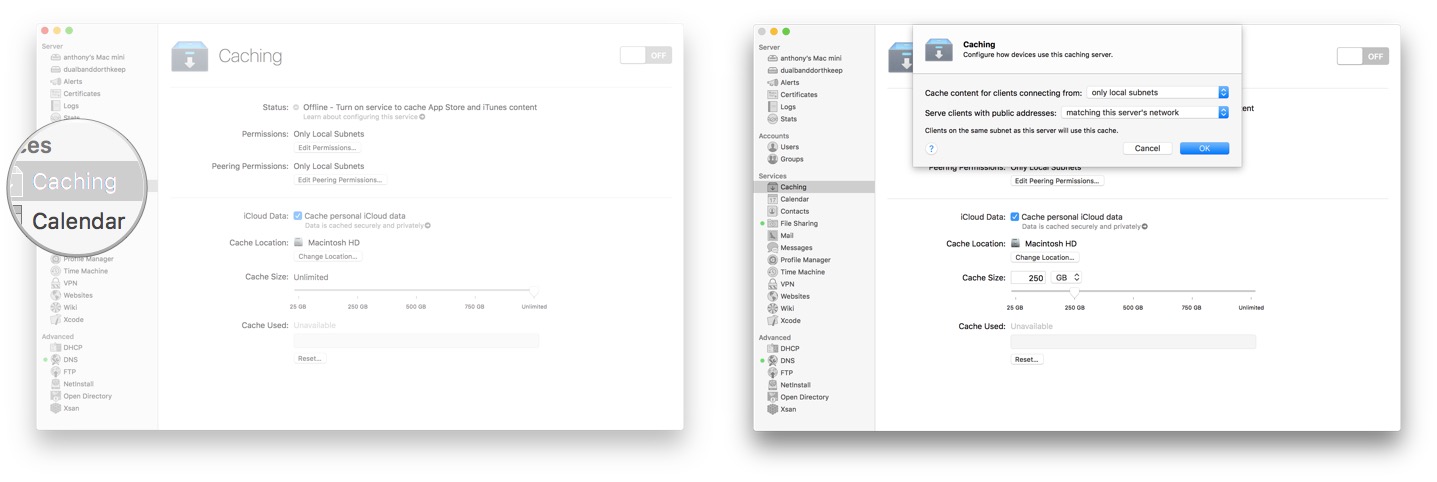
- Select Caching under the Services listing.
- Optionally select Edit Permissions to determine which devices on which networks are allowed to connect to your macOS Server.
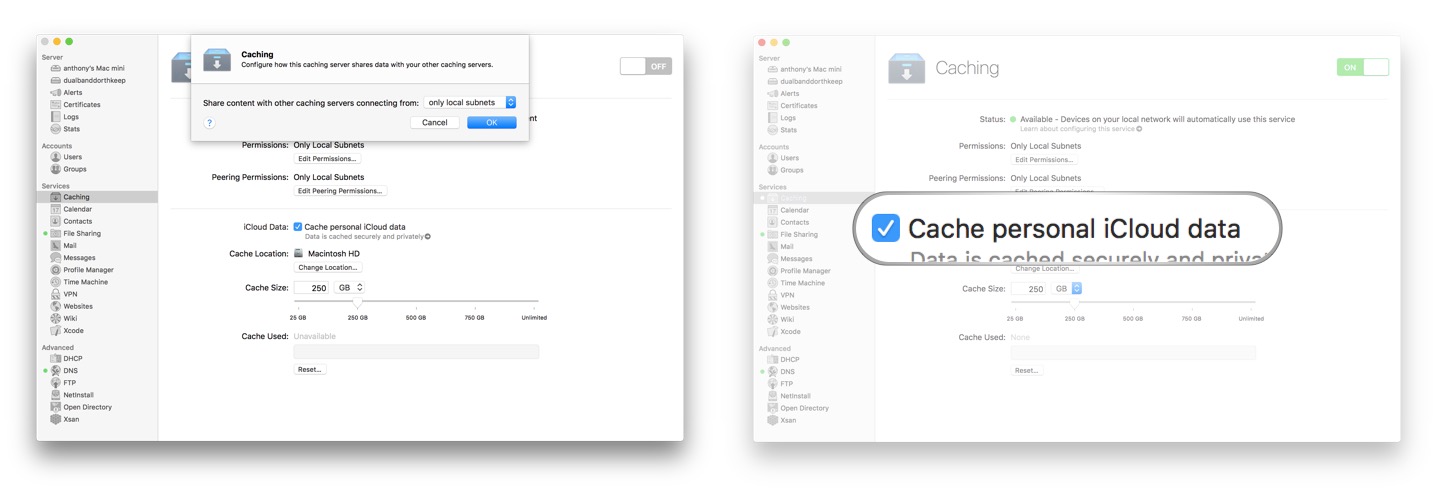
- Optionally select Edit Peering Permissions to select from what networks other Caching servers can be used to share data.
- Leave Cache personal iCloud data enabled to allow for caching of iCloud data to quickly synchronize all of your iCloud-connected devices.
- Click Change Location if you have a secondary storage device connected to your macOS Server to change the cache location.
- Click and drag the Slider or type in the Cache Size to set how much of your storage device you want to use for the caching service.
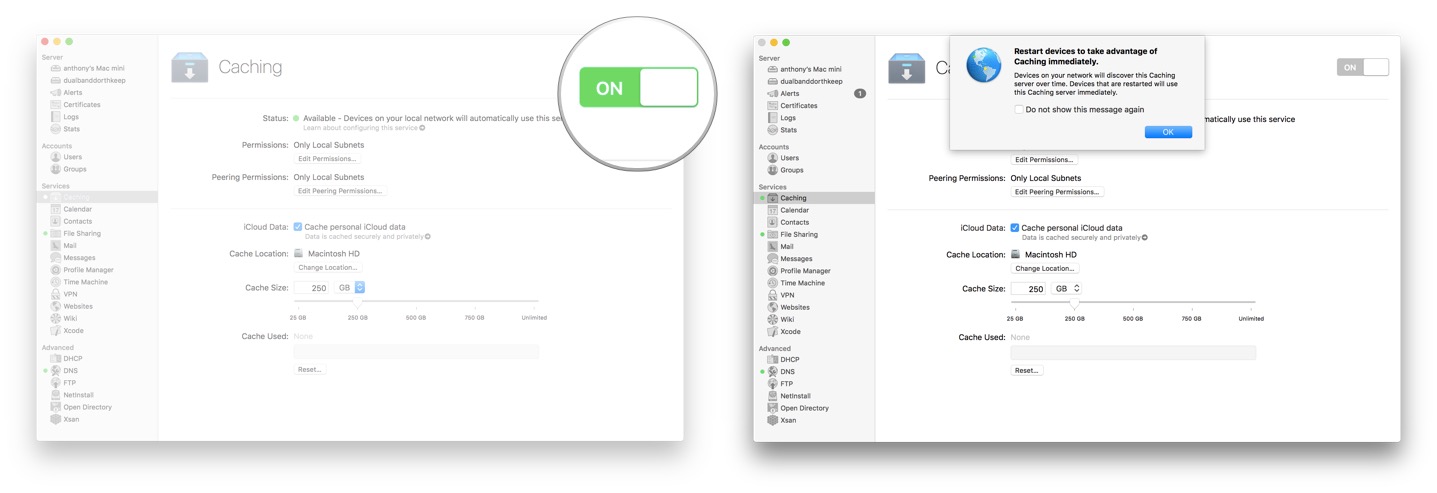
- Click the OFF/ON button to start the service.
- Restart all of your Apple devices so that they can detect the caching service running on your network.
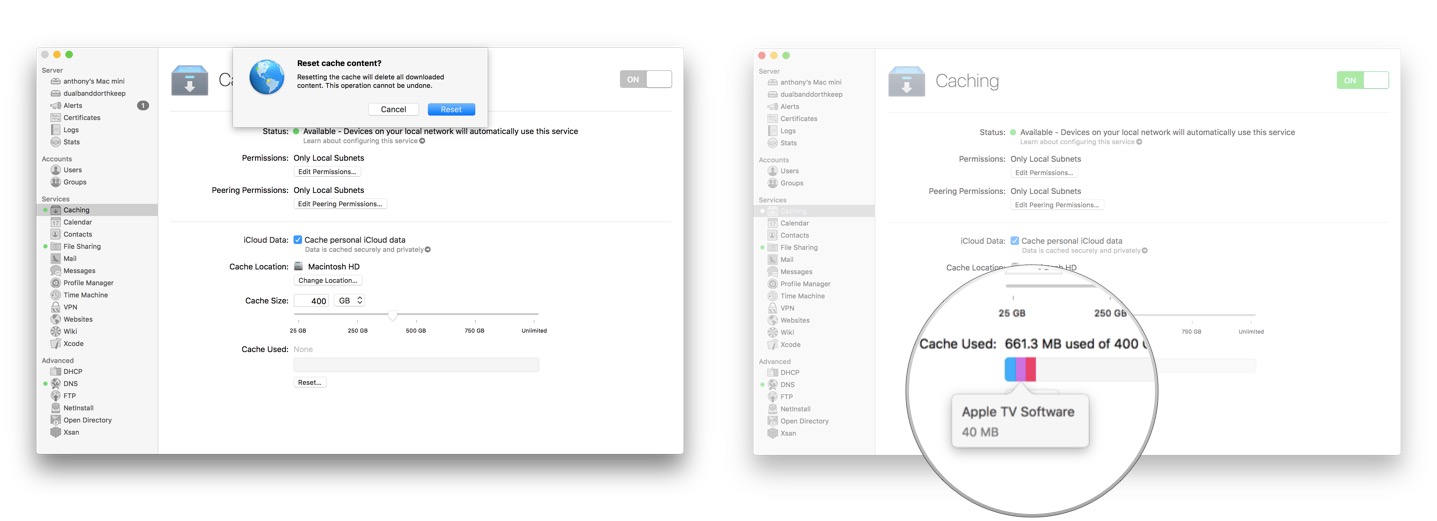
With that, your devices will automagically start using and storing data and files on your caching server. You can see what type of file and how much space is being used for each type of data populating your server. If ever you need to reset the data in the cache, you need to simply click on Reset on the caching service administration page.
Any comments or questions?
This is by far one of the most useful and simplest services to set up on your Apple-centric network. It's also one of the most impactful since the bandwidth and time saved can be dramatic across all of your hardware. If you have any questions or comments, leave it below!
iMore offers spot-on advice and guidance from our team of experts, with decades of Apple device experience to lean on. Learn more with iMore!
