The iPhone 5 comes equipped with an 8 megapixel rear iSight camera. It's a great camera, as long as it's functioning properly. However, if you're experiencing issues with your rear camera and you're out of warranty, replacing it yourself could be a lot cheaper than a new iPhone. Symptoms could include a black screen, hazing in images, spots showing up in photos, or lines through photos. If any of these problems sound like something you've experienced, it may be time to DIY replace your camera.
What you need to DIY replace the iPhone 5's rear iSight camera
You'll need some tools and parts in order to repair your iPhone 5. iMore recommends using only quality and genuine parts from a reputable supplier like iFixYouri. They have quality parts, tools, and much more for all your repair needs.
- Replacement rear iSight Camera
- Suction cup
- 5-point security screwdriver
- Flat head screwdriver
- Standard #000 Phillips screwdriver
- Spudger tool
- Razor blade
- iSesamo Opening tool
Step 1: Power off your iPhone 5

Before beginning any repair, always power your iPhone down completely using the Slide to power off option. Easy enough right?
Step 2: Remove the front screen assembly
- To begin, use your security screwdriver to remove the two screws in the bottom of your iPhone 5 that sit on either side of the dock.

- Now place your suction cup above the Home button and gently pry up from the bottom. Take care not to pull the entire screen off as the top of the screen is still attached by several cables. You only want to release the bottom portion.

- Once the screen is free, swing up the display assembly so you can get to the shield that is holding the cables in place.

- Using your ##000 screwdriver to remove the three screws holding the display shield down. Set the shield aside and remember not to mix up the screws.


- Now use your spudger tool to pry up the three cables that attach the display to the board. After you do so, the display should be free from the device. As a side note, you can only see two of the cables (as marked in the photo below) as the third is underneath. Most of the time the third one simply pops up on its own when you remove the first two. You may need to free it but most likely, it'll come up on its own. The second photo below shows its location on the board for reference.


- Set the screen assembly aside once the display is free.

Alternate method: If you're having issues pulling the screen up with a suction cup, you may insert a razor blade on the outer edge of either screw hold and pry upwards slightly. This method gives you enough clearance to stick your spudger tool underneath and release the screen. I recommend this method if your hands aren't as steady or you're afraid you may pull too hard and damage a cable.
Step 3: Remove the battery
I'll preface this section by saying the plastic battery tabs to pull to release them are useless. They break off and/or bend the battery. You can try that method but I suggest following my instructions below instead.
- Start by removing the two screws shown in the photo below. This shield covers the battery connector itself. Use your #000 screwdriver for this.

- Now use your spudger tool in order to gently pry the connector off the board as shown.


- We are now ready to remove the battery, which is the hardest part and must be done with extreme caution as to prevent puncturing it or causing damage to the logic board. I use the iSesamo opening tool for battery removal because it's pliable and that means it's more delicate. You may use the flat end of a spudger tool if you'd like but I've found them to break off rather easily.
- In order to remove the battery, start at the top left corner and put your opening tool between the casing and the battery. Gently start lifting upwards. You should hear adhesive start to crack. Now slowly move your tool around the left side of the battery and gently pry upwards a little at a time. Each time you should hear more adhesive cracking. Just apply pressure evenly and move your pry tool each time.


- By the time you get to the bottom the adhesive should be nearly free, or free enough for you to grab hold of the battery and carefully break the rest and remove it.

It is important while performing the steps above that you're careful to not puncture or bend the battery. Just take your time and you'll get there. Don't rush and don't force it.
Step 4: Unplug the dock connector assembly
- Remove the dock connector shield by removing the 1 screw holding it in place. Use your #000 Phillips screwdriver for this.

- Next pry up the cable using your spudger tool. Also pry up the round connector cable which is found a little further down on the logic board and is pictured below.

Step 5: Remove the logic board
Note: It is important to make sure you do not mix up screws to the logic board. Place them in an order you know you will remember!
- Start at the top of the logic board by removing the two screws holding the top silver shield in place. They are located to the left of the camera assembly. Once you've removed the two screws with your #000 Phillips screwdriver, you can remove the shield. Note that it may still be tucked on the side of the camera so just be sure you don't bend or tear it when removing it.

- Use your #000 Phillips screwdriver again to remove the two screws in the top frame of your iPhone 5 as shown in the photo below.

- At the top of the logic board, unplug the three cables shown below using your nylon spudger tool. Be very careful not to tear any of them or rip off the connectors in the sockets. They are very delicate so treat them as such. The reason we are doing this is because one of the screws you'll need to remove in the next step is somewhat hidden by these cables.

- Now remove the five screws shown in the photo below. Three of them you'll need a flat head screwdriver for while the other two screws use a standard #000 Phillips screwdriver. You can tell the difference because the ones you use the flat head for the taller standoff screws. You should easily be able to tell the difference.


- Now remove the SIM tray from your iPhone 5. You can use a paperclip, SIM removal tool, or even the end of your security screwdriver should fit.

- You can now start lifting the logic board up from the bottom. However, do not pull up all the way. There is a cable still attached at the top as illustrated in the photo below. Carefully push down on this cable using your nylon spudger tool while gently lifting up on the board in order to free it.

- Once the round connector has disconnected, you can pull the logic board completely out of your iPhone 5.

Step 6: Replace the rear iSight camera
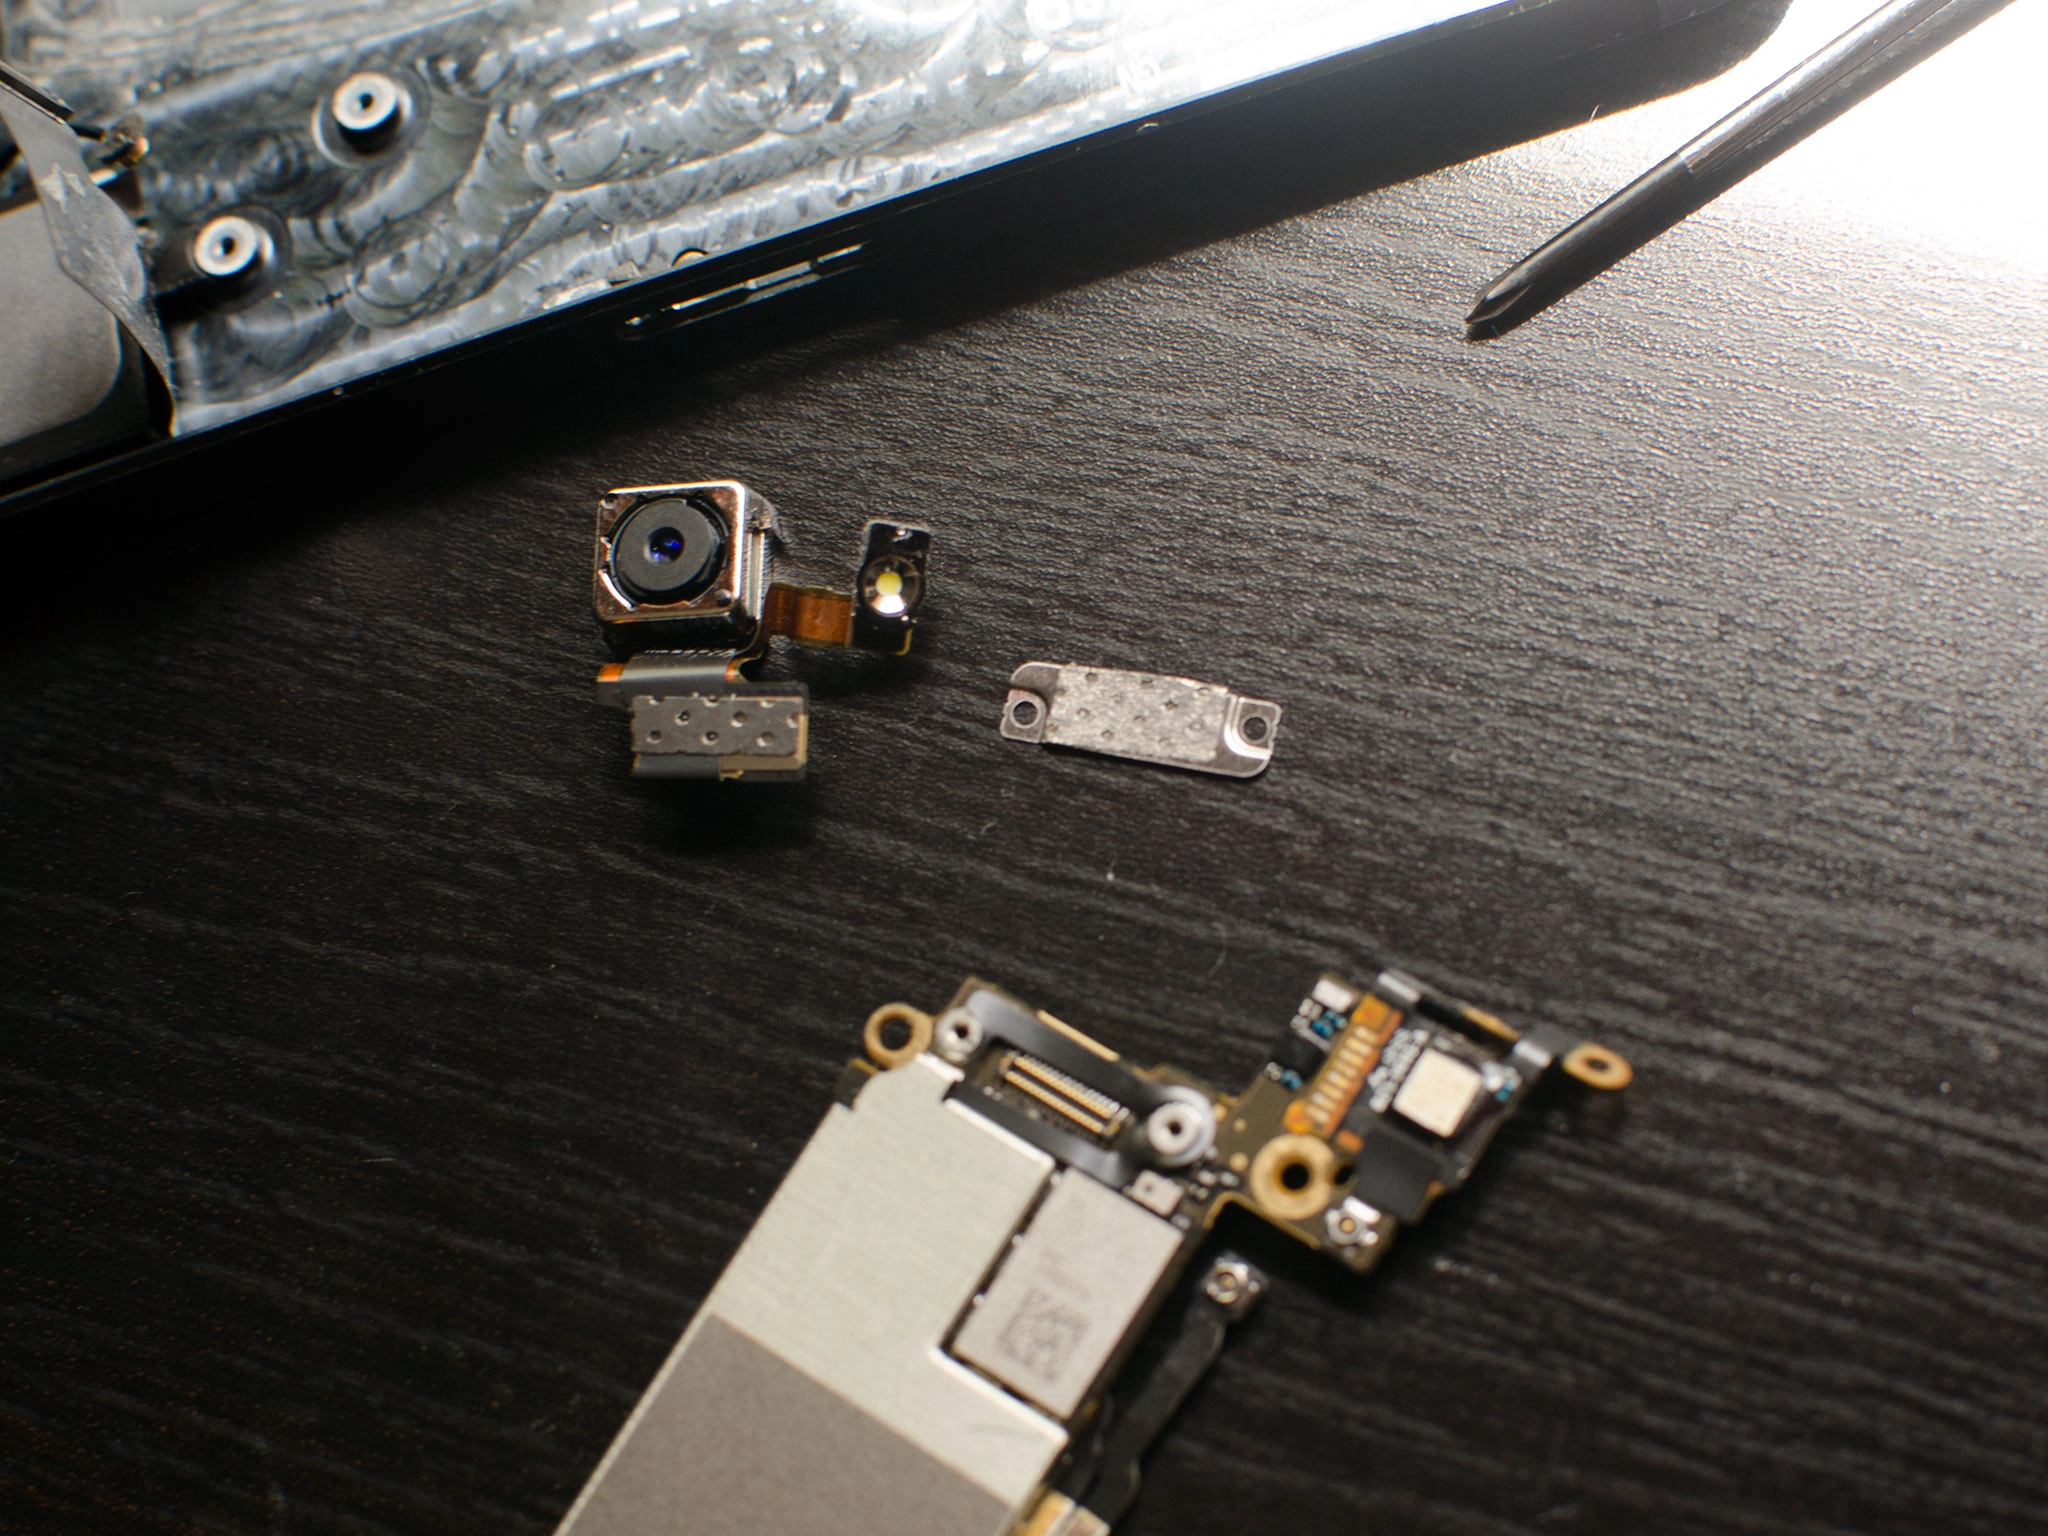
- Carefully flip over your logic board to reveal the two screws that are fastening the camera assembly to it. Remove them with your #000 Phillips screwdriver. I typically do this while holding the logic board to prevent from bending or damaging it on a table top surface.

- You can now remove the shield and disconnect the single cable holding the camera assembly to the logic board.

- Go ahead and replace the old camera assembly with the new one and replace the shield.
Step 7: Replace the logic board
- Start by reconnecting the round connector at the top. The easiest way to do this is by holding the logic board sideways and reconnecting it. Once it's connected, simply pivot the board back into place. Be sure when you're doing this that no cables in the frame get stuck underneath the logic board.

- Once the board is in place, be sure the camera and flash diffuser are placed correctly.

- Replace the SIM tray in your iPhone 5. This is an easy way to be sure your iPhone 5's logic board is in place. If the SIM tray won't go in, do not force it. This means the board is not lined up correctly. Re-align it and try again. Once it slides in easily, you're in good shape. The SIM tray also serves as a great way to hold the board in place while you replace screws.
- Now replace the five screws you took out earlier using both the #000 screwdriver and the flat head screwdriver.
- Replace the two screws at the very top of the logic board using your #000 Phillips screwdriver.
- You can now re-connect the three cables at the top of the logic board as well as the two cables at the bottom — the round connector cable and the dock connecter cable.

- Replace the top silver shield and the two screws that hold it in place, use your #000 Phillips screwdriver for this.
Step 8: Reconnect the dock connector assembly
- Now reconnect the round connector at the bottom of the logic board that it connected to the dock assembly.

- Lastly, reconnect the dock connector cable and replace the shield with your #000 Phillips screwdriver.
Step 9: Replace the battery
- Carefully lay the battery back down into place. Press firmly in order to cause the adhesive to grab hold of the back casing again.

- Reconnect the battery connector by carefully lining it up and pressing firmly with your finger.
- Reposition the battery shield and use your #000 screwdriver to replace the two screws.
Step 10: Reconnect the display assembly
- Re-attach the three cables for the display back to the board of your iPhone 5.
- Carefully re-position the display shield over the cables once you're sure they are secure.
- Replace the three screws you removed previously using your ##000 screwdriver. Sometimes the top right screw is not magnetized and may be a little tricky to get back in. I normally guide it in with my finger and then use the screwdriver. Makes for an easier job.
- Now snap the display back down and into place. Be sure to line up the grooves in the top of the screen inside the frame. If you are facing resistance, do not force the display down. Make sure everything is lined up properly and that the clips in the top are aligned properly. Then try gently pressing down again.
- Replace the two screws that sit on either side of the Lightning dock using your security screwdriver.
Step 11: Test the new camera assembly

Once you've got everything put back together, you can go ahead and power on your iPhone 5 again. In order to test the rear iSight camera, I recommend performing the following:
- Take a photo as you normally would without the flash
- Go in a darker area, such as a dark room, and take a photo with the flash
- Switch to the front facing camera and then back again to make sure the software hands off correctly
- Take a video with the rear facing camera
If all checks out okay, you're good to go! If you run into problems, be sure to check out our iMore mod forums for answers to commonly asked questions.
○ Fix a broken iPhone 7 or 7 Plus
○ Fix a broken iPhone 6s or 6s Plus
○ Fix a broken iPhone SE
○ Fix a broken iPhone 6 or 6 Plus
○ Fix a broken iPhone 5c
○ Fix a broken iPhone 5s
○ Fix a broken iPhone 5
○ Fix a broken iPhone 4s
○ Fix a broken iPhone 4 (GSM)
○ Fix a broken iPhone 4 (CDMA)
○ Fix a broken iPhone 3GS or 3G

