How to customize the Touch Bar Control Strip on the MacBook Pro
iMore offers spot-on advice and guidance from our team of experts, with decades of Apple device experience to lean on. Learn more with iMore!
You are now subscribed
Your newsletter sign-up was successful
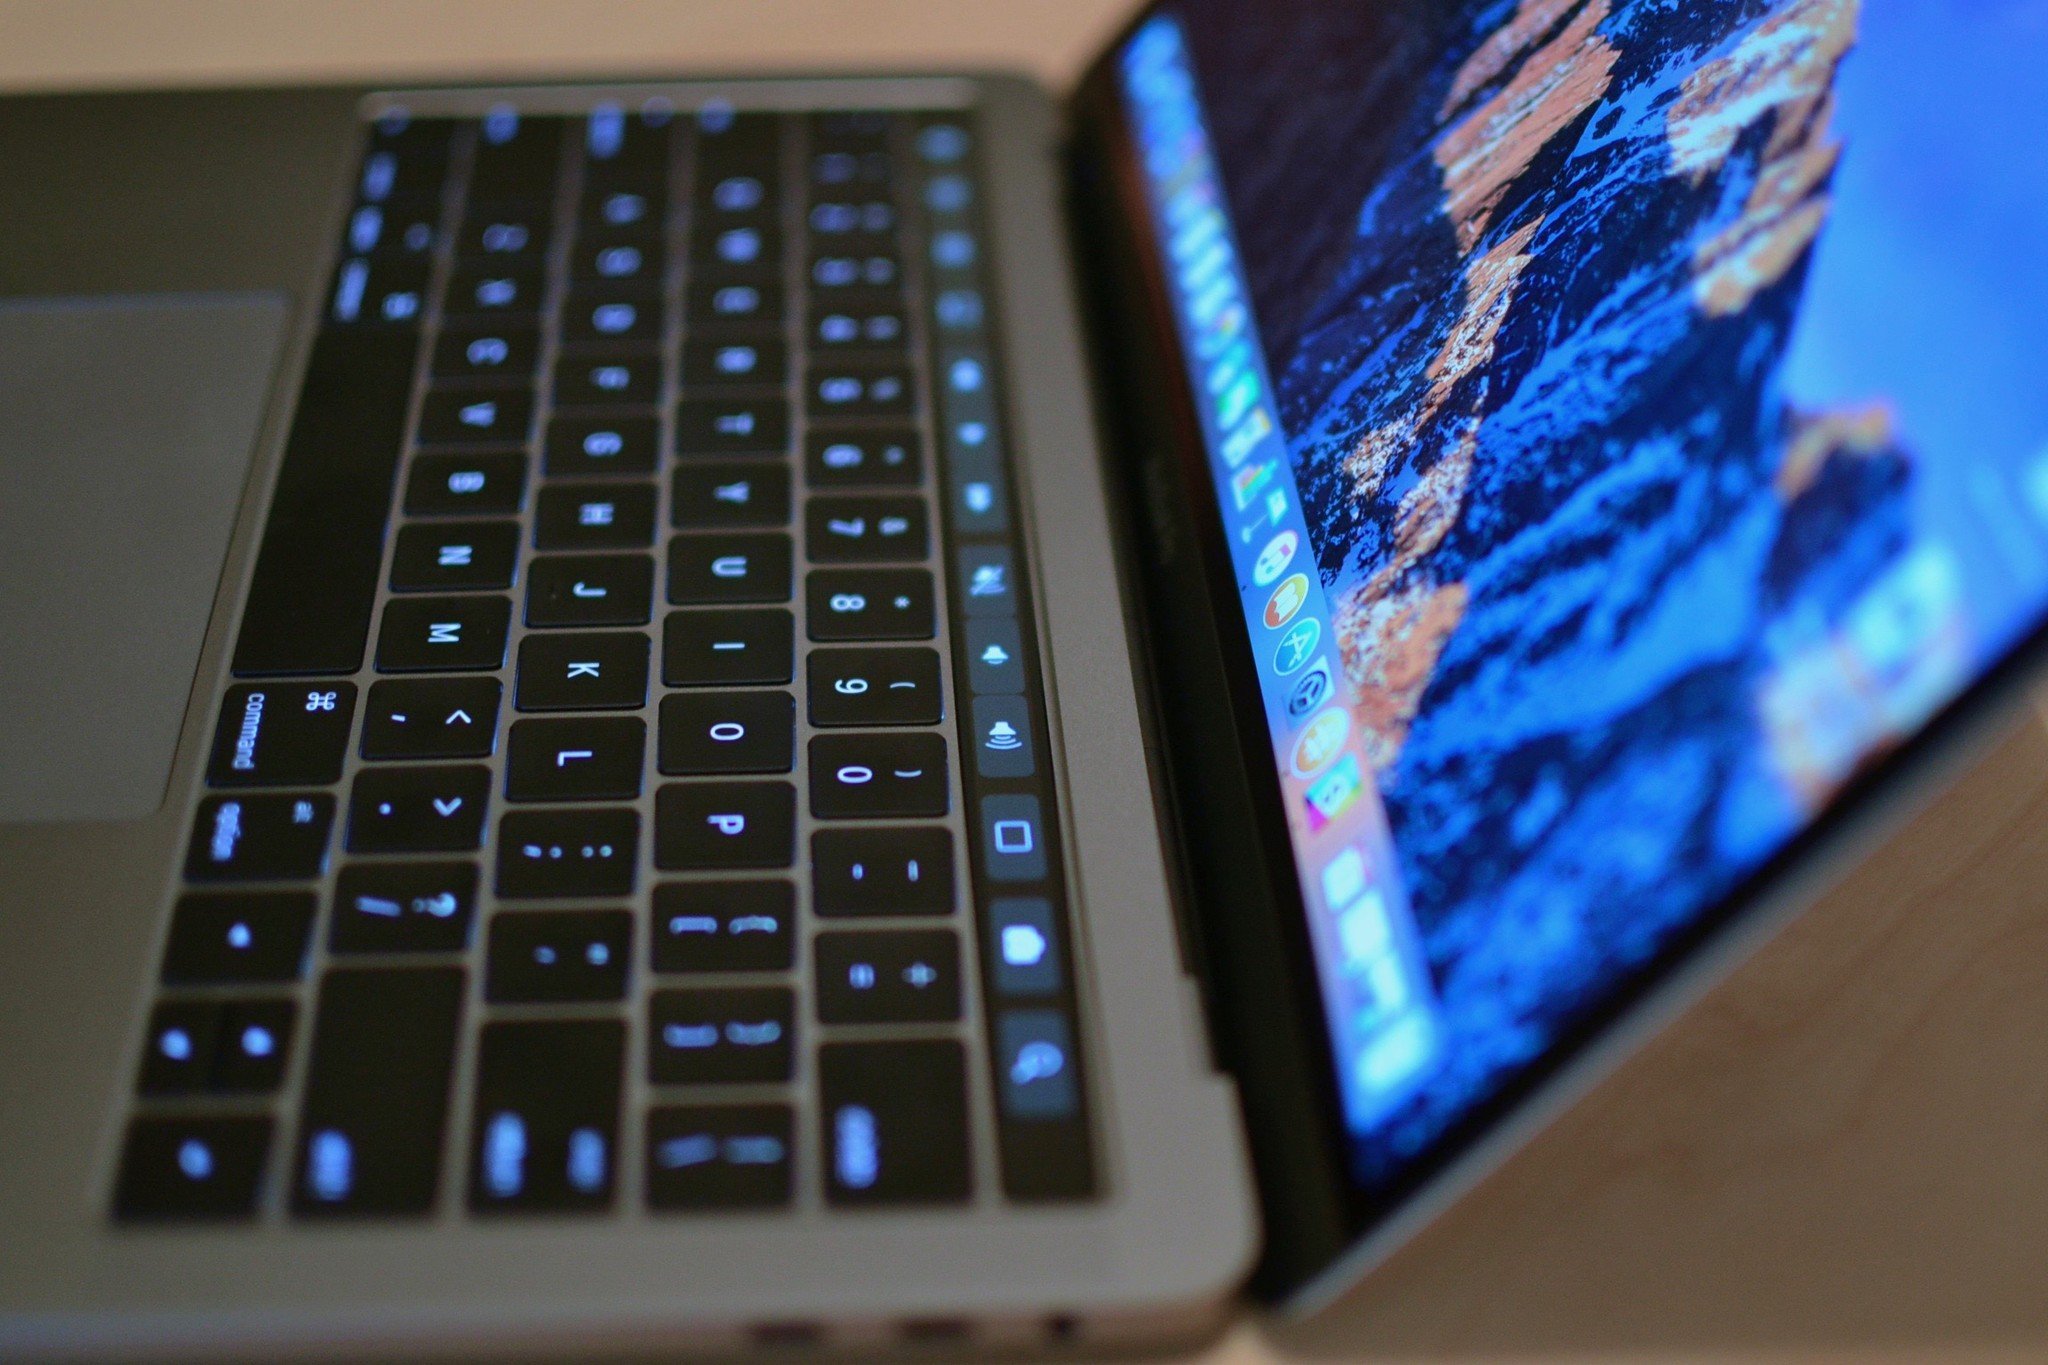
The Touch Bar on the MacBook Pro has a lot of customization features. You can add or remove a lot of tools in the Touch Bar settings section of various apps. Even the Control Strip is customizable if you know how to find it. Here's how.
- What is the Control Strip on the Touch Bar?
- How to set the expanded Control Strip as the default display on the Touch Bar
- How to remove the Control Strip from the Touch Bar
- How to customize the Control Strip on the Touch Bar
What is the Control Strip on the Touch Bar?
On a traditional Mac Keyboard, you will notice that the top row of keys, also known as the function key row, has additional tools, like volume controls, screen brightness, quick access to Mission Control, and the like. The Control Strip is where you find those features on the Touch Bar.
You can have a collapsed Control Strip with just four tools that sit on the right side of the Touch Bar and can be expanded manually by tapping the Expand button (<), or you can disable the app controls and just keep the Control Strip expanded across the Touch Bar all of the time.
You can also add or remove tools from the Control Strip. So, for example, if you always accidentally tap the Siri button, you can move it out of the way and replace it with something you might use more often, like Spotlight or Mute.
How to set the expanded Control Strip as the default display on the Touch Bar
If you don't think you're going to care about the different tools that are available in all of the apps (including supported third-party apps), you can set the Control Strip to be expanded by default. This makes system tools, like Lock Screen and playback controls, always within reach without needing to expand them.
Keep in mind, if you keep the Control Strip expanded, you won't be able to use Touch Bar tools in other apps.
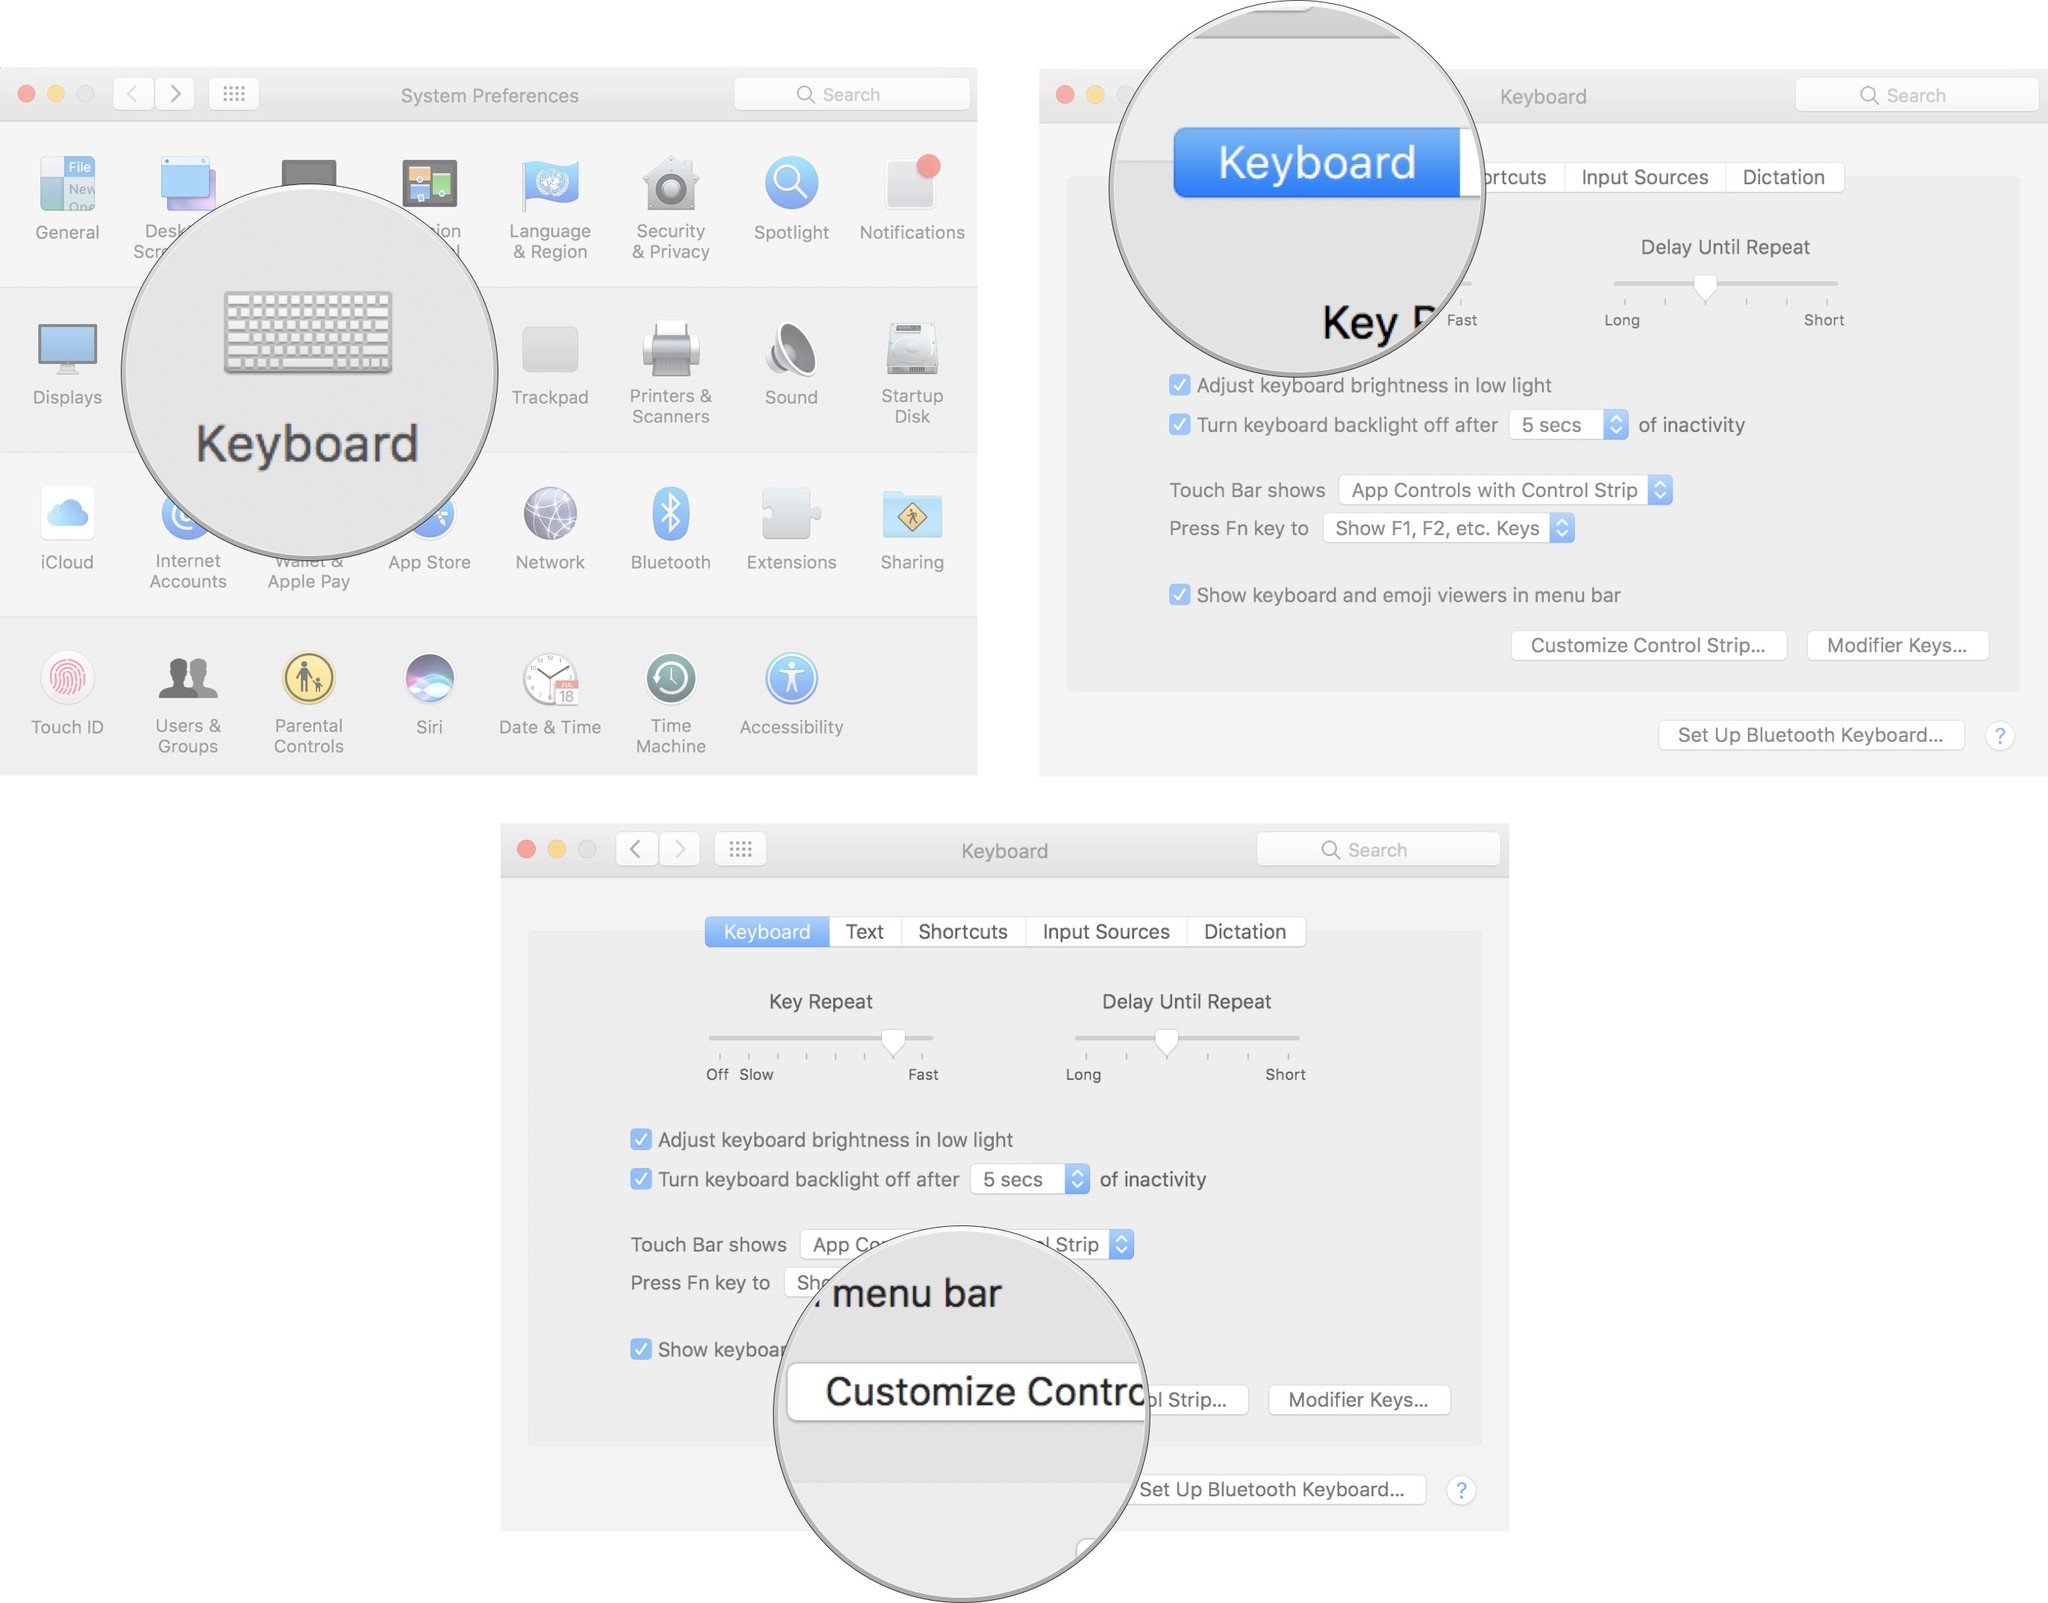
You can find the Keyboard settings by searching in Spotlight, or manually access them via System Preferences.
iMore offers spot-on advice and guidance from our team of experts, with decades of Apple device experience to lean on. Learn more with iMore!
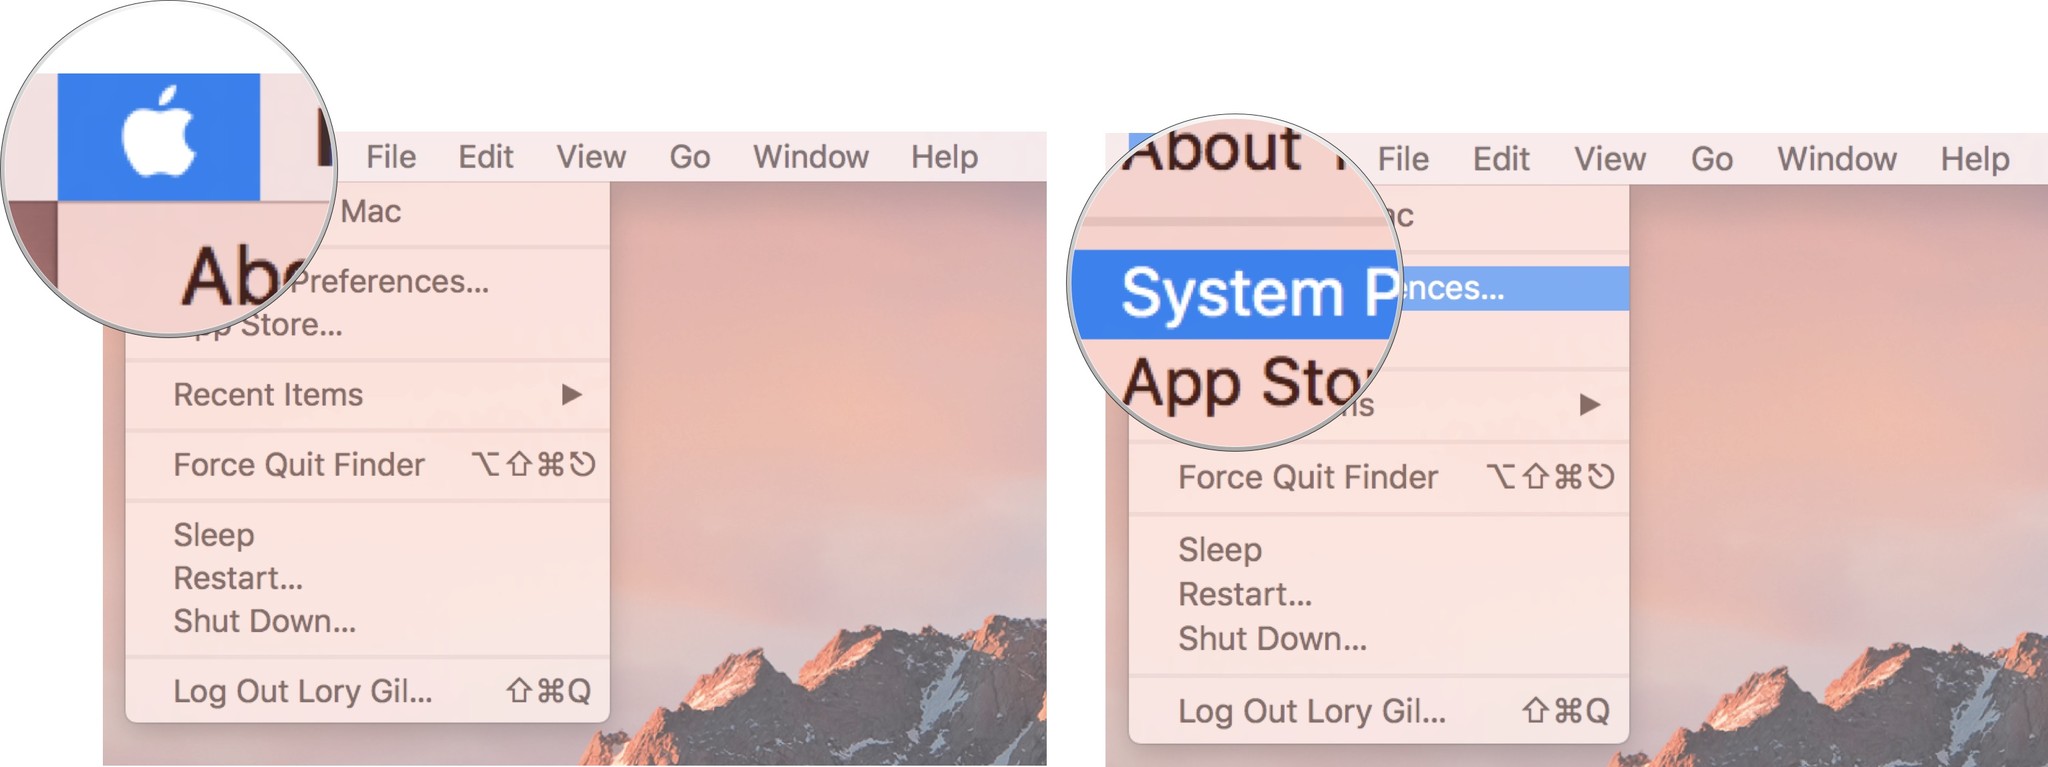
- Click on the Apple menu icon in the upper left corner of the screen.
- Click on System Preferences in the drop down menu.
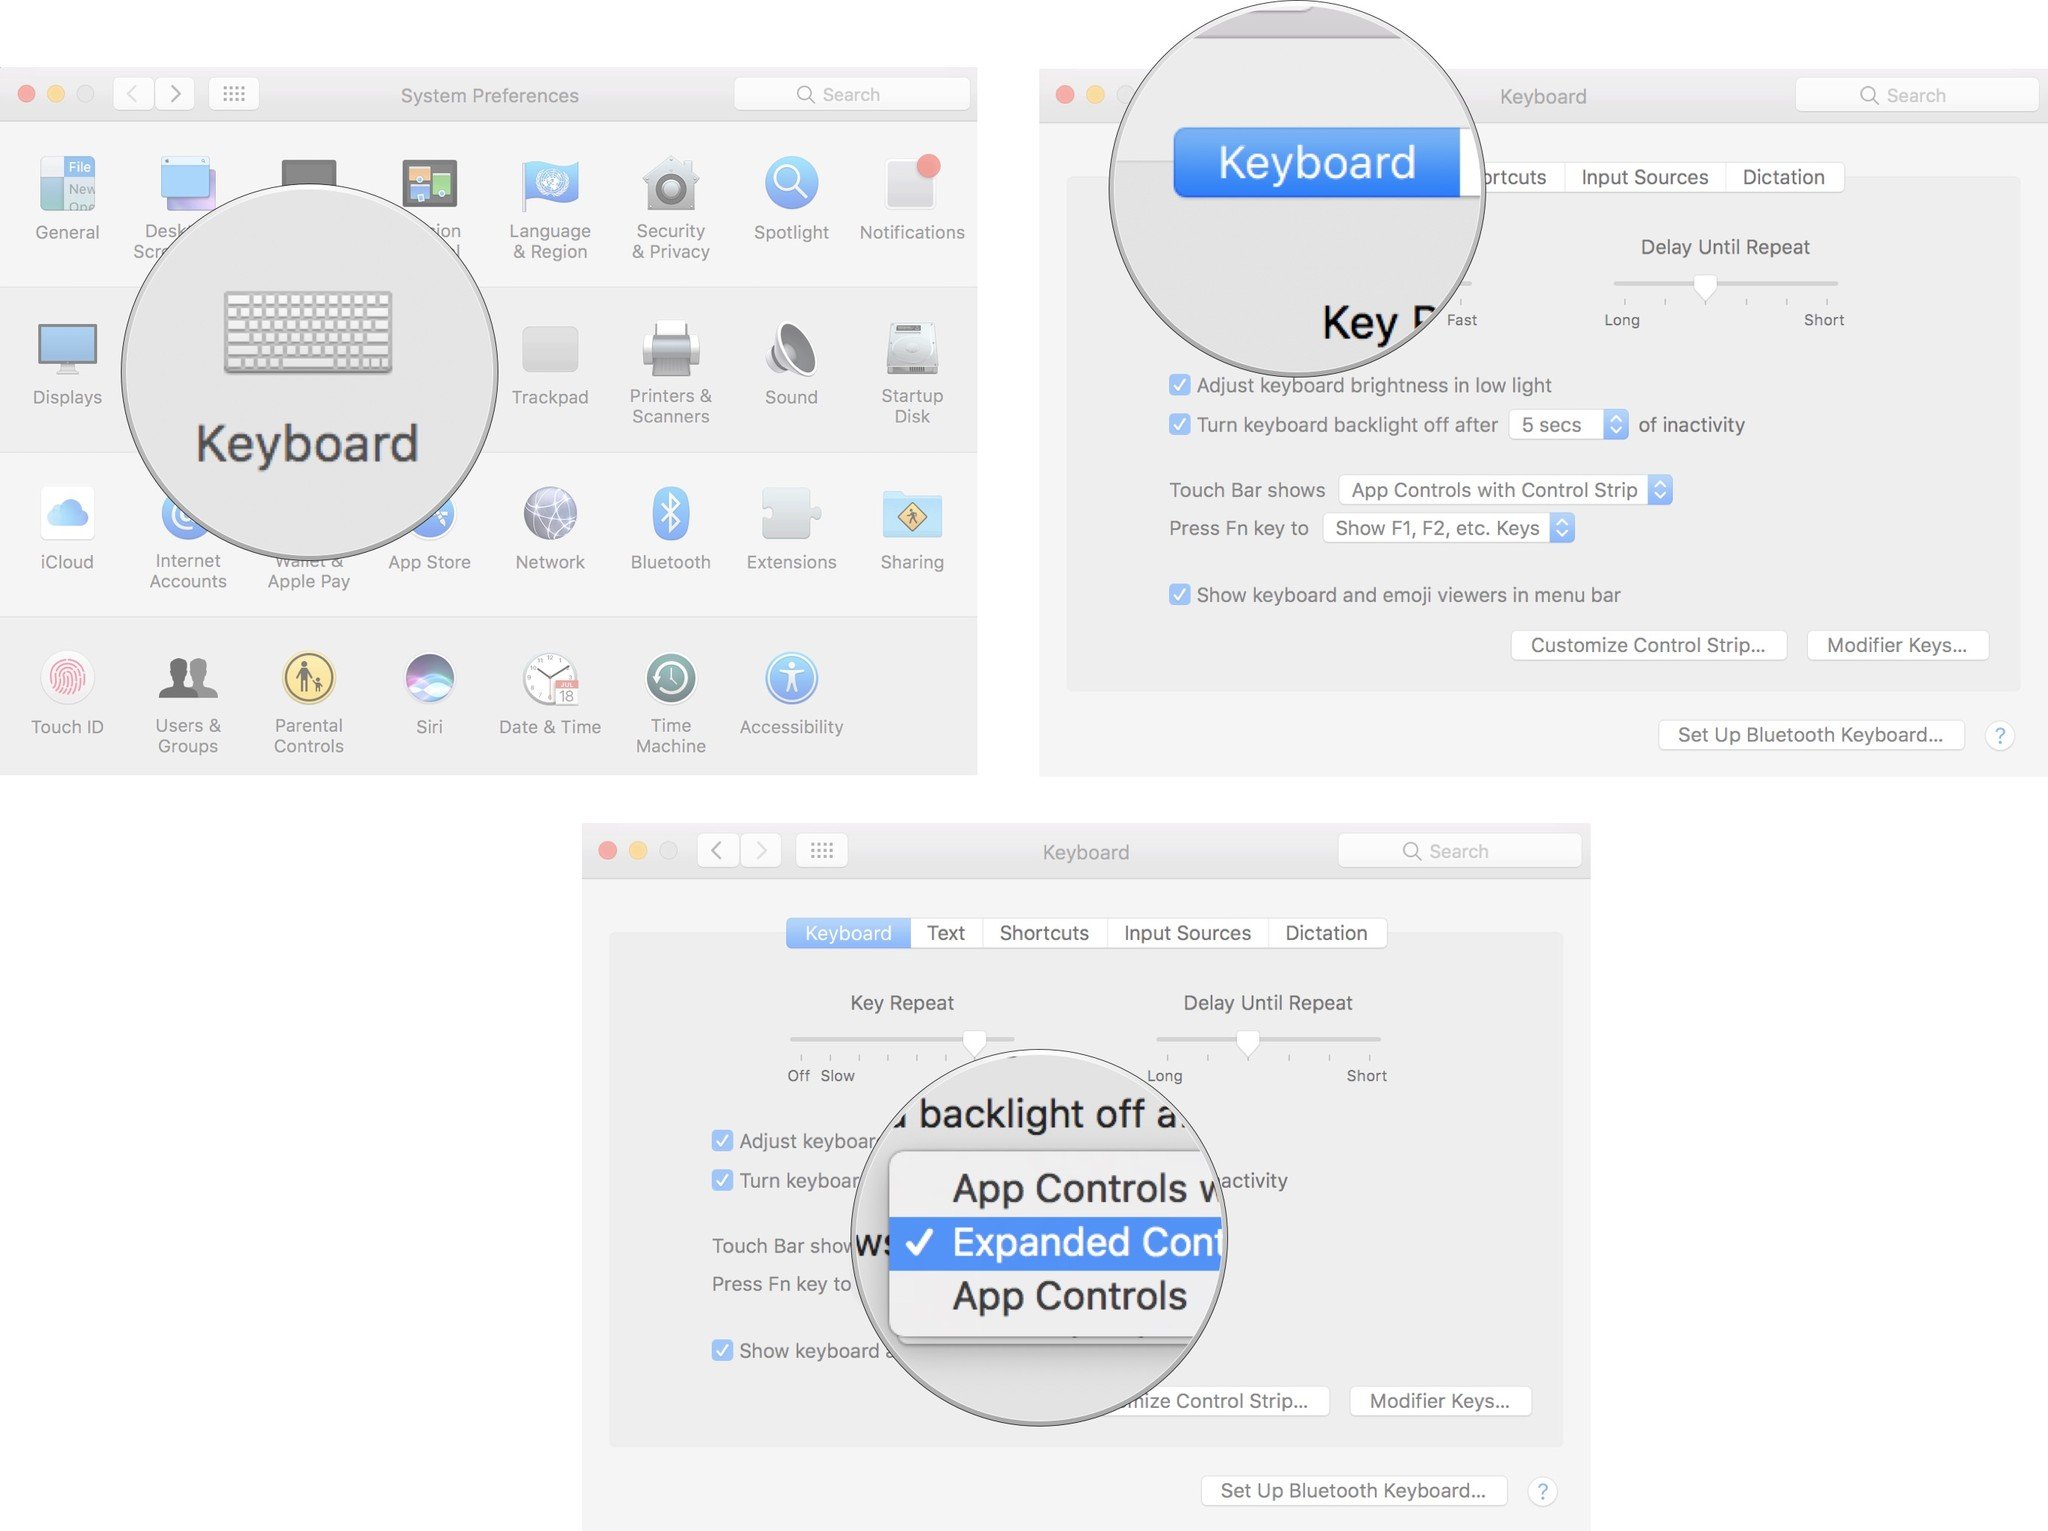
- Click on Keyboard.
- Click on the Keyboard tab.
- Under Touch Bar Shows Click the drop down menu and select Expanded Control Strip.
This will set the Touch Bar to only show the Control Strip tools, no matter what app you are using.
How to remove the Control Strip from the Touch Bar
If you don't think there will ever be a reason you might want to access the Control Strip, you can remove it from the Touch Bar entirely. You can find the Keyboard settings by searching in Spotlight, or manually access them via System Preferences.
- Click on the Apple menu icon in the upper left corner of the screen.
- Click on System Preferences in the drop down menu.
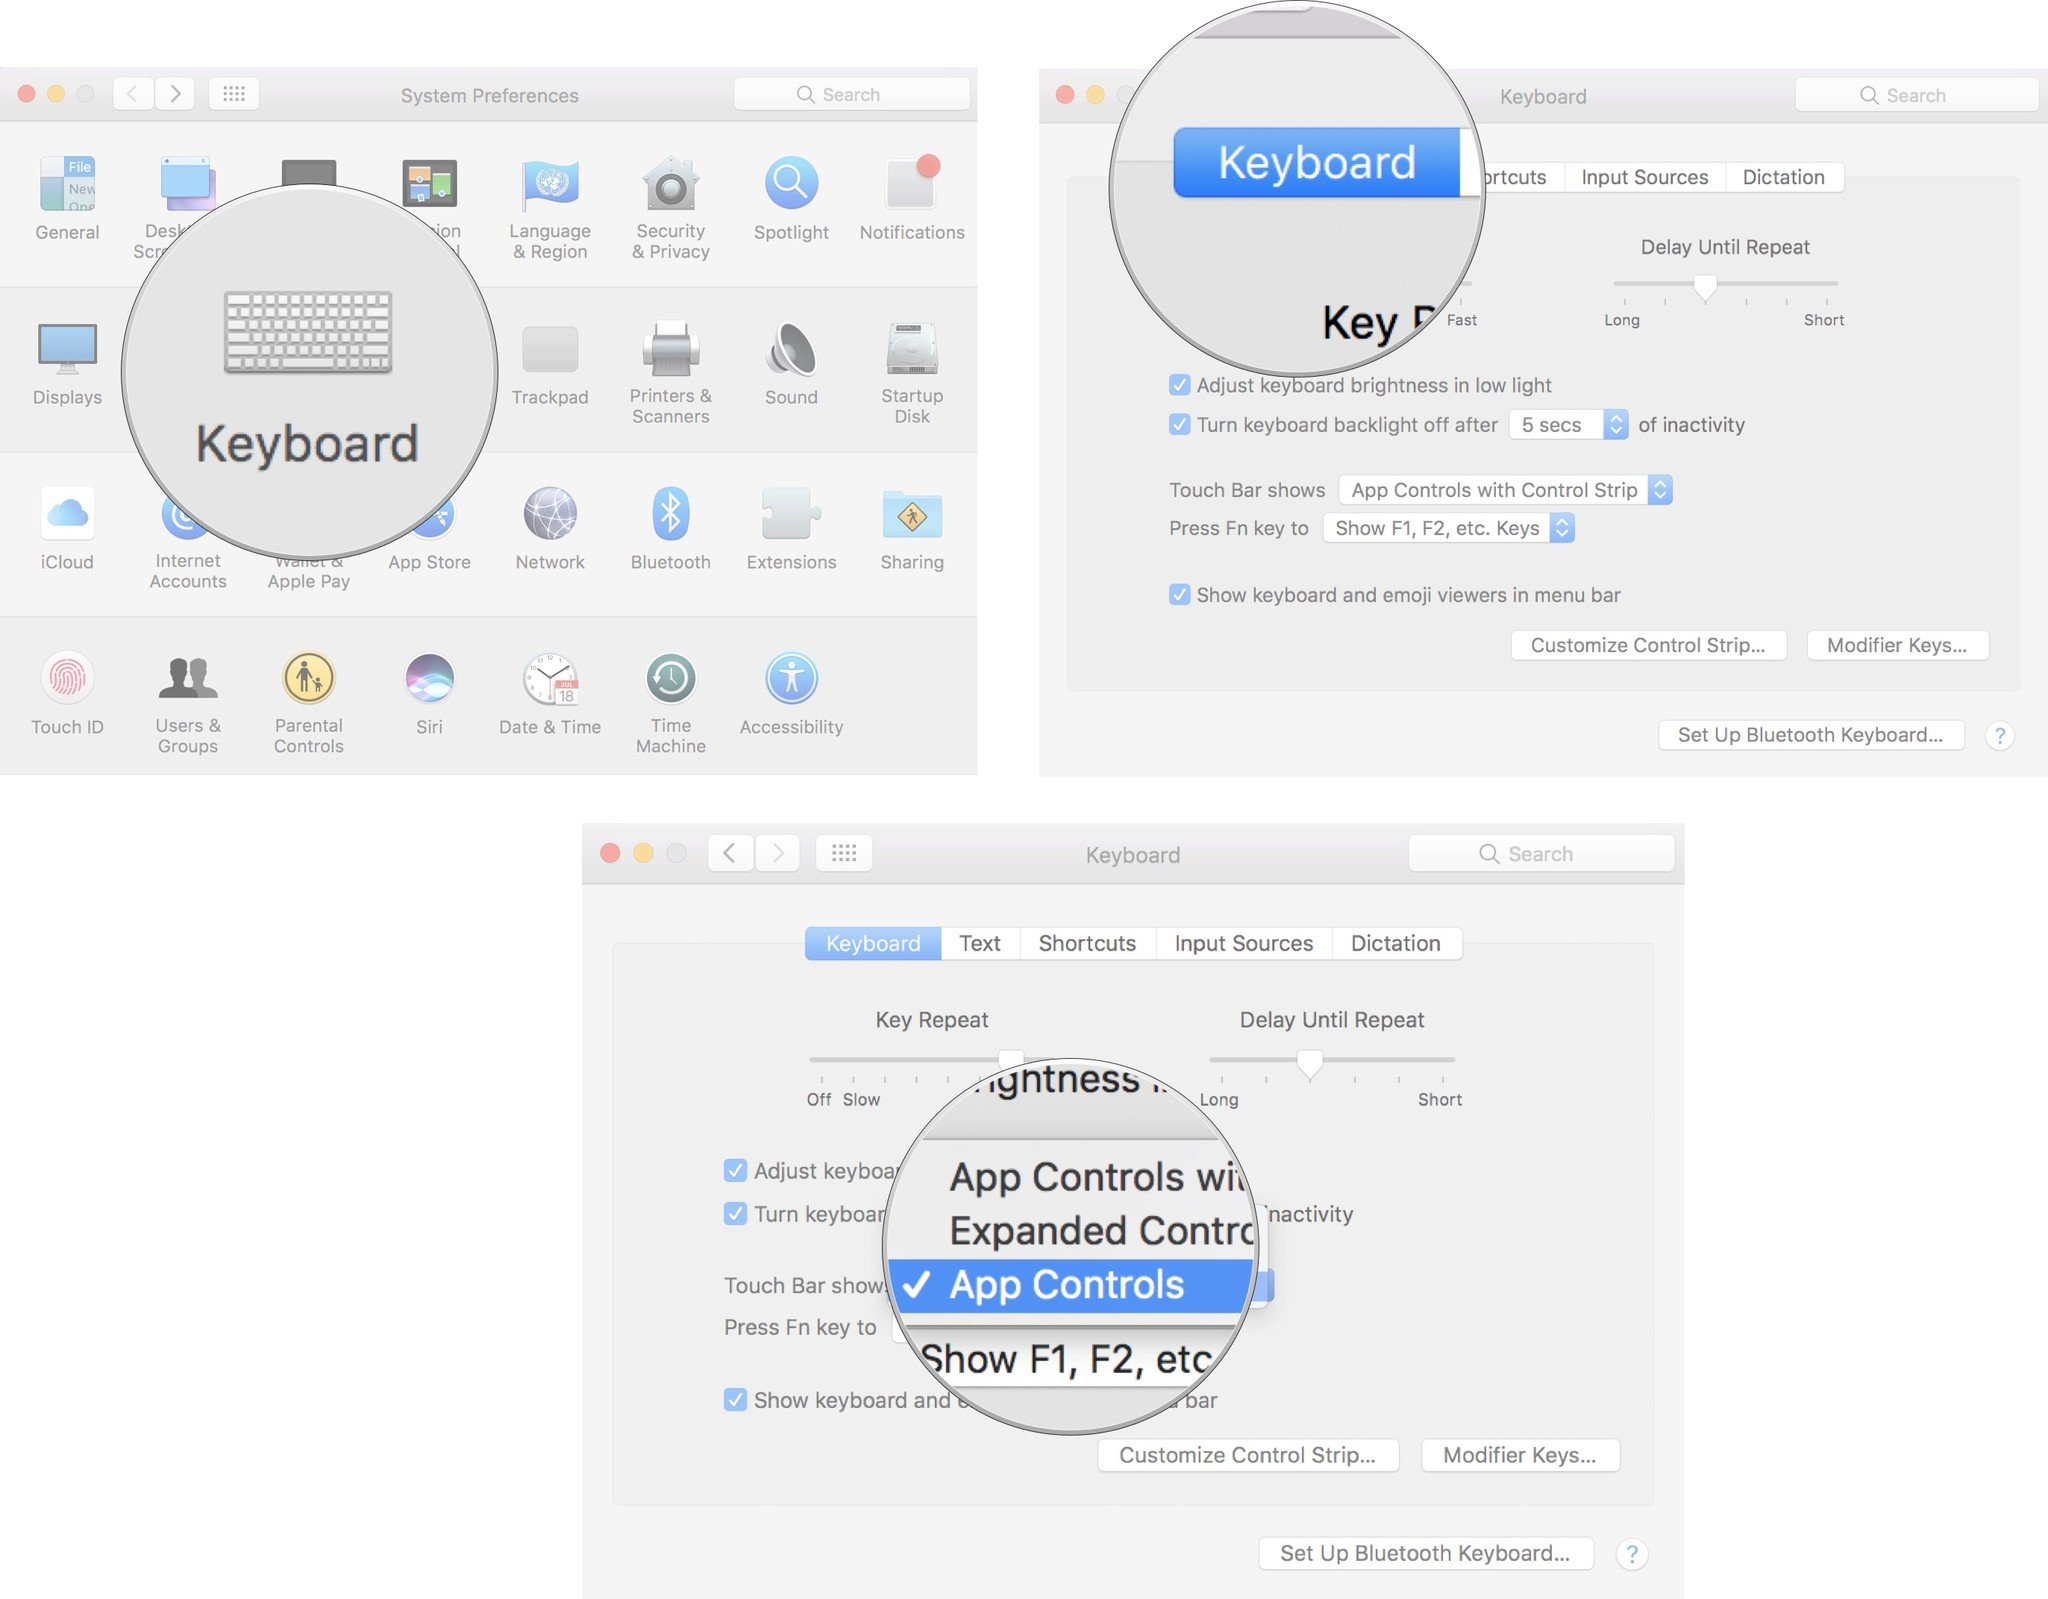
- Click on Keyboard.
- Click on the Keyboard tab.
- Under Touch Bar Shows Click the drop down menu and select App Controls.
The Touch Bar will only show app controls. If you are using an app that does not support the Touch Bar, the entire strip will remain blank, except for the Escape key.
How to customize the Control Strip on the Touch Bar
If you like the Control Strip, but don't like how it is set up, you can add or remove tools, and even rearrange them in a different order on the Touch Bar. You can find the Keyboard settings by searching in Spotlight, or manually access them via System Preferences.
- Click on the Apple menu icon in the upper left corner of the screen.
- Click on System Preferences in the drop down menu.
- Click on Keyboard.
- Click on the Keyboard tab.
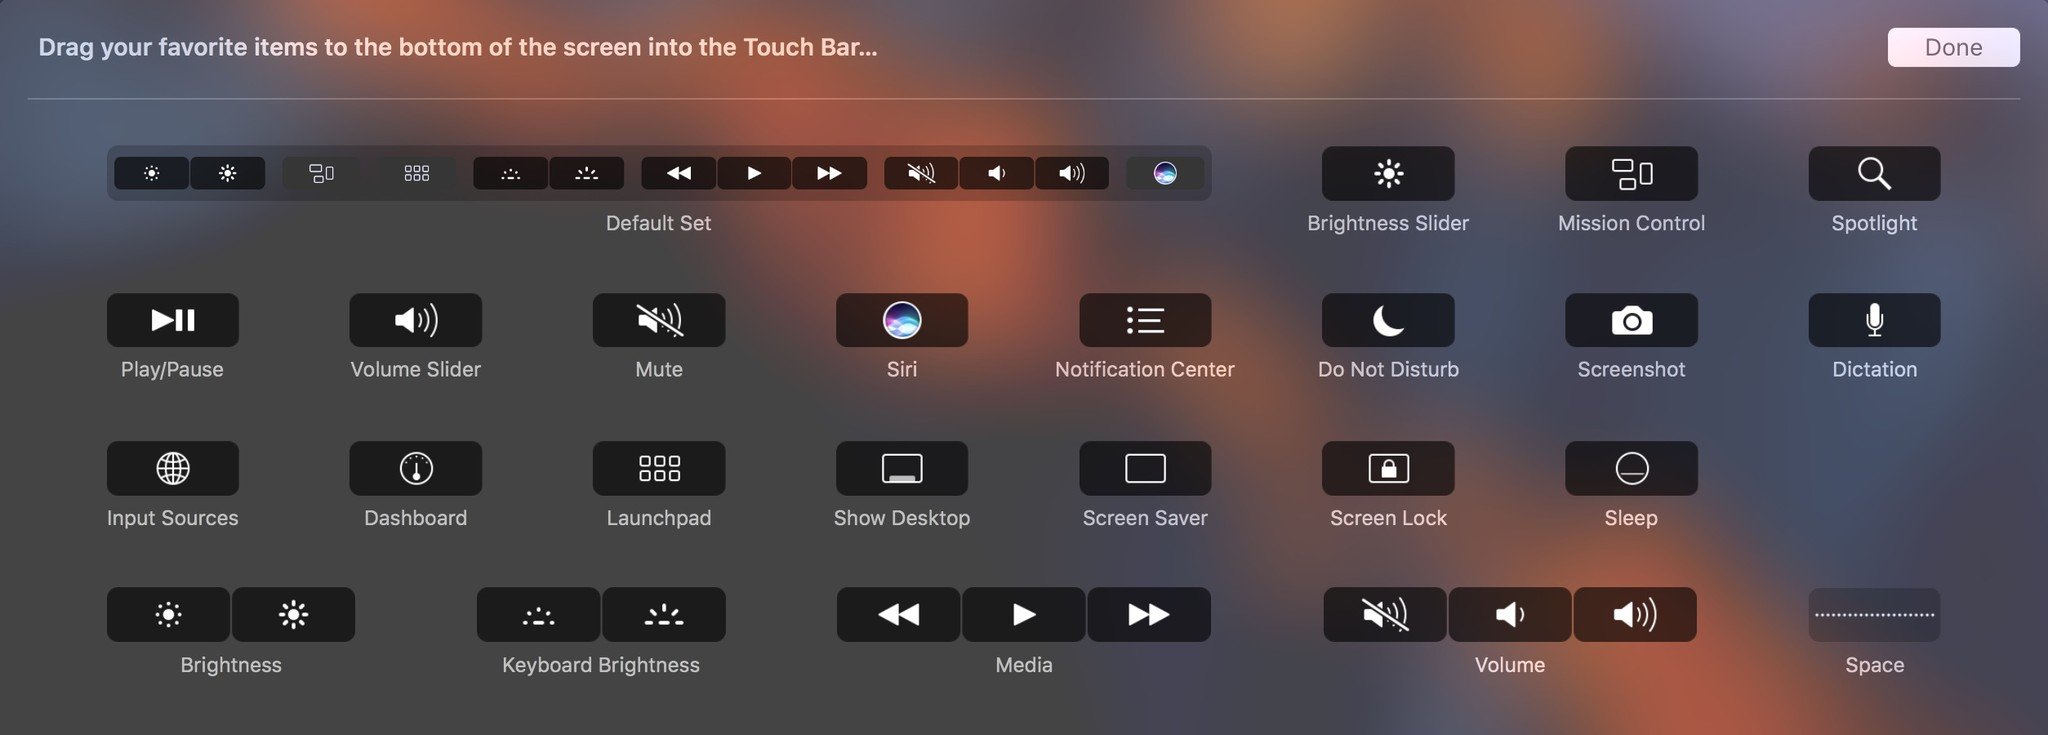
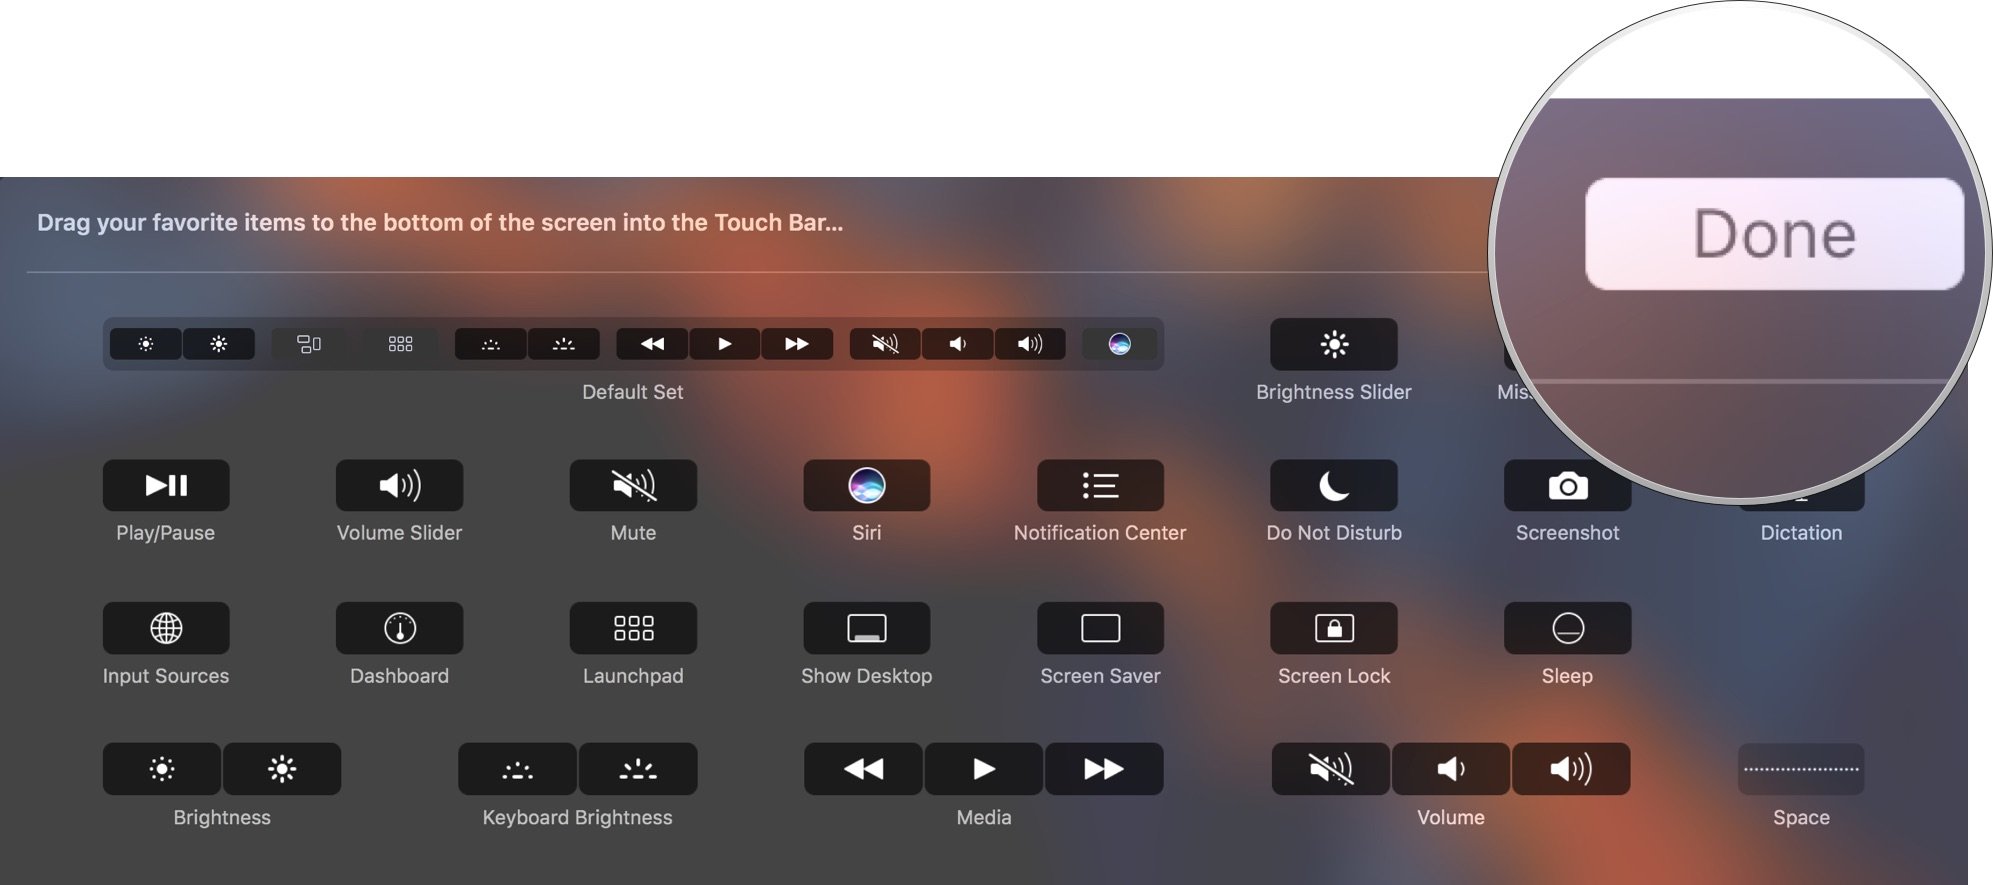
- Click on Customize Control StripYour screen will blur and the customization panel will appear. The buttons on the Touch Bar will also enter jiggly mode.
- To customize the four tools in the collapsed Control Strip, tap the Collapse button (>) at the far left of the Touch Bar.
- To customize the full control strip, tap the Expand button (<) directly to the left of the four tools in collapsed mode.
- Drag a tool from the screen and into the Touch Bar to add it to the Control Strip.Even though the Touch Bar is not attached to the screen, it will appear as though you have crossed a barrier with the tool. Drop it into the Touch Bar.
- Move the cursor down into the Touch Bar and select a tool to remove it from the Control Strip.You will notice that, as you move your cursor above the tools, they light up.You can either drag the tool into the Trash can on the far left of the Touch Bar, or drag it upward, back into the tool panel on the screen to remove it.

- Select a tool on the Controls Strip and drag it to a new location on the Touch bar to rearrange the order.
- Click Done when you are finished.
Any questions?
Do you have any questions about how to customize the Control Strip on the Touch Bar on the MacBook Pro? Let me know in the comments and I'll help you out.
Lory is a renaissance woman, writing news, reviews, and how-to guides for iMore. She also fancies herself a bit of a rock star in her town and spends too much time reading comic books. If she's not typing away at her keyboard, you can probably find her at Disneyland or watching Star Wars (or both).


