How to update the DNS settings on your iPhone

iMore offers spot-on advice and guidance from our team of experts, with decades of Apple device experience to lean on. Learn more with iMore!
You are now subscribed
Your newsletter sign-up was successful
Yesterday, web performance and security company Cloudflare launched its latest foray into making the internet better and safer for consumers. Called 1.1.1.1, the project is a DNS service that values privacy and speed above all else. Oh, and it is definitely not an April Fool's joke.
If you're not familiar, DNS stands for "Domain Name System" and is essentially, as Cloudflare puts it, "the directory of the internet." When you click on a link or open an app or type http://imore.com/ into your search bar, your computer needs to resolve that domain into an IP address so it can actually get you to the content you seek. However, according to Cloudflare, most DNS servers aren't exactly privacy respecting, which is pretty dangerous in an age where internet service providers can sell your browsing data for ad-targeting purposes:
What many Internet users don't realize is that even if you're visiting a website that is encrypted — has the little green lock in your browser — that doesn't keep your DNS resolver from knowing the identity of all the sites you visit. That means, by default, your ISP, every wifi network you've connected to, and your mobile network provider have a list of every site you've visited while using them.
Worse yet, DNS servers can be used as a tool of censorship by governments in times of political turmoil:
In March 2014, for instance, the government of Turkey blocked Twitter after recordings showing a government corruption scandal leaked online. The Internet was censored by the country's ISP's DNS resolvers blocking DNS requests for twitter.com. People literally spray painted 8.8.8.8, the IP of Google's DNS resolver service, on walls to help fellow Turks get back online. Google's DNS resolver is great, but diversity is good and we thought we could do even better.
If these are concerns you have, you may consider manually switching your DNS service to 1.1.1.1, which not only outperforms some of the most popular consumer DNS services in terms of speed (like Google's 8.8.8.8), but also wipes all transaction logs within 24 hours and never writes your IP addresses to disk. Here's how!
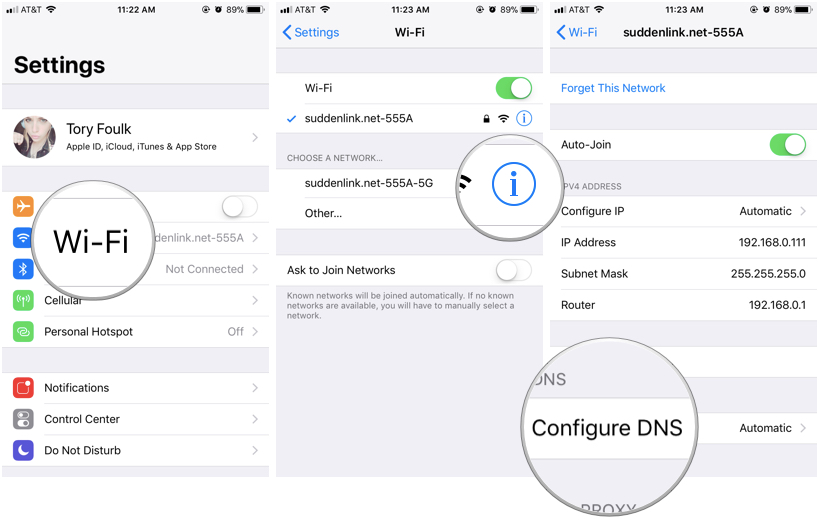
- Launch Settings from your home screen.
- Tap Wi-Fi to open your Wi-Fi options.
- Next to your selected Wi-Fi network, tap the small "i" icon to open up that network's information.
- Underneath DNS, tap Configure DNS.
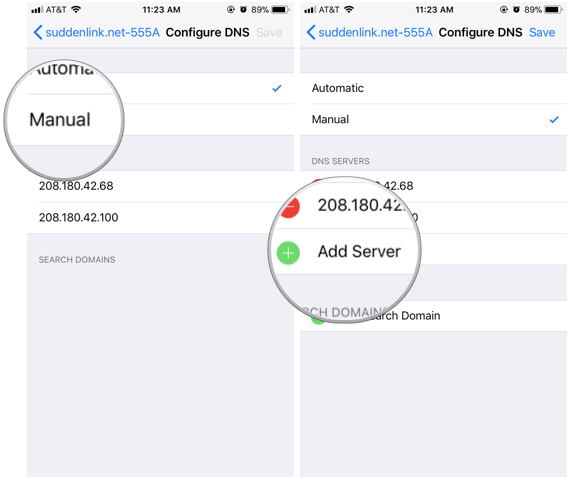
- At the top of the DNS configuration screen, you should see that Automatic is selected. Tap Manual to make manual changes instead.
- Now, little green plus and red minus icons should appear next to each DNS server in your list. Tap Add Server at the bottom.

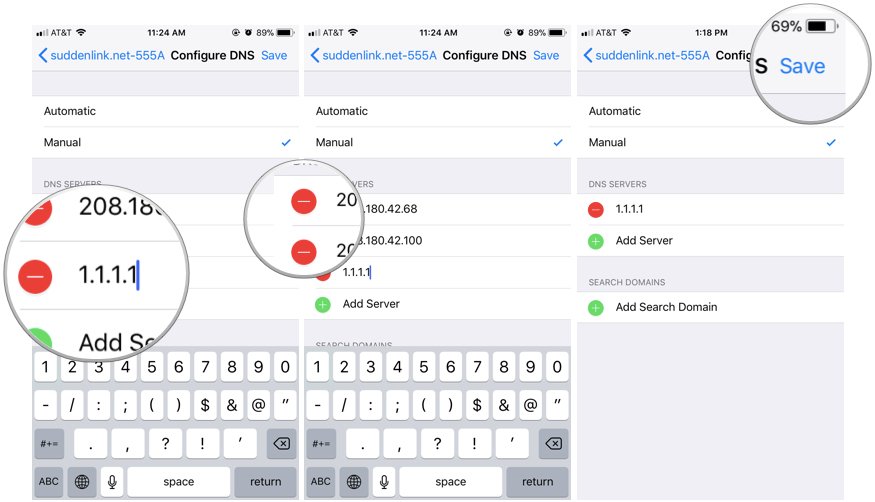
- Type in 1.1.1.1.
- Tap Add Server and type in 1.0.0.1 (Cloudflare's backup server).
- If you'd like to use 1.1.1.1 as your only DNS server, you can tap the red minus icons next to any other DNS servers in the list to delete them.
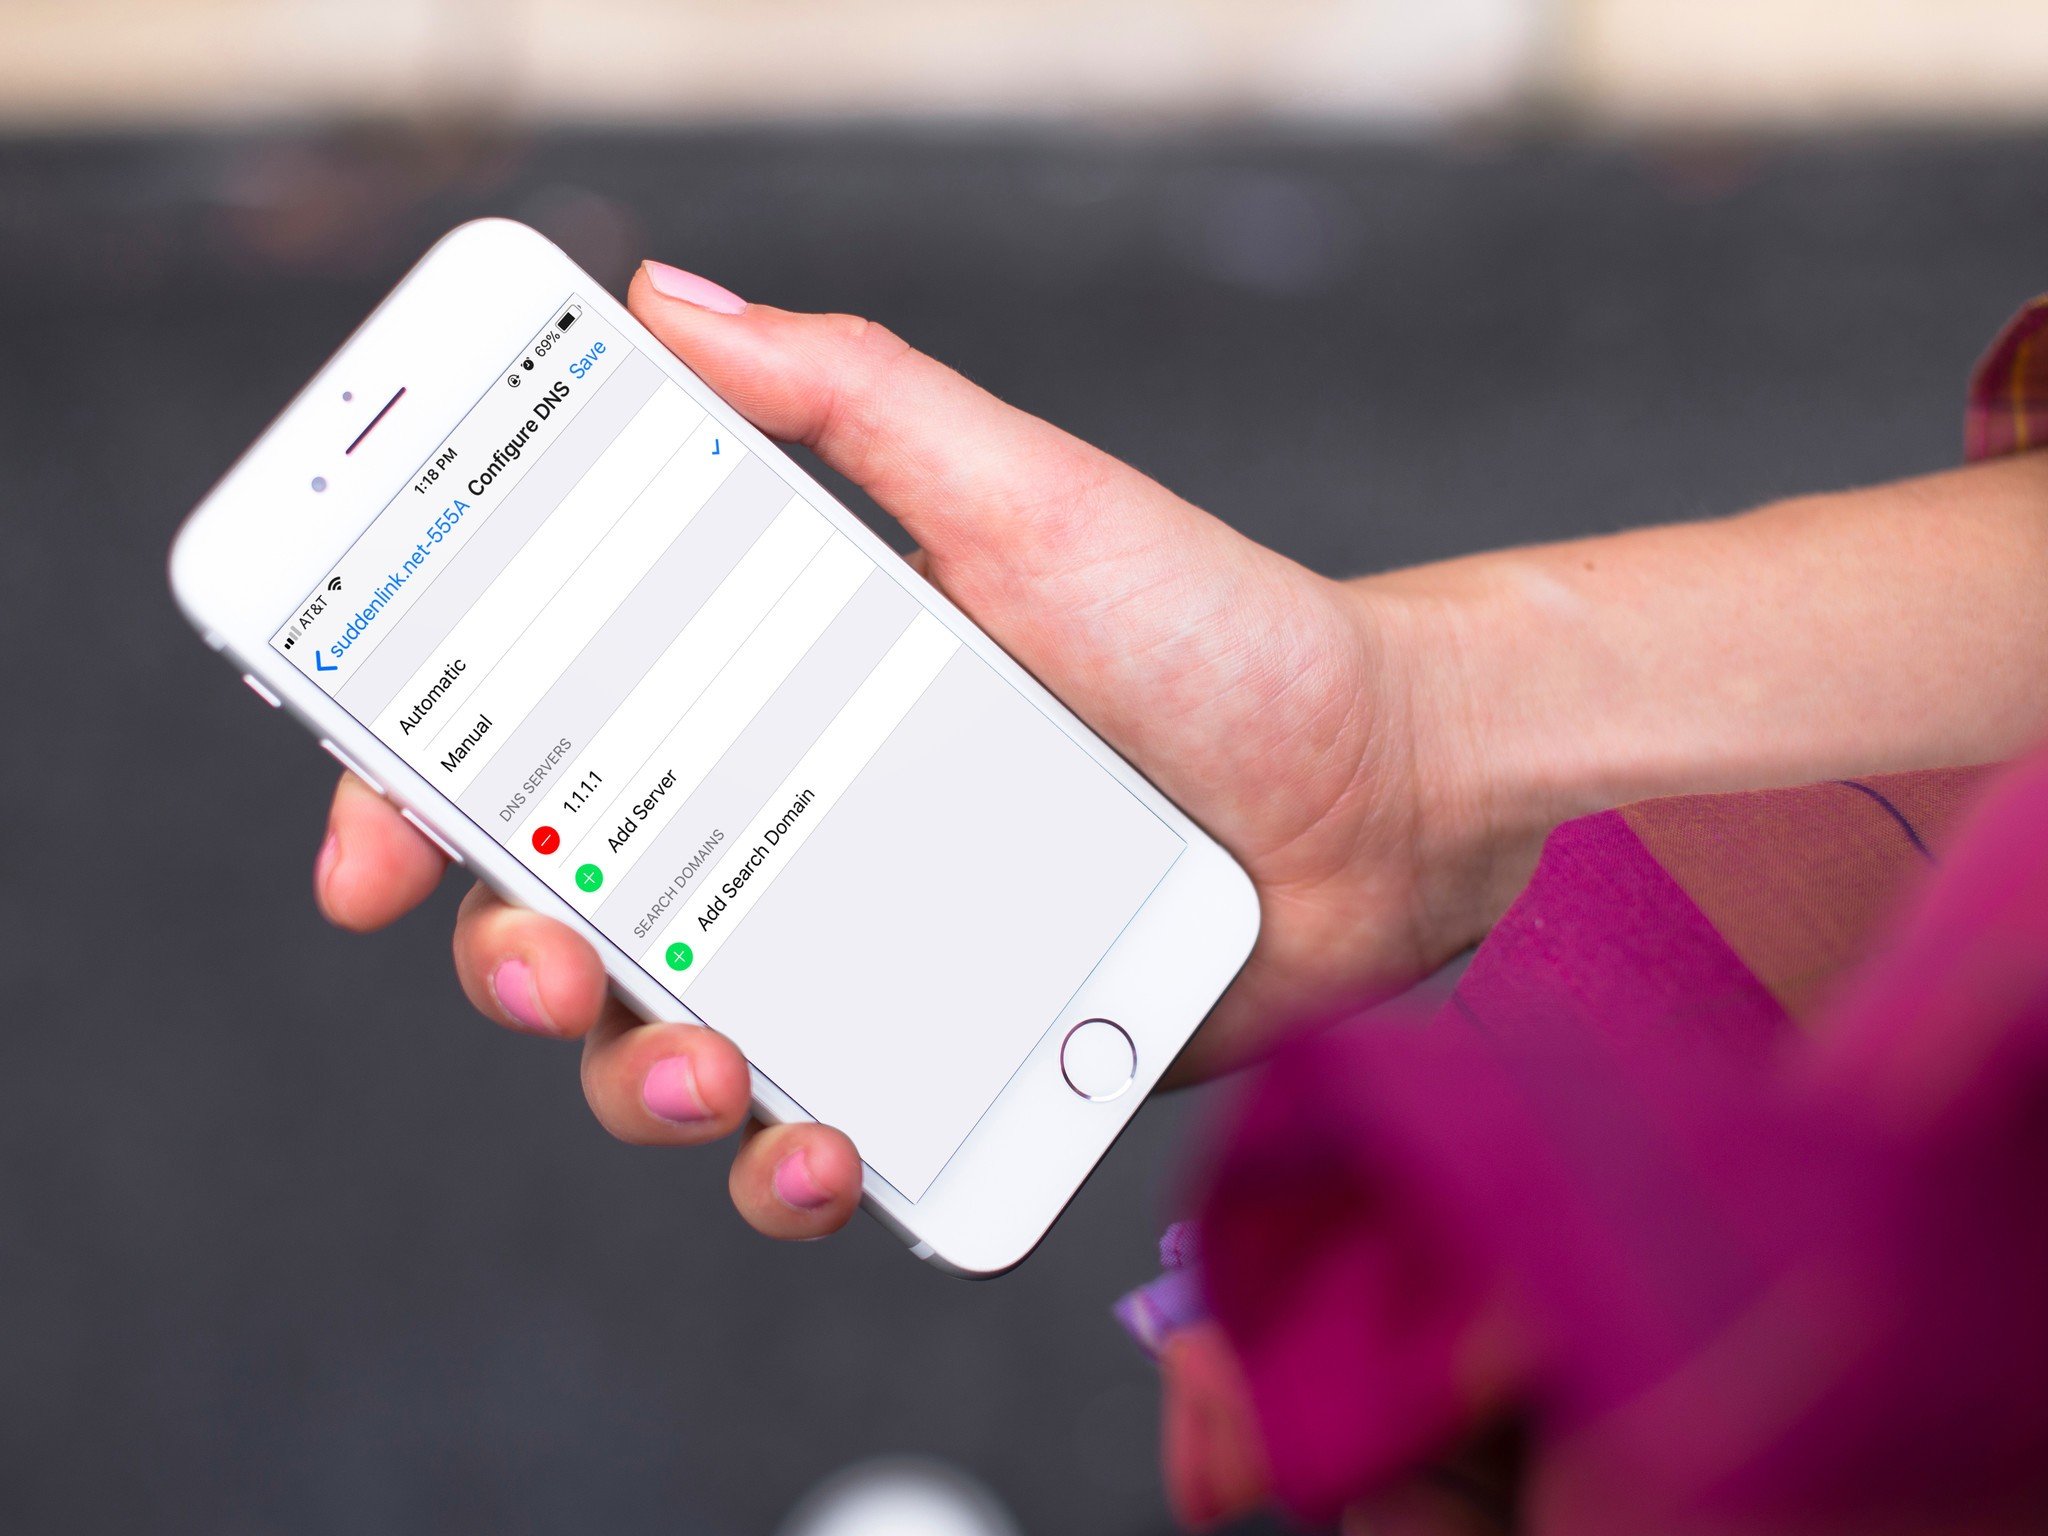
- Tap Save. Ta-da! Now you can use the internet more quickly and securely.
For more information on Cloudflare's 1.1.1.1, check out the company's full announcement here.
Note: Some individuals are experiencing issues with switching their DNS on the iPhone X when using 11.3. Make sure you're choosing "Configure DNS" and not "Configure IP."
Thoughts? Questions?
Did you have any trouble switching DNS services? Give us a shout in the comments and we'll do our best to help you out.
iMore offers spot-on advice and guidance from our team of experts, with decades of Apple device experience to lean on. Learn more with iMore!
Tory Foulk is a writer at Mobile Nations. She lives at the intersection of technology and sorcery and enjoys radio, bees, and houses in small towns. When she isn't working on articles, you'll likely find her listening to her favorite podcasts in a carefully curated blanket nest. You can follow her on Twitter at @tsfoulk.


