How to get the most out of Mail directly on iCloud.com
iMore offers spot-on advice and guidance from our team of experts, with decades of Apple device experience to lean on. Learn more with iMore!
You are now subscribed
Your newsletter sign-up was successful
If you're using iCloud email on your Mac or iOS device, you already know some of the benefits: Rich text email messages, Mail Drop for large attachments, and email that stays in sync on all your devices.
Apple's Mail apps on your Mac, iPhone, and iPad are very similar—but not identical—in the features they offer.
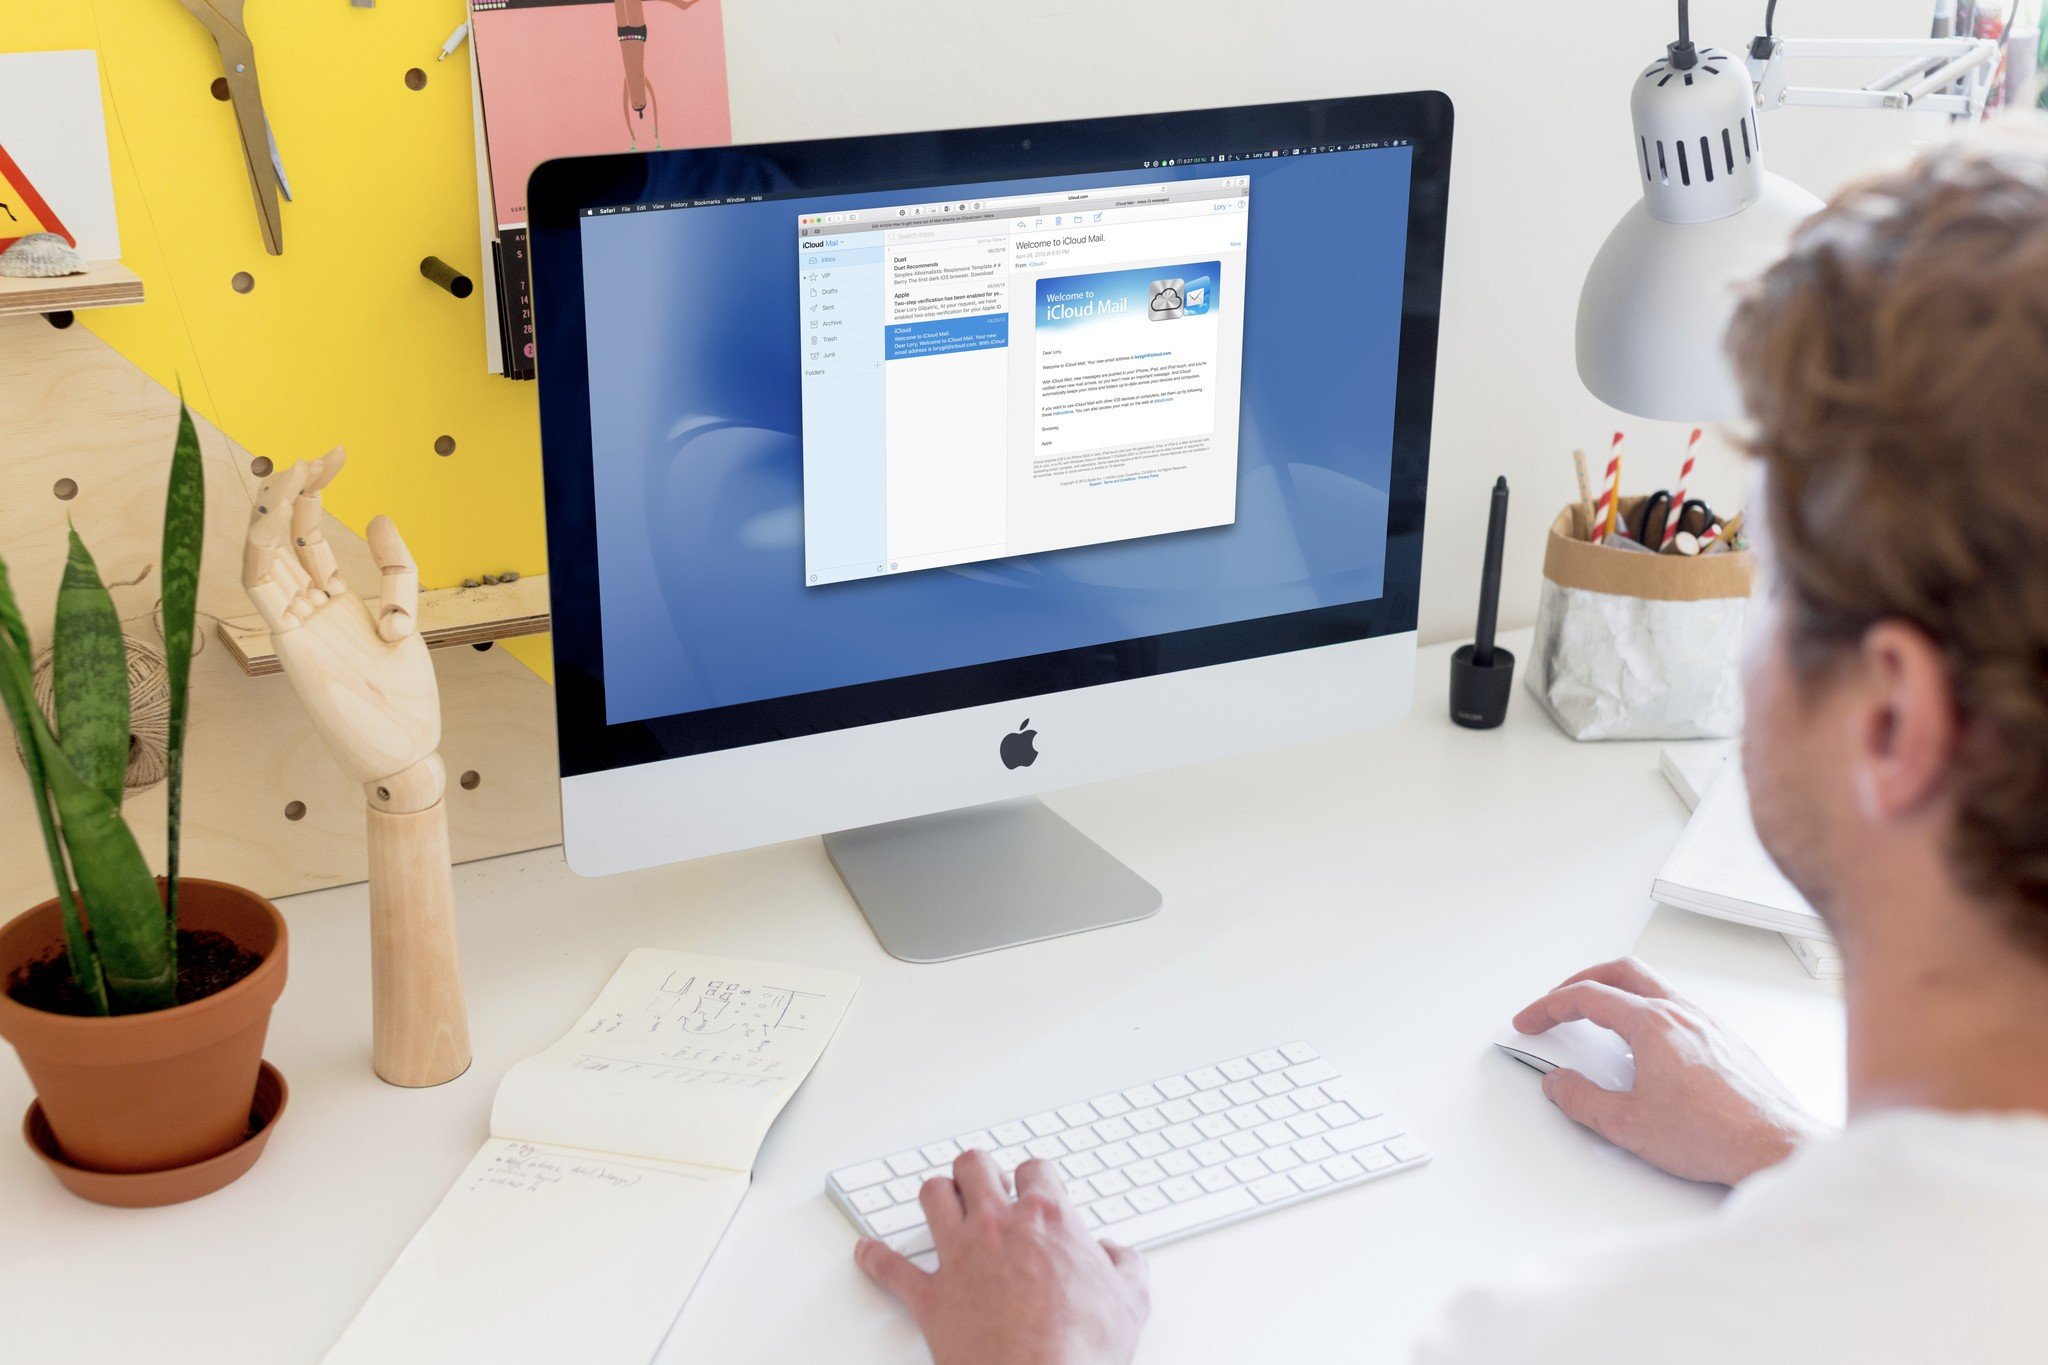
Did you also know that you can access your iCloud email using a web browser on a Mac or a PC? And that the web-based version of iCloud Mail offers some features that are either easier to implement or aren't even possible on the Mac and iOS versions?
So launch your favorite browser, and let's have a look.
- Accessing iCloud Mail with a Browser
- Automatically Forward Your Mail
- Add an Alias
- Create a Vacation Reply
- Add a Mail Rule
Accessing iCloud Mail with a Browser
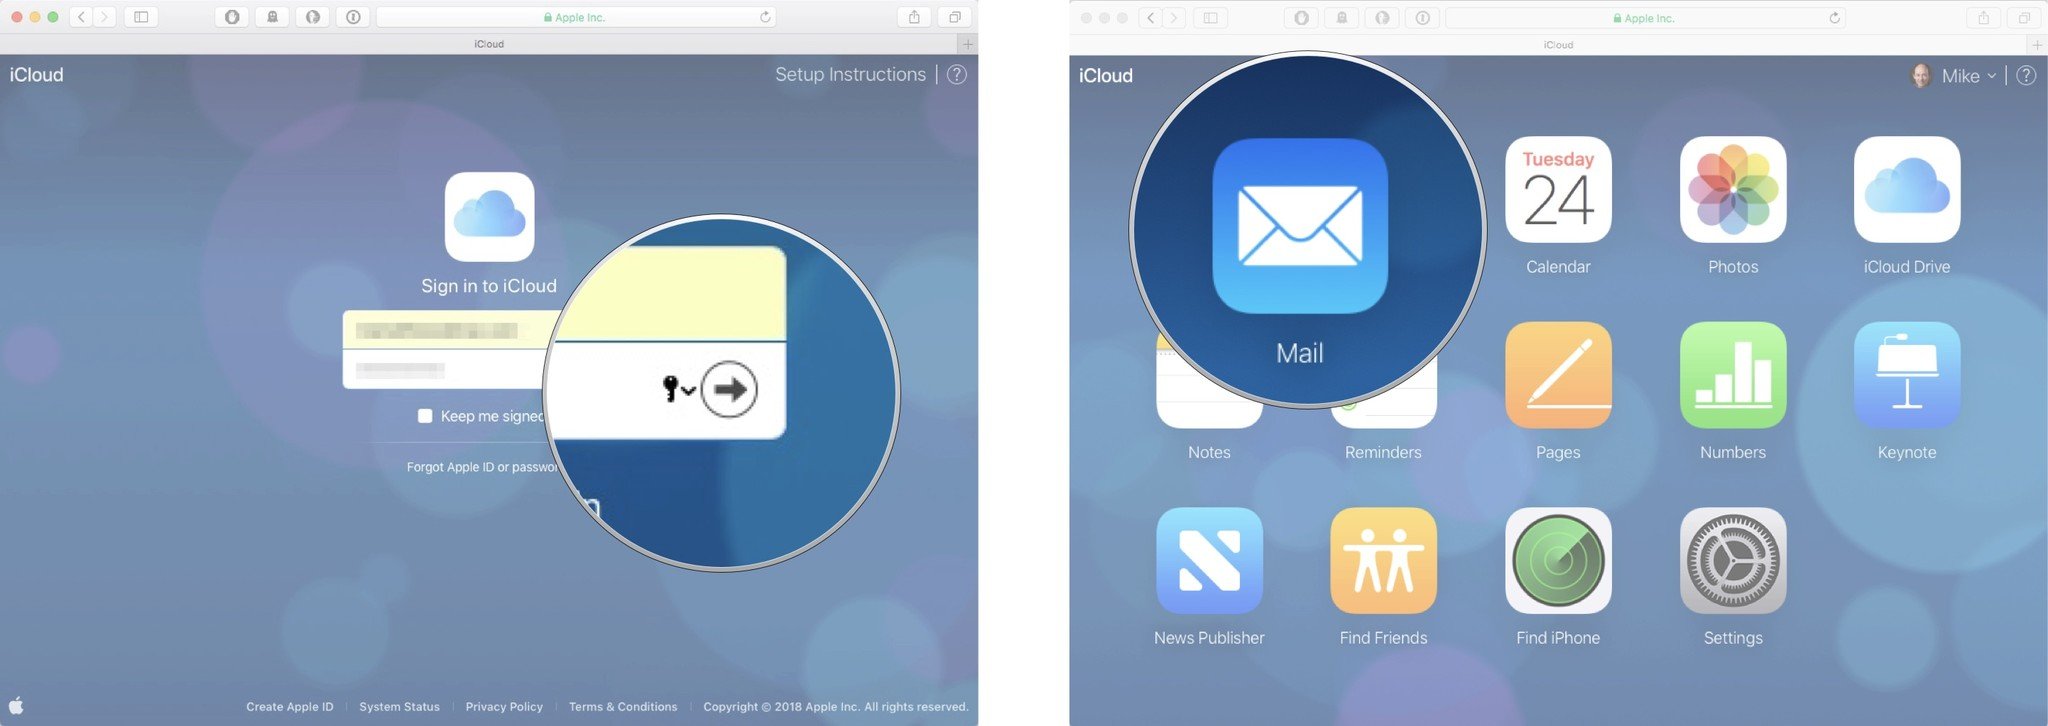
- Launch your browser of choice and navigate to www.icloud.com.
- Sign in with your Apple ID and password.
- Click the Mail button.
Now that you've accessed your iCloud email, here are a few things that can make your life easier.
Automatically Forward Your Mail
You could set up a rule in the macOS Mail preferences to automatically forward your mail to another address and have it perform a series of complex options, such as filing it in a new mailbox and attaching a flag to it.
But if you just want to simply forward your incoming iCloud email messages to another email account (something you can't even do with the iOS version of Mail), iCloud.com is the best place to do it.
iMore offers spot-on advice and guidance from our team of experts, with decades of Apple device experience to lean on. Learn more with iMore!
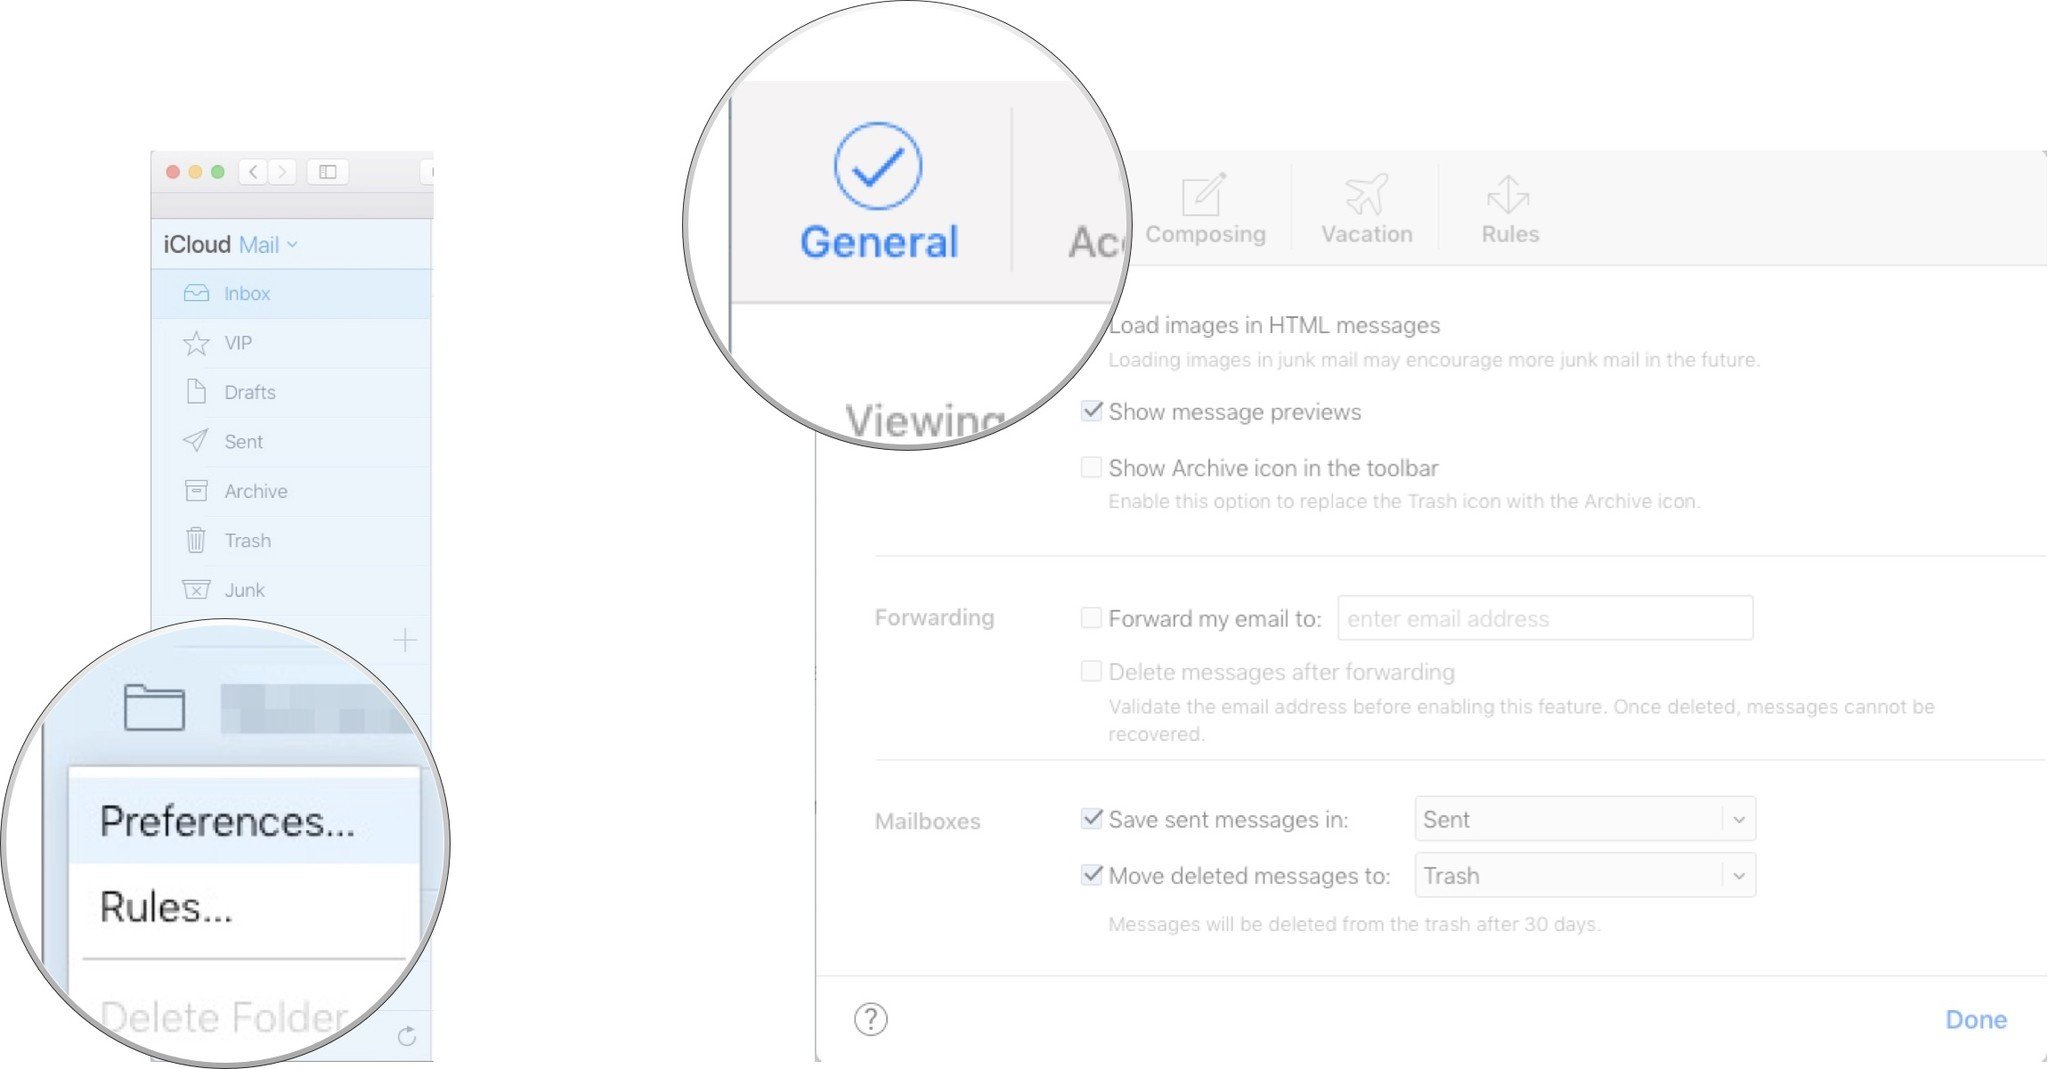
- Click the Action pop-up menu at the bottom of the sidebar and choose Preferences....
- Click General.
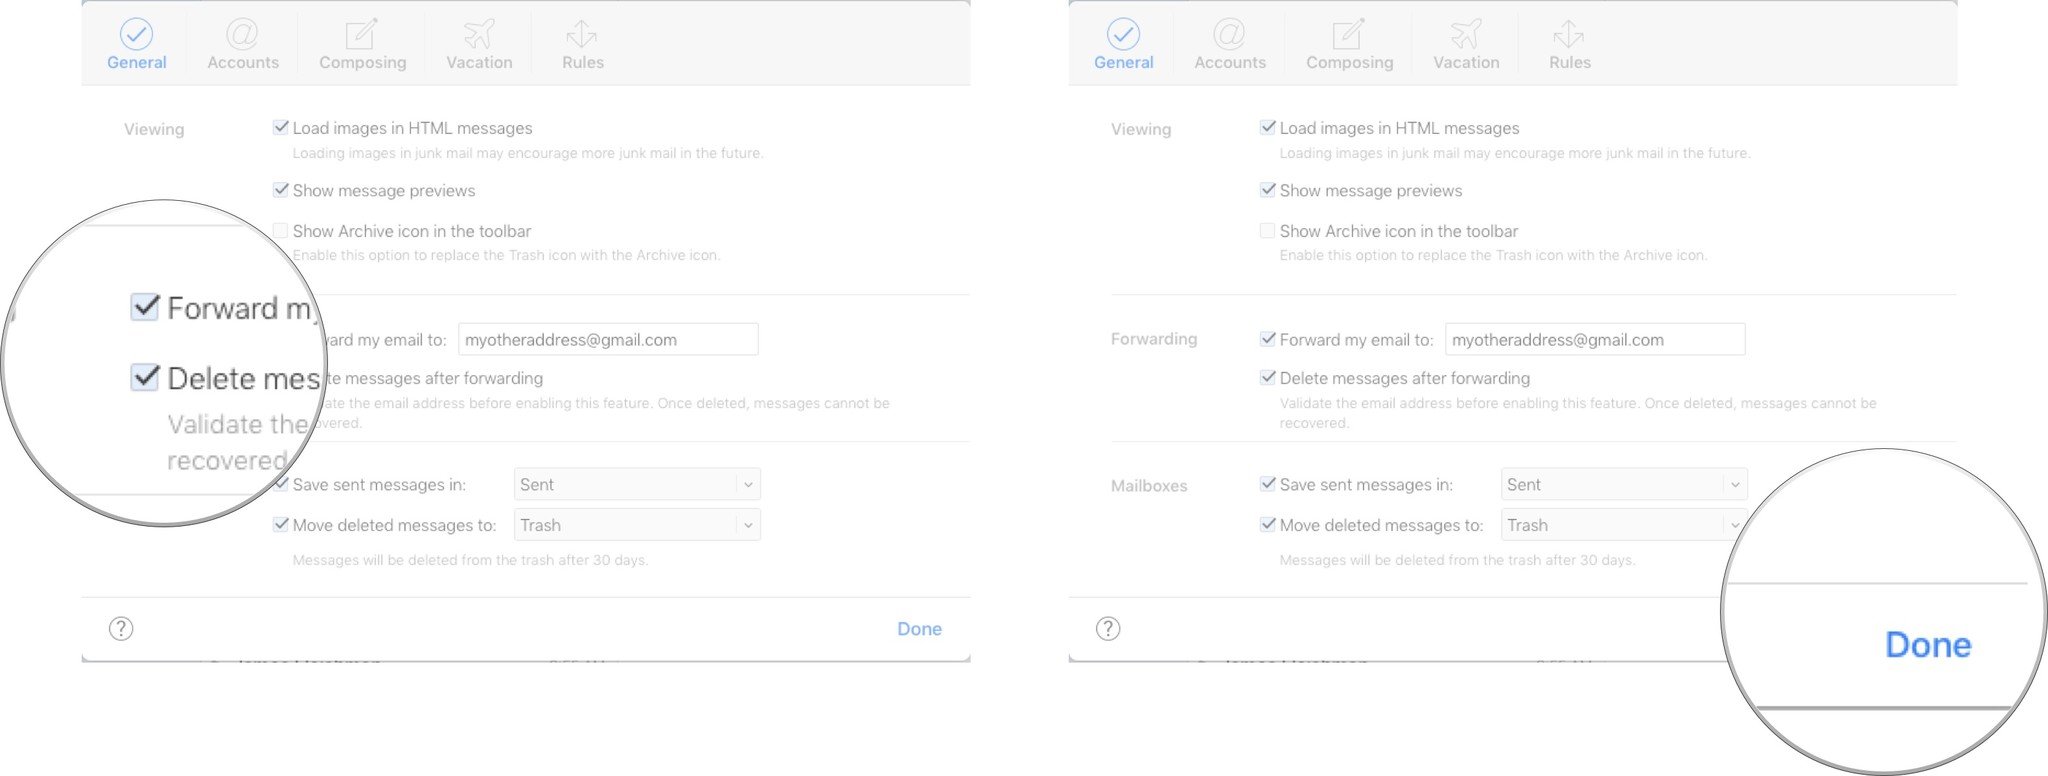
- Check the box to forward my email and enter the email address. You can also check the box to delete messages after forwarding.
- Click Done.
Add an Alias
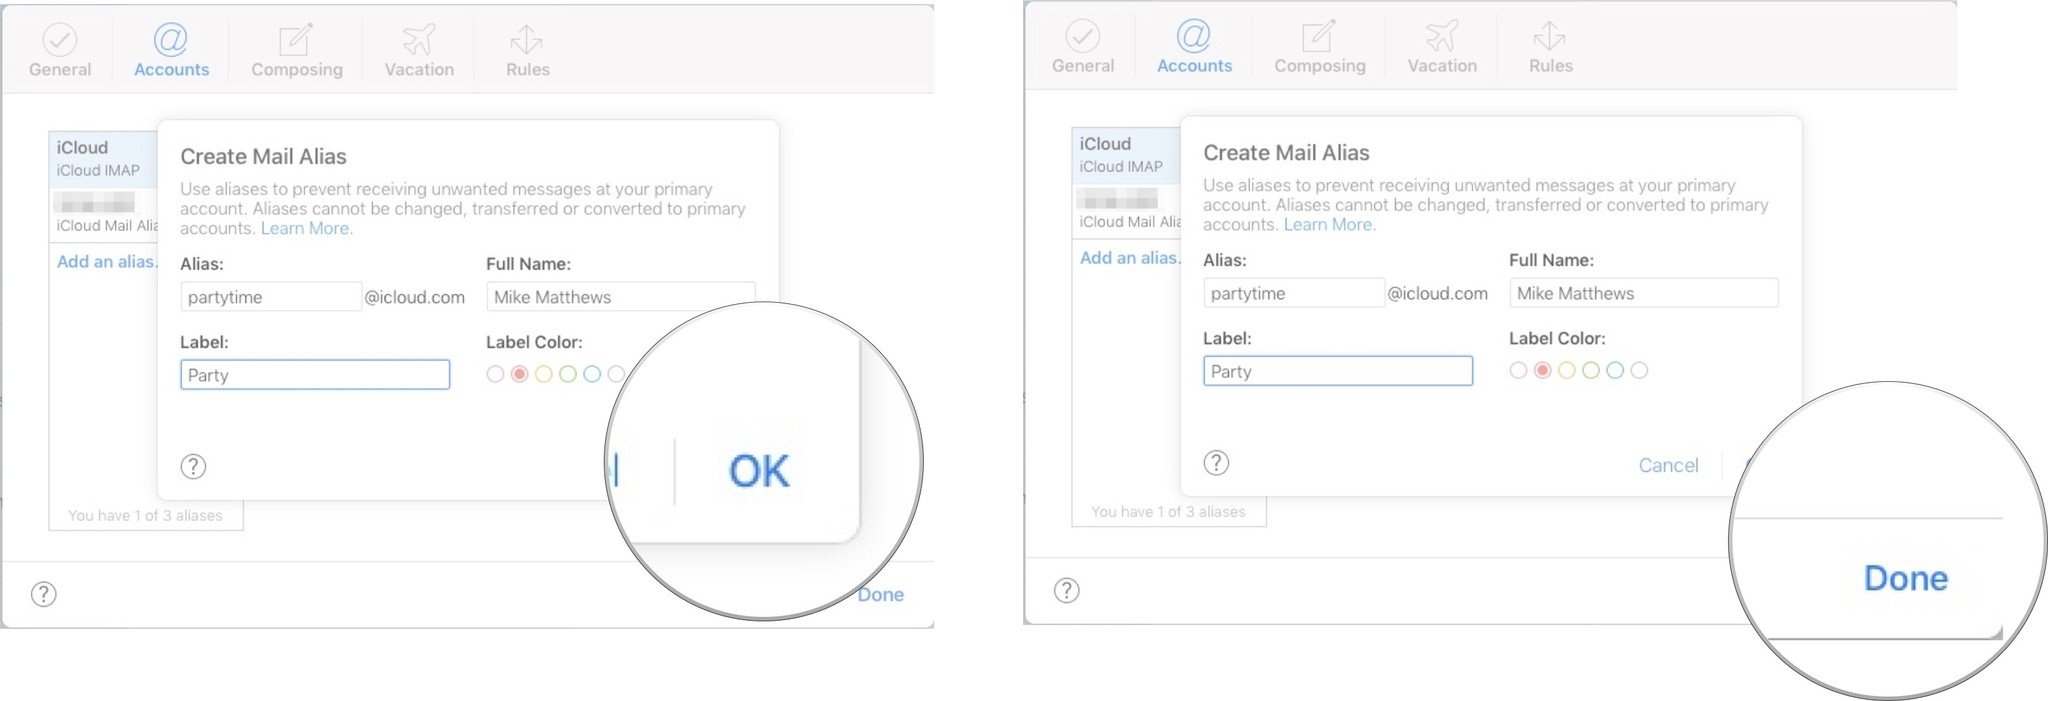
You might want to set up a temporary email address that will funnel messages to your iCloud email account without revealing your actual iCloud email address. For example, you could create an email alias to gather RSVPs for an event, then delete the alias when the event is over.
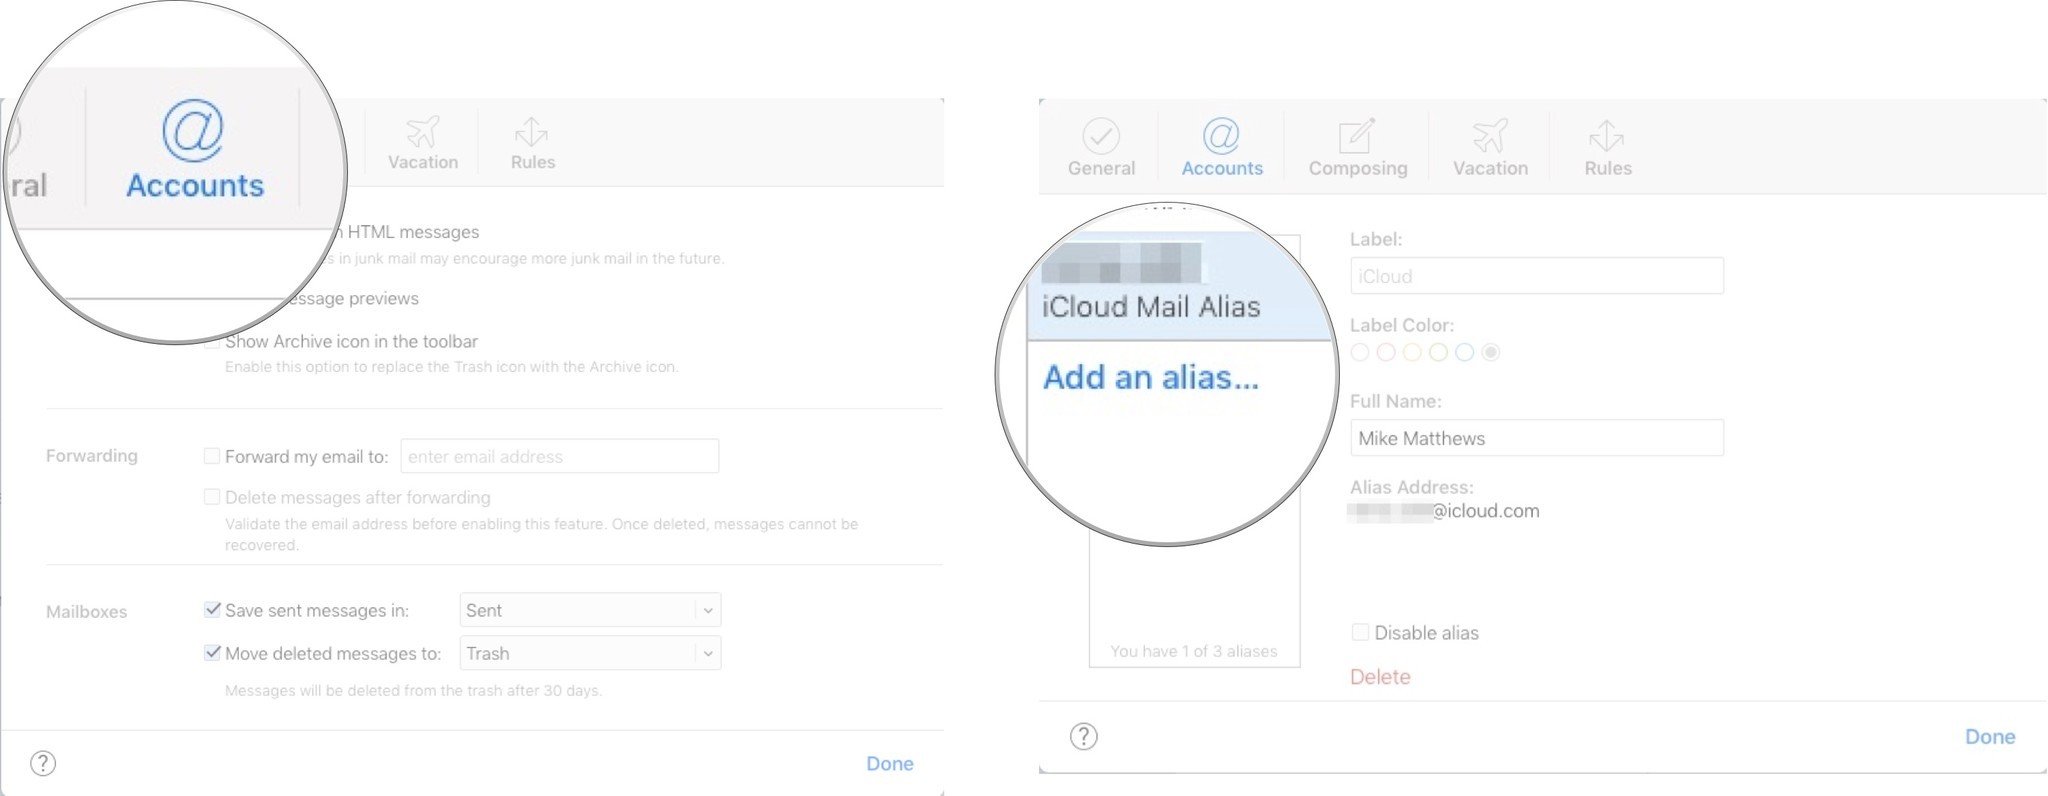
- In the Preferences window, click Accounts.
- Click Add an alias....
- Enter the alias name and other details and click OK.
- Click Done.
Create a Vacation Reply
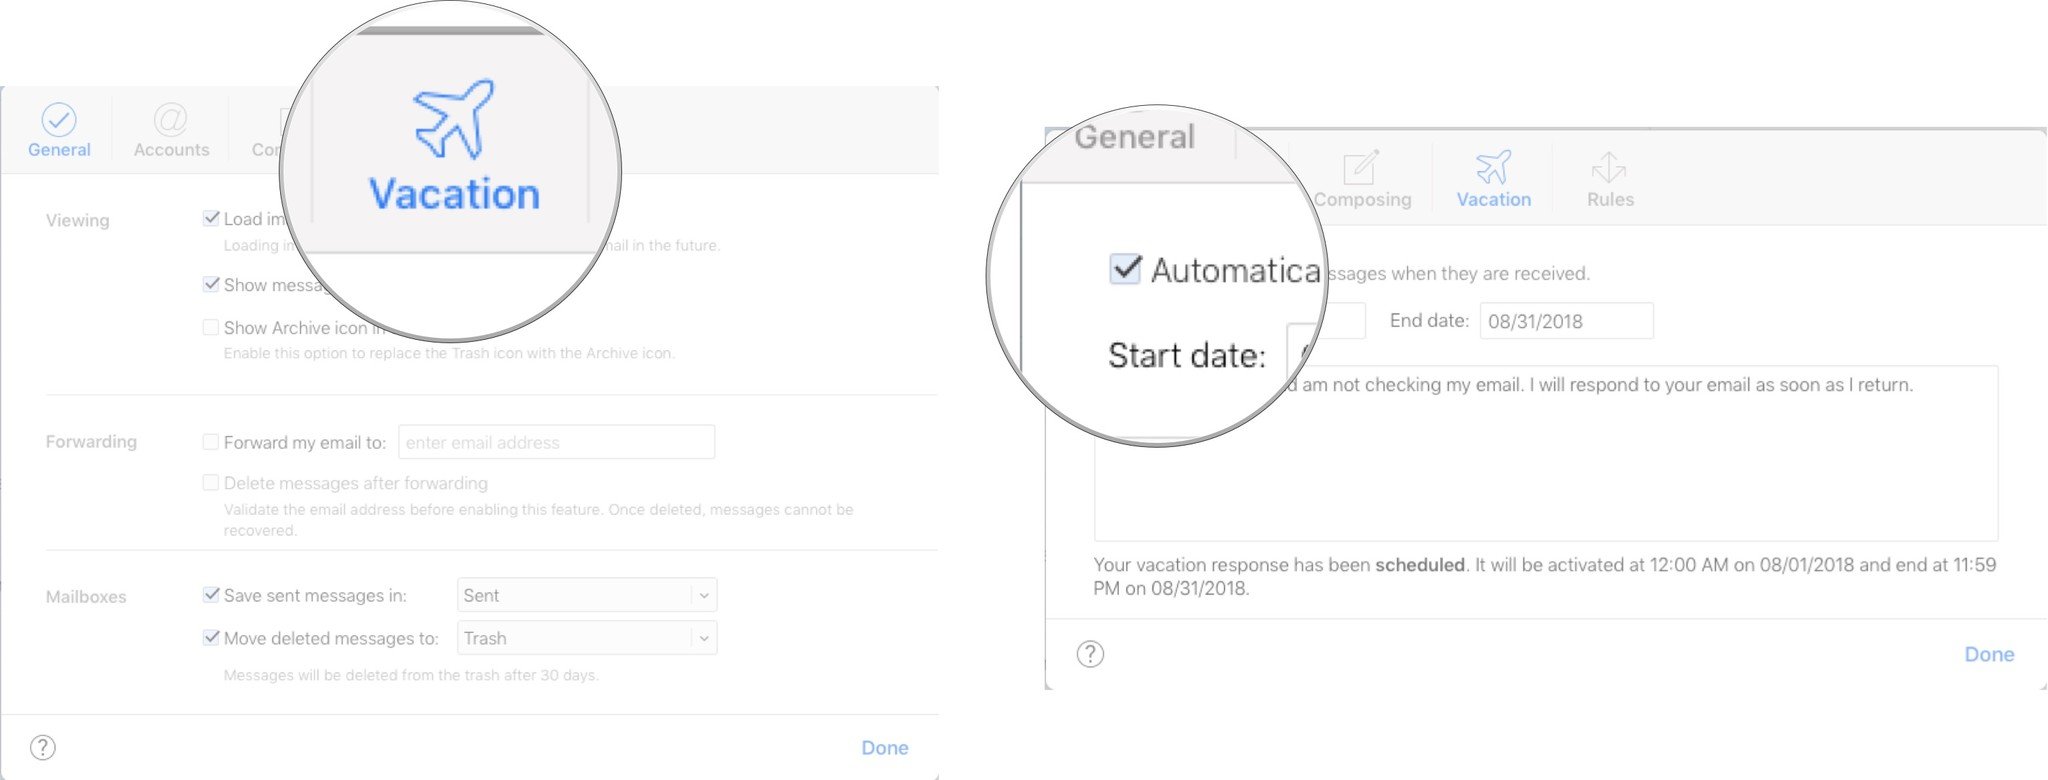
Just as with forwarding mail, you could create a mail rule on your Mac to reply automatically to email messages while you're on vacation. But it's a complex process, and there's no way to do it on iOS. But if you're into this sort of thing, it's really easy to do on iCloud.com.
- In the Preferences window, click Vacation.
- Check the box to automatically reply to messages when they are received.
- Enter the start date, end date, and a vacation message.
- Click Done.
Add a Mail Rule
The Mail app in macOS has an extremely powerful mechanism for creating rules that can sift through your incoming messages and perform actions on them. Conversely, the iOS Mail app has no ability to create mail rules akin to those of macOS.
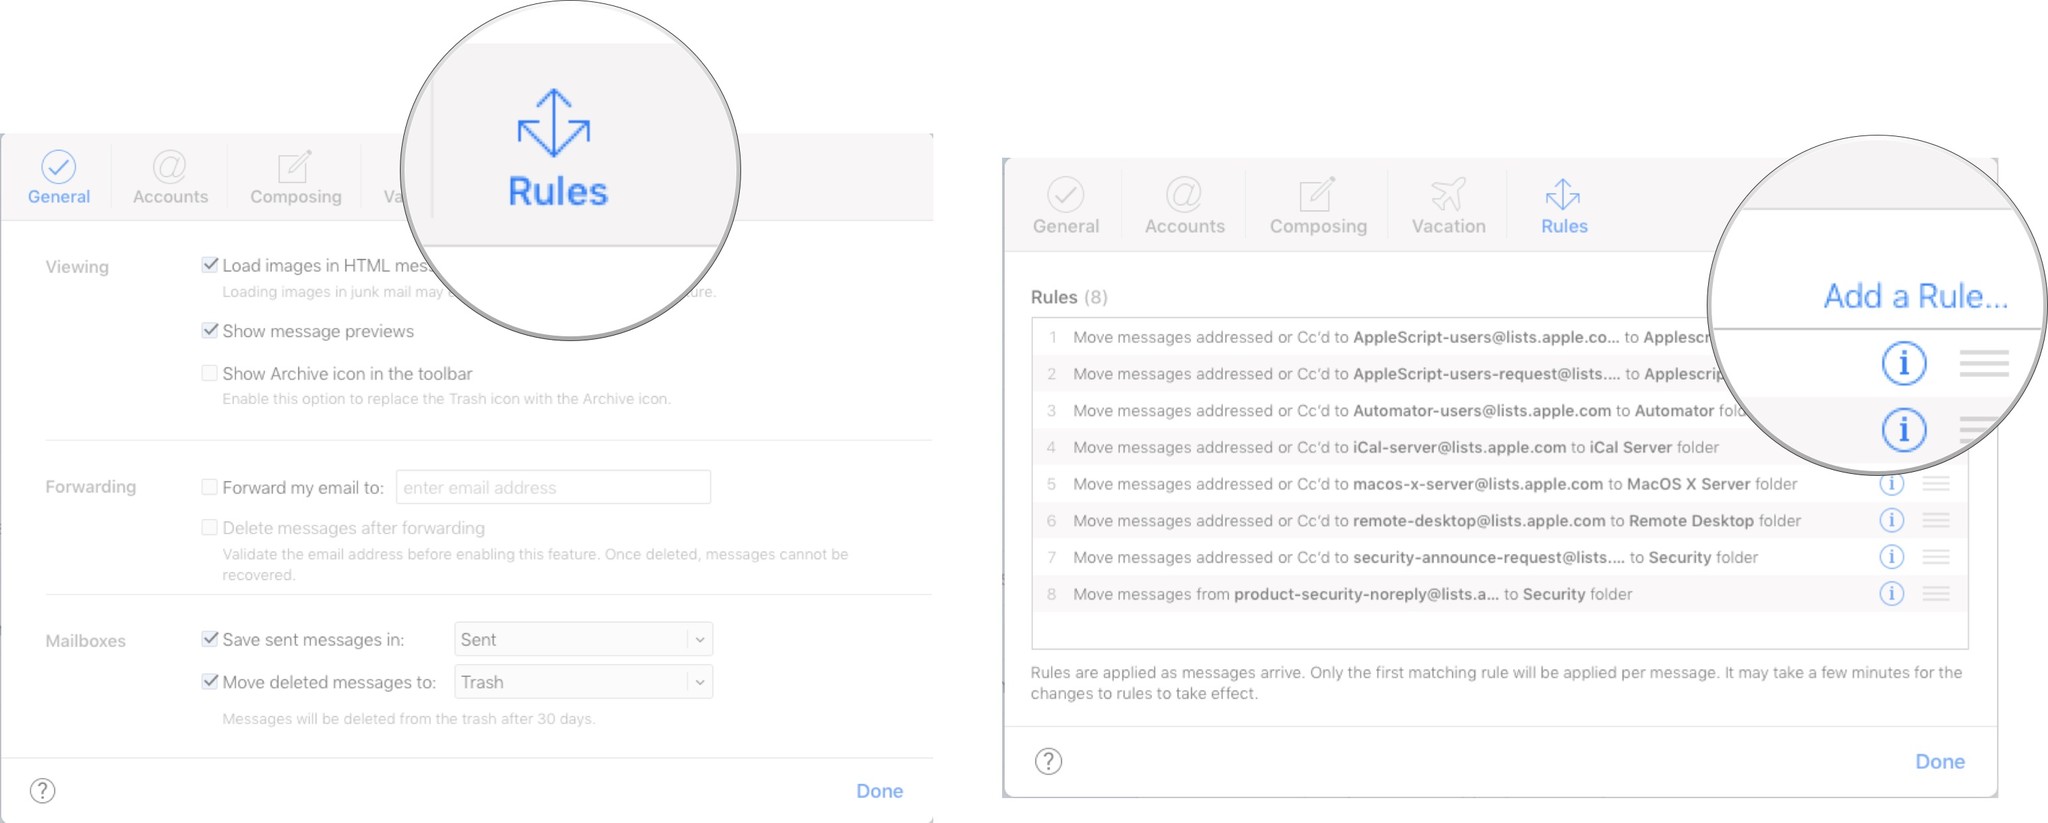
Mail on icloud.com falls between its Mac and iOS counterparts. Only very simple rules that forward messages, mark them as read, or place them in different folders can be created on iCloud.com.
Here's how to make a rule.
- In the Preferences window, click Rules.
- Click Add a Rule....
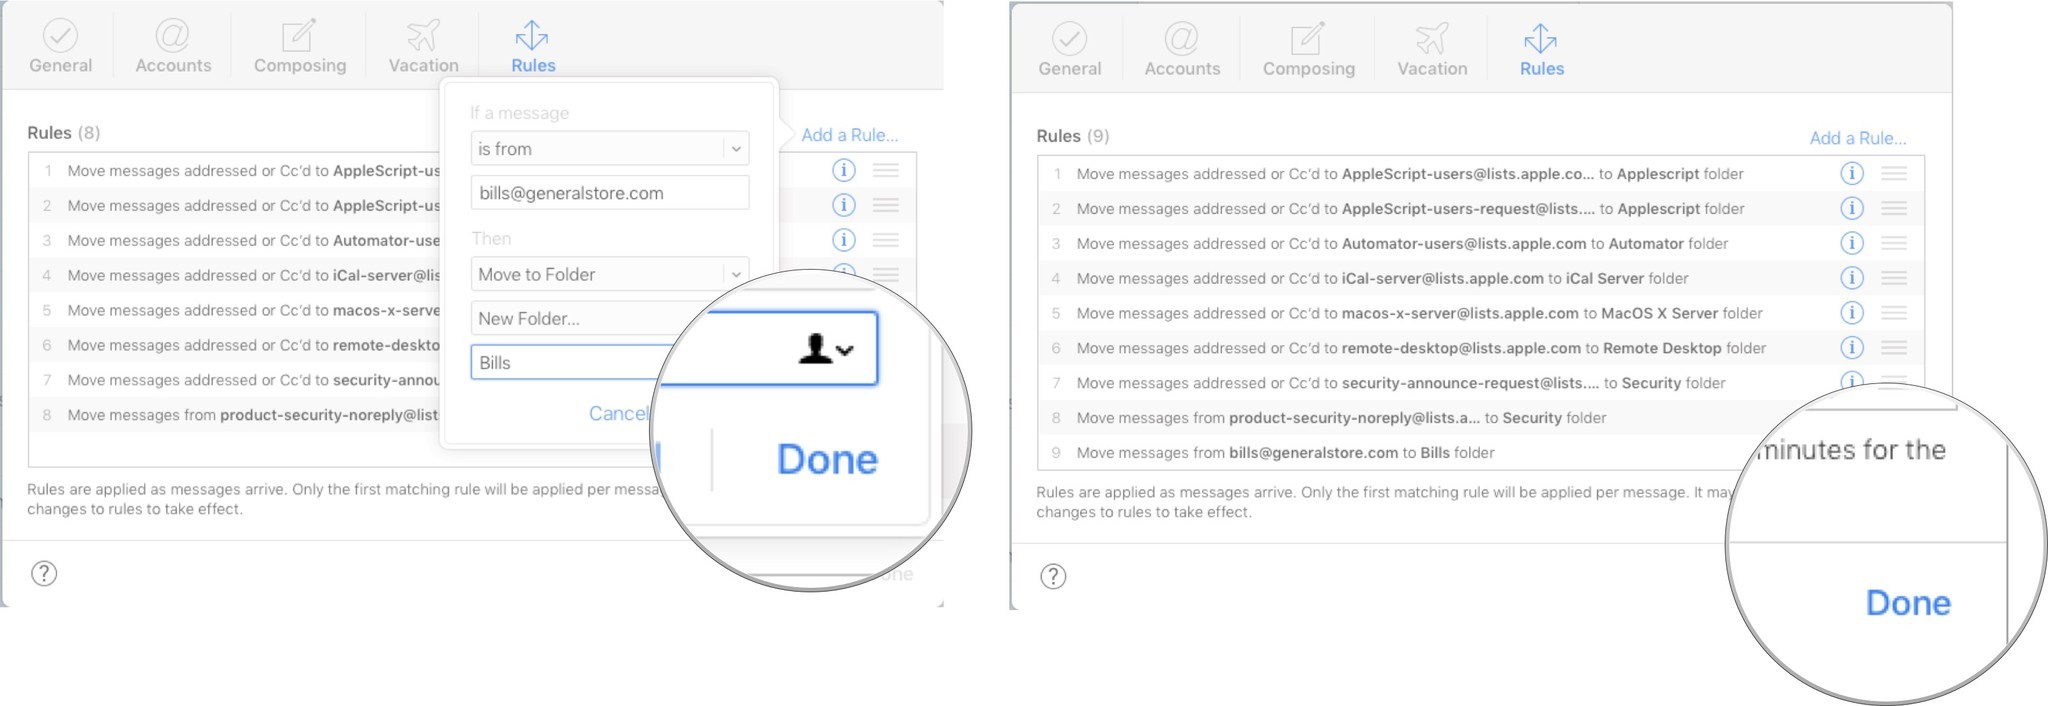
- Select a criteria for the message and an action to be performed.
- Click Done.
- Click Done.
The big benefit of adding rules via icloud.com is that the rules will be applied to an incoming message the moment it hits the inbox. There's no need to put the same rule in the Mac's Mail preferences. Also, the effects of the rules will appear when viewing iCloud mail on an iOS device. In the example above, email from bills@generalstore.com will already be placed in the Bills folder when the Mail app is opened on an iPhone, iPad, or Mac.
Make Mail Work for You
What uses for aliases or mail rules for your iCloud mail have worked for you? Tell us in the comments below.
Mike Matthews is a writer at iMore.com. He has used Apple products all the way back to the Apple II+. He appreciates no longer having to launch apps by loading them from a cassette tape recorder.
