
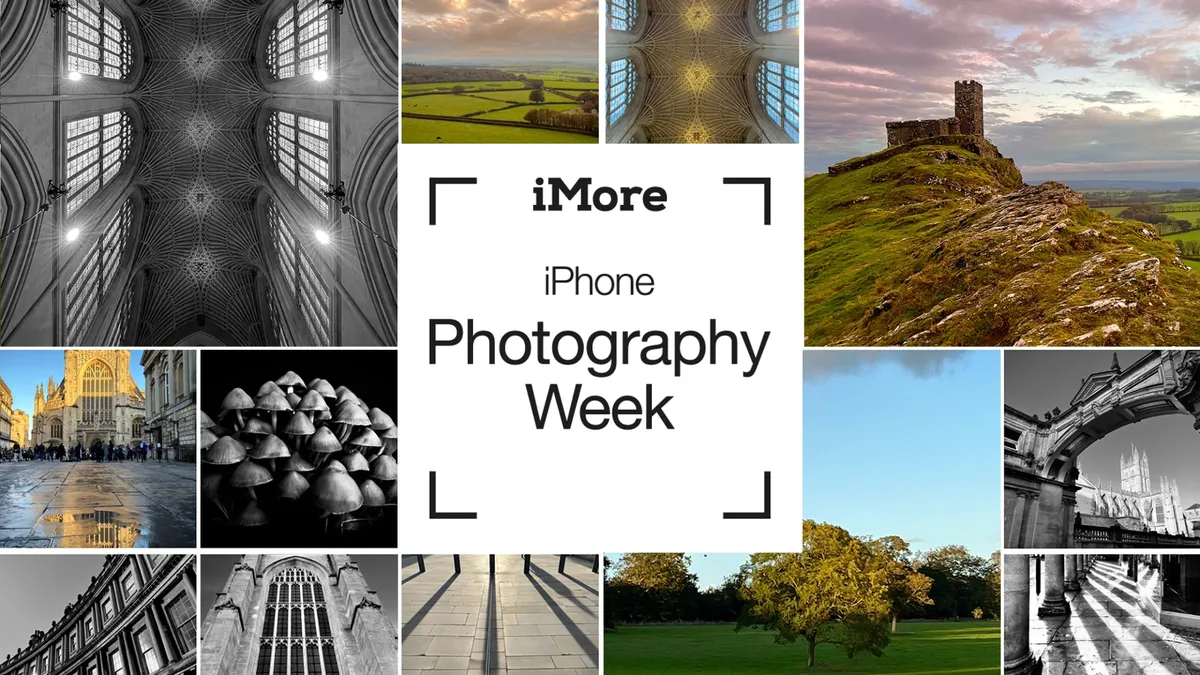
Take better photos with the camera in your pocket. iMore's iPhone Photography Week 2024 is filled with great content that will take your iPhone camera-snapping ability to the next level.
- Check out more iPhone Photography Week 2024
#iMorePhotographyWeek
Low lighting is the most challenging condition a camera can face. After all, a photograph can only be made when a digital sensor or film cell is exposed to light. This traditionally made it very difficult – if not impossible – to capture great low-light iPhone photography. That is, until the iPhone 11 launched with a brand new feature called Night mode.
Night mode has revolutionized the best iPhones’ low-light capabilities. It works by extending the length of the iPhone Camera’s exposure. You see, there are three ways a manual camera can be set up to gather more light. The aperture inside the lens is opened as wide as possible to allow more light through. The light sensitivity of the sensor is increased by raising the camera’s ISO. Or the shutter speed is slowed right down so more light can enter over a longer period of time.
The problem is, your iPhone’s aperture is already fixed at a wide-open aperture and when you increase the sensor’s sensitivity too high, image quality is reduced by an increasingly intense layer of colorful specs called noise. The best solution then is to increase the exposure length, but this presents something of a problem too. Longer exposures mean that movement can ‘soften’ (or blur) an image.
Thankfully, Apple’s unique blend of optical image stabilization [OIS] and computational photography has made it possible to shoot incredible handheld long exposures using Night mode. And in true Apple fashion, the process couldn’t be easier…

I’m Deputy Editor of N-Photo: The Nikon Magazine, but moonlight as iMore’s go-to photography know-it-all. I’ve worked in the photo industry for over six years and have been an avid iPhone photographer since the iPhone 4. I’m a firm believer that iPhone photography is a great starting point for burgeoning photographers, which is why I’ve created a series of iPhone photography basics tutorials, so you can either firm up your existing iPhone Camera skills or embark on a whole new passion.
How to activate Night mode
Your iPhone will helpfully determine when Night mode is required via a moon icon that appears next to the flash icon in the top-left corner of the Camera app’s screen. When you’re shooting in adequate light, it’s not visible. Night mode is also accessible by swiping up on the live view screen (or hitting the arrow at the very top) and tapping the moon icon that appears just above the shutter button. Once again, it’s next to the flash icon but will only appear in low-light conditions. You can also take Night mode selfies by simply activating the front camera in low light.
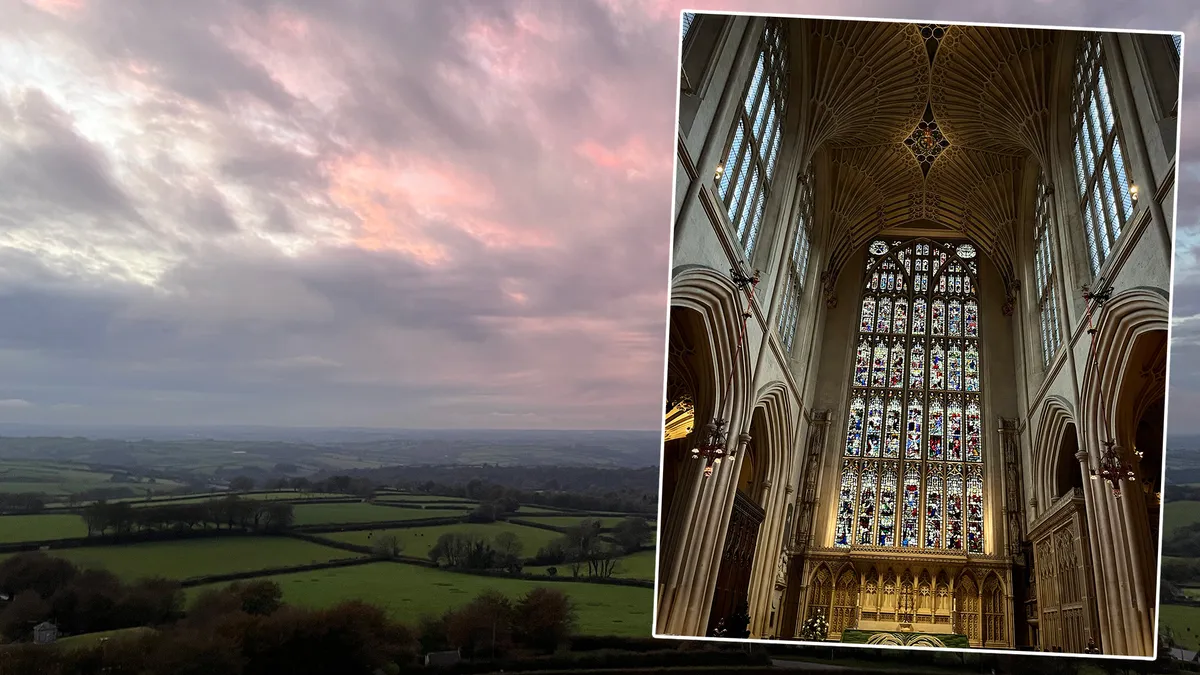
When I photographed Pulteney Bridge and the nearby weir in the UK’s famous Georgian city of Bath, Night mode kicked in roughly around blue hour. While this will vary depending on the ambient light where you’re shooting, blue hour is a fantastic time to capture low-light images in general. It occurs just before sunrise and just after sunset and is so-called due to the light’s distinctive cool hue. You can work out when blue hour is on a given day and at a specific location via a planning app like PhotoPills.
- Open the Camera app in low light and the Night mode icon will appear in the top-left corner of the screen
- Swipe your finger upwards, over the live camera view, to reveal the features bar. The Night mode icon will appear in low enough light
- Download and open the PhotoPills app
- Tap the Sun icon to reveal a chart with timings for blue hour on the selected day
How to control Night mode
Unsurprisingly, Apple has made Night mode extremely intuitive to use, and paired with the iPhone’s computational photography, it isn’t hard to capture a great-looking image. That said, you do have some control over Night mode’s functionality. Firstly, it can be switched off by tapping the icon in the top-left corner of the screen or by tapping the icon in the bottom menu and moving the slider left, all the way to Off.
This slider also allows you to set the exposure length to Auto (middle position) and Max (right-hand position), which is the longest exposure available in the current lighting. The exposure length, in seconds, will appear just above the slider and the icon in the top-left corner will turn into a yellow lozenge, with the exposure length also visible. Ultimately, the length of the exposure will depend on the available light, but Night mode exposures can range from one to 30 seconds. But even on the Max setting, you’ll only be able to use 30 seconds in very low-light conditions, like shooting astrophotography.
- Switch off Night mode by tapping the icon in the top-left of the screen
- Swipe up to reveal the features bar and select Night mode
- Move the slider all the way to the left to turn off Night mode
- Move the slider to the middle position to turn on Auto
- Move the slider all the way to the right to turn on Max
How to prevent blur

Short exposures are used to freeze movement, while long exposures exaggerate movement by creating motion blur. The longer the exposure the more pronounced the motion blur. But this doesn’t just relate to moving subjects within the frame. If you move your iPhone too much when using Night mode, the entire image will blur, this is called camera shake. iPhones with Night mode feature OIS, which helps to combat camera shake. Computational photography also has a hand in beating blur, reducing noise, and rendering more detail.
If you move the camera too much when the long exposure is being taken, a pair of crosshairs will appear that you can line up to help prevent blur. But your iPhone can only do so much. If you’re intent on producing the sharpest, shake-free images, you’ll need to use a tripod. You can pick up dedicated iPhone tripods or if you already have a tripod you can buy iPhone-compatible heads that attach via a standard tripod thread like the Joby GripTight Mount PRO (pictured) or the more affordable GripTight Mount for MagSafe.
- Line up the two crosshairs if they appear on screen when capturing a Night mode image to help prevent blur
- When using a tripod, always extend the thickest legs first and always extend the legs further, rather than extend the center column as this is the least stable part of the tripod
- Use the built-in level in Photo mode to ensure your horizon is straight, or use your iPhone’s Measure app
- Go to Settings > Camera and check Level, if the level doesn’t appear in Photo mode
How to use blur to your advantage

In the right circumstances, motion blur can be used to your advantage. Pulteney Weir is a moving body of water and as the image (above) illustrates, it really comes to life when shot with a long exposure to blur the running water. Other examples of motion blur that will inject still images with a sense of movement include light trails caused by the head and tail lights of moving vehicles, bustling crowds of pedestrians – which can give busy street scenes an abstract flavor – and light trails formed by moving fairground rides such as Ferris wheels. You might think that the longer the exposure, the better looking the motion blur, but that isn’t necessarily the case. As the quality of light changes, experiment with different exposures to find the length that works best for your scene.
- Frame a low-light image with a moving subject such as vehicles or running water
- Open the Camera app and select Photo mode
- Night mode will turn on automatically if you’re working in low enough light
- Experiment with different exposure lengths as the lighting conditions get darker
- Review your images in Photos to determine the best exposure length for your moving subject
How to edit a night shot

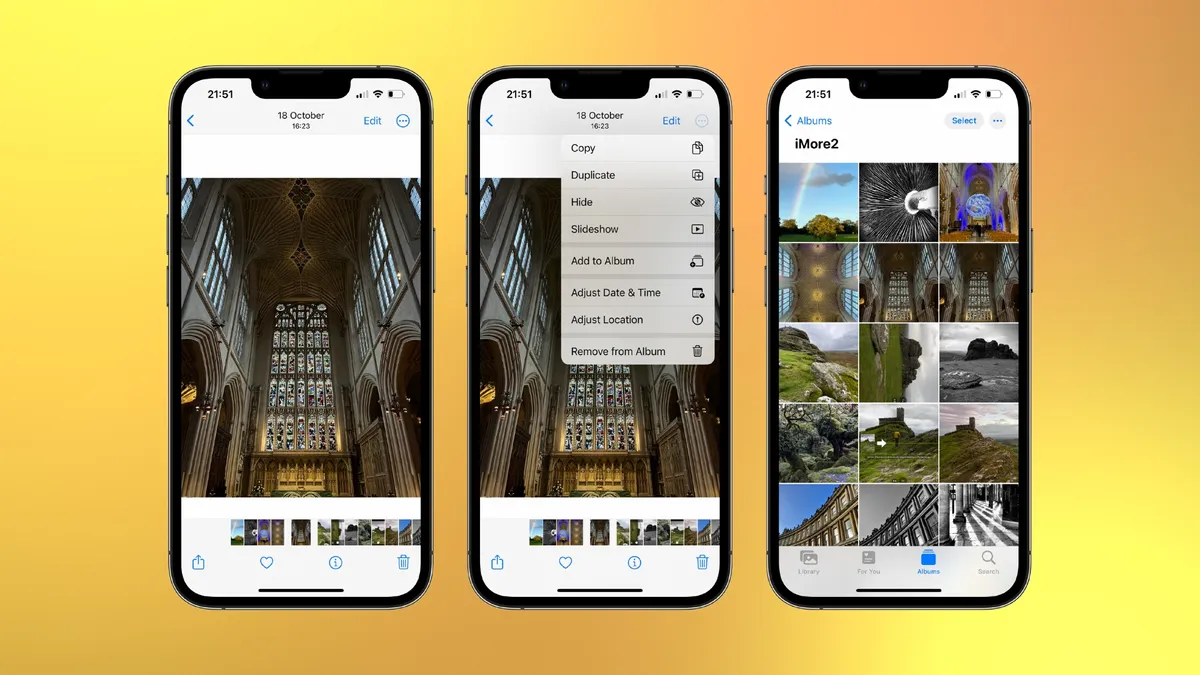
You can find a plethora of powerful editing apps such as Photoshop Express on the App Store, but if you want to learn to edit iPhone photos the right way, the Photos app’s editing suite is a simple but effective starting point. The first thing to be aware of is Apple’s computational photography. This AI-powered tech automatically edits the images you capture with your iPhone, every time you fire the shutter, and it’s pretty effective, too. Fresh from the camera, images are well exposed, sharp and the colors tend to look relatively accurate. This means that any edits you make manually will likely be to tweak, rather than overhaul, an image.
The temptation when editing a low-light image can be to try and brighten the dark areas as much as possible. There’s nothing wrong with boosting the Exposure or lifting the Shadows sliders to bring back more detail, just make sure you use them sparingly. You’re not trying to simulate the daytime, after all. For this image, I boosted the Exposure (+15) and Shadows (+26) slightly, and then reduced the highlights (-52) to add detail and definition to the bright lighting. I then added a little contrast (+10) and increased Black Point (+10) to darken the blacks and add punch to the highlights. Rather than boost Saturation, which would have increased the yellowness of the lighting, I increased Vibrance (+35). This targets less intense colors such as the blue-hour sky. I finished with Warmth (-10) to cool the warmth omitted from the lights and Tint (+35) to neutralize the water’s green hue.
- Select your image in the Photos app and hit Edit in the top right corner
- Boost Exposure and Shadows sparingly to bring back a little detail in the shadows
- Generously reduce Highlights to pull back a little detail in the lights
- Add Contrast or Black Point to darken the blacks and add punch to the highlights
- Add Vibrance to selectively up the saturation of less intense hues
- Slide Warmth to the left to cool the color temperature and slide Tint to the right to balance any unwanted green hues
How to shoot a Night mode Timelapse
If you own an iPhone 12 or later, you can make use of Apple’s Night mode Time-lapse function. Just like the standard Night mode, it works automatically when low enough lighting conditions are detected. Unlike the standard Night mode, there’s no indicator to suggest that Night mode is activated and it’s not customizable in any way. The Time-lapse function is activated by activating the Camera app and swiping the menu above the shutter button to the far left. For the best results, use a tripod or prop your iPhone up so it’s completely still throughout the time-lapse.
- Put your iPhone on a tripod and frame your nighttime scene
- Open the Camera app and keep sliding the mode menu left to find Time-lapse
- Press the shutter button to start the time-lapse
What’s Night mode Portrait?
Night mode Portrait is exactly what you’d expect, Night mode functionality while using Portrait mode. It’s only available on Pro models (iPhone 12 onwards) and just like the standard Night mode, it turns on automatically when you’re working in low light. It’s certainly a neat feature, but you'll have to work smart if you’re to avoid unwanted motion blur. Ask your portrait subject to remain as still as possible when you’re taking a photo and remember that the longer the exposure, the more pronounced any movement will be, so it’s best to stick to one or two seconds, if possible.
You’ll also have to be mindful of wind-blowing clothing or hair, although this can be used to your advantage if you’re willing to capture a more creative portrait. A good tip to help keep the exposure as short as possible, while also highlighting your subject is to experiment shooting in different light sources. This could be street lighting, shop window lights, or even neon lights. And if you want a little more control over the lighting, consider picking up a small smartphone-sized LED panel, like the Lume Cube Panel Pro 2.0.
This tutorial is part of iPhone Photography Week 2024. Expect new posts to appear daily, focused on making your photos shot with iPhone better than ever before.
Share your photos with iMore on X (Twitter) using #iMorePhotographyWeek
