How to format in Notes on Mac

iMore offers spot-on advice and guidance from our team of experts, with decades of Apple device experience to lean on. Learn more with iMore!
You are now subscribed
Your newsletter sign-up was successful
A little bit of formatting can go a long way to improve the look and organization of your writing inside of Notes for Mac. It's easy to format text inside of Notes to break up ideas or create lists.
- How to create titles and headings in Notes
- How to automatically title notes on Mac
- How to format text in Notes
- How to use lists in Notes on Mac
- How to create checklists in Notes
How to create titles and headings in Notes
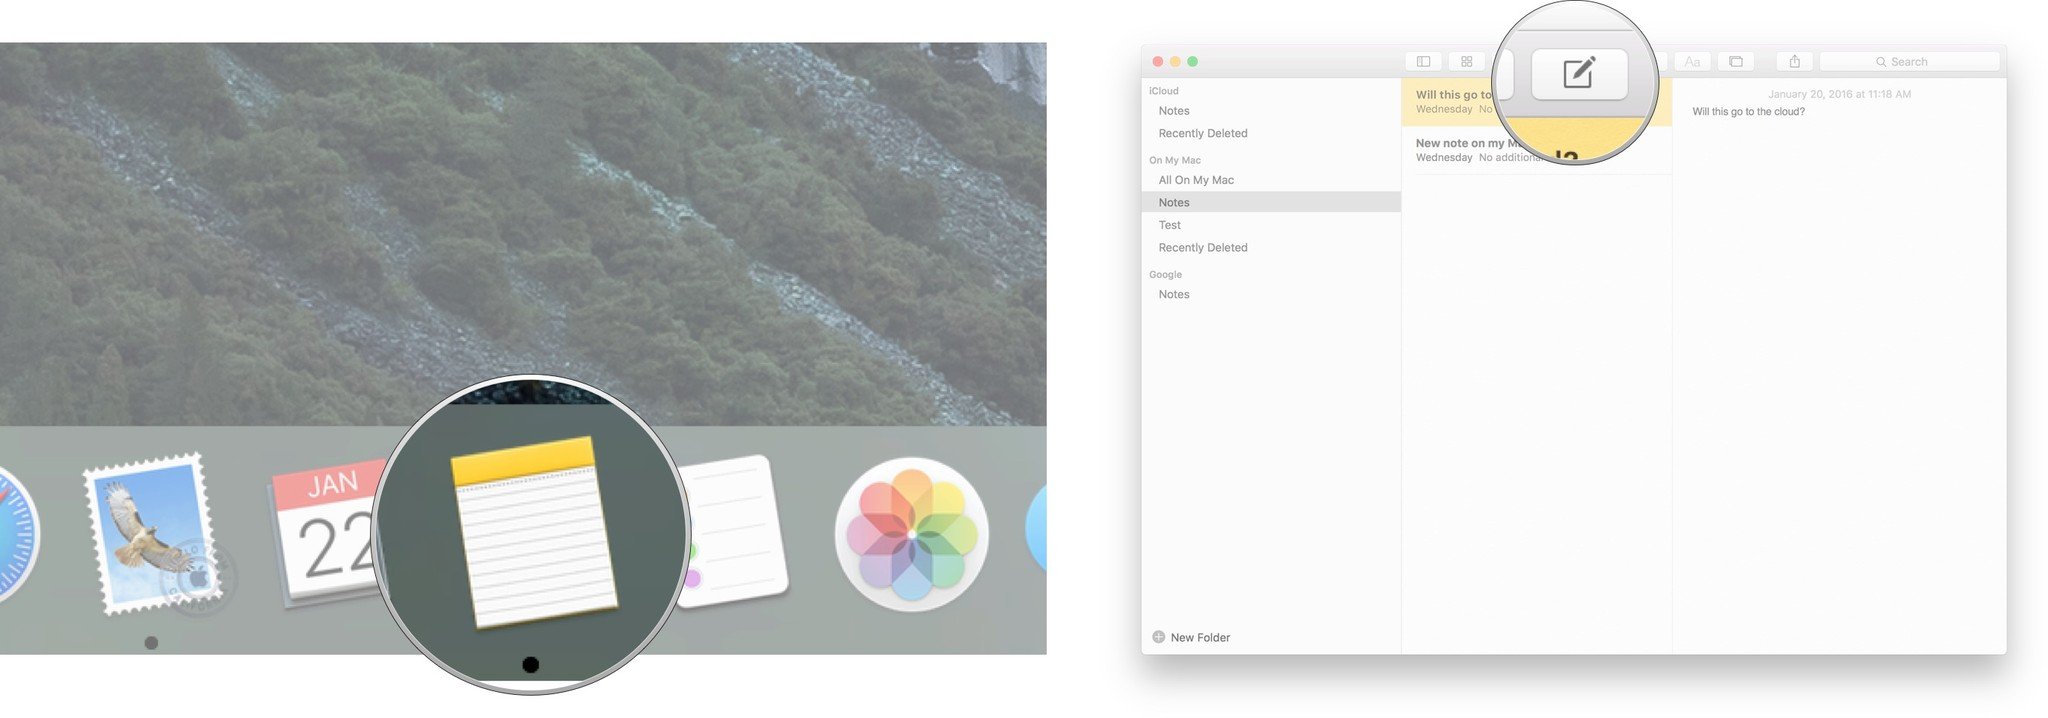
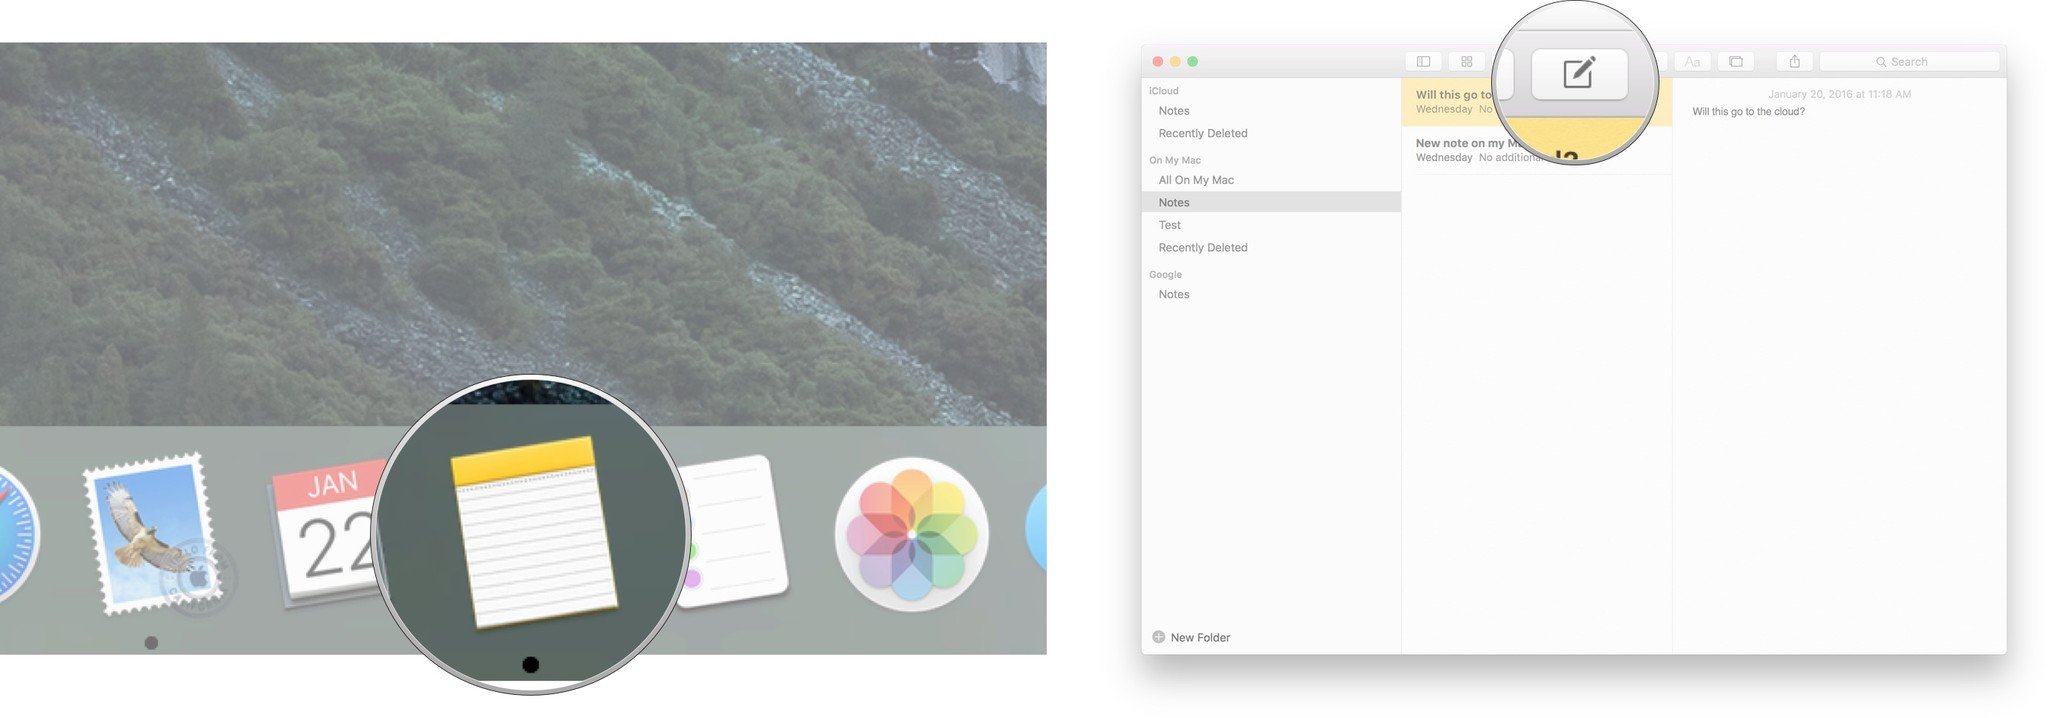
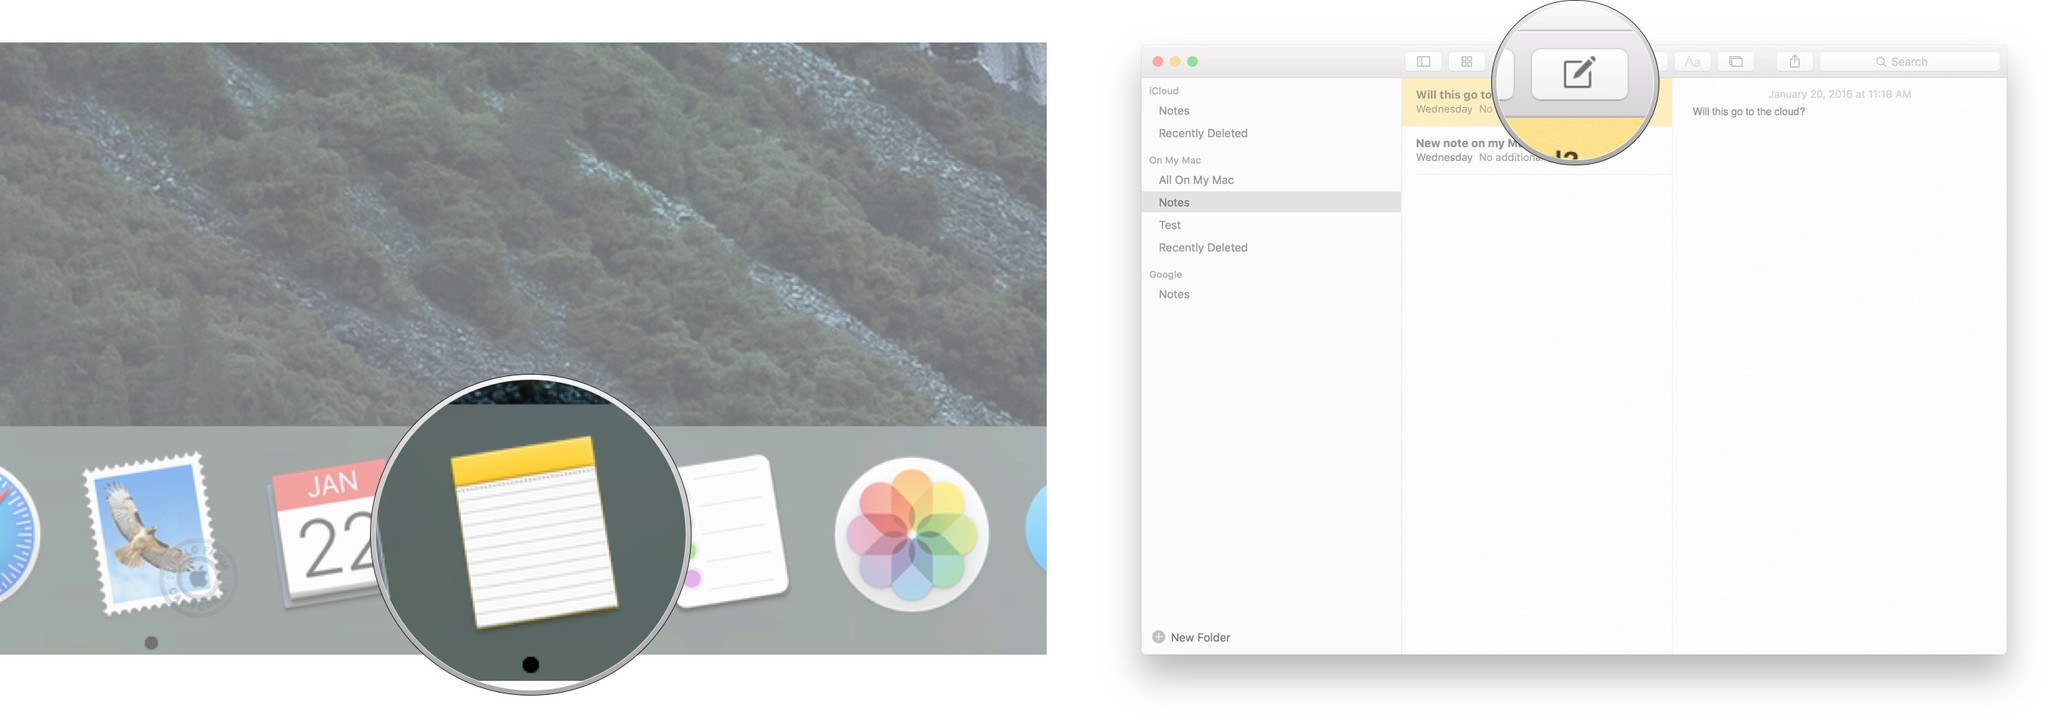
- Launch Notes from the Mac dock.
- Click the Create a note icon from the top menu to start a new note (it looks like a pencil and paper).
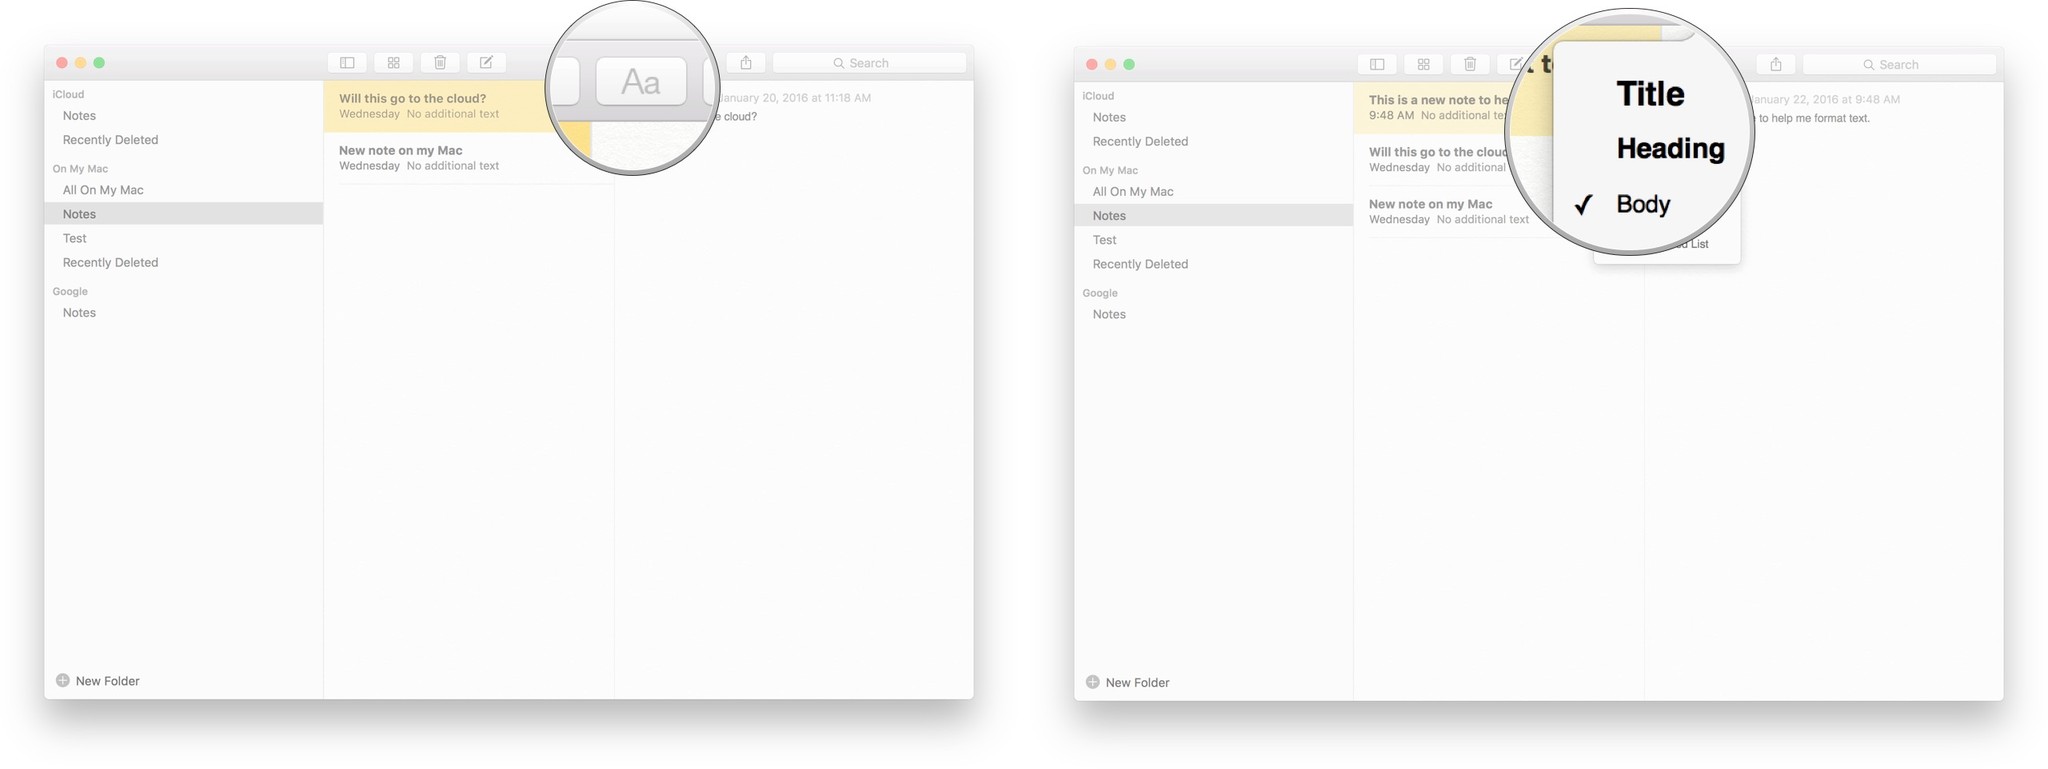
- Click the Choose a style to apply to text icon ("Aa" icon at the top of the screen).
- This will launch a menu with a variety of font formatting options:
- title
- heading
- body text
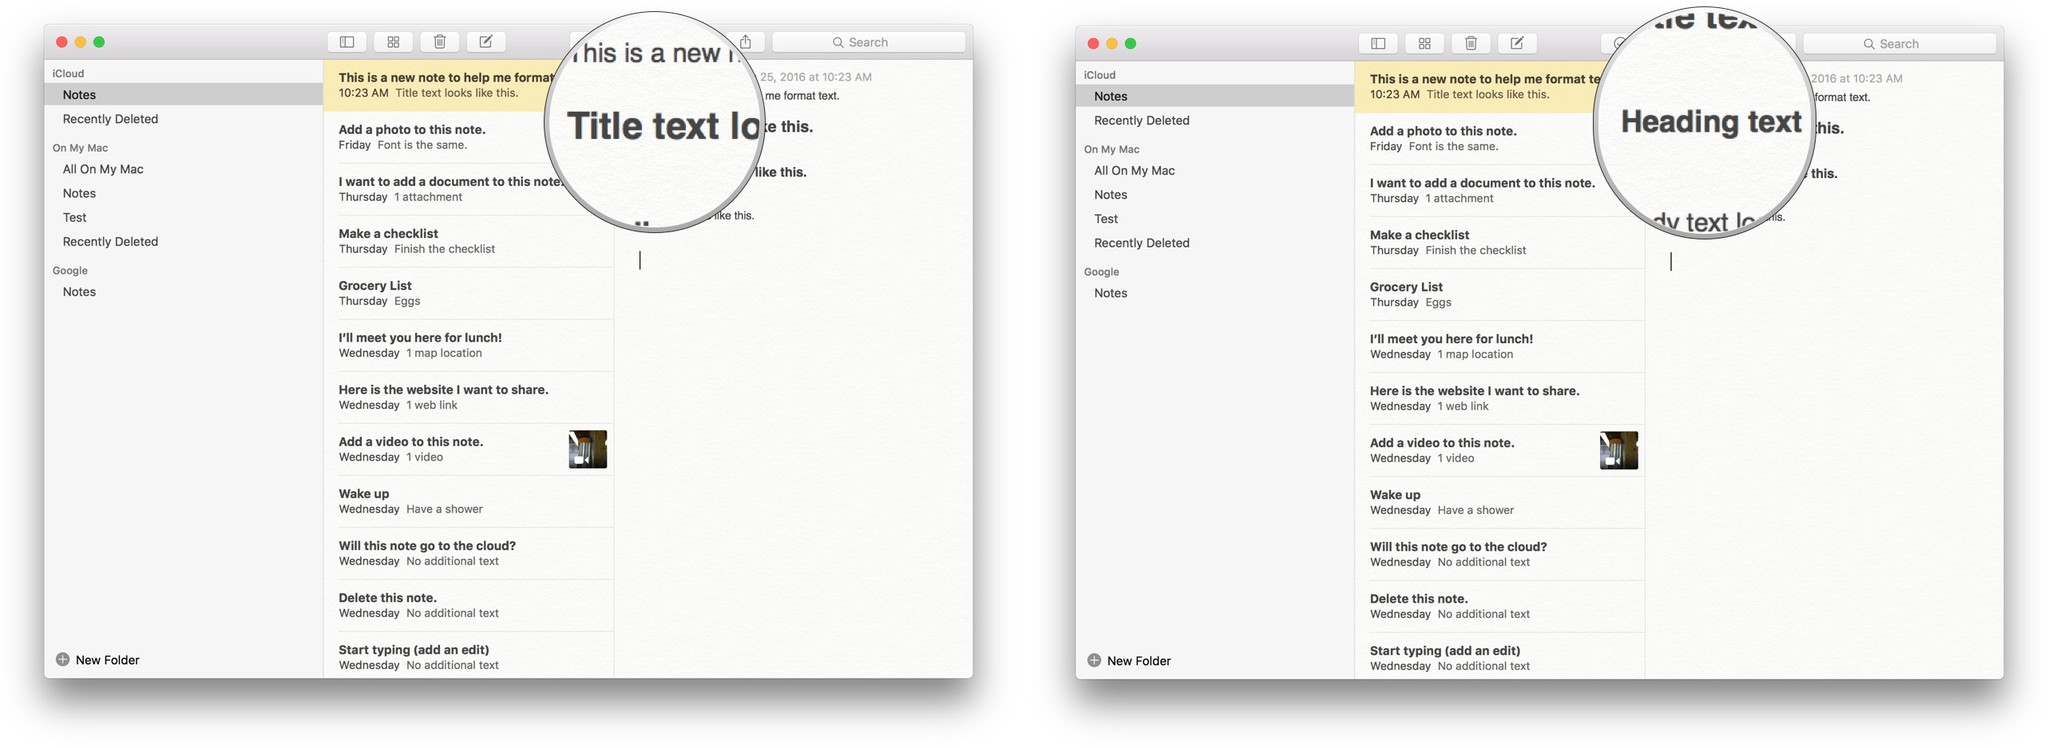
- Select title to type text in a large-sized, title font.
- Select heading to type text in a medium-sized heading font.
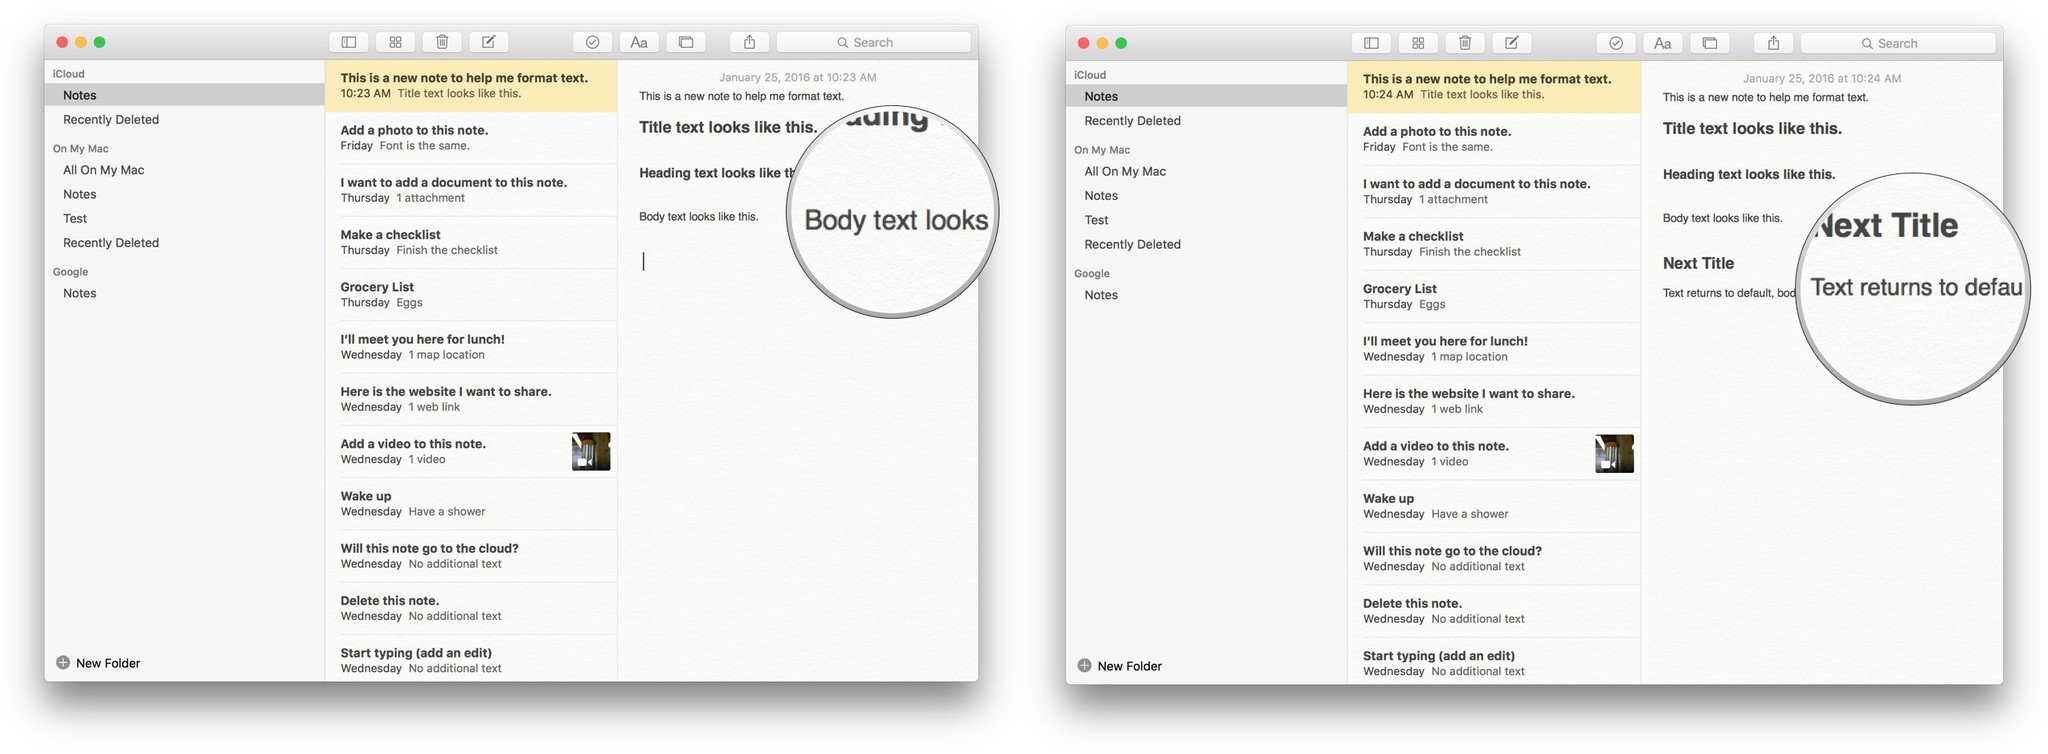
- Select body text to type in the program's default, small-sized font.
- By double-tapping the return key, your text will default to its original body font style.
If you want to convert existing text to a title or heading, highlight the text you want to format and select the style you would like to use from the "choose a style to apply to text" icon.
How to automatically title notes on Mac
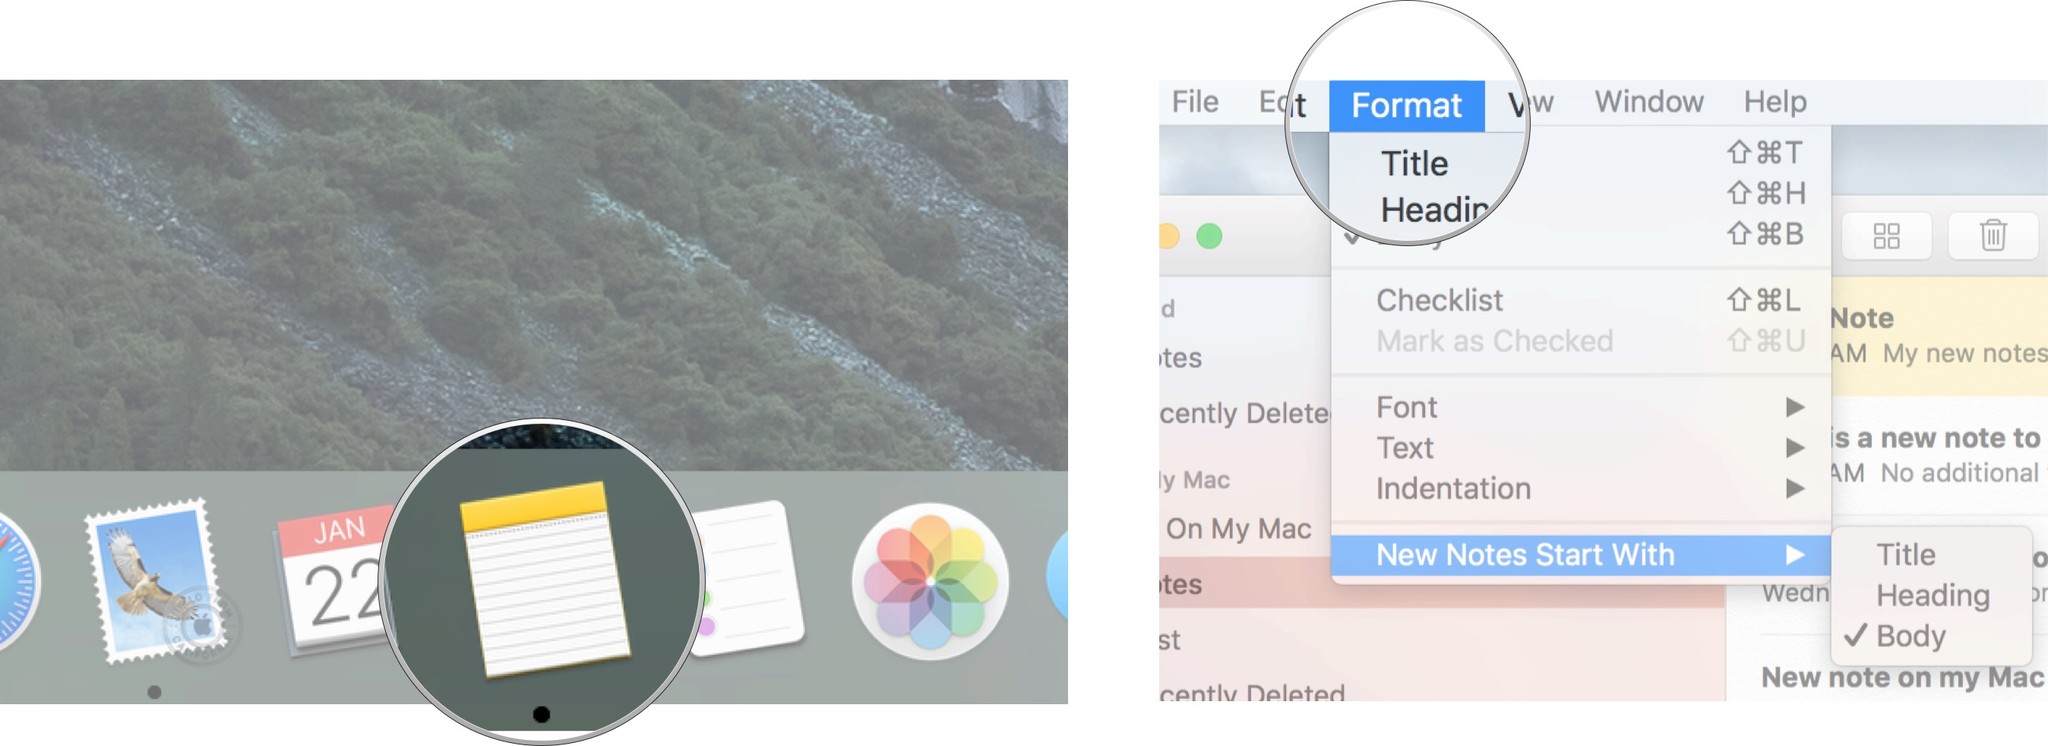
When you start a new note, you can automatically have it begin with one of three main styles: title, heading, or body text.
- Launch Notes from your Mac dock.
- Click Format from from the top menu bar in Notes.
- Scroll to New Notes Start With to launch a list of menu options.
- Click one of the three options so the first words you type in your new notes are formatted as either:
- title
- heading
- body text
How to format text in Notes
You can emphasize importants parts of a note with bold, italicized, and underlined text. This can be helpful when you're composing a long note and want to quickly flag important information or break up long blocks of text.
- Launch notes from your Mac dock.
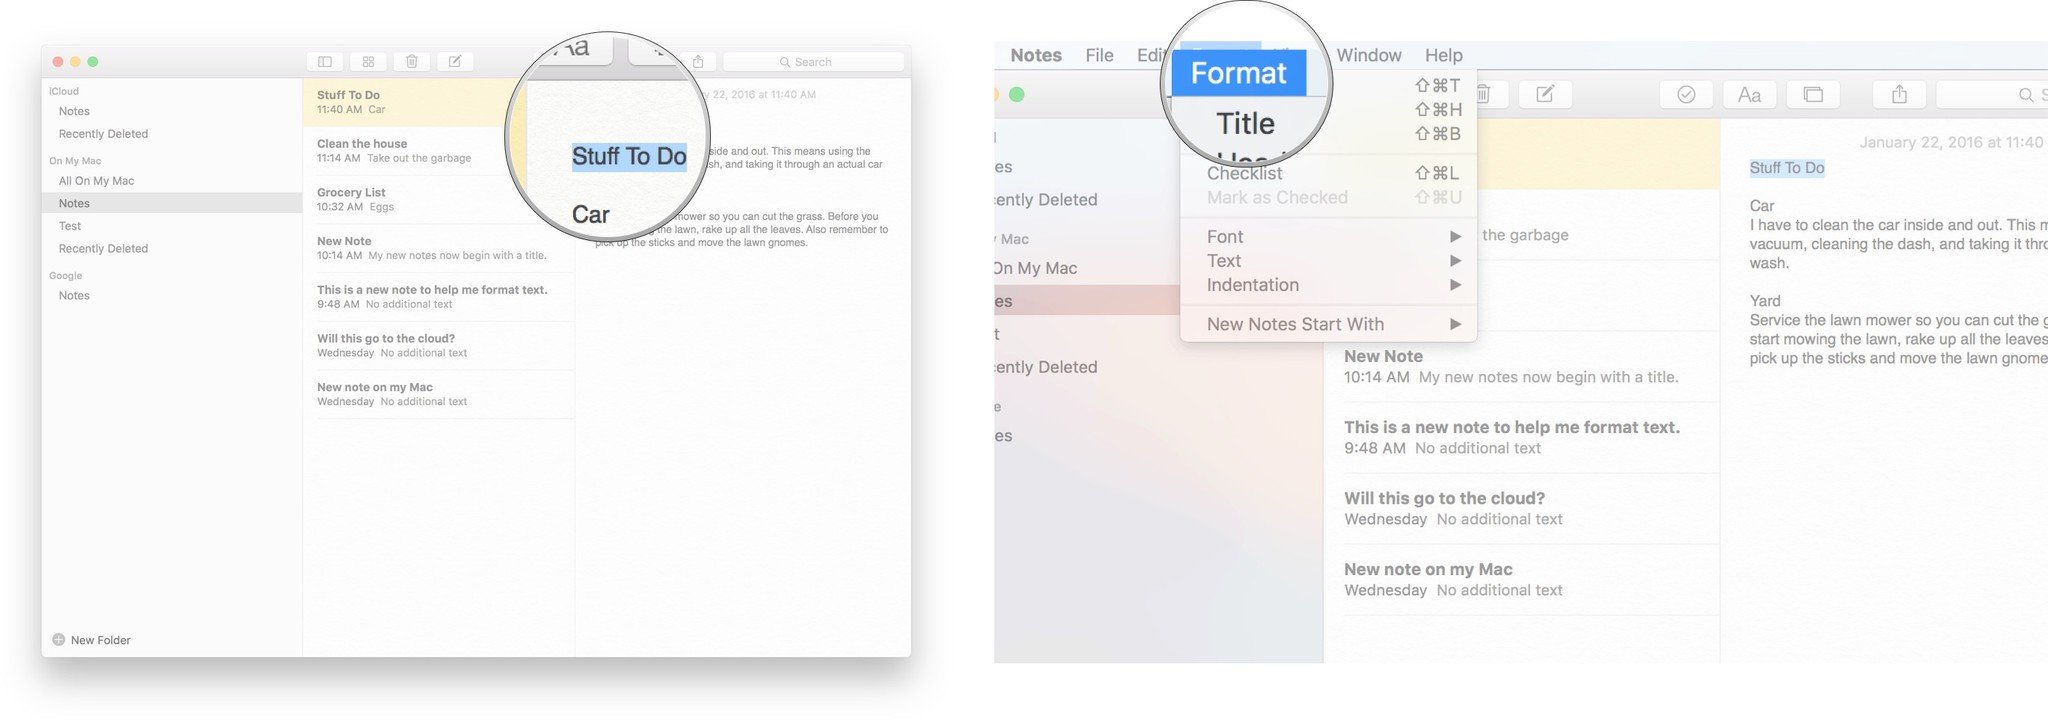
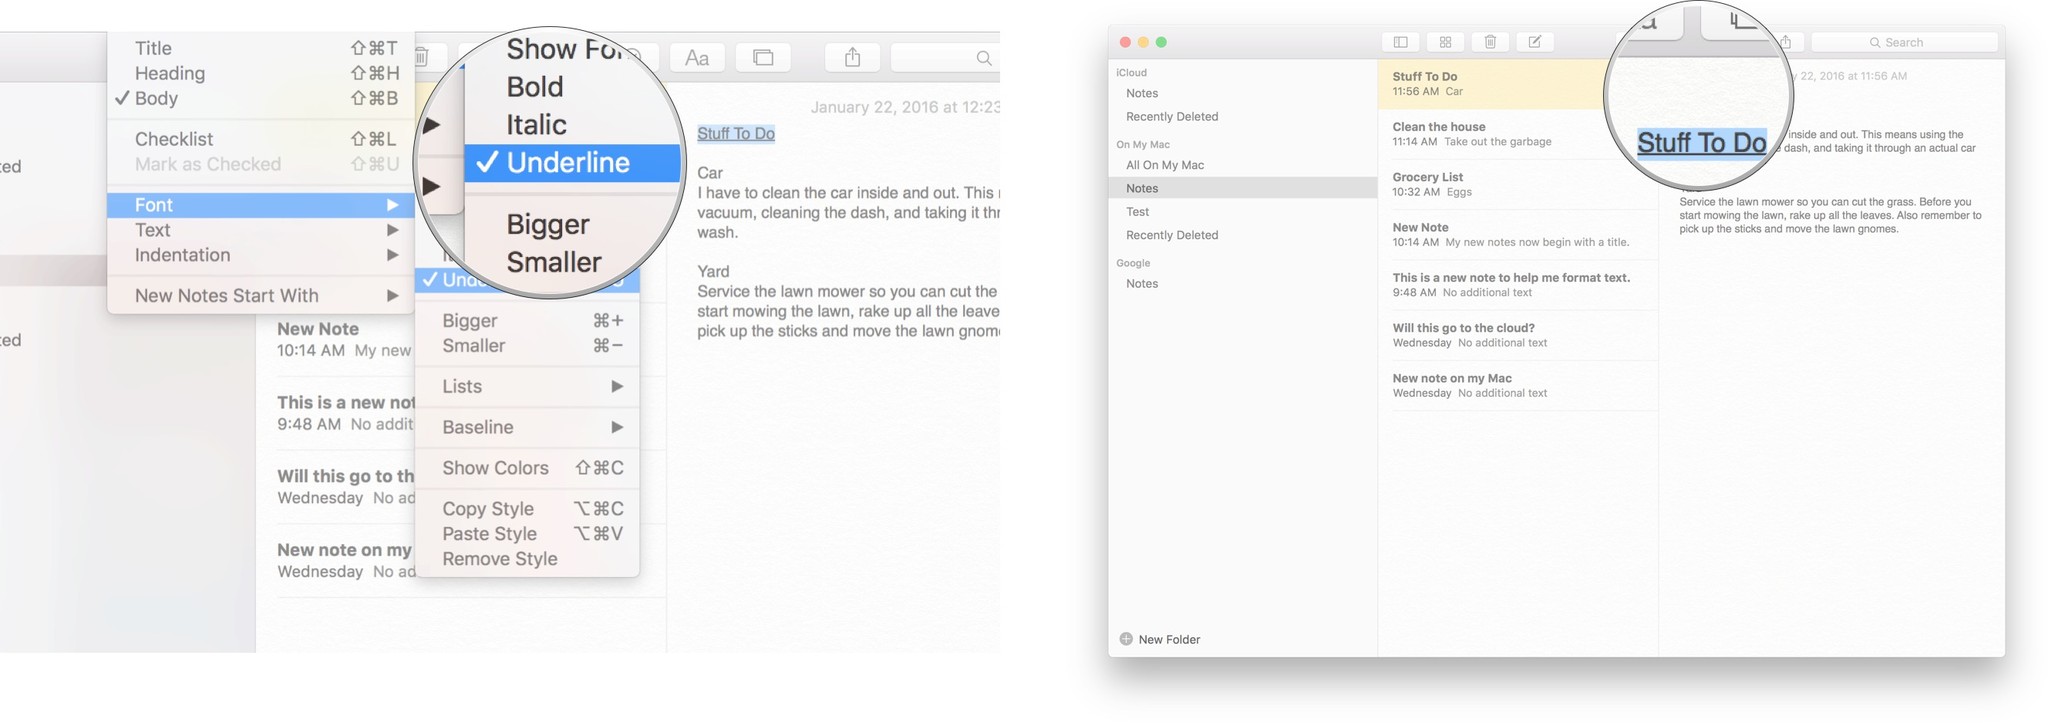
- Click the Create a New Note icon to start a new note, or click on an existing note you would like to format (I selected an existing note called Stuff To Do).
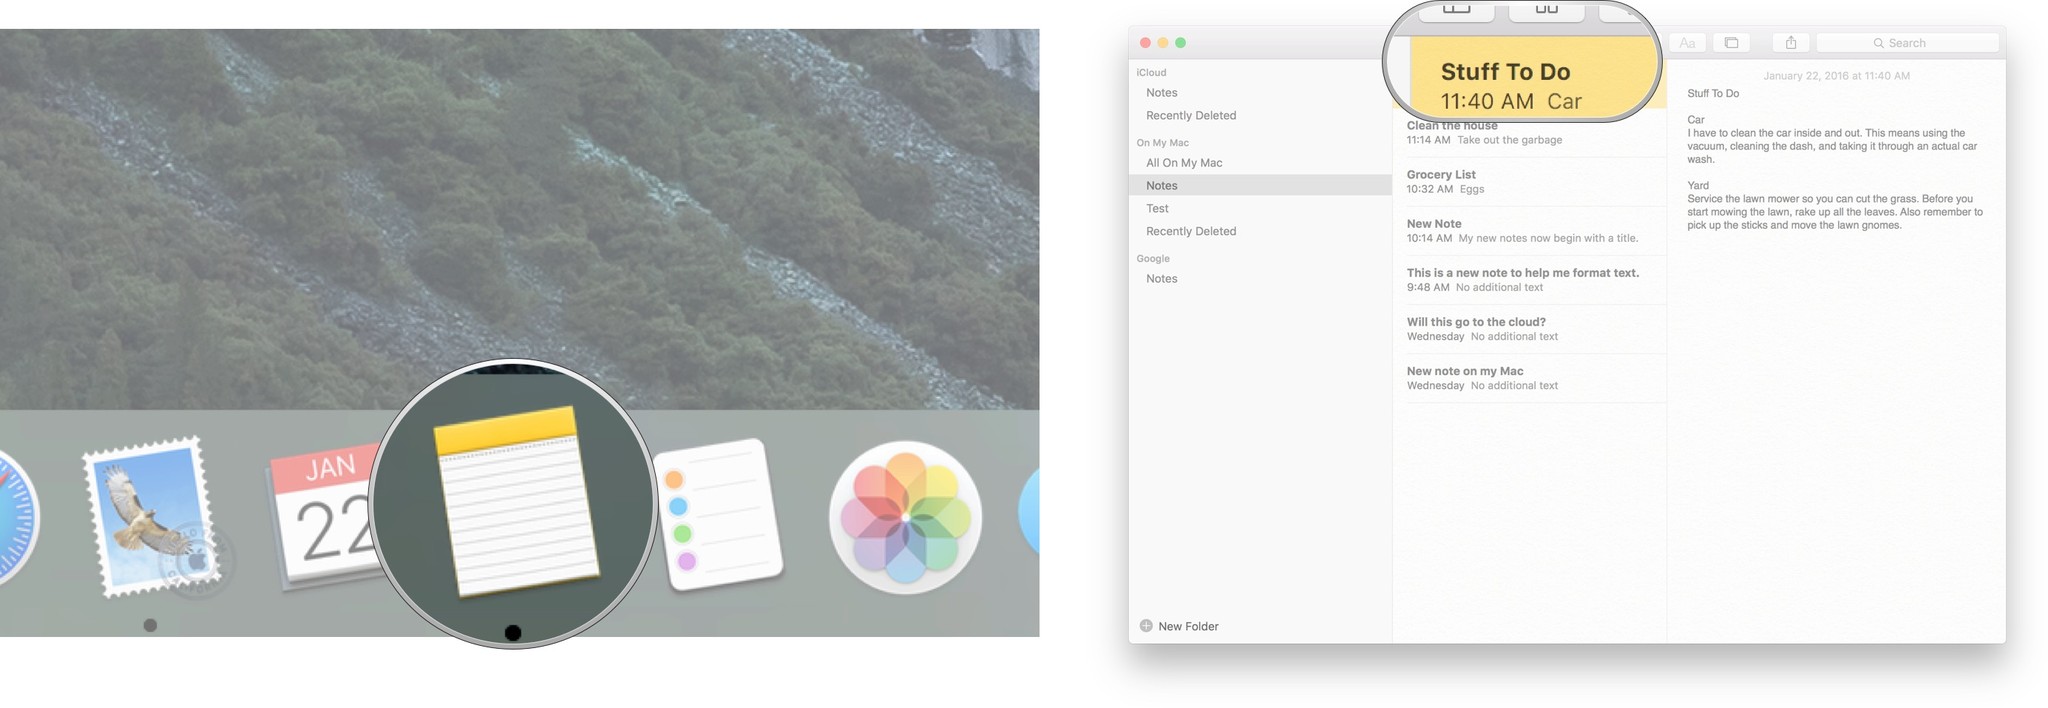
- Select the text you would like to format in Notes (I selected "Stuff To Do").
- Click Format from the top menu bar.
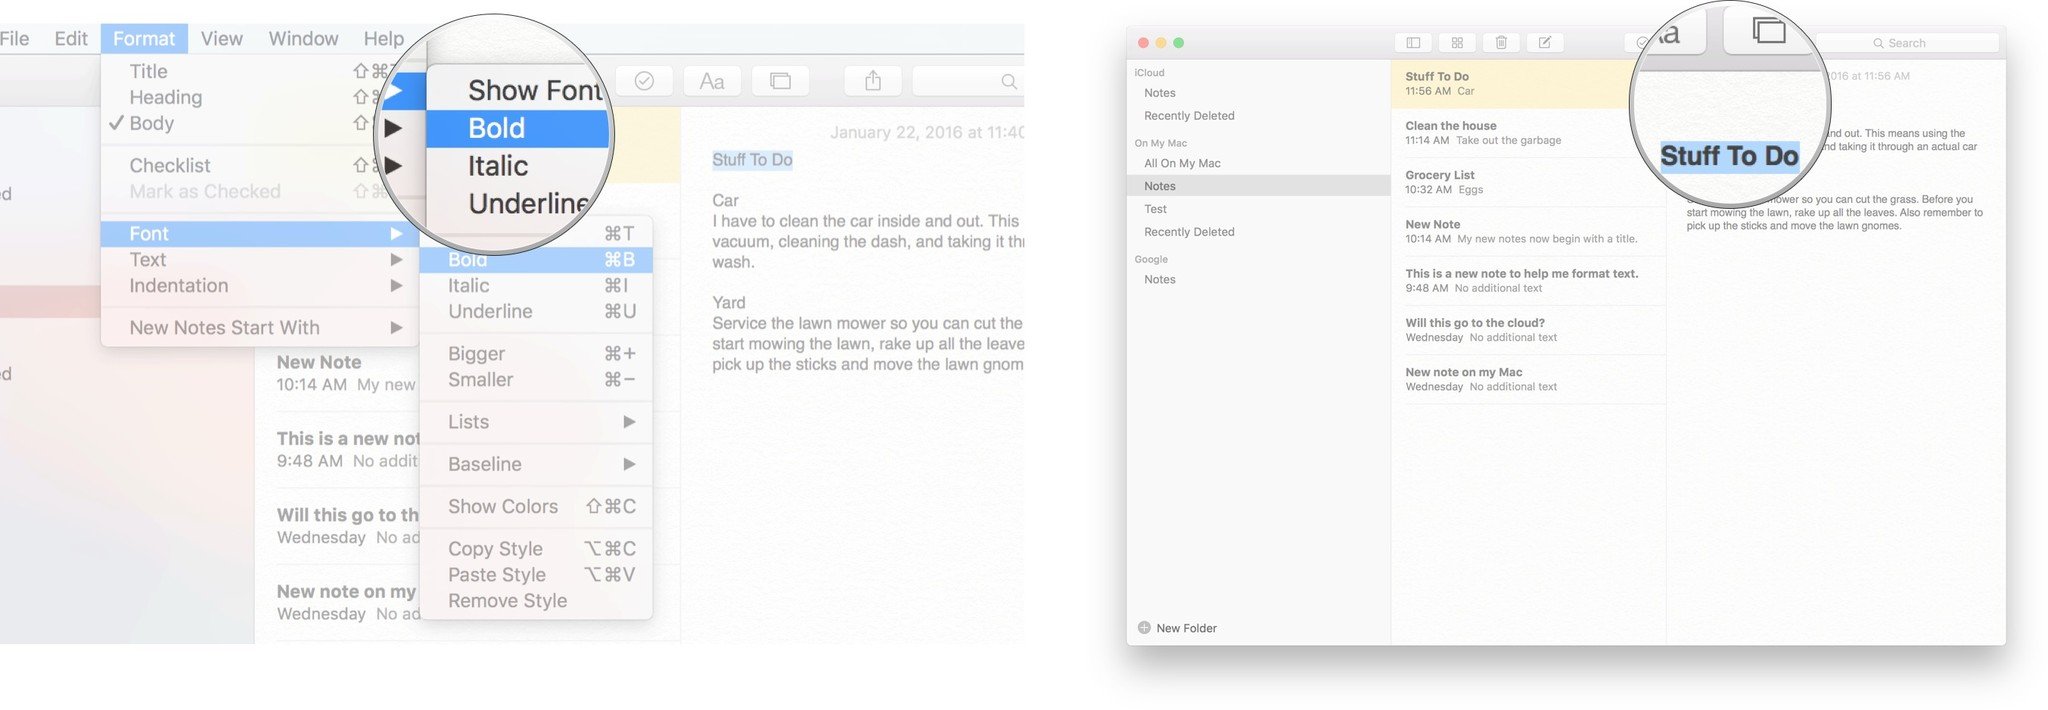
- Drag your mouse over Font to activate a side menu.
- From this side menu you can format your text in several ways including making it bold, italicized, and underlined.
- Click Bold to convert your highlighted text to a bold format.
- Your highlighted text will now be formatted into bold.
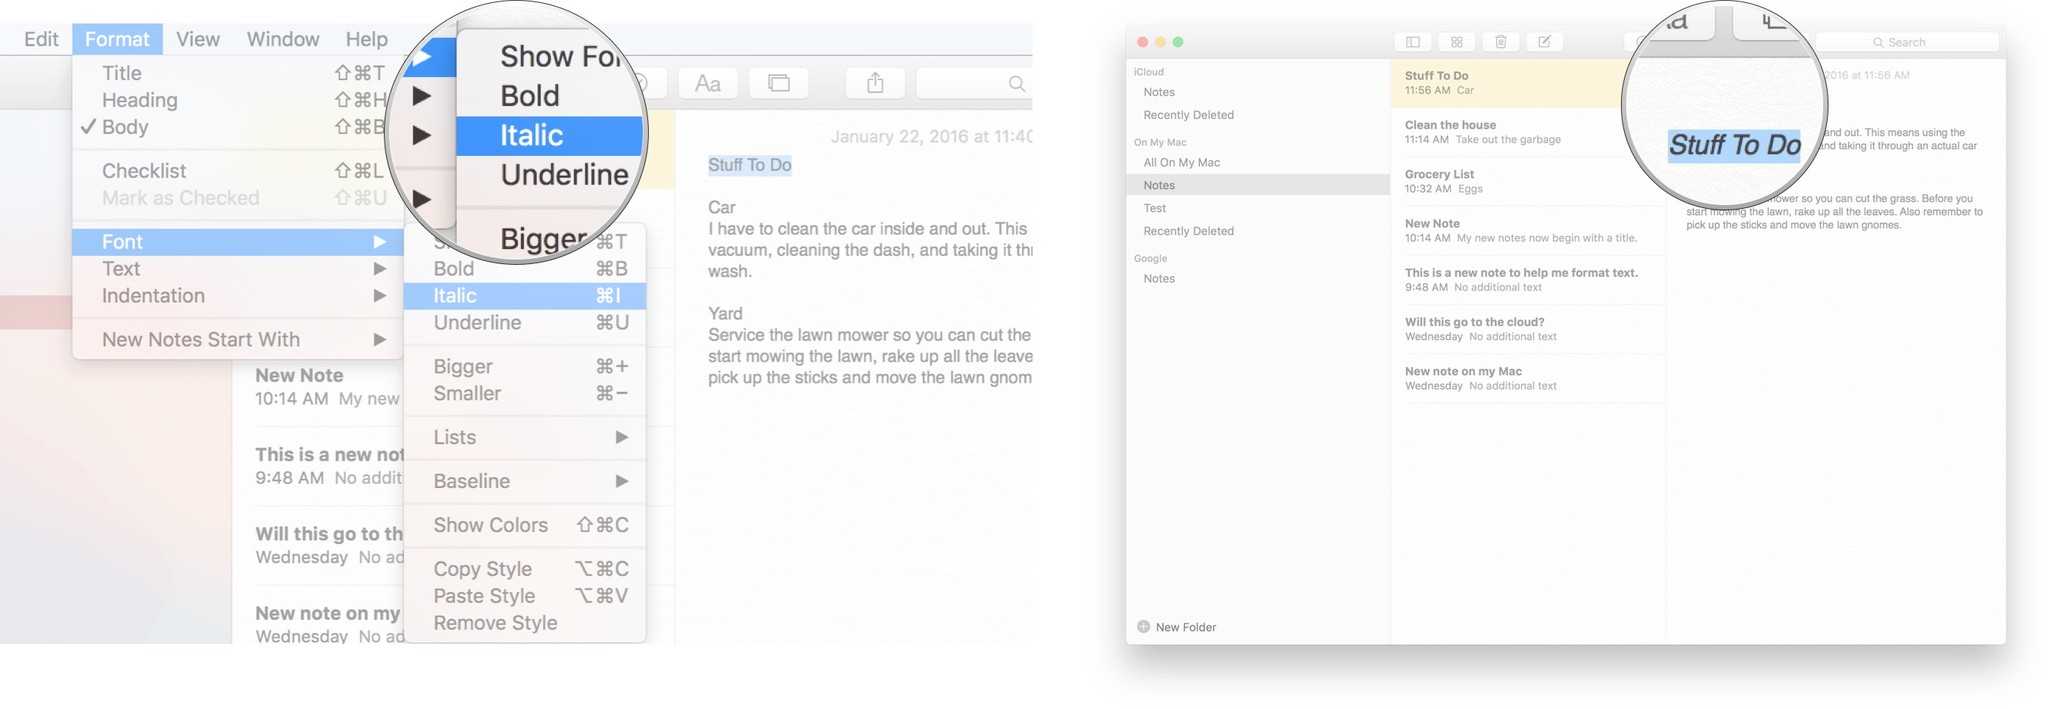
- Click Italics to italicize your text.
- Your highlighted text will now be formatted into Italics.
- Click Underline to underline your selected text.
- Your highlighted text will now be underlined.
For a faster way to format text, highlight the text you want to format then use the following shortcuts:
- Command+B = bold
- Command+I = italics
- Command+U = underline
How to use lists in Notes on Mac
In the same menu as the titles and headings, you can also create lists in Notes. You can create a bulleted, dashed, or numbered list.
- Launch notes from your Mac dock.
- Click the Create a New Note icon to start a new note.
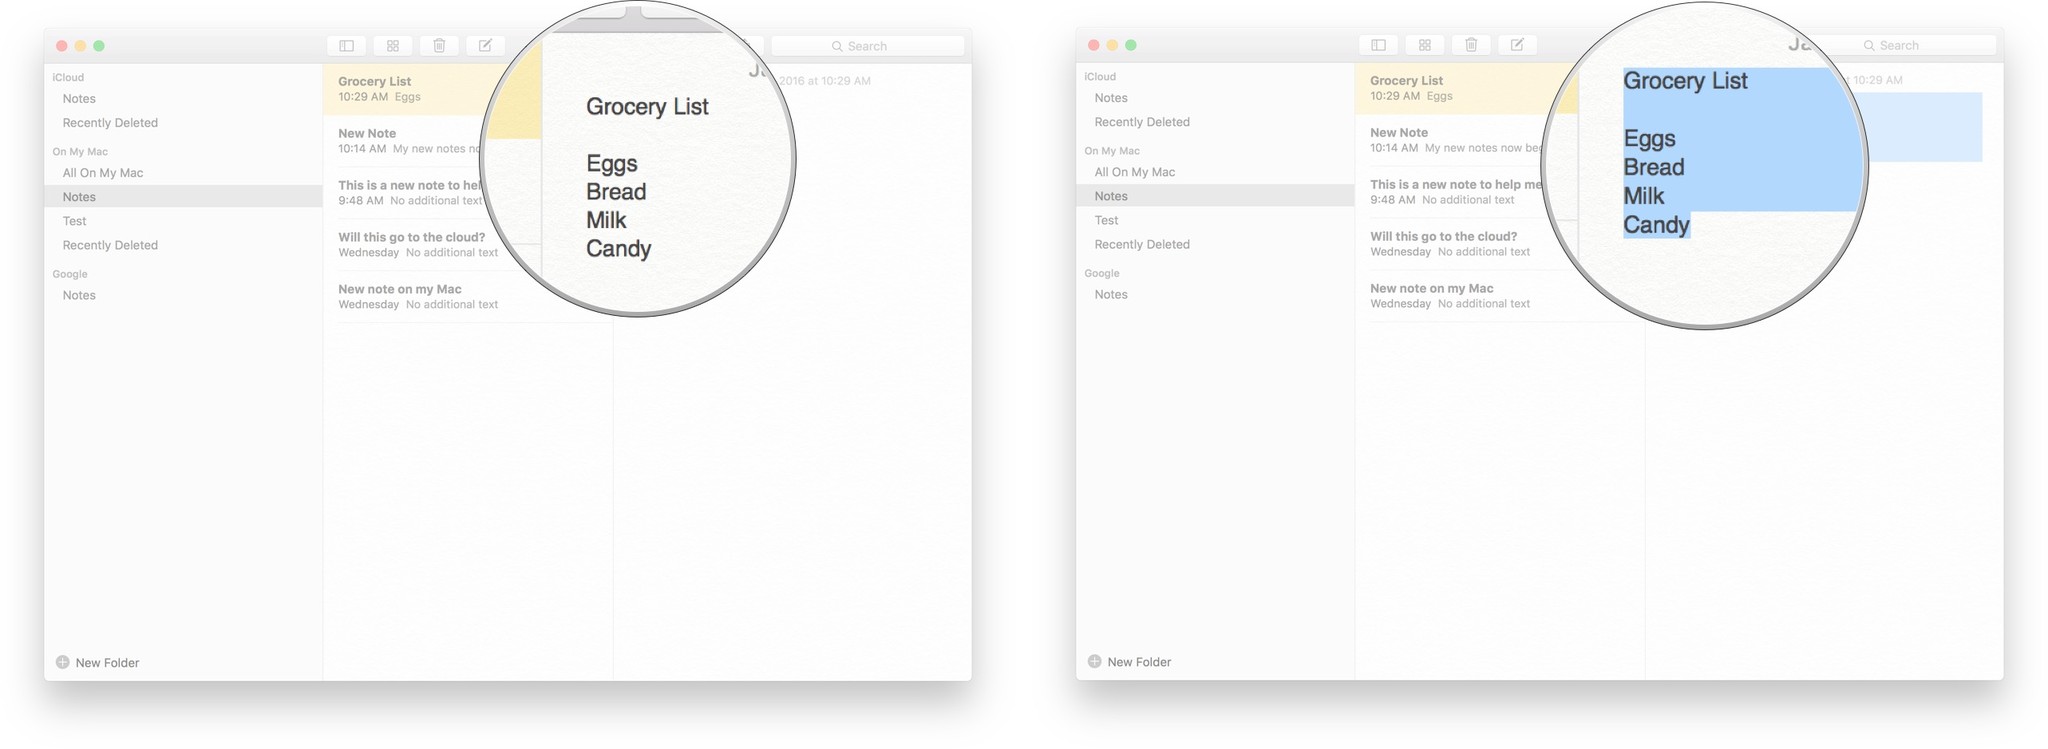
- Type the text you want to format into a list (eg. a grocery list).
- Highlight the text you would like to format into a list.
- Click the "Aa" icon from the Notes menu, which will bring up a variety of list styles:
- Bulleted list
- Dashed list
- Numbered list
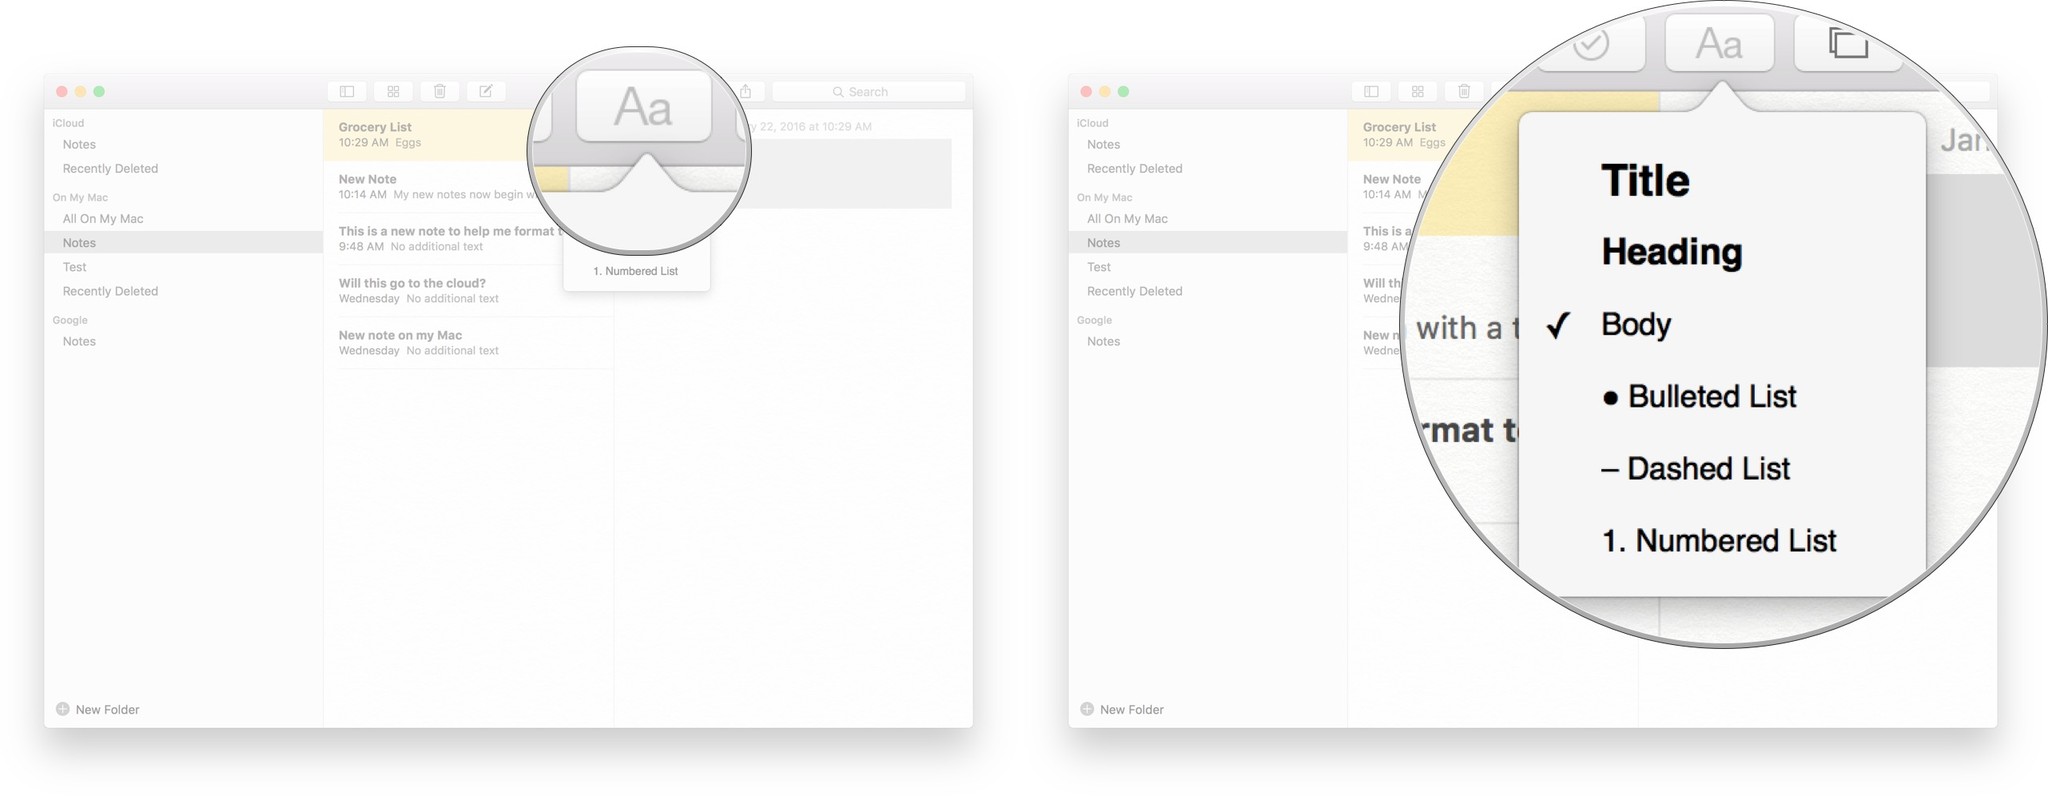
Note: Double-tap the return key to stop typing in list form and resume typing in body text.
iMore offers spot-on advice and guidance from our team of experts, with decades of Apple device experience to lean on. Learn more with iMore!
How to create checklists in Notes
Checklisting items in Notes is a great way to organize your to-do list and enjoy that satisfying feeling that comes with seeing your tasks accomplished.
- Launch notes from your Mac dock.
- Click the Create a New Note icon to start a new note.
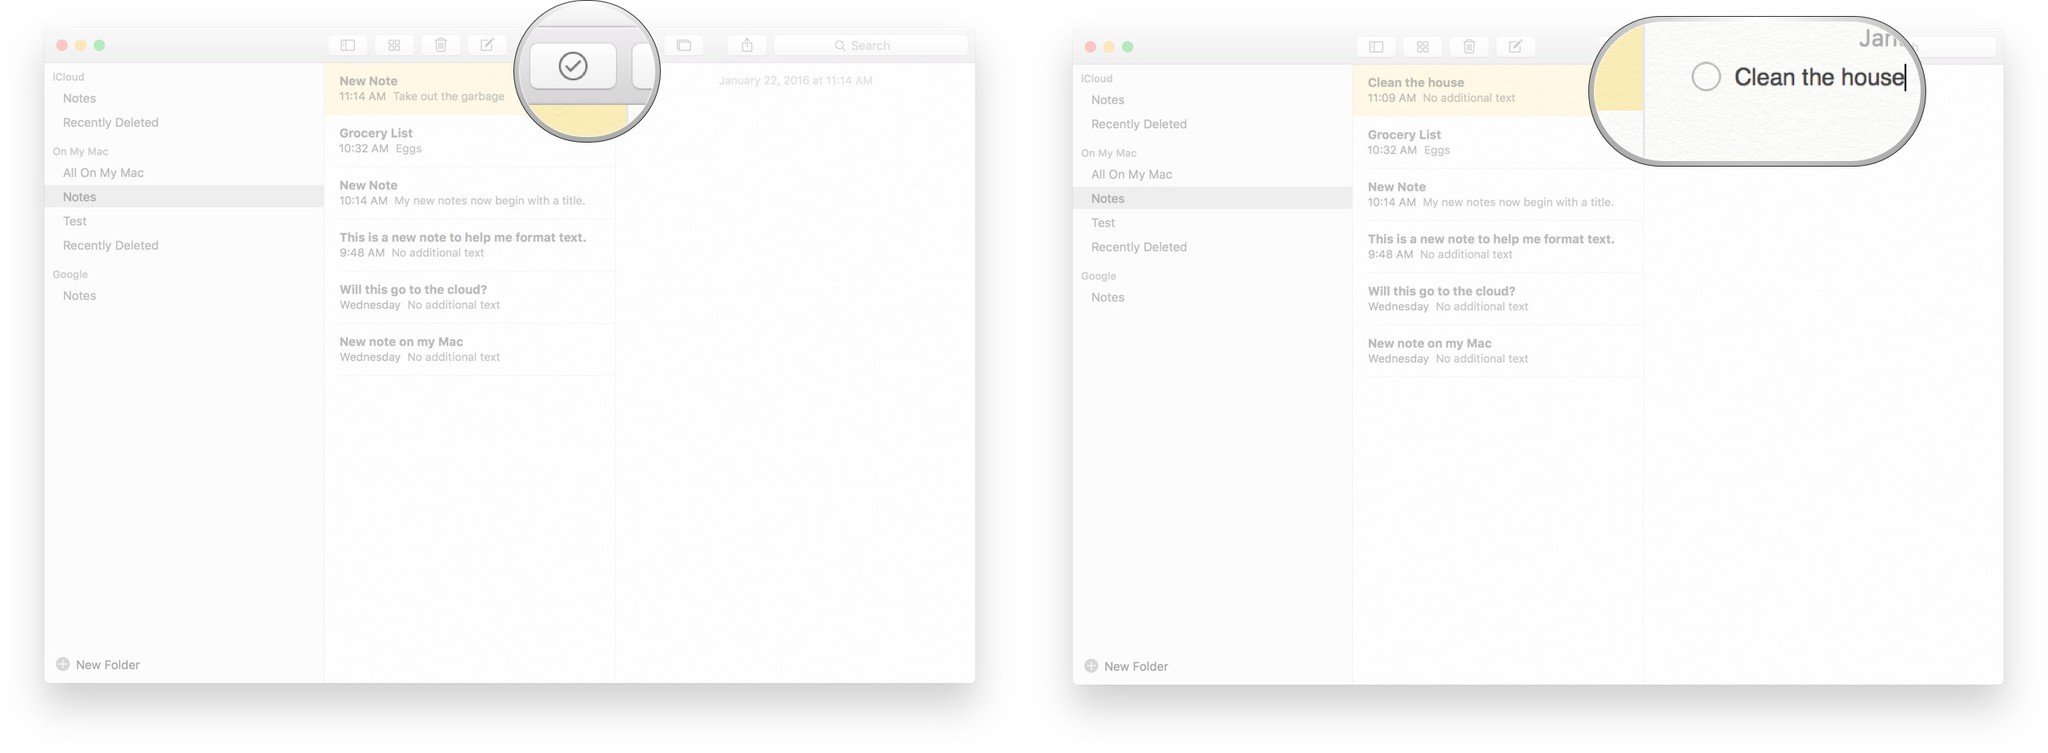
- Click the Make a Checklist icon (it has a circle with a checkmark in it).
- Begin typing whatever you want your first checklist item to be.
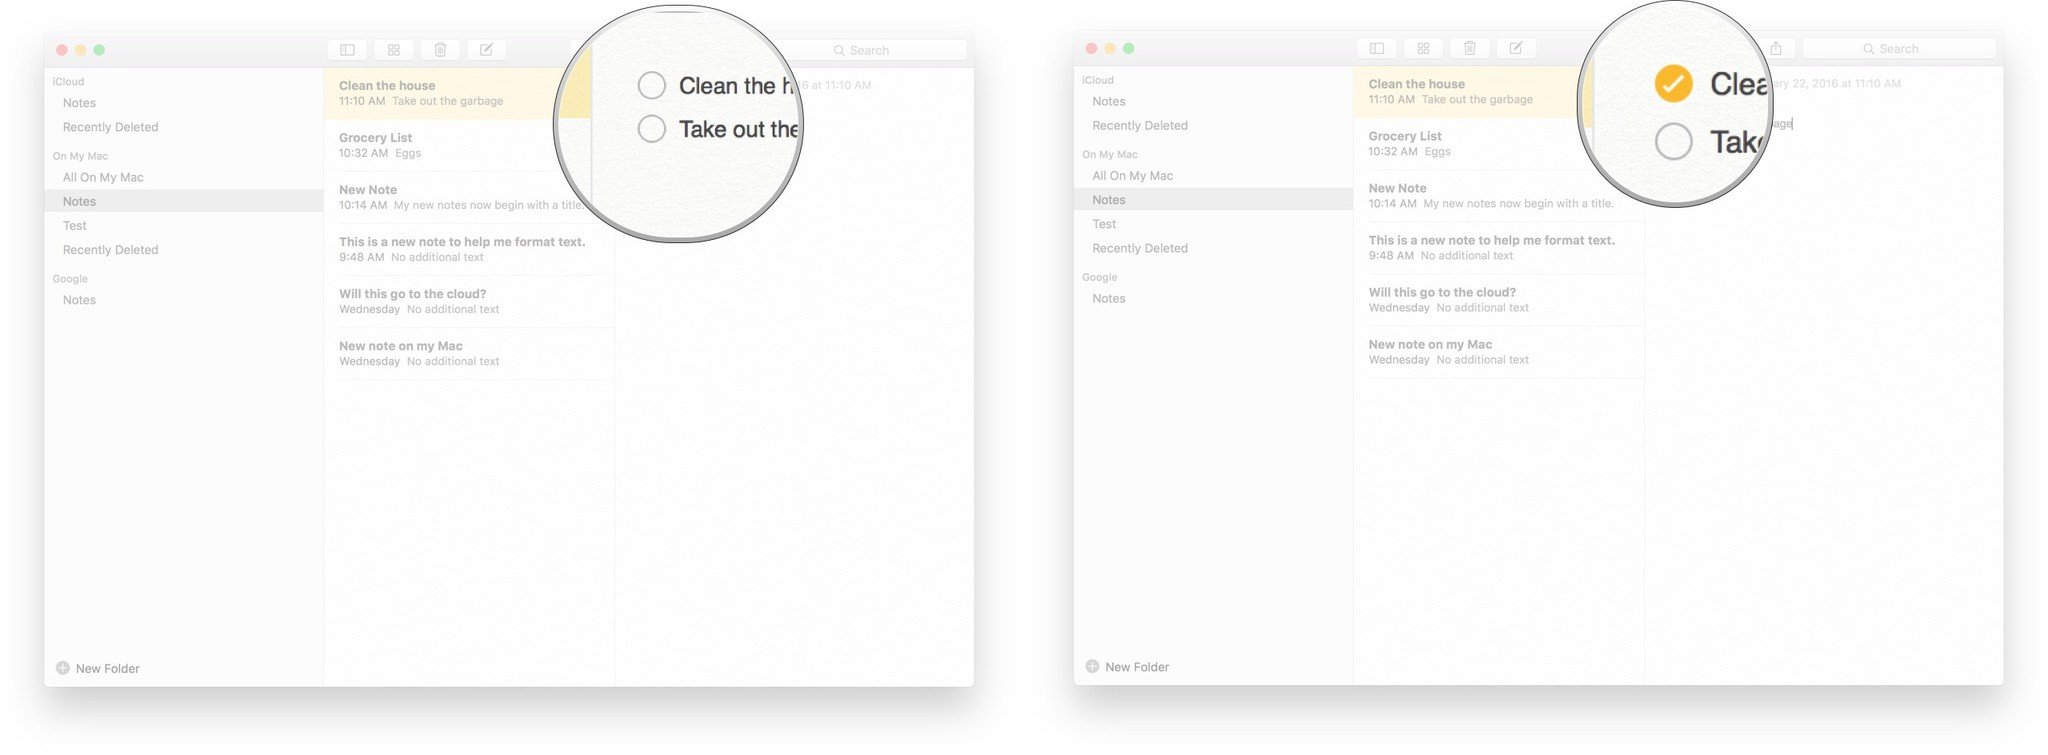
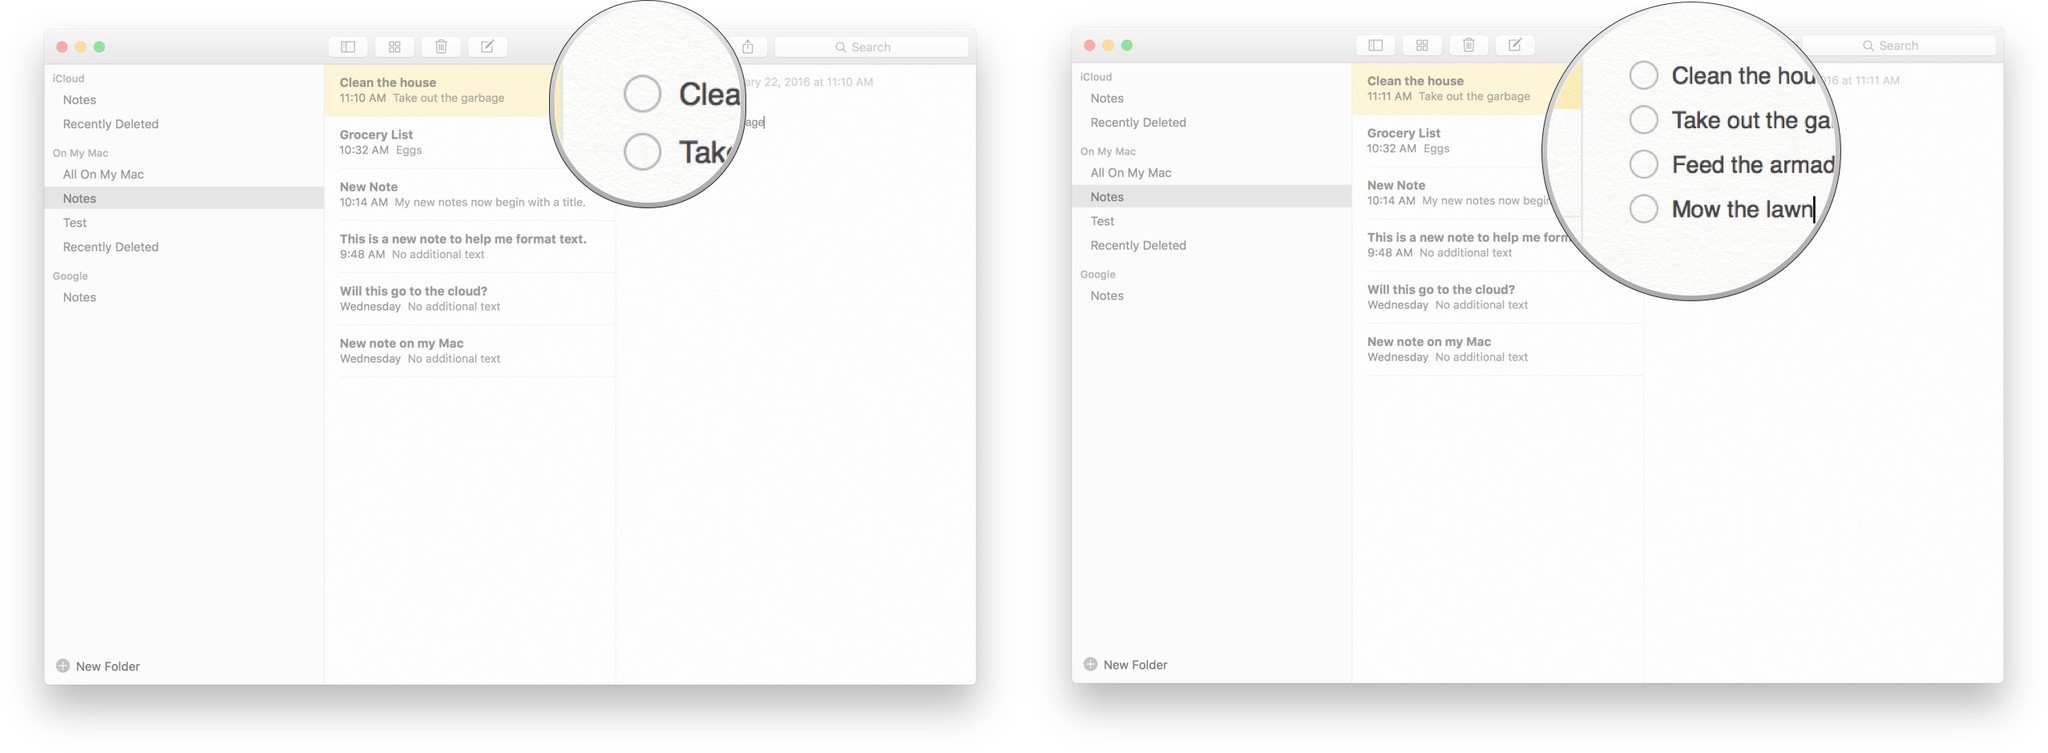
- Press the return key to begin typing your next checklist item.
- Click the checklist bullet point to check them off.
- Click a checked item to uncheck it.
- Add additional items to your checklist by pressing return to trigger a new checklist bullet point.
Tip: You can select multiple lines of text and click the Checklist icon to turn each line into an item on the checklist.
Note: While the interactive icons on the checklist items works in the Notes on Mac OS X and the Notes App, if you want to share the note via email or text, the checkboxes convert to bullet points.
"Siri, write a really funny bio for me to use for Mobile Nations" "Okay, Drew, here's your really funny bio: How-to writer, fiddle player, retro gamer."
