How to use iCloud Private Relay on iPhone and iPad

Alongside the launch of iOS 15 and iPadOS 15, Apple launched a new service called iCloud+. One of the features of iCloud+ is Private Relay, which allows you to browse Safari on your iPhone and iPad a little more securely. After all, a secure iPhone is the best iPhone.
Here's everything you need to know about using iCloud Private Relay on your iPhone and iPad.
What is iCloud Private Relay?
iCloud Private Relay can easily be mistaken for a Virtual Private Network (VPN), but in reality, it's much more limited than what a VPN service provides. iCloud Private Relay does hide your IP address like a VPN, but it doesn't fully spoof your location. In other words, you can't use iCloud Private Relay to fool Netflix into thinking you're in a different country. What it's designed to do, though, is encrypt all your connections not using HTTPS, hide your real IP address, and prevent anyone — even Apple — from knowing both who you are and where you're connecting to on the web. In short, Private Relay makes browsing the web in Safari on your iPhone and iPad a little more secure.
How to turn on iCloud Private Relay on iPhone and iPad
If you've signed up for iCloud+, Private Relay should be enabled automatically. If it isn't, or you want to check and ensure it's enabled, here's how to turn on iCloud Private Relay.
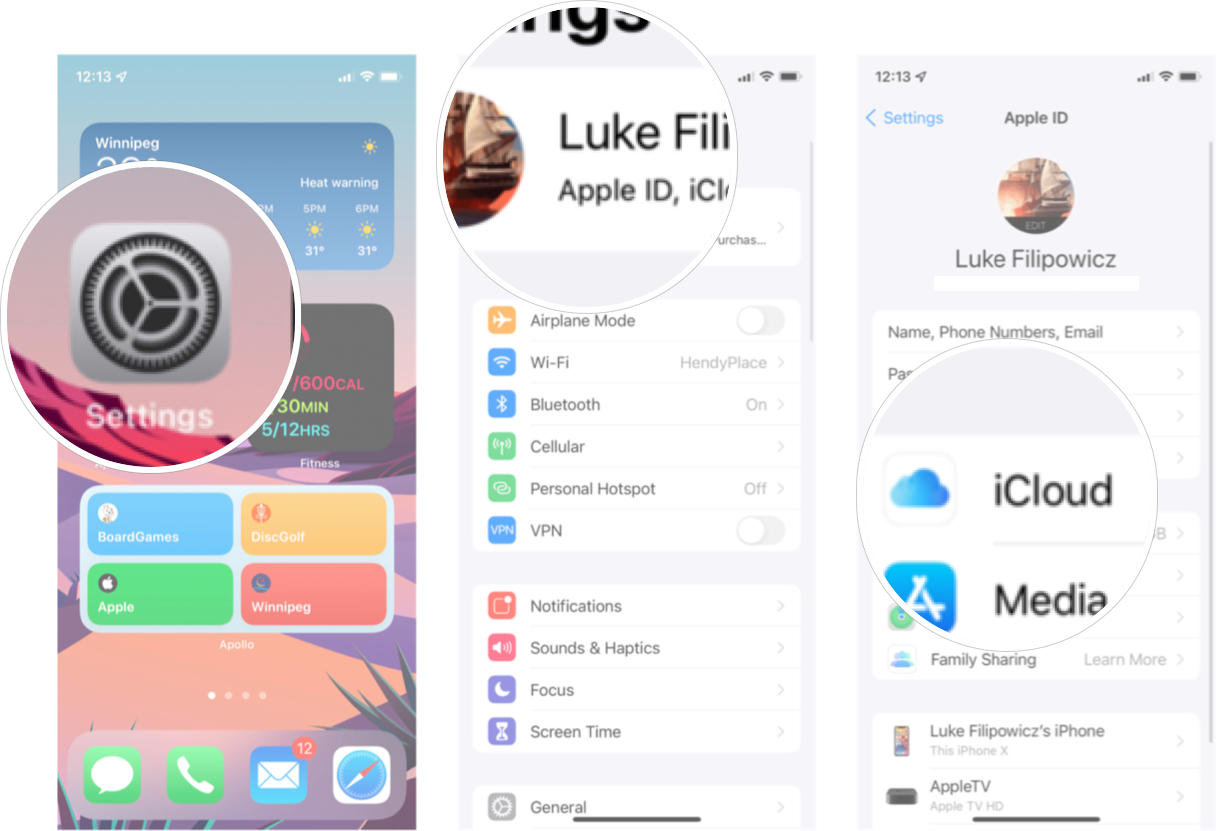
- Launch Settings from your Home screen.
- Tap your Apple ID banner located at the top of the screen.
- Tap *iCloud**.
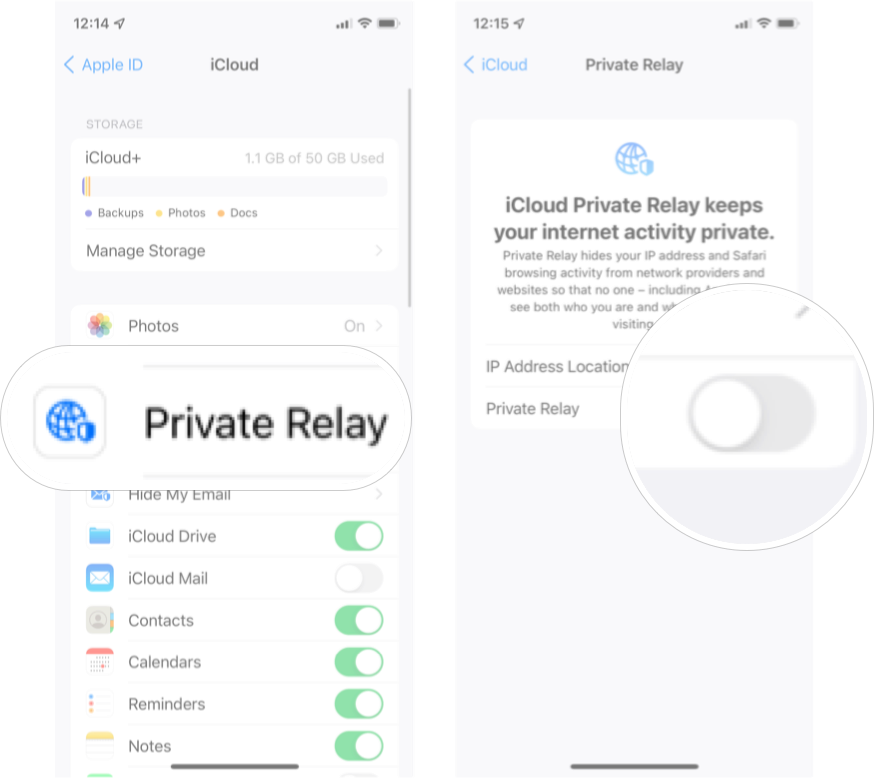
- Tap Private Relay.
- Tap the Private Relay On/Off Switch. The switch will be green when the feature is enabled.
You can turn off Private Relay anytime you want by following the same direction above.
How to change IP address settings for iCloud Private Relay
There are two different options to obscure your IP address for iCloud Private Relay: Maintain General Location and Use Country and Time Zone.
The Maintain General Location option will still hide your IP address but keep you in the same general location you're already in, so you can still get local content in Safari if you want.
iMore offers spot-on advice and guidance from our team of experts, with decades of Apple device experience to lean on. Learn more with iMore!
The Use Country and Time Zone option will keep you in the same country and time zone you're currently in, but allow you to use a broader location. You may not see the same local content in Safari if you choose this option.
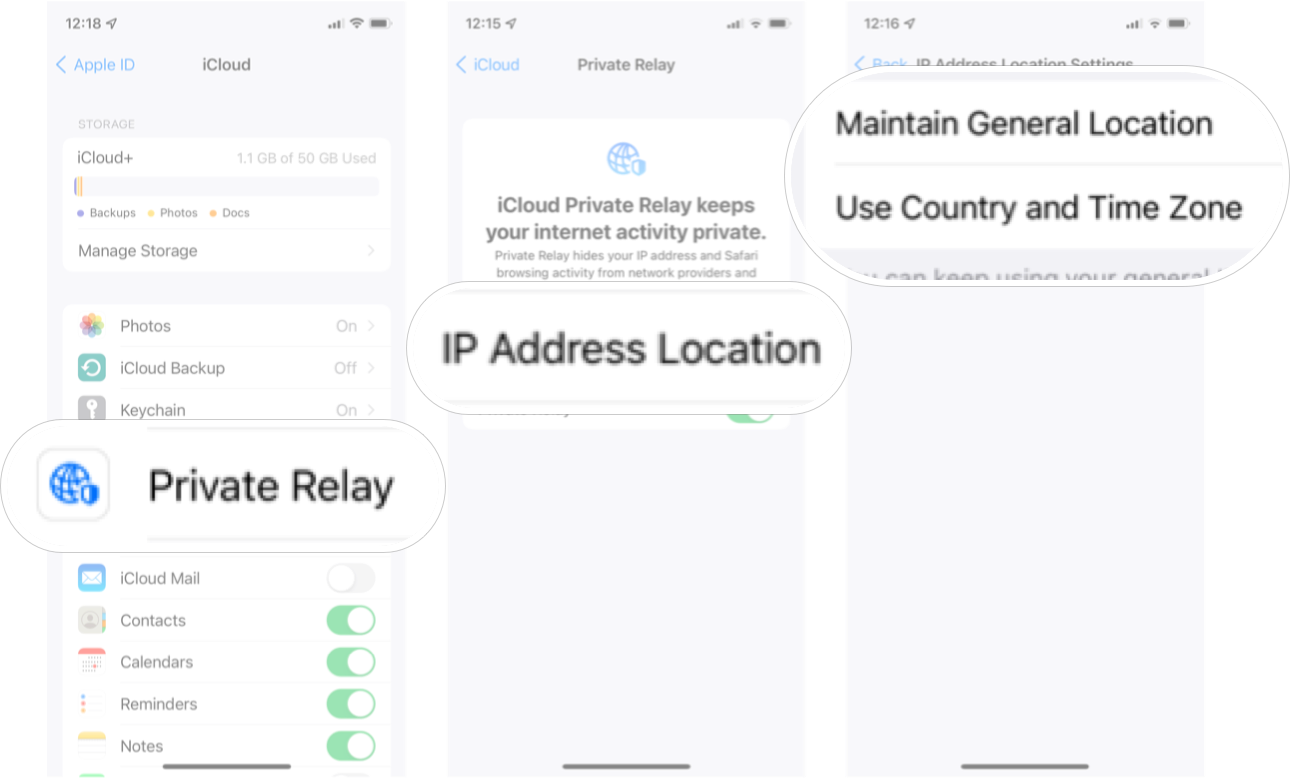
- Launch Settings from your Home screen.
- Tap your Apple ID banner located at the top of the screen.
- Tap iCloud.
- Tap Private Relay.
- Tap IP Address Location.
- Tap the option you want.
You can change the option you have selected at any time by following the same steps posted above.
Any questions?
Anything unclear about using Private Relay on your iPhone and iPad? Let us know in the comment section down below.

Luke Filipowicz has been a writer at iMore, covering Apple for nearly a decade now. He writes a lot about Apple Watch and iPad but covers the iPhone and Mac as well. He often describes himself as an "Apple user on a budget" and firmly believes that great technology can be affordable if you know where to look. Luke also heads up the iMore Show — a weekly podcast focusing on Apple news, rumors, and products but likes to have some fun along the way.
Luke knows he spends more time on Twitter than he probably should, so feel free to follow him or give him a shout on social media @LukeFilipowicz.


