How to connect hearing aids and use audio accessibility on iPhone and iPad
You can pair your hearing aid to your iPhone and iPad to make sure you don't miss any of the sounds or audio. You can also enable subtitles, switch the music to mono, and more. All because accessibility remains incredibly important to Apple—and its customers.
- How to pair a supported hearing aid to your iPhone or iPad
- How to enable visual notifications on your iPhone using the LED flash
- How to enable mono audio on iPhone and iPad
- How to enable Phone Noise Cancellation on iPhone or iPad
- How to control Audio Balance on iPhone or iPad
- How to manage call audio routing on iPhone and iPad
- How to turn on subtitles and closed captions on iPhone and iPad
How to pair a supported hearing aid to your iPhone or iPad
Hearing aid support is an accessibility feature that allows the iPhone and iPad to connect with and manage compatible hearing aids. You can connect to most Bluetooth enabled hearing aids as well as special MFi—made-for-iPhone and iPad—hearing aids. Made-for-iPhone (and iPad) hearing aids can also be placed into a "live listen" mode where anyone with a hearing impairment can use the iPhone's mic to help pick up conversation and sound.
Apple maintains a list of devices and their hearing aid compatibility (HAC) ratings.
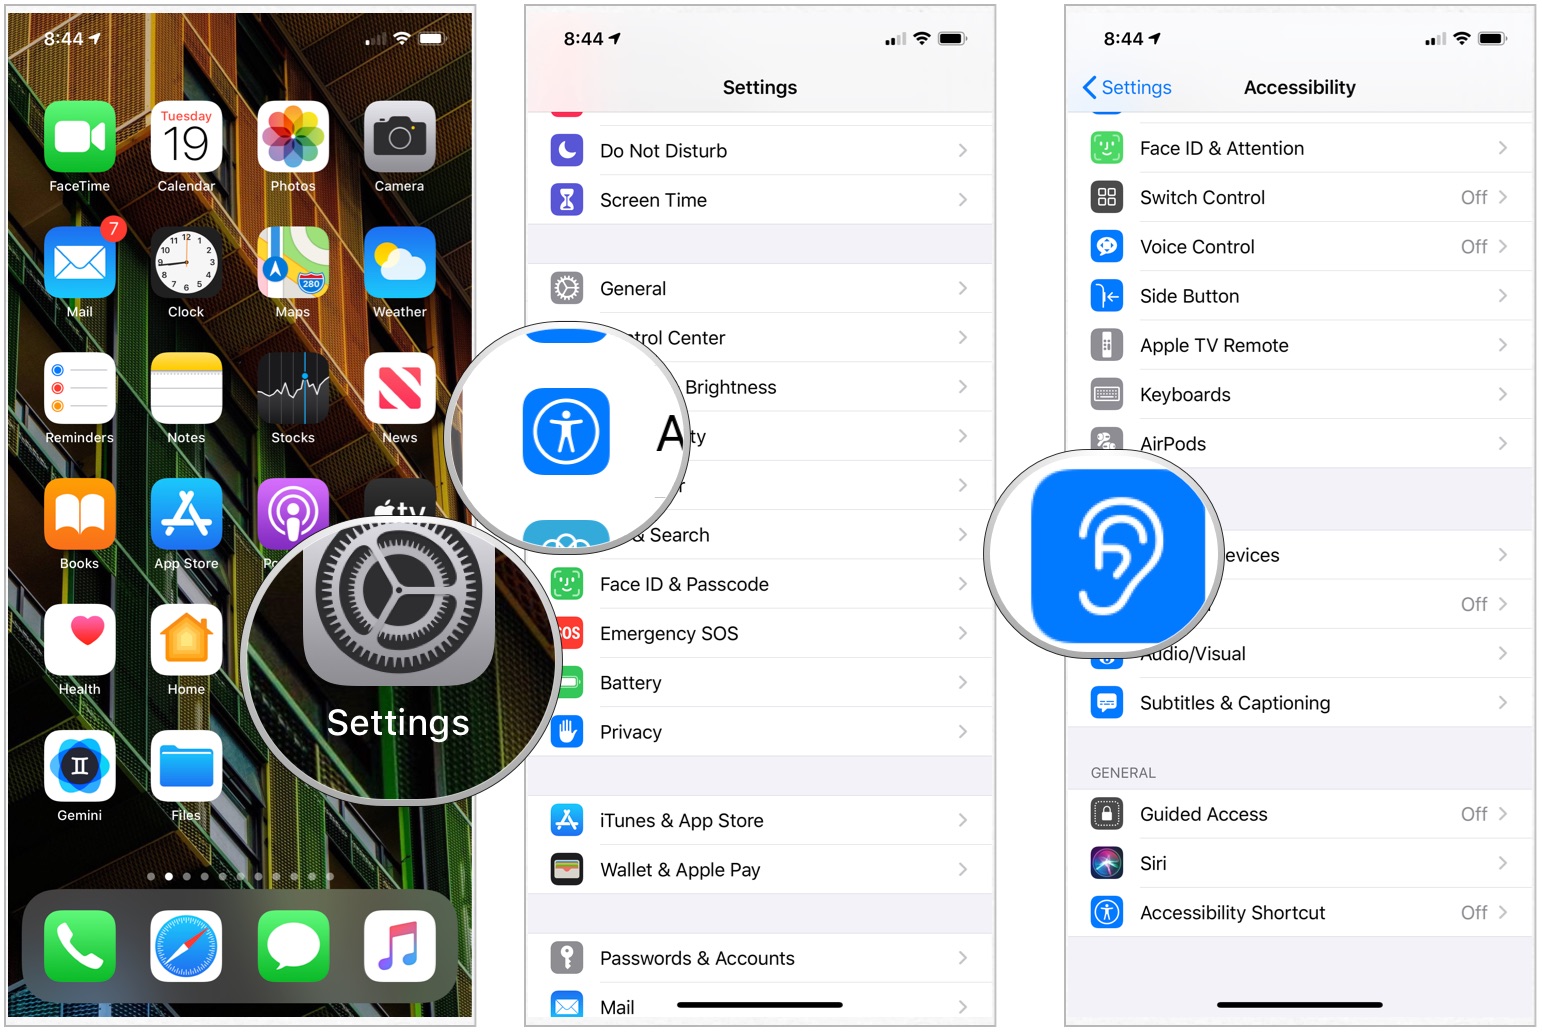
- Launch the Settings app from your Home screen.
- Tap on Accessibility.
- Choose Hearing Devices under the Hearing section.
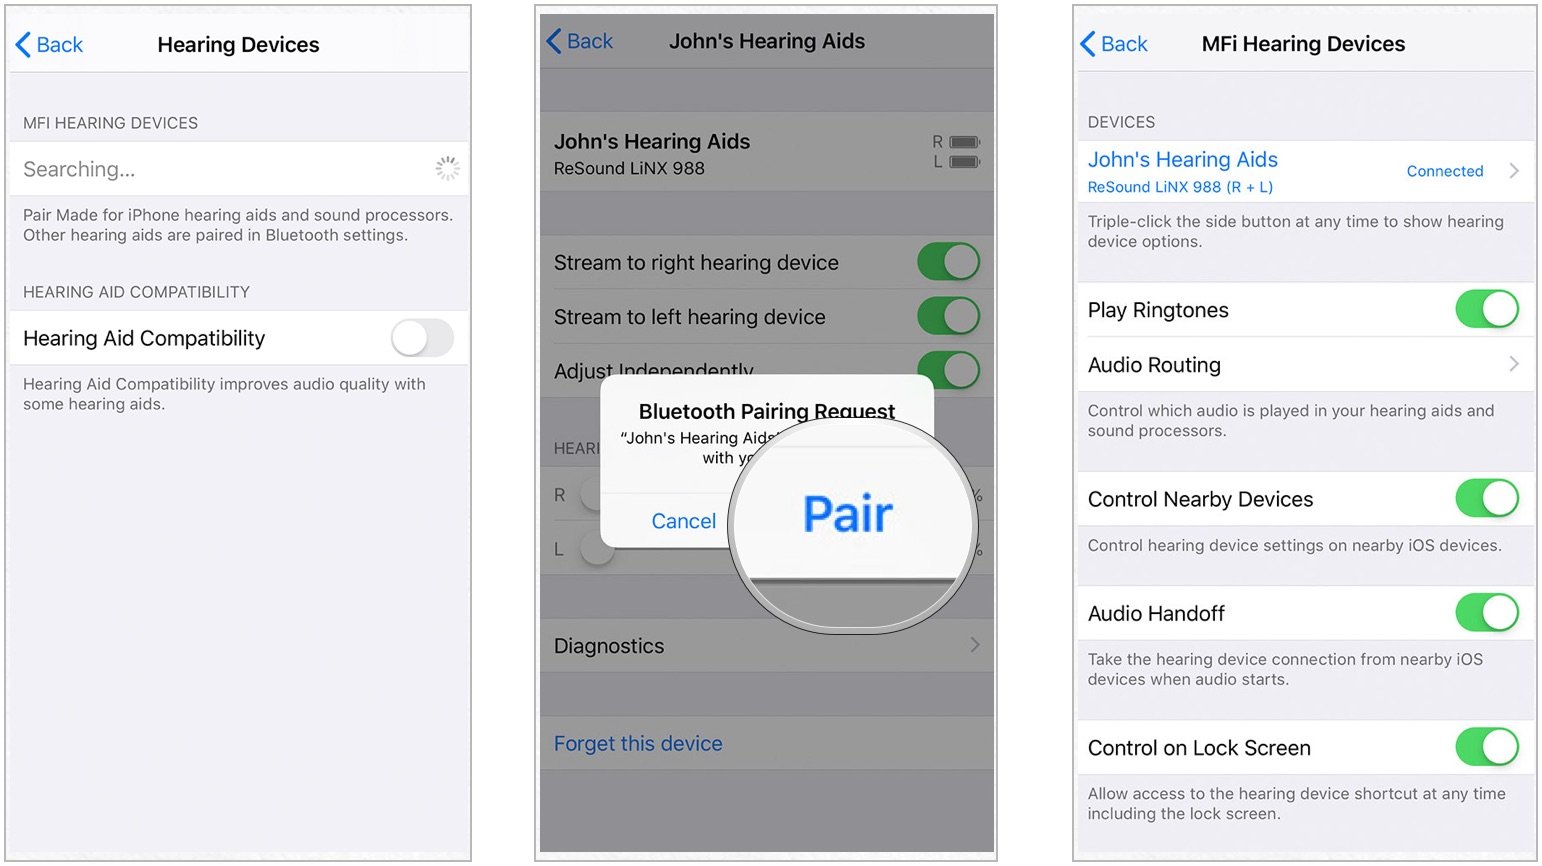
- Close the battery doors on your hearing device. Your Apple device will search for your hearing device. Your iPhone or iPad will automatically search for any compatible hearing aids nearby
- Tap the name of your hearing device under MFi Hearing Devices.
- Tap Pair when you see the pairing request on the screen. If you have two hearing devices, you'll get two requests. Pairing could take up to a minute.
Once pairing is completed, you can use your hearing aids with your iPhone or iPad.
How to enable visual notifications on your iPhone using the LED flash
iPhone doesn't include a dedicated notification light. It does, however, let you use the LED flash to provide a visible cue for incoming notifications.
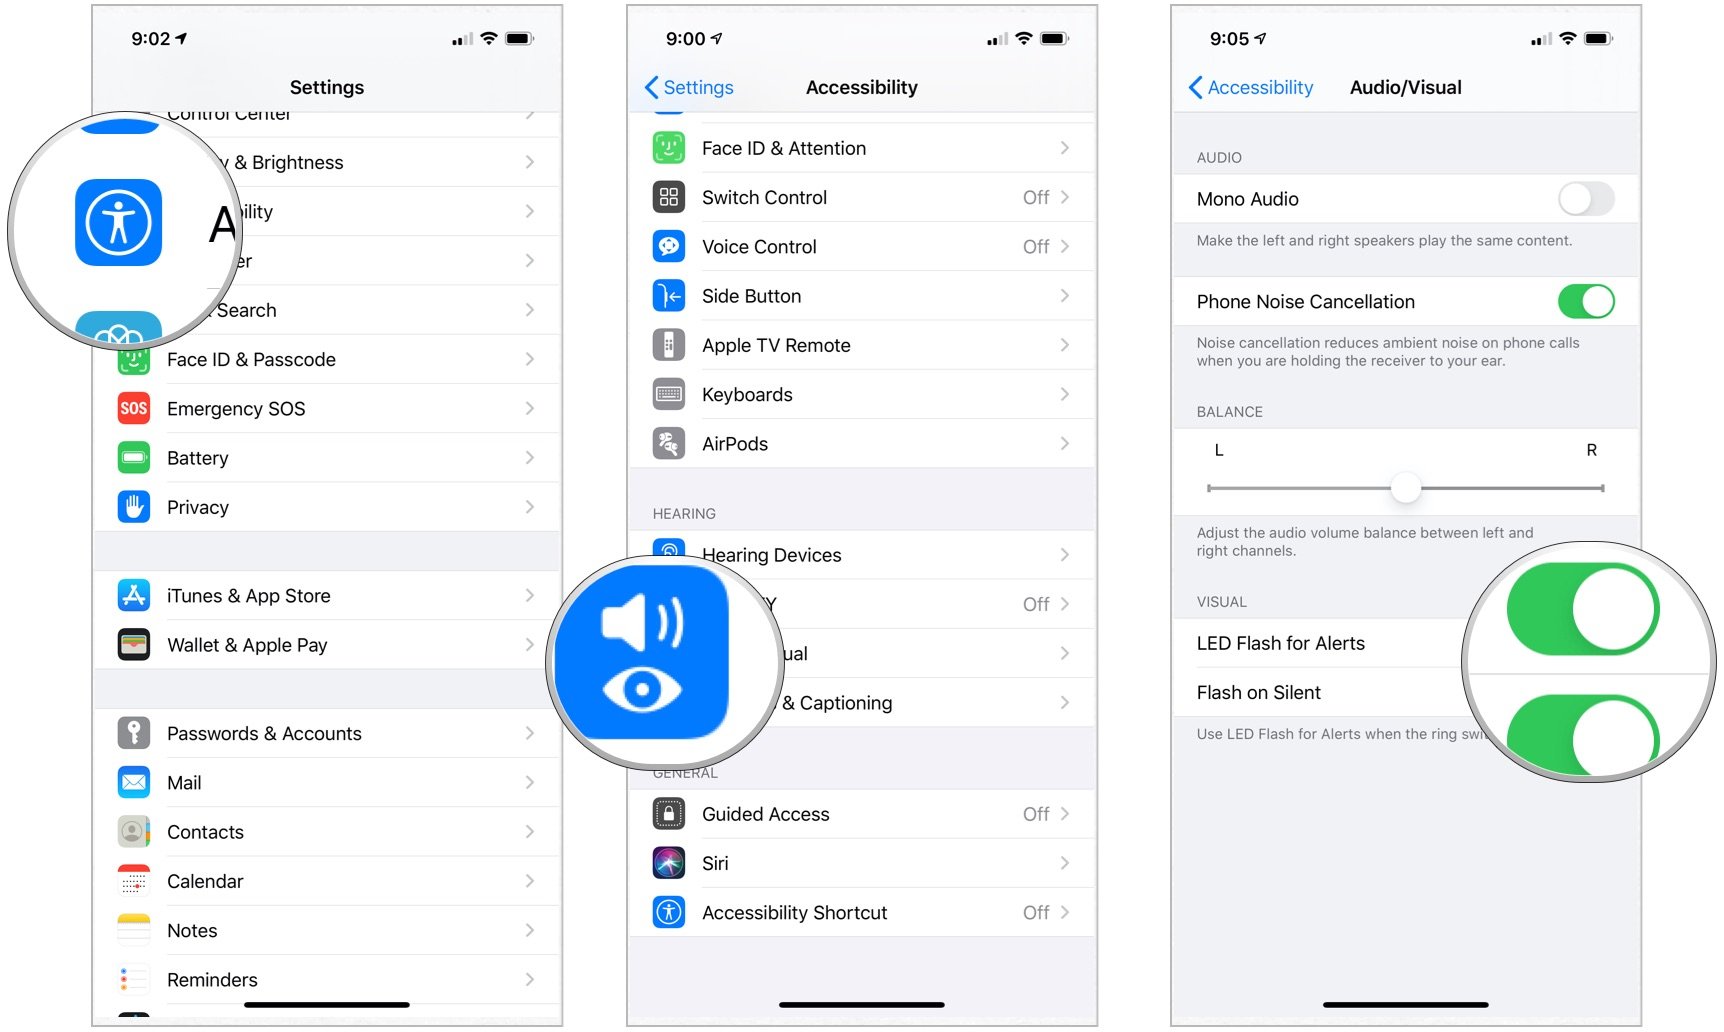
- Launch Settings from your Home screen.
- Tap on Accessibility.
- Select Audio/Visual.
- Choose the switch next to LED Flash for Alerts to enable the feature.
- Select the switch next to Flash on Silent to use LED flash alerts when the ringer switch is set to silent.
To disable the notification light, repeat the same process, and toggle the setting to OFF.
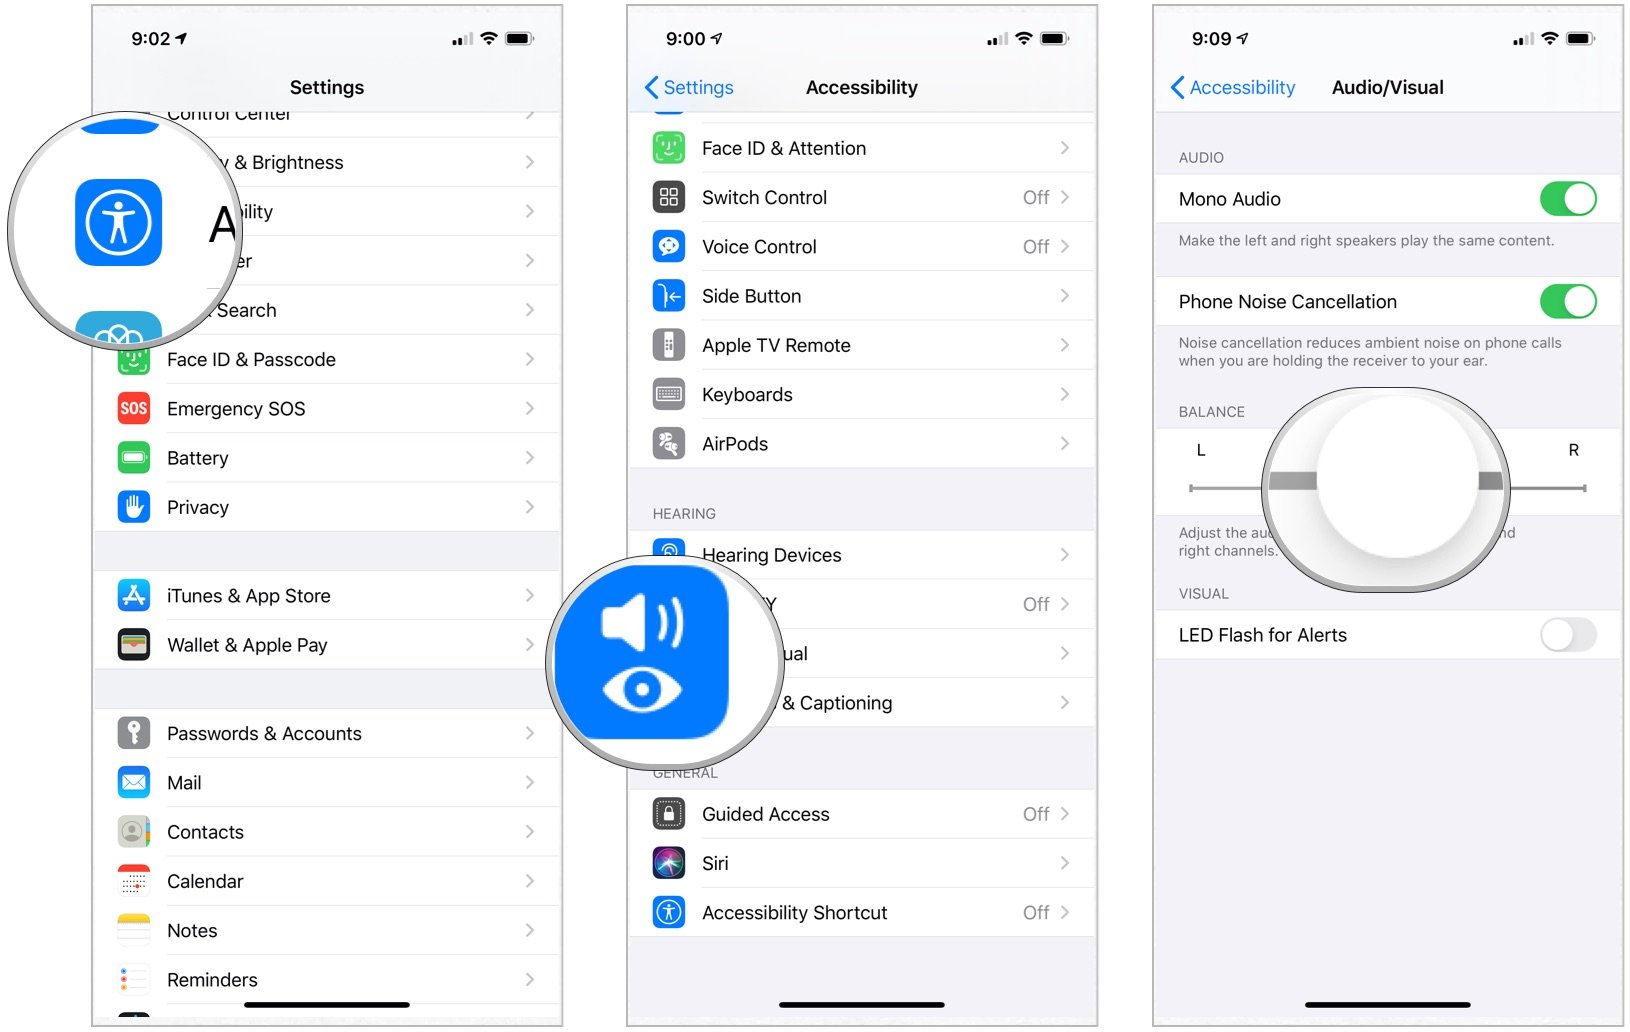
How to enable mono audio on iPhone and iPad
Typical stereo audio includes distinct left and right channels, so each ear gets different sounds. Mono audio makes sure both ears get all the noise. You can also adjust the volume independently for either ear, so you everything from audiobooks to podcasts to songs to videos come in loud and clear.
iMore offers spot-on advice and guidance from our team of experts, with decades of Apple device experience to lean on. Learn more with iMore!
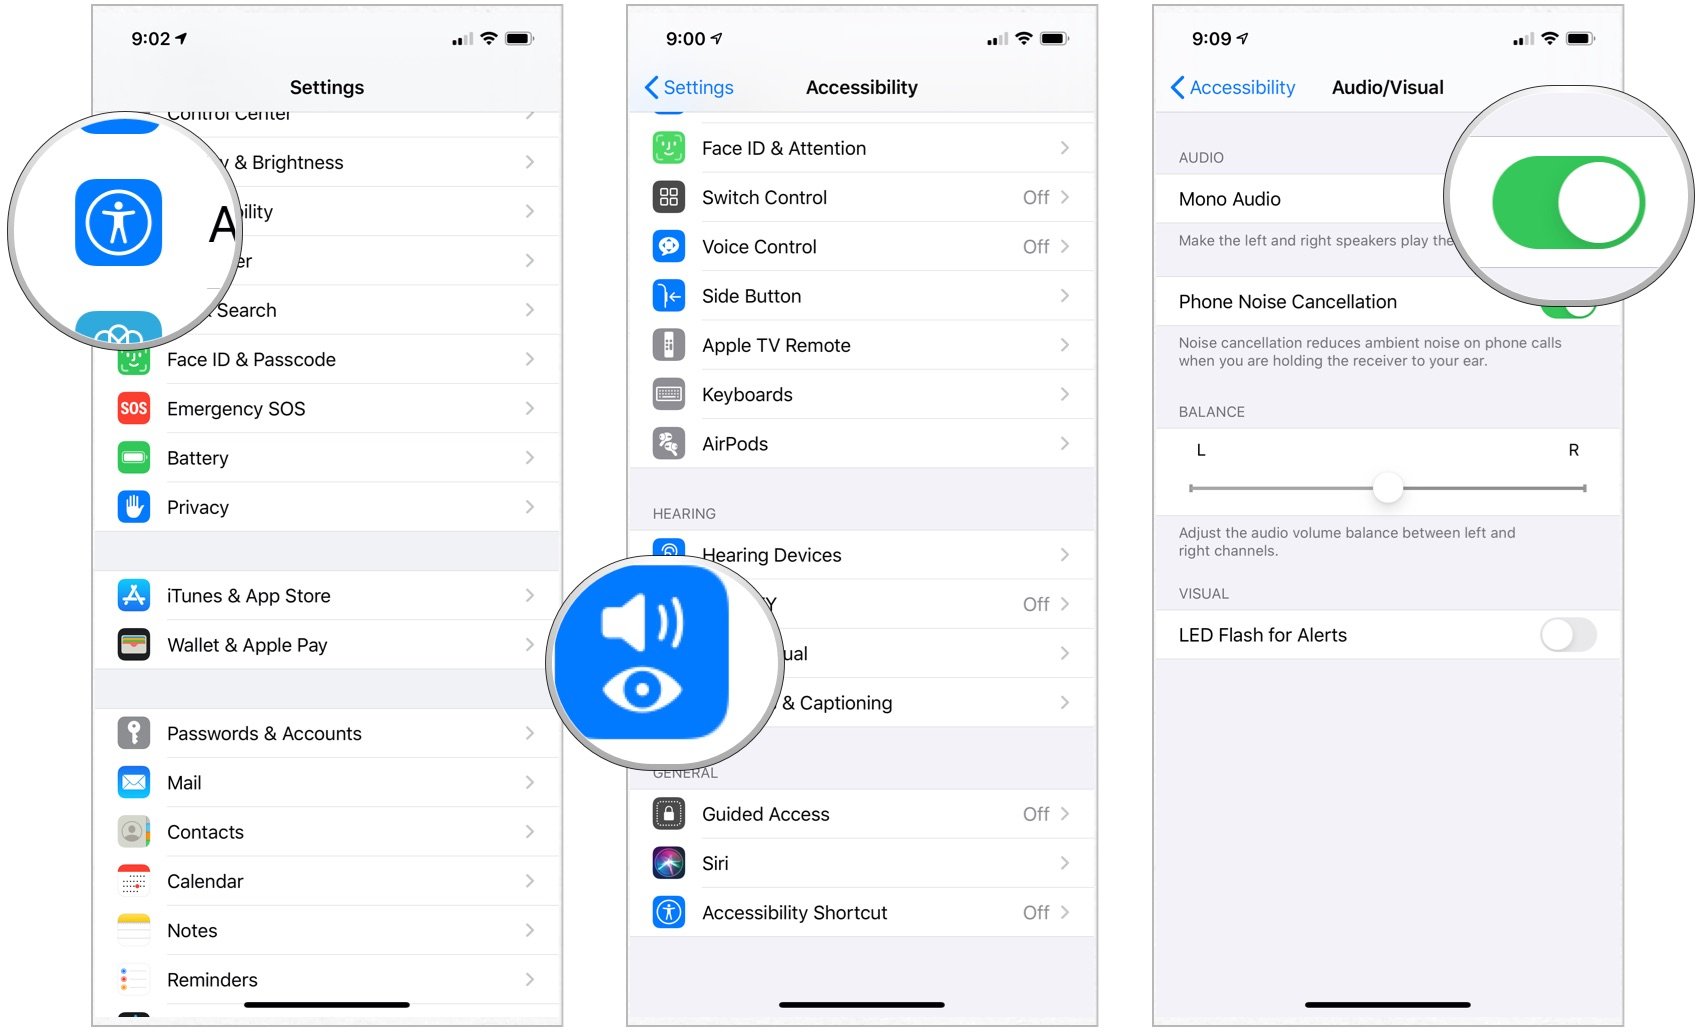
- Launch the Settings app from your Home screen.
- Tap on Accessibility.
- Choose Audio/Visual.
- Tap the switch next to Mono Audio to turn it on.
Note: You can also use mono audio if a podcast or other audio file has screwed up the tracks and put all audio, or just one or two out of a group of speakers, on only one channel.
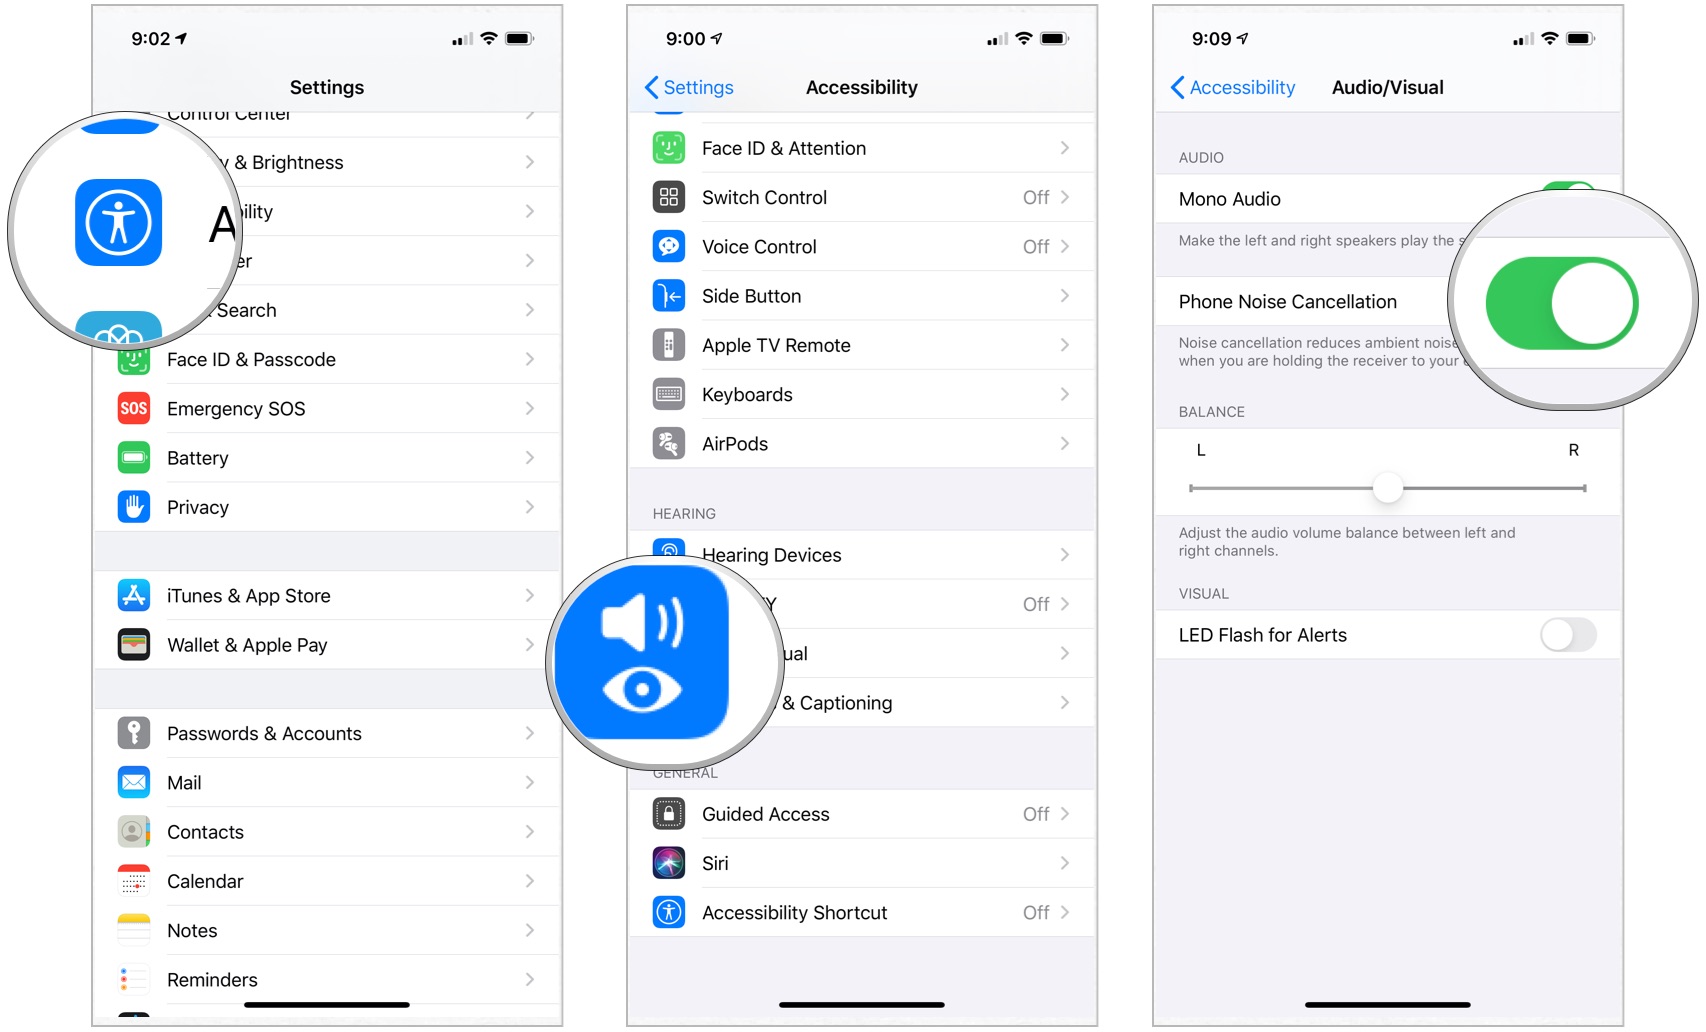
How to enable Phone Noise Cancellation on iPhone or iPad
Noise cancellation can help clear up phone calls by reducing the ambient noise you hear while holding the receiver to your ear.
- Launch the Settings app from your Home screen.
- Tap on Accessibility.
- Choose Audio/Visual.
- Tap the switch next to Phone Noise Cancellation to turn it on.
How to control Audio Balance on iPhone or iPad
If you don't hear as well in one ear, you can toggle the audio balance so that it's louder on one side. Here's how:
- Launch the Settings app from your Home screen.
- Tap on Accessibility.
- Choose Audio/Visual.
- Tap and drag the slider that appears at the end of the Hearing section. This will move audio between the right and left channels.
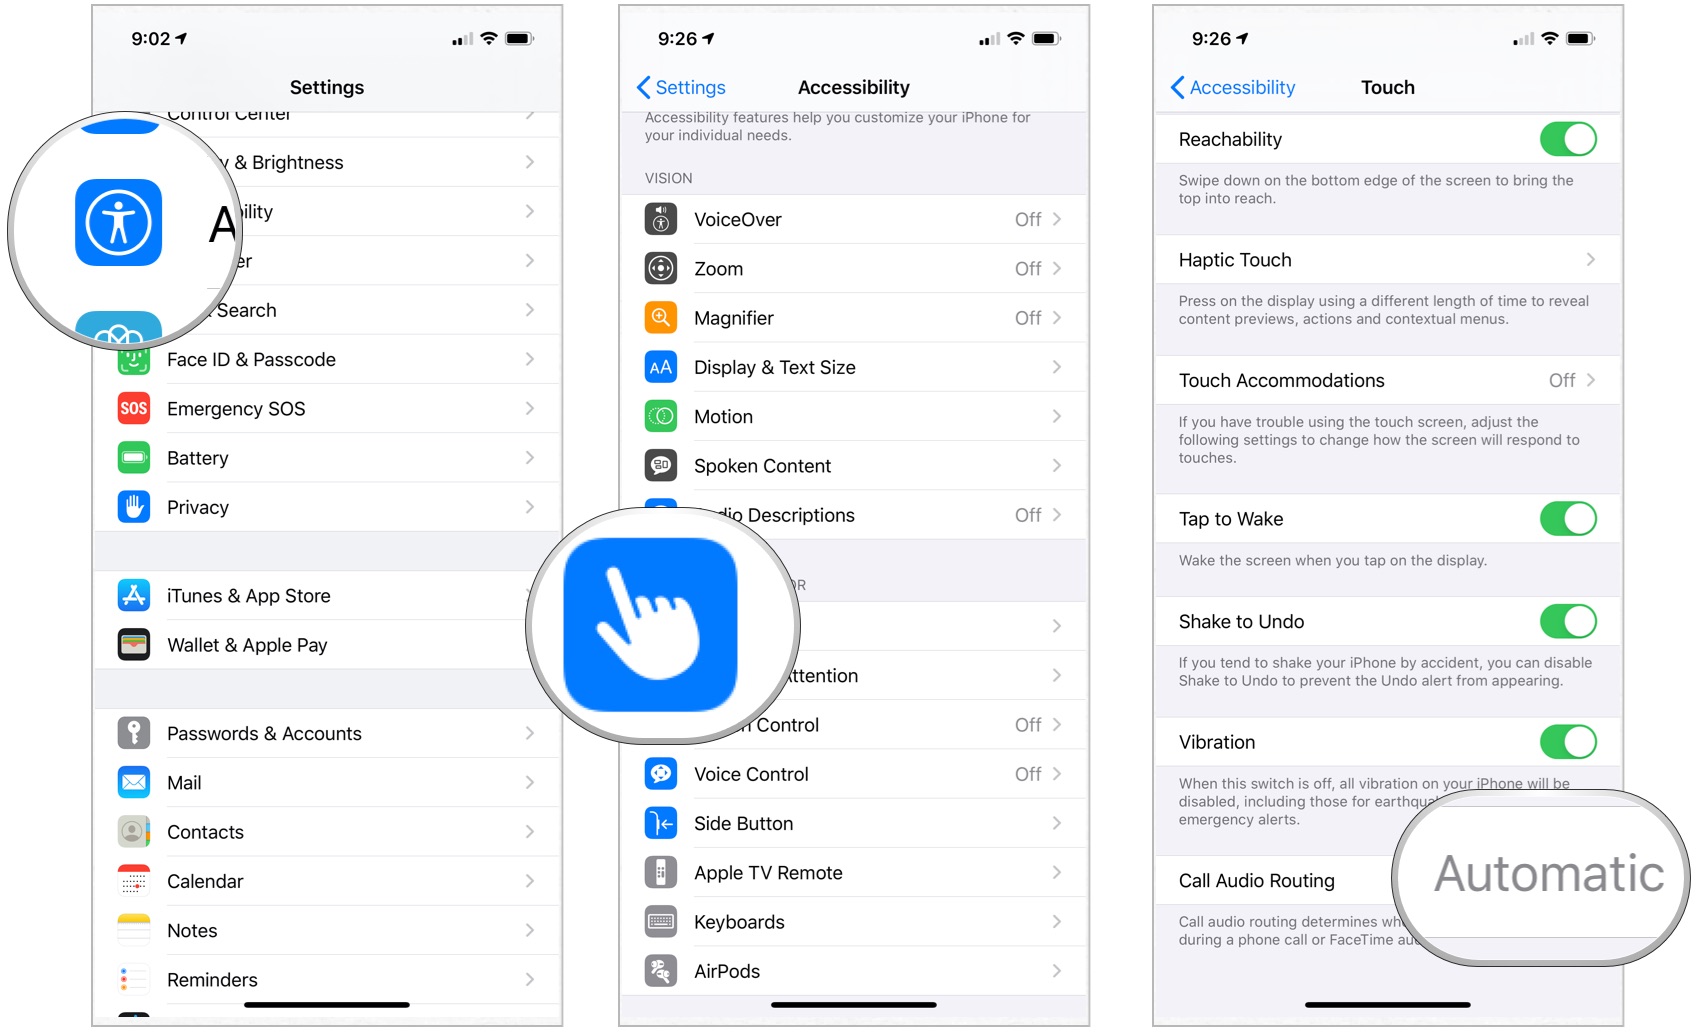
How to manage call audio routing on iPhone and iPad
Call audio routing determines from where audio will be heard during a phone or FaceTime call. If you always want it to work in the same, specific way, you can set it just so.
- Launch the Settings app from your Home screen.
- Tap Accessibility.
- Choose Touch.
- Selection Call Audio Routing.
- Tap how you want call audio to be routed. Choices are automatic, Bluetooth headset, or speaker.
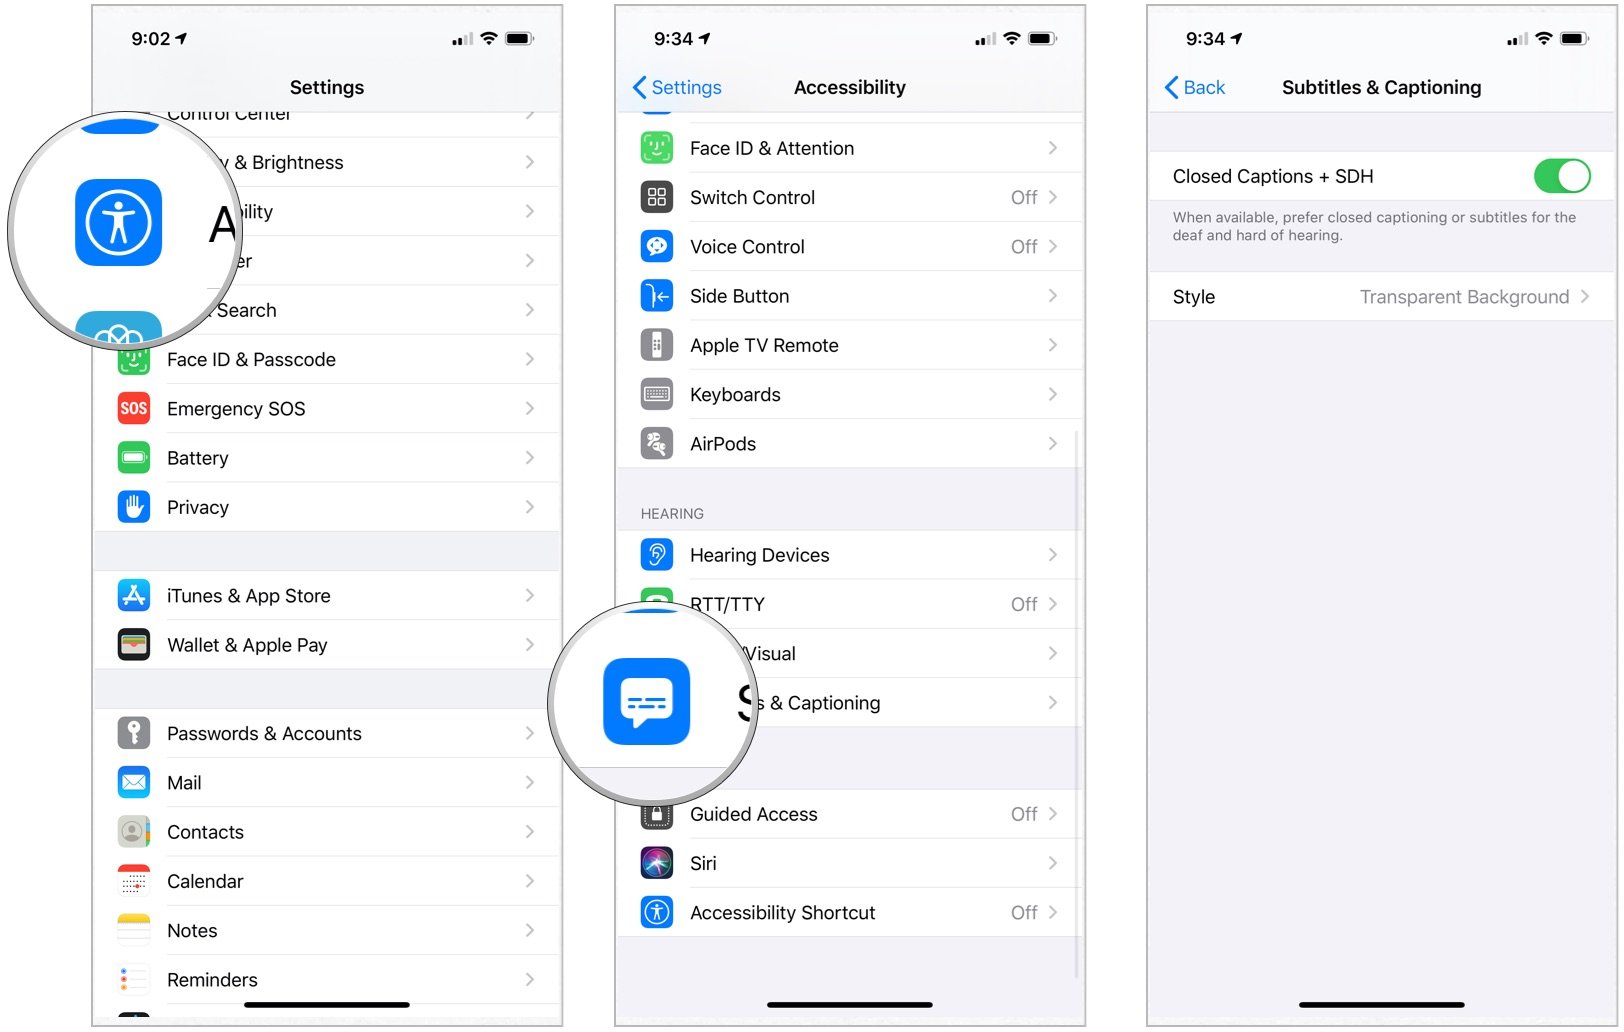
How to turn on subtitles and closed captions on iPhone and iPad
Subtitles and closed captioning work by layering text over the video so you can read instead of listening. You can create different display styles so you can make them as easy to see and enjoyable to read as possible.
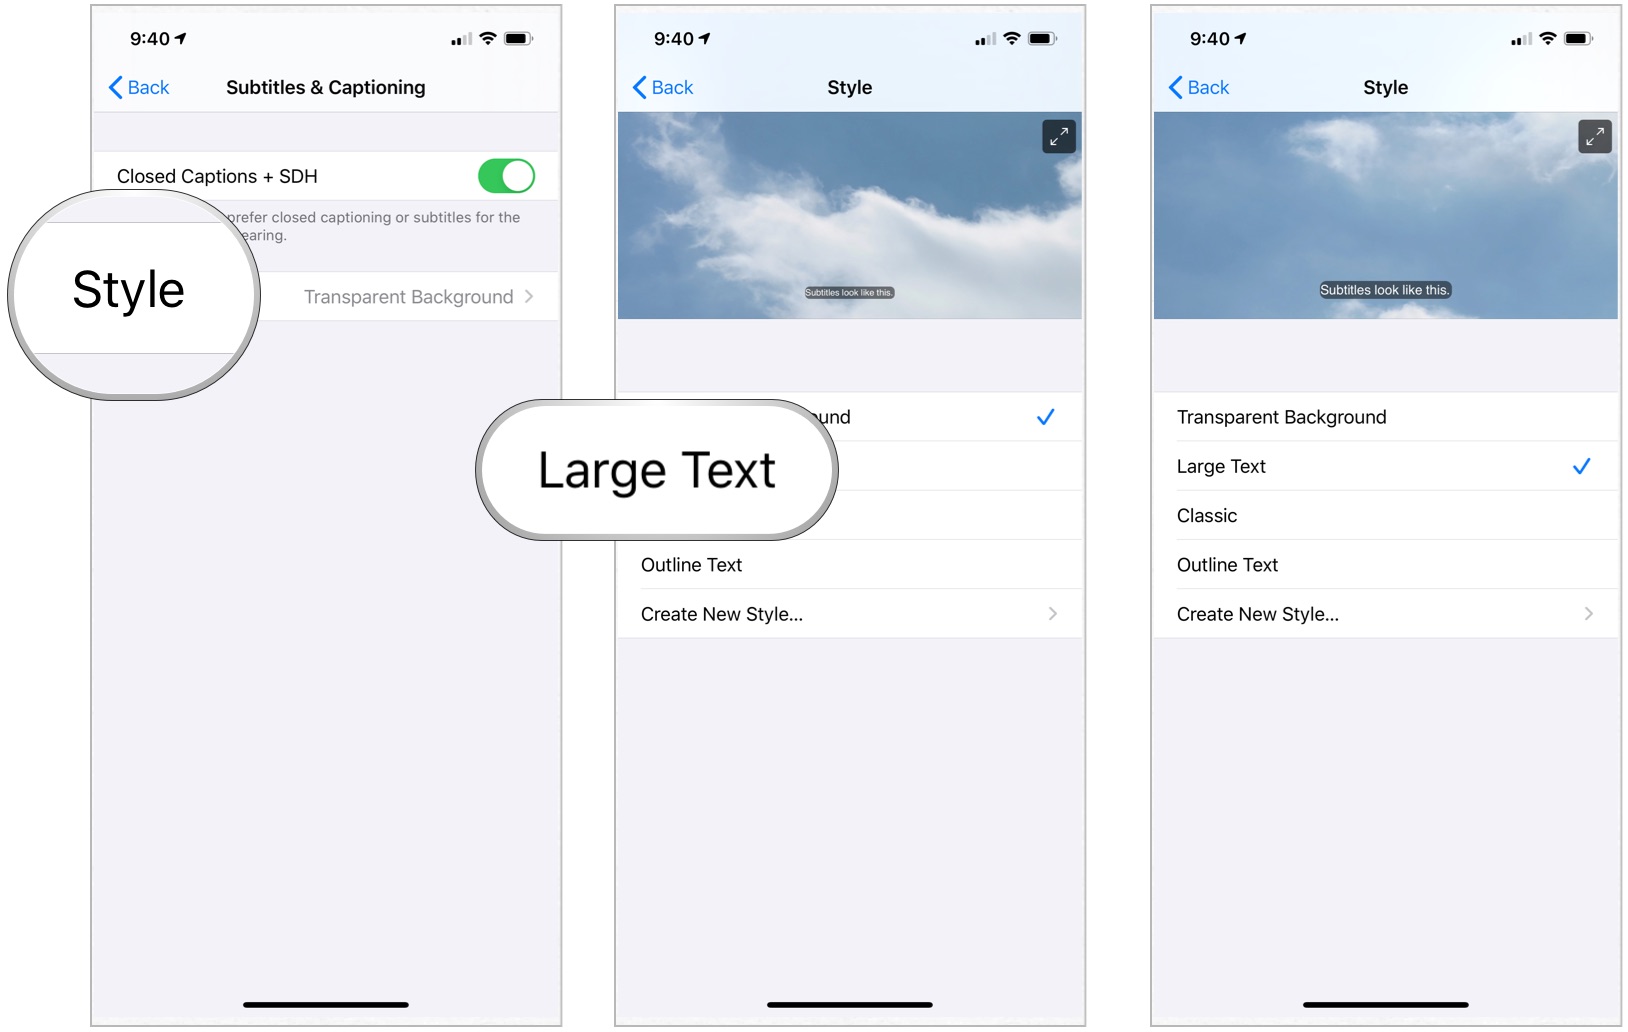
- Launch the Settings app from the Home screen of your iPhone or iPad.
- Tap on Accessibility.
- Choose Subtitles & Captioning under the Media section.
- Select the switch for Closed Captions + SDH to turn them on.
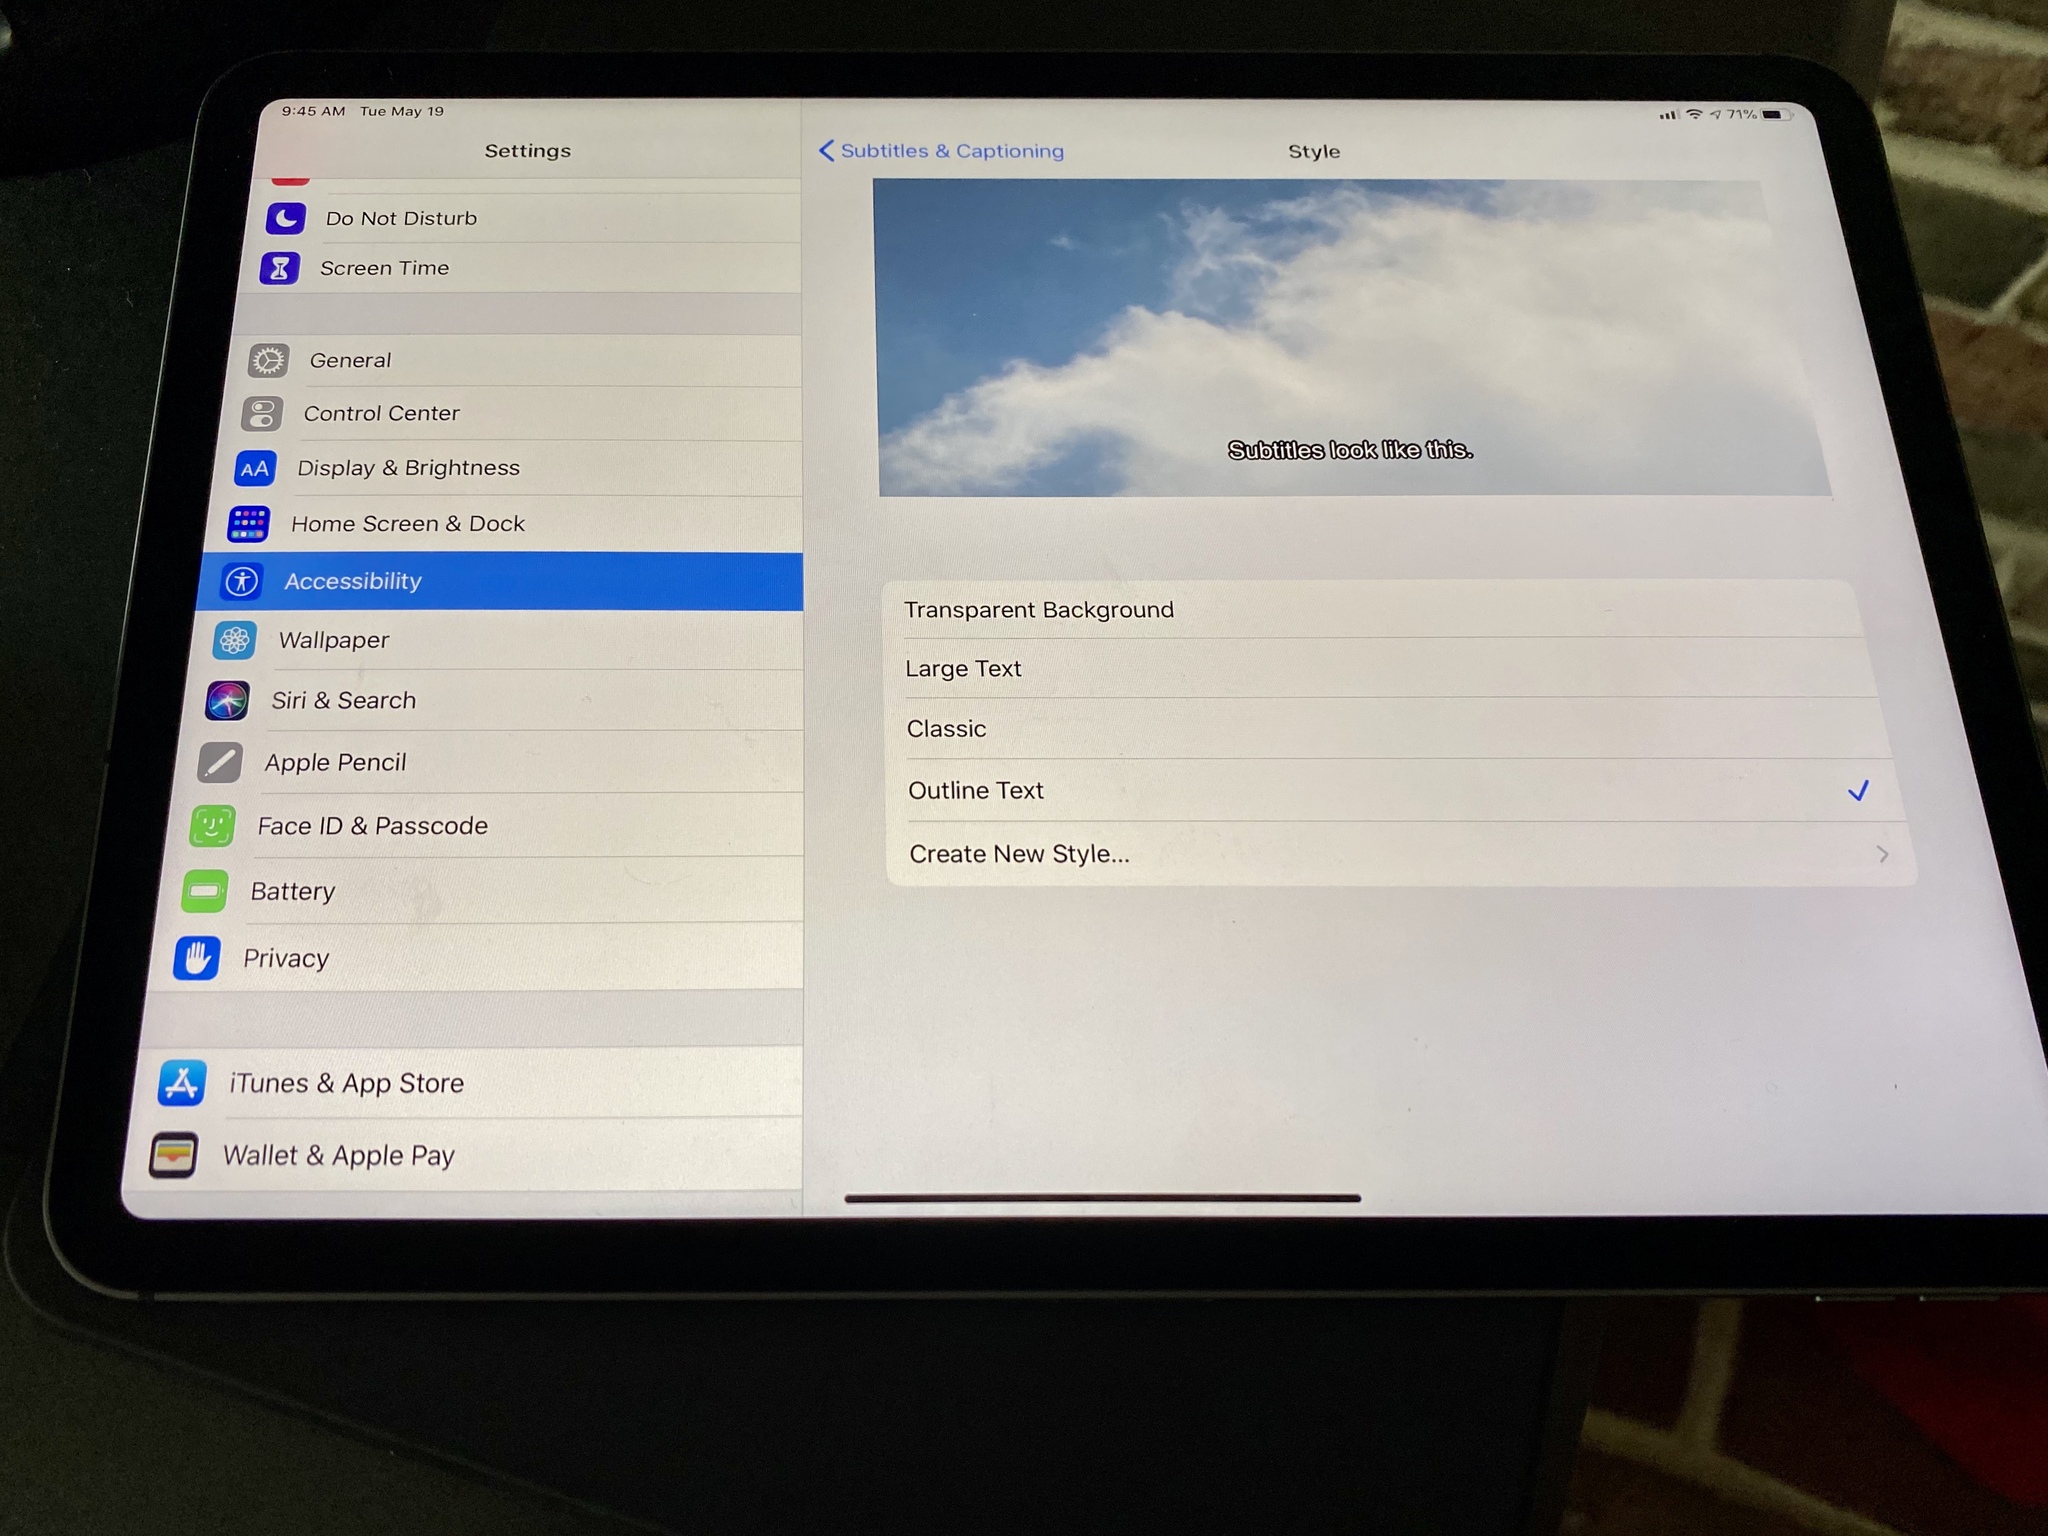
- Tap on Style in order to customize how closed captions work if you'd like.
- Choose on Create New Style... to choose your own font type and size.
Just keep in mind that closed caption and subtitles will work where available, but third-party apps may have settings you'll have to use.

Bryan M. Wolfe has written about technology for over a decade on various websites, including TechRadar, AppAdvice, and many more. Before this, he worked in the technology field across different industries, including healthcare and education. He’s currently iMore’s lead on all things Mac and macOS, although he also loves covering iPhone, iPad, and Apple Watch. Bryan enjoys watching his favorite sports teams, traveling, and driving around his teenage daughter to her latest stage show, audition, or school event in his spare time. He also keeps busy walking his black and white cocker spaniel, Izzy, and trying new coffees and liquid grapes.
