DIY repairs can help you get lots more life out of your device and prevent having to buy a new iPhone before you absolutely have to. If you're soon to be out of warranty or otherwise not covered for exchange or replacement, or if you're just a DIY type who wants to learn more about the inner workings of your iPhone, we've got you covered.
Disclaimer: As with any repair, iMore cannot be held responsible for any damage you may do to your device. It's also worth considering that opening up your device to perform any repair or modification can and will void your Apple warranty. If you don't feel comfortable opening your device, don't. Use extreme care and caution when performing a repair on any device.

What you'll need to DIY replace an iPhone 4S battery
iMore recommends using only quality and genuine parts from a reputable supplier like iFixYouri. They have quality parts, tools, and much more for all your repair needs.
- Replacement battery
- 5-point security screwdriver
- Standard #000 Phillips screwdriver
- Spudger tool
- iSesamo Opening tool (not necessary but awesome for prying up cables and getting under adhesive)
Power off your iPhone 4S

Before performing any repair you should always power off your device before opening it up.
Remove the back plate
- Using your security screwdriver, remove the 2 screws on either side of the dock connector port.

- Set them aside. They are both the exact same size and length so it does not matter if you mix them up. They are interchangeable.
- Gently slide up the back plate by applying a bit of pressure along the bottom with your thumbs and sliding upwards.

- Now lift off the back plate and set it aside.

Remove the battery and grounding clip
- Using your #00 Phillips screwdriver, remove the two screws holding the battery in place.


- These screws are different lengths so make sure you remember which one goes where. The one that is slightly larger is the bottom screw.
- There is a tiny grounding clip underneath the battery clip where the first screw is located. Use your spudger tool or finger to remove it before prying the clip up. Many times it can go flying if you don't remove it first and then you'll have difficulty locating it so it's best to remove it first.


- Now use your spudger tool and at the bottom of the battery clip, gently pry upwards so the clip pops up.

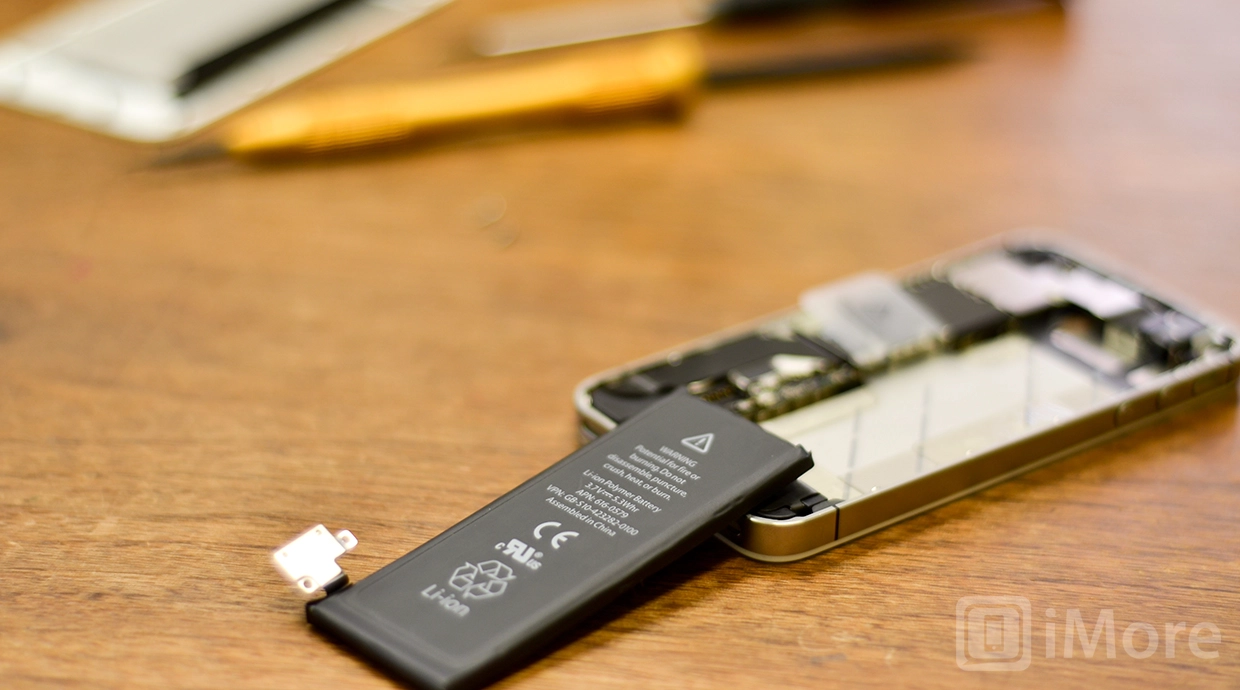
- Move to the edge of the iPhone where the volume buttons are located and use your spudger tool to carefully pry up the battery. It is stuck down with a good amount of adhesive so be careful when prying upwards that you don't bend the battery. This is why I do not use the plastic tab that is provided. It typically rips or bends the battery. If one part is resistant move your pry tool a little further down and gently start prying it up in different places taking care not to come too close to the volume button cables towards the top.

- Once you've gotten the battery pulled out of the iPhone 4S we can move on to inserting the replacement battery.
Replace the battery and grounding clip
- Pay attention to how the cable is bent on your old battery and if the new one is not crimped in the same fashion put the folds in it before inserting it into the iPhone 4S.

- Line up the grounding clip you removed previously over the screw hole before snapping down the battery.

- Snap down the battery in place to the logic board and then position the battery and press down firmly to make sure the adhesive sticks.
- Replace the two screws you removed in a prior step starting with the top one using your #00 Phillips screwdriver. Make sure the grounding clip stays positioned. Use your other hand to hold it straight while you replace the top screw if you need to.
- Now replace the bottom screw.
Replace the back plate
- To replace the back plate line up the hinges around the edges. It should fall right into place. There will be a gap at the bottom.
- Using slight pressure slide the cover down into place with your thumbs. If there is resistance make sure the hinges are lined up correctly and don't force it down and you can easily snap the hinge if it's caught up on something.
- Once the back cover is securely in place and flush with the antenna band, replace the two screws on either side of the dock connector using your security screwdriver.
And ...done!

Now that your iPhone 4S is completely put back together you can turn it back on. If the phone doesn't come on, try plugging it into a wall charger and see if the charging icon comes up. It's quite possible that the battery may need to be charged before use.
If you're still having problems, or you have a question about this repair, let us know in the comments!
More iPhone DIY guides
○ Fix a broken iPhone 7 or 7 Plus ○ Fix a broken iPhone 6s or 6s Plus ○ Fix a broken iPhone SE ○ Fix a broken iPhone 6 or 6 Plus ○ Fix a broken iPhone 5c ○ Fix a broken iPhone 5s ○ Fix a broken iPhone 5 ○ Fix a broken iPhone 4s ○ Fix a broken iPhone 4 (GSM) ○ Fix a broken iPhone 4 (CDMA) ○

