Why the Menu Bar is the best way to get started with Shortcuts for Mac
Accessibility, flexibility, and interactivity — what's not to love?
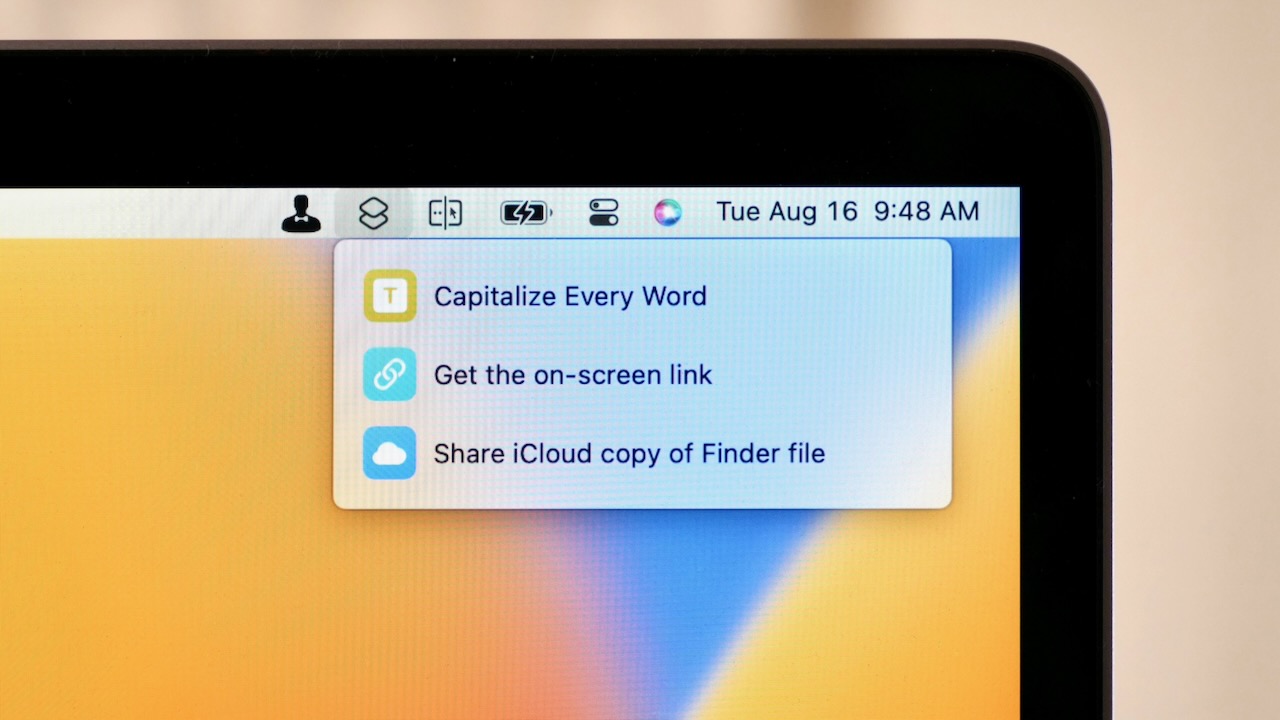
Part of the core macOS experience is interacting with the Menu Bar, whether it’s choosing from the current app’s specific commands from the top left or using Menu Bar apps that sit at the top right of your screen all day long.
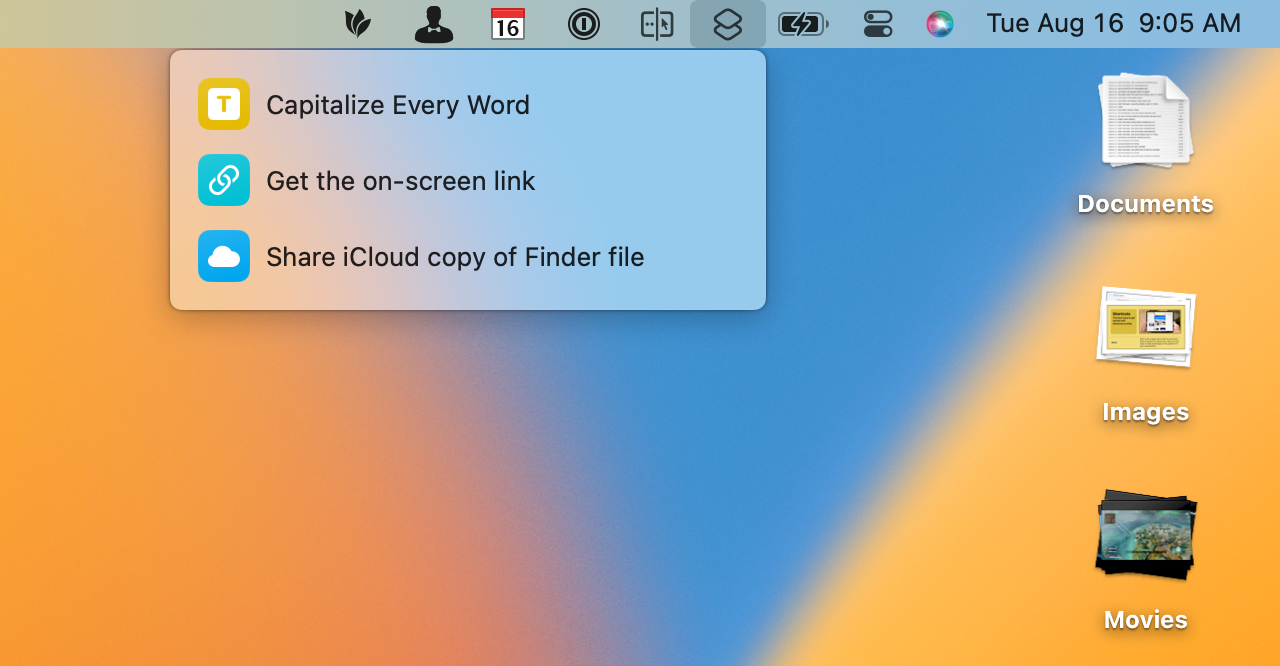
That’s why it’s fantastic that Apple released Shortcuts for Mac with Menu Bar support, showing a small Shortcuts icon that can be clicked to reveal a list of assigned shortcuts.
This small spot is perhaps one of the best to place the most-important shortcuts you use on a daily basis from your favorite Mac, giving you quick access to running them, editing them, and even working interactively with what you currently have open on-screen.
Here, we’ll cover how to set up your shortcuts to show up in the Menu Bar, ways you can build shortcuts that work well when run from the Menu Bar, and a few example shortcuts you can run that interact with the content open on your Mac.
Setting up Menu Bar shortcuts
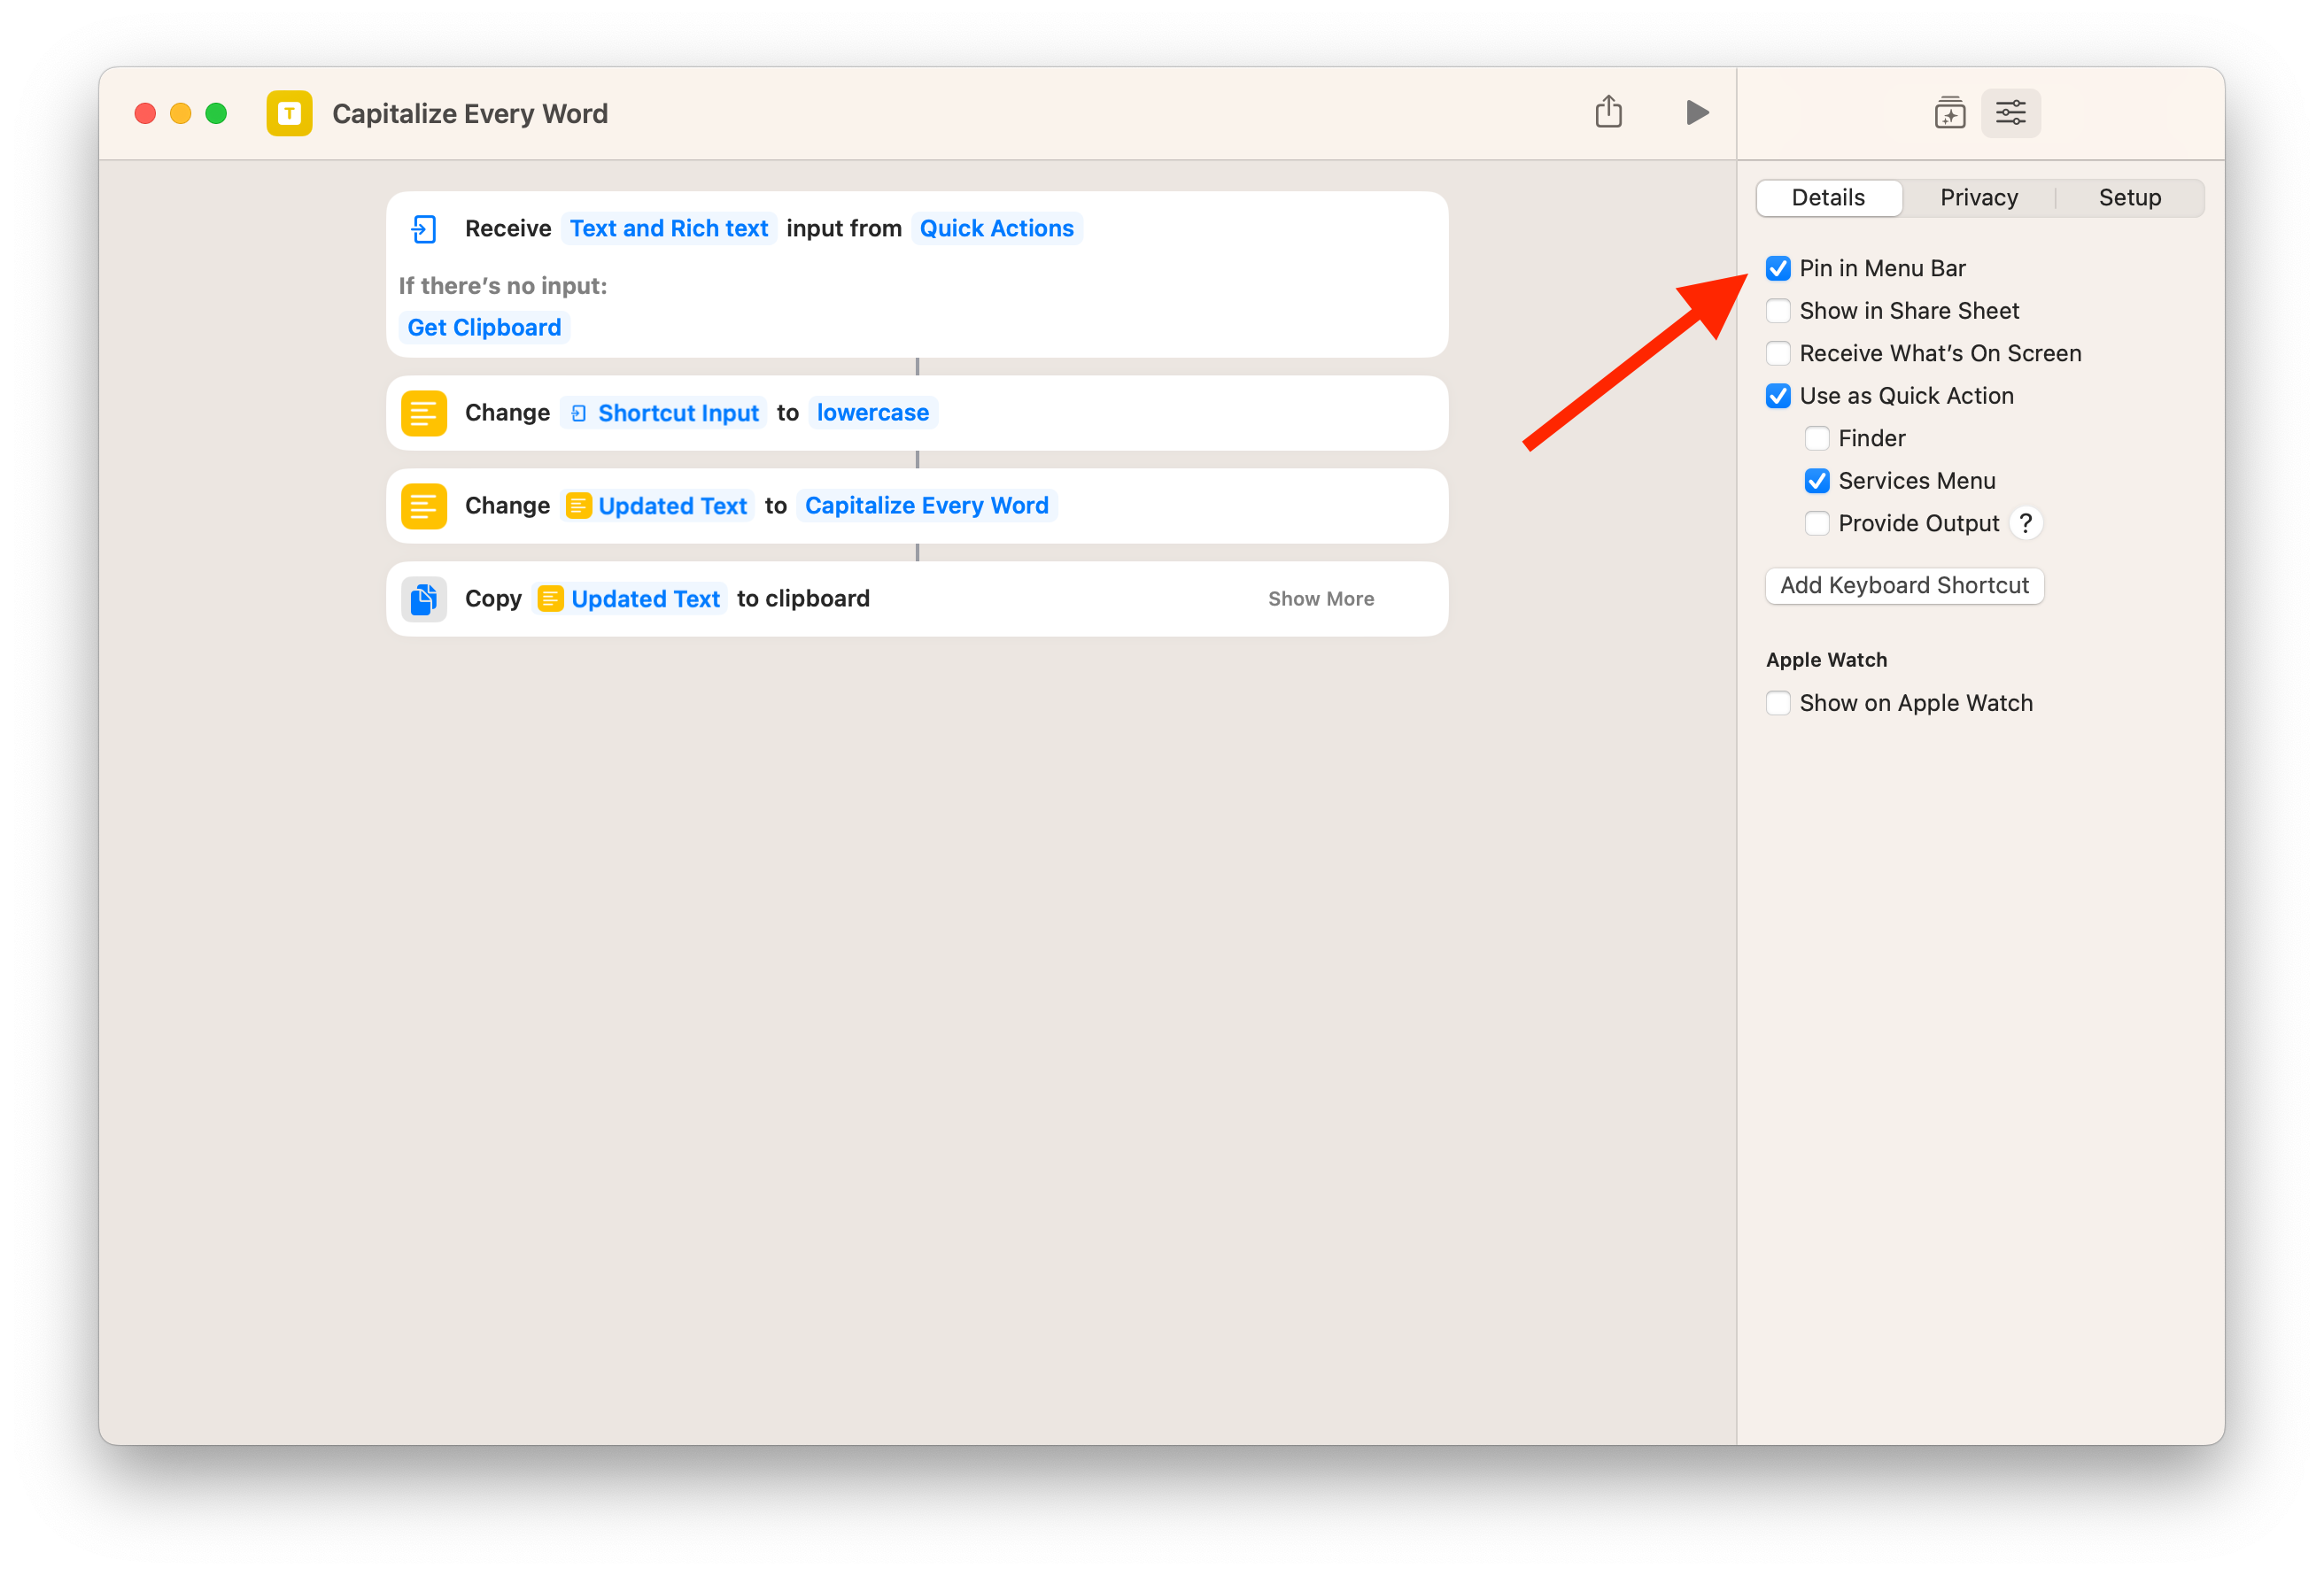
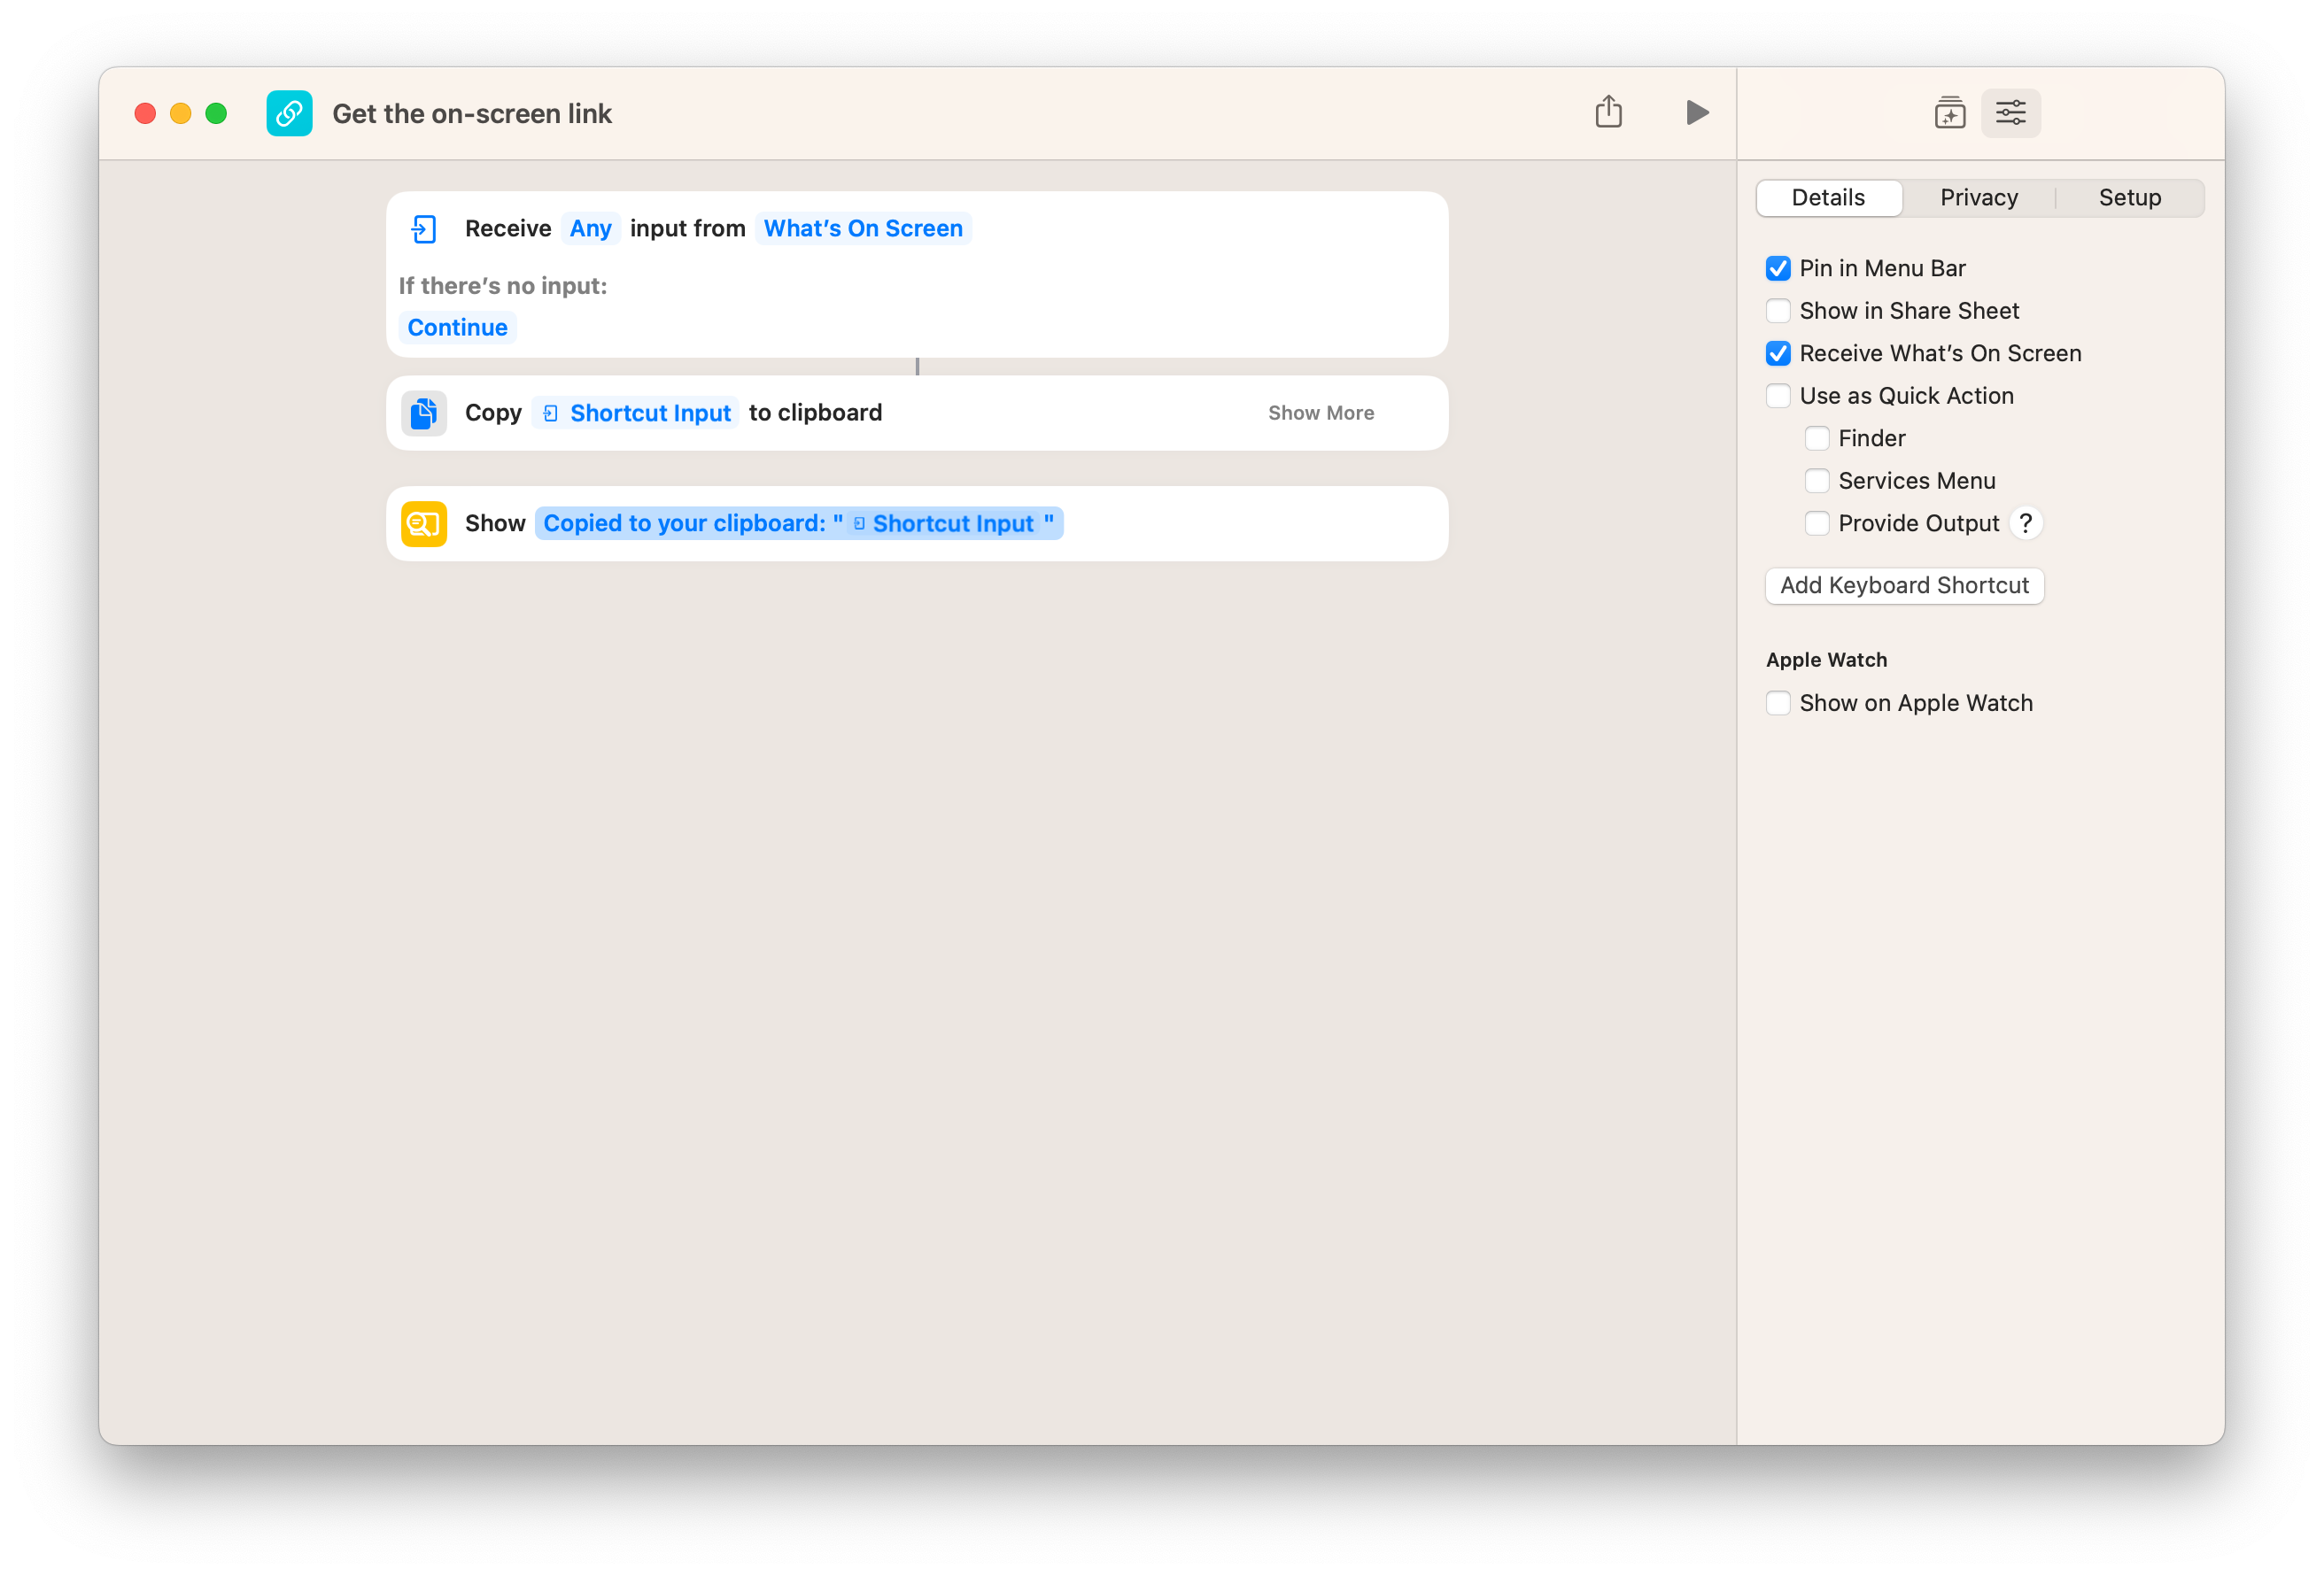
To add a shortcut to the Menu Bar, Shortcuts users need to open the Details screen of a shortcut and select Pin in Menu Bar.
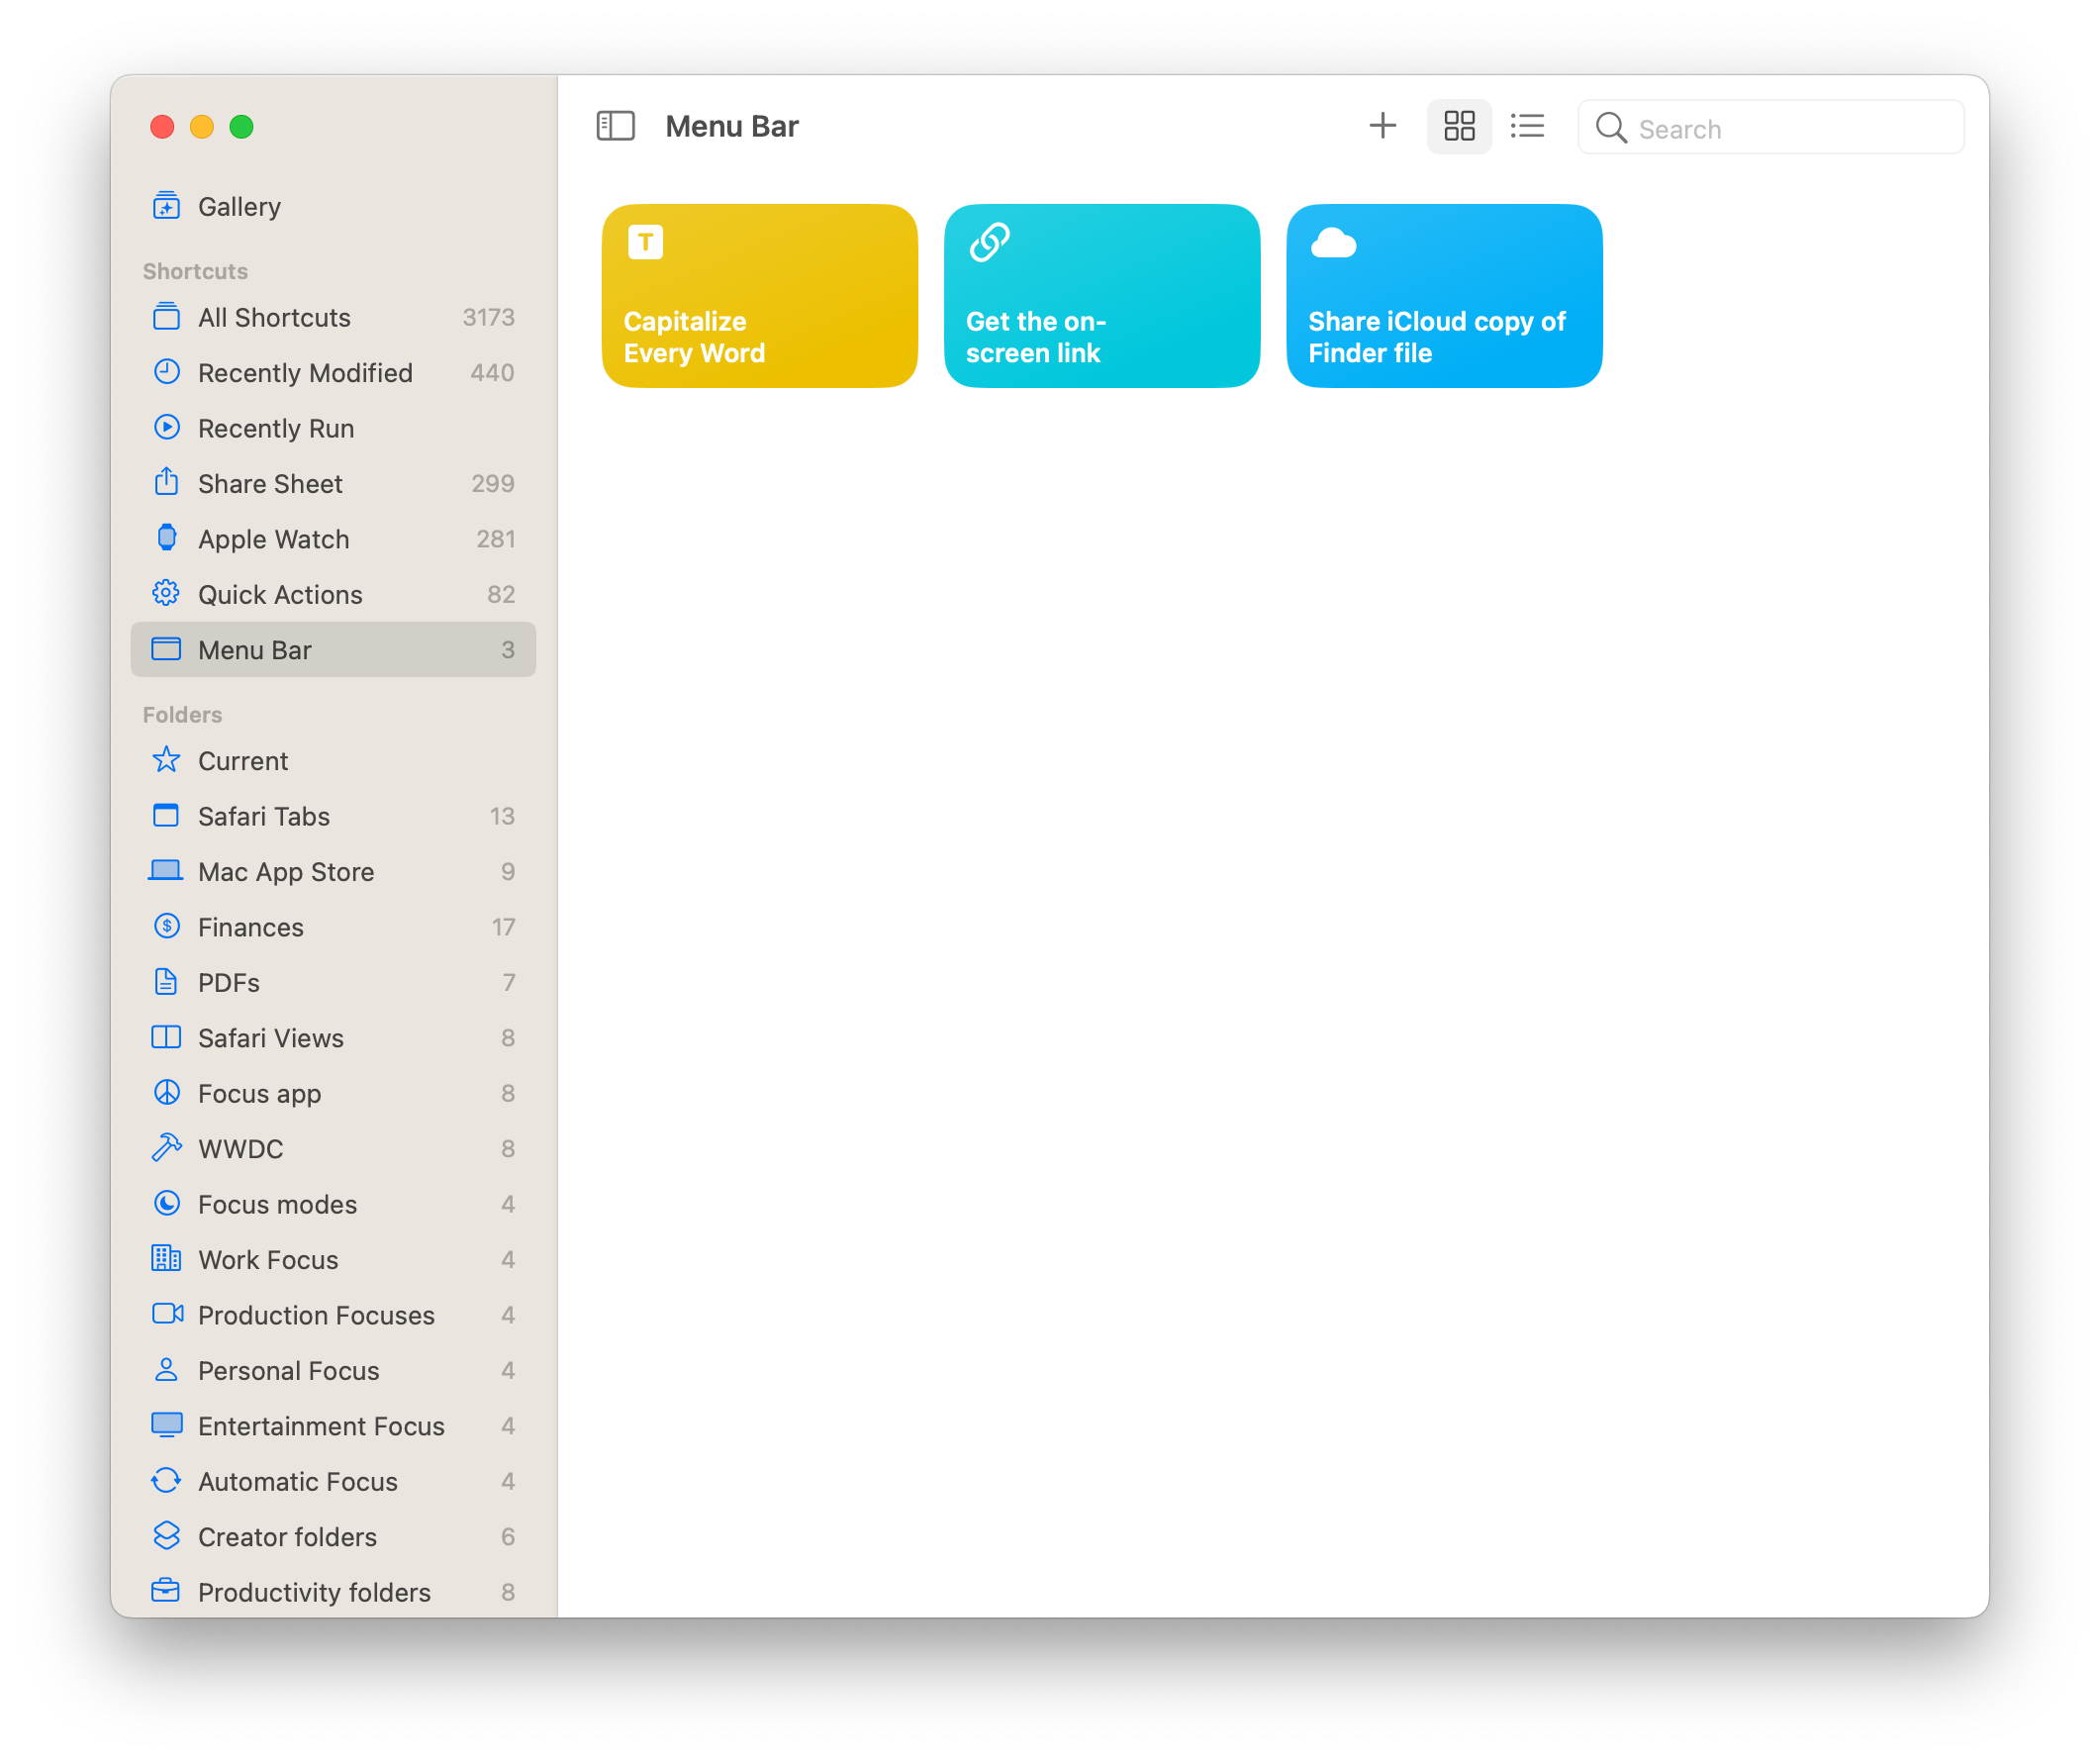
Once shortcuts are “pinned” in the Menu Bar, they’ll show up in an auto-generated Menu Bar folder in Shortcuts where users can then rearrange the list to change the final order shown when the Menu Bar is activated.
Left-clicking on the Shortcut icon in the Menu Bar will reveal the sorted list of pinned shortcuts. Clicking one will run it right away.
iMore offers spot-on advice and guidance from our team of experts, with decades of Apple device experience to lean on. Learn more with iMore!
This quick access to running a shortcut immediately makes the Menu Bar a great place to store your most-used shortcuts, so they’re always within reach when you need them.
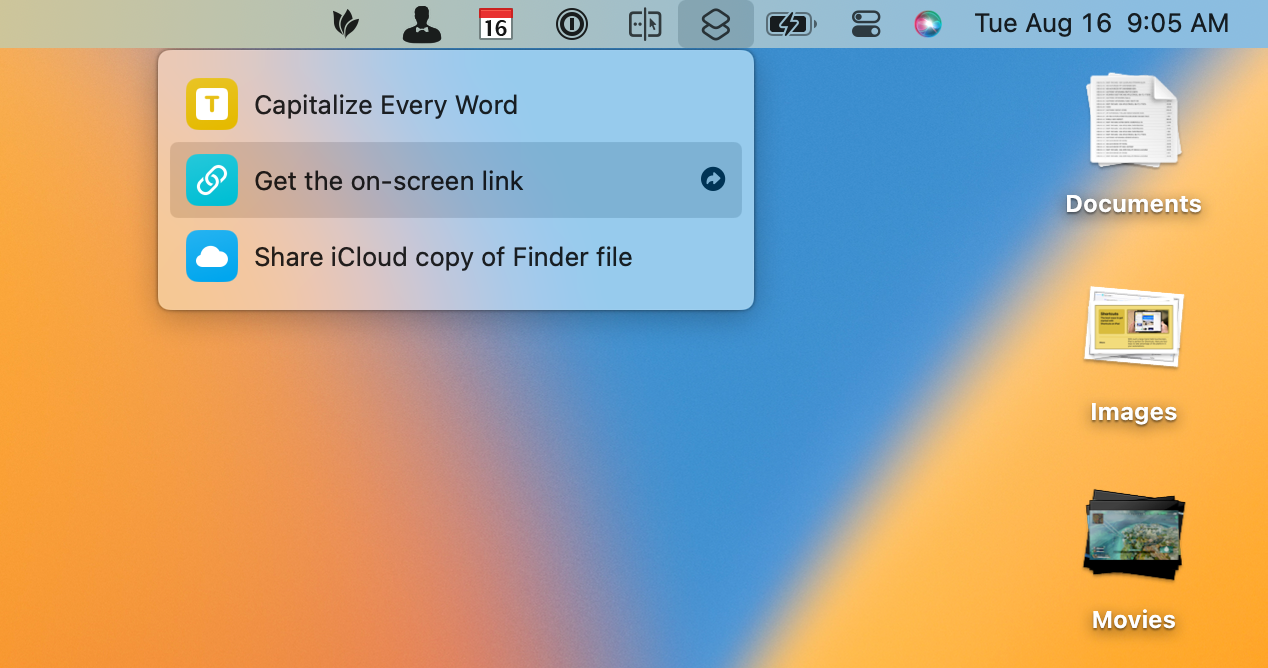
Additionally, hovering over a shortcut reveals a small, right-arrow icon, which opens it in the Shortcuts app when clicked.
This ability makes the Menu Bar a good spot to store in-progress shortcuts as well since you can update them over time. Being able to sort them separately from the folder-based organization in the app is handy for experimenting with a different sort order for your new shortcuts as well.
Adding interactivity
Shortcuts run from the Menu Bar on Mac can also benefit from a level of interactivity based on what you’re already doing on the computer.
By taking advantage of actions and functions like Receive What’s On-Screen, Get Clipboard, and Get Selected Files in Finder, the Menu Bar can do more than host your favorite shortcuts; it can act as a standalone menu item for any app or content on your Mac.
Receive What’s On-Screen
Shortcuts run from the Menu Bar don’t immediately interact with any foreground apps, but toggling the ability to Receive What’s On-Screen lets your shortcut check the current app and pass any available content into the start of your shortcut.
This works well from apps like Safari or Maps, for example. You can copy the webpage or maps link from your current view and get the on-screen link copied on your clipboard right away.
Get Clipboard
Similarly, your Menu Bar shortcuts can be designed to work with anything you’ve copied to your clipboard and are waiting to paste elsewhere.
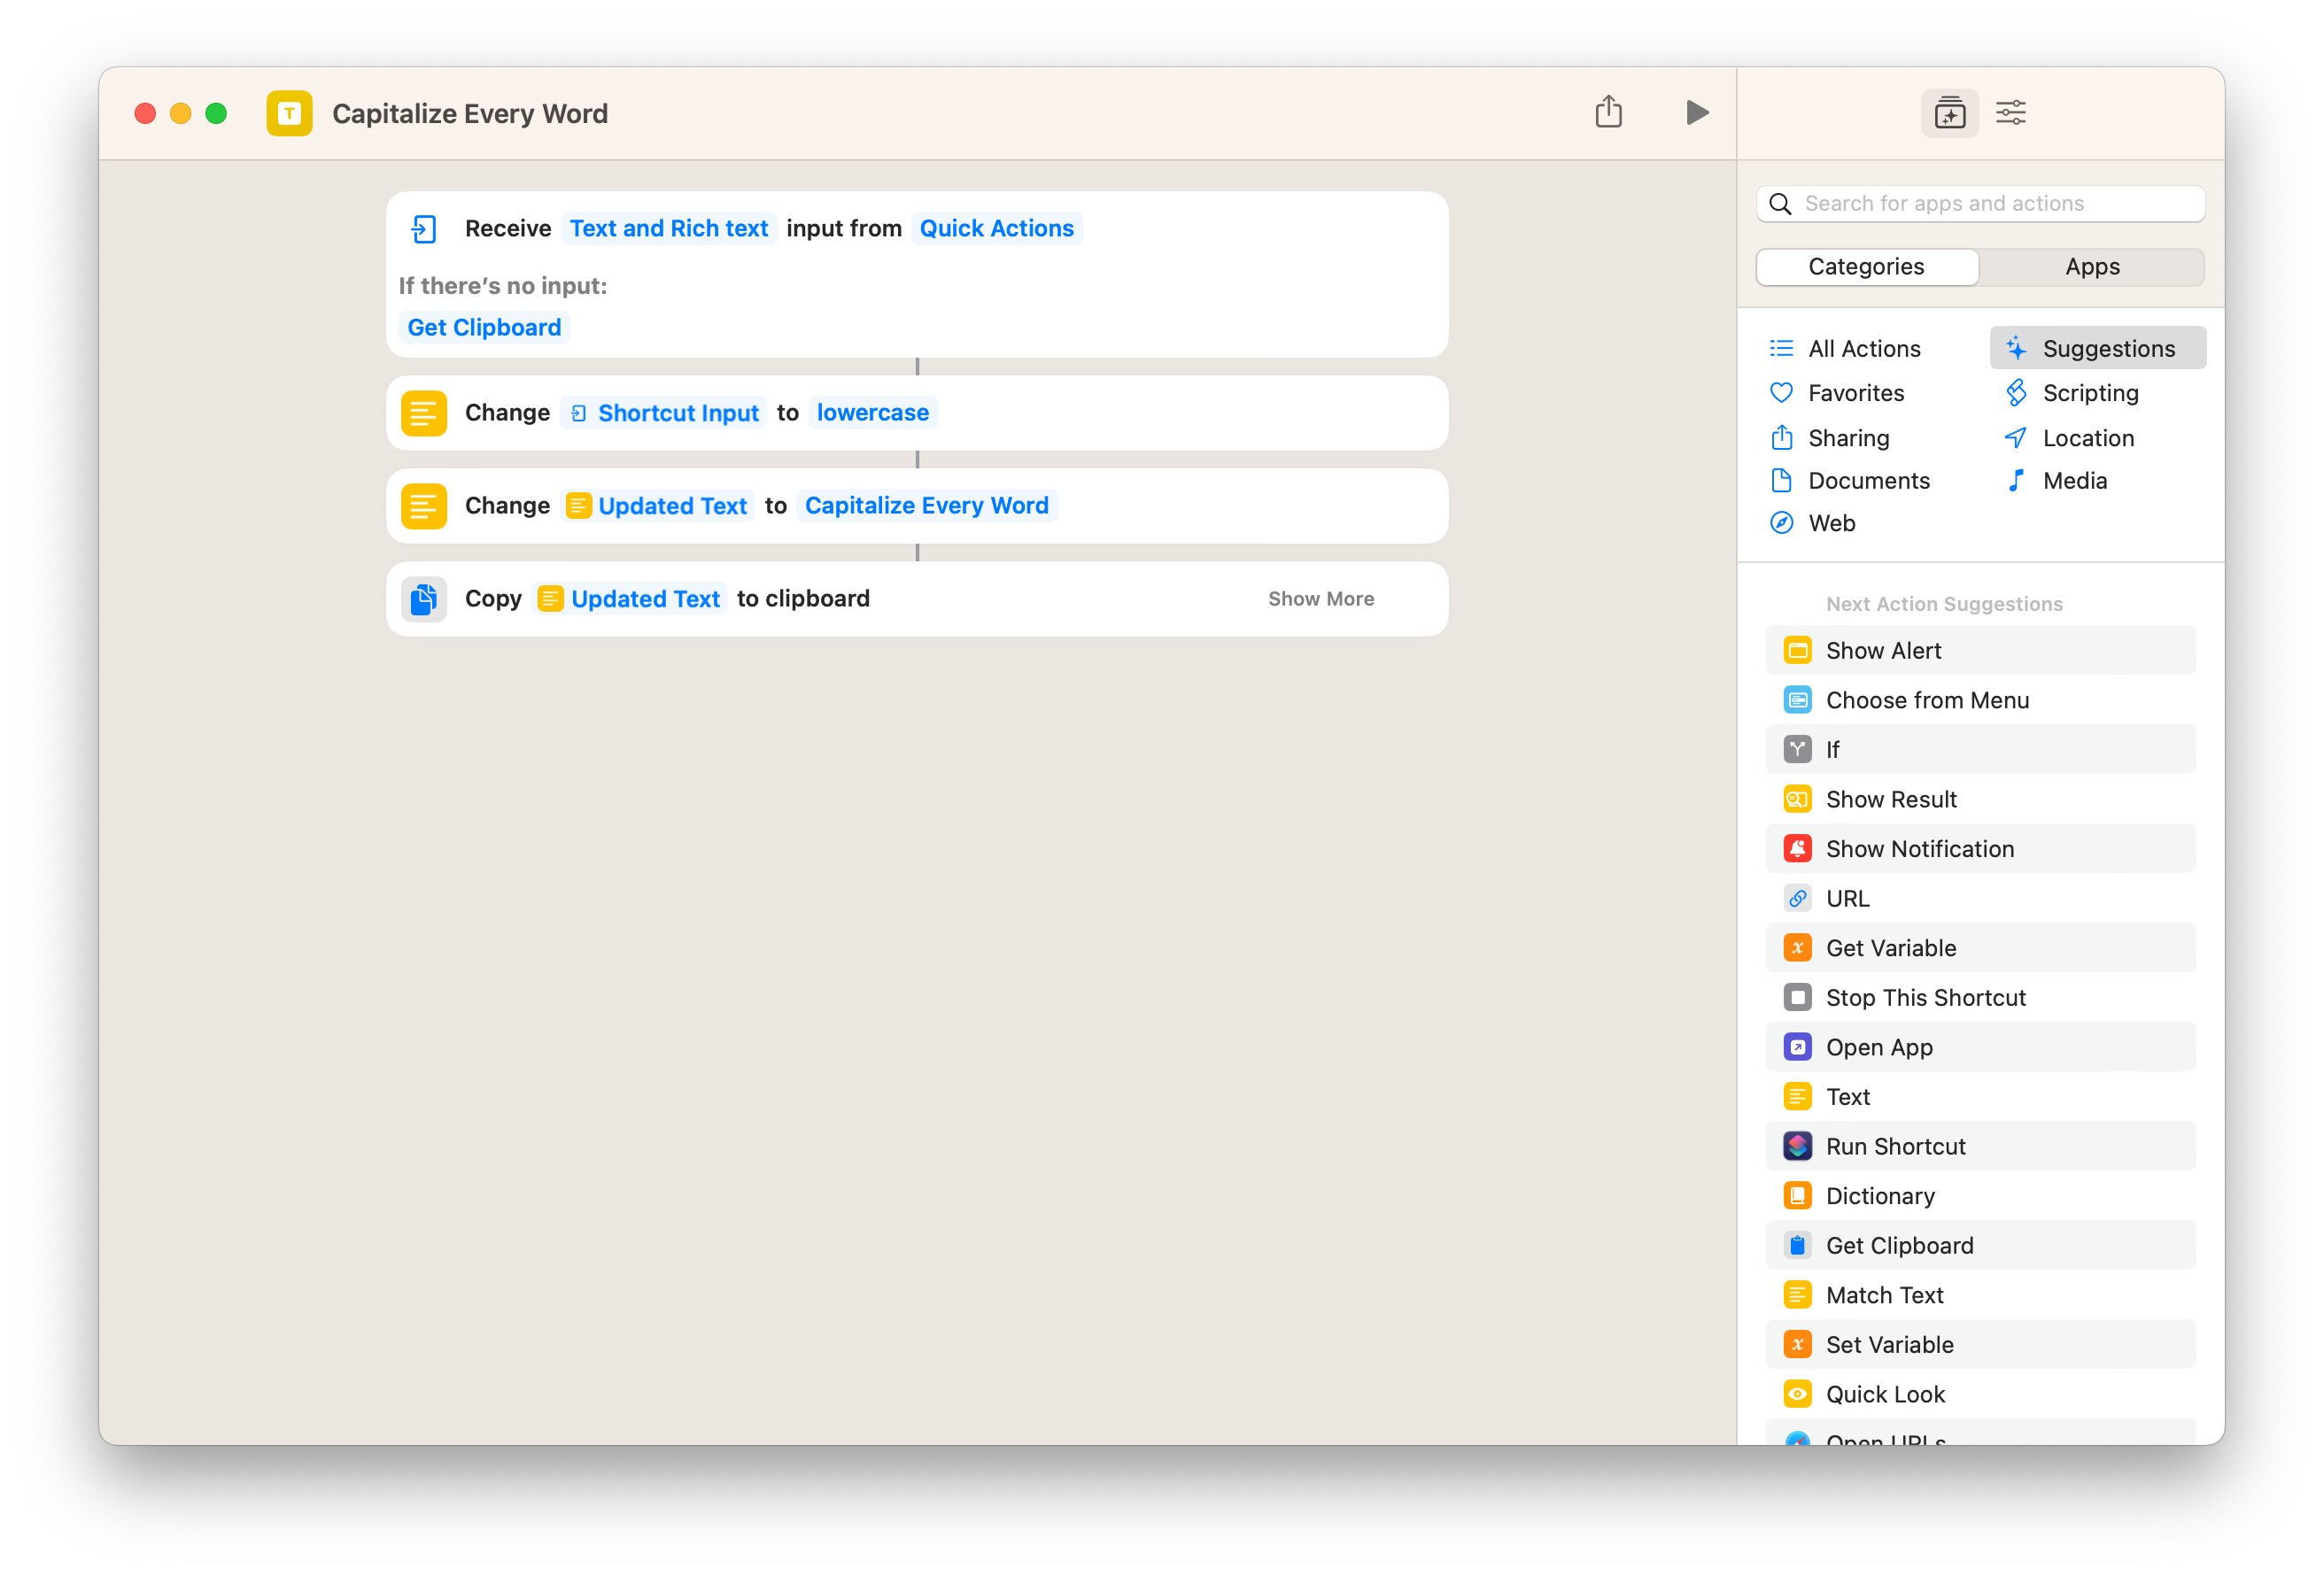
Using the Get Clipboard action (or check for If there’s no Shortcut Input, then Get Clipboard), you can use Menu Bar shortcuts by copying text and pulling that into your flow before operating on it — like Capitalizing Every Word — and sending it elsewhere.
These Clipboard and Get What’s On-Screen methods are good replacements for trying to pass content via the Share Sheet, which isn’t widely supported by apps on macOS the same way they are on iOS.
Get files from Finder
For interactivity with your files, Apple has also included a Get Selected File in Finder action that’s a unique take on working with a document.
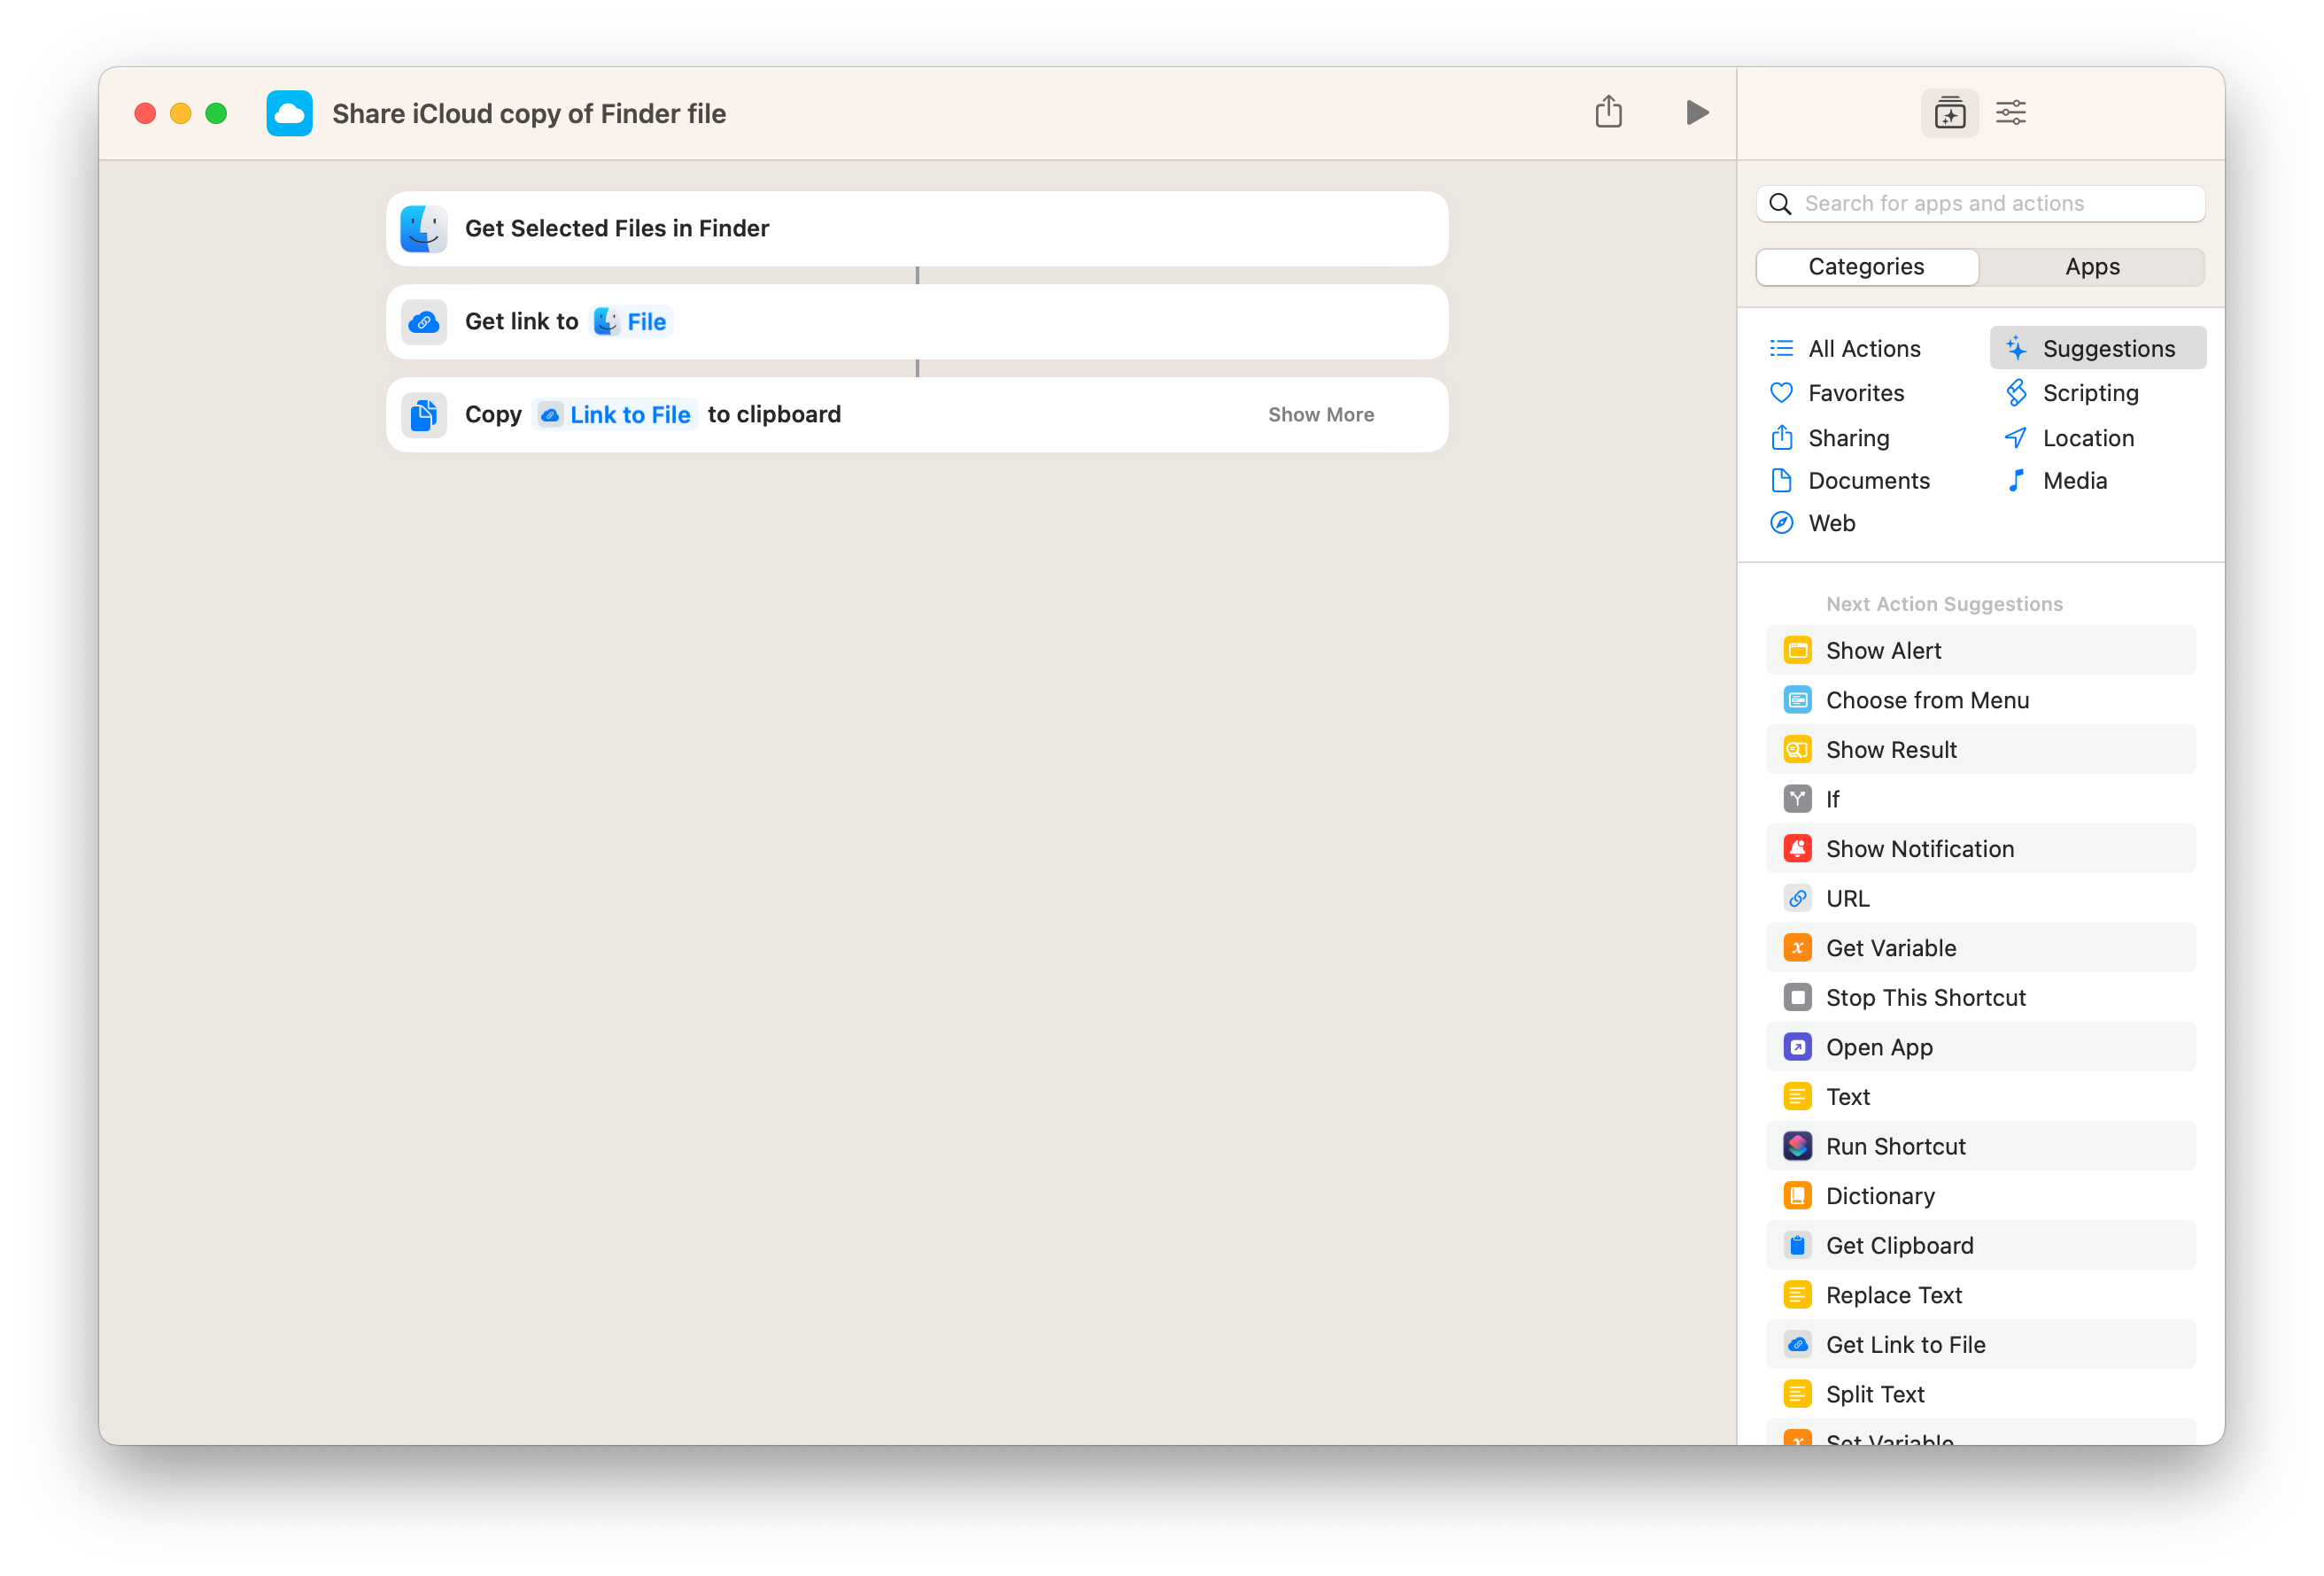
You’d run this type of shortcut by first clicking on a file in the Finder app, then running the shortcut from the Menu Bar. Then, the file is passed out of the Finder action, ready for any operation.
In our Share iCloud copy of Finder file shortcut, the Get Link to File action is used to generate an iCloud link to your selected file in Finder, making it easy to share a copy of the document with anyone via a URL.
For many people, the Menu Bar could be the best way to run most of your shortcuts on the Mac — they’re always accessible, they’re easy to edit, and very customizable from the sort order of the main app.
And for anybody who wants to make their Menu Bar actions interactive with their current content and make their own menu items for apps, Apple has provided powerful tools to do just that. This is the kind of power pro users are looking for.
What shortcuts do you plan to include in your Menu Bar? Send them to me at @mattcassinelli on Twitter — I love seeing everyone’s unique setups!

Matthew Cassinelli is a writer, podcaster, video producer, and Shortcuts creator. After working on the Workflow app before it was acquired by Apple and turned into Shortcuts, Matthew now shares about how to use Shortcuts and how to get things done with Apple technology.
On his personal website MatthewCassinelli.com, Matthew has shared hundreds & hundreds of shortcuts that anyone can download, plus runs a membership program for more advanced Shortcuts users. He also publishes a weekly newsletter called “What’s New in Shortcuts.”
