How to keep personal messages from showing up on a shared iPad
iMore offers spot-on advice and guidance from our team of experts, with decades of Apple device experience to lean on. Learn more with iMore!
You are now subscribed
Your newsletter sign-up was successful
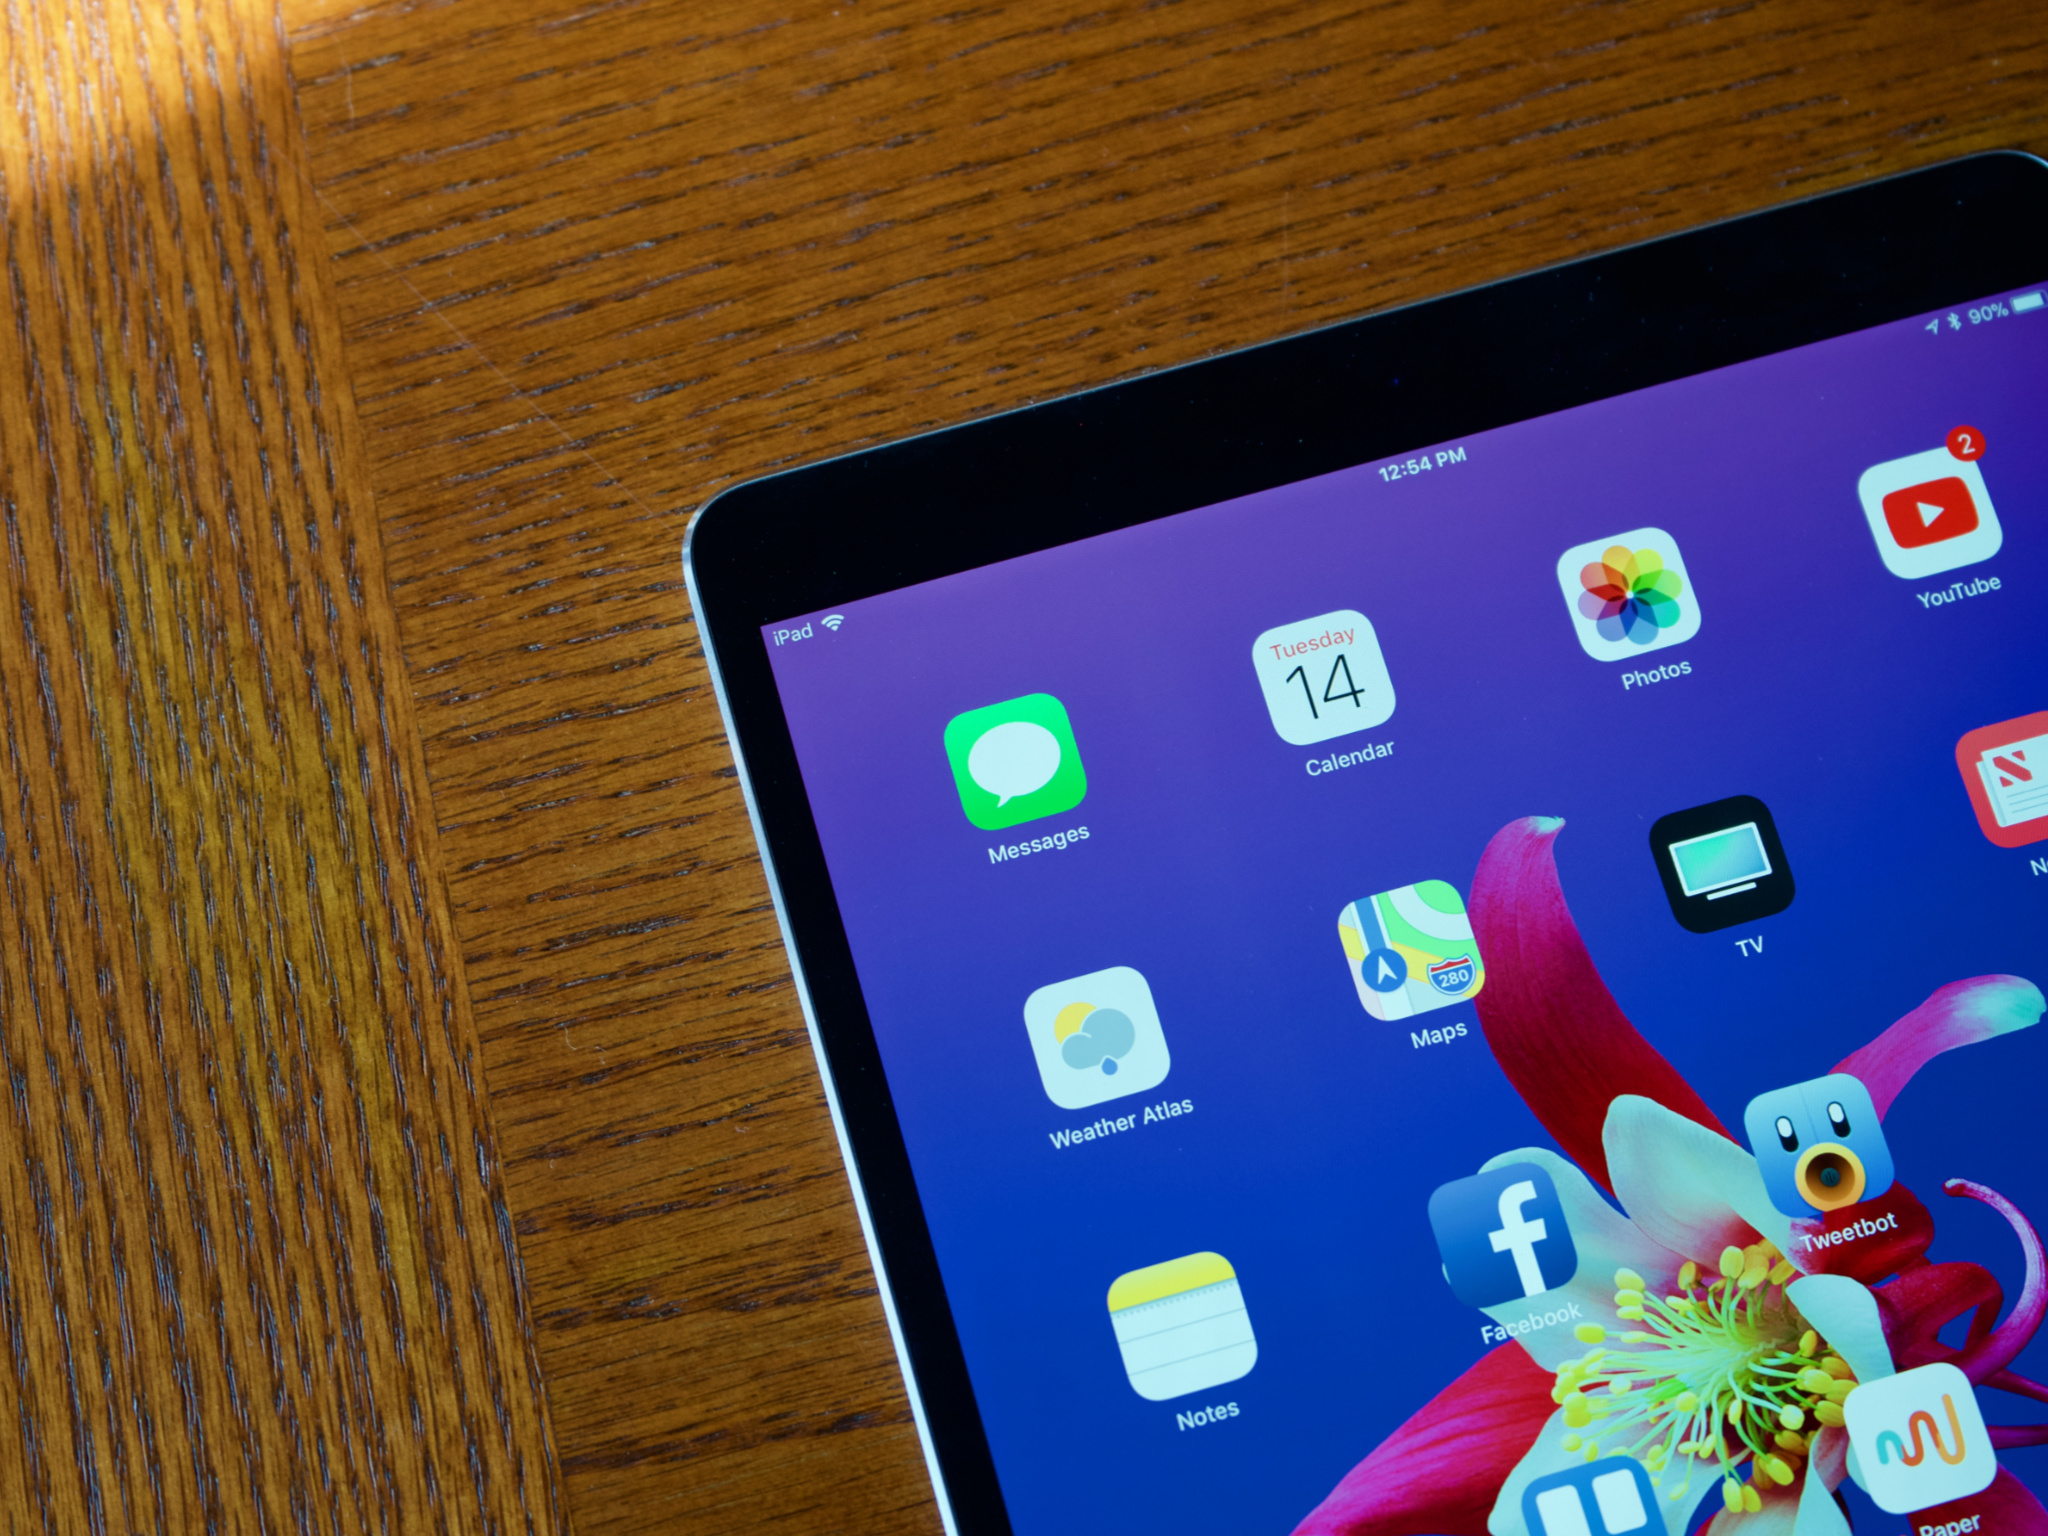
Sharing an iPad with a spouse or family member is a common occurrence. Maybe you have a common iPad in your kitchen, or use it in the living room to read the news or check email while you watch TV. If you used an Apple ID to set up the iPad initially, you might find that personal iMessages are unintentionally ending up on your shared device.
Here's what you can do if personal messages are showing up on a shared iPad.
- How to deactivate iMessage on iPad
- How to exclude a phone number from iMessage
- Add another email address
- Create a new Apple ID
How to deactivate iMessage on iPad
The simplest solution is just to deactivate iMessage for the iPad in question.
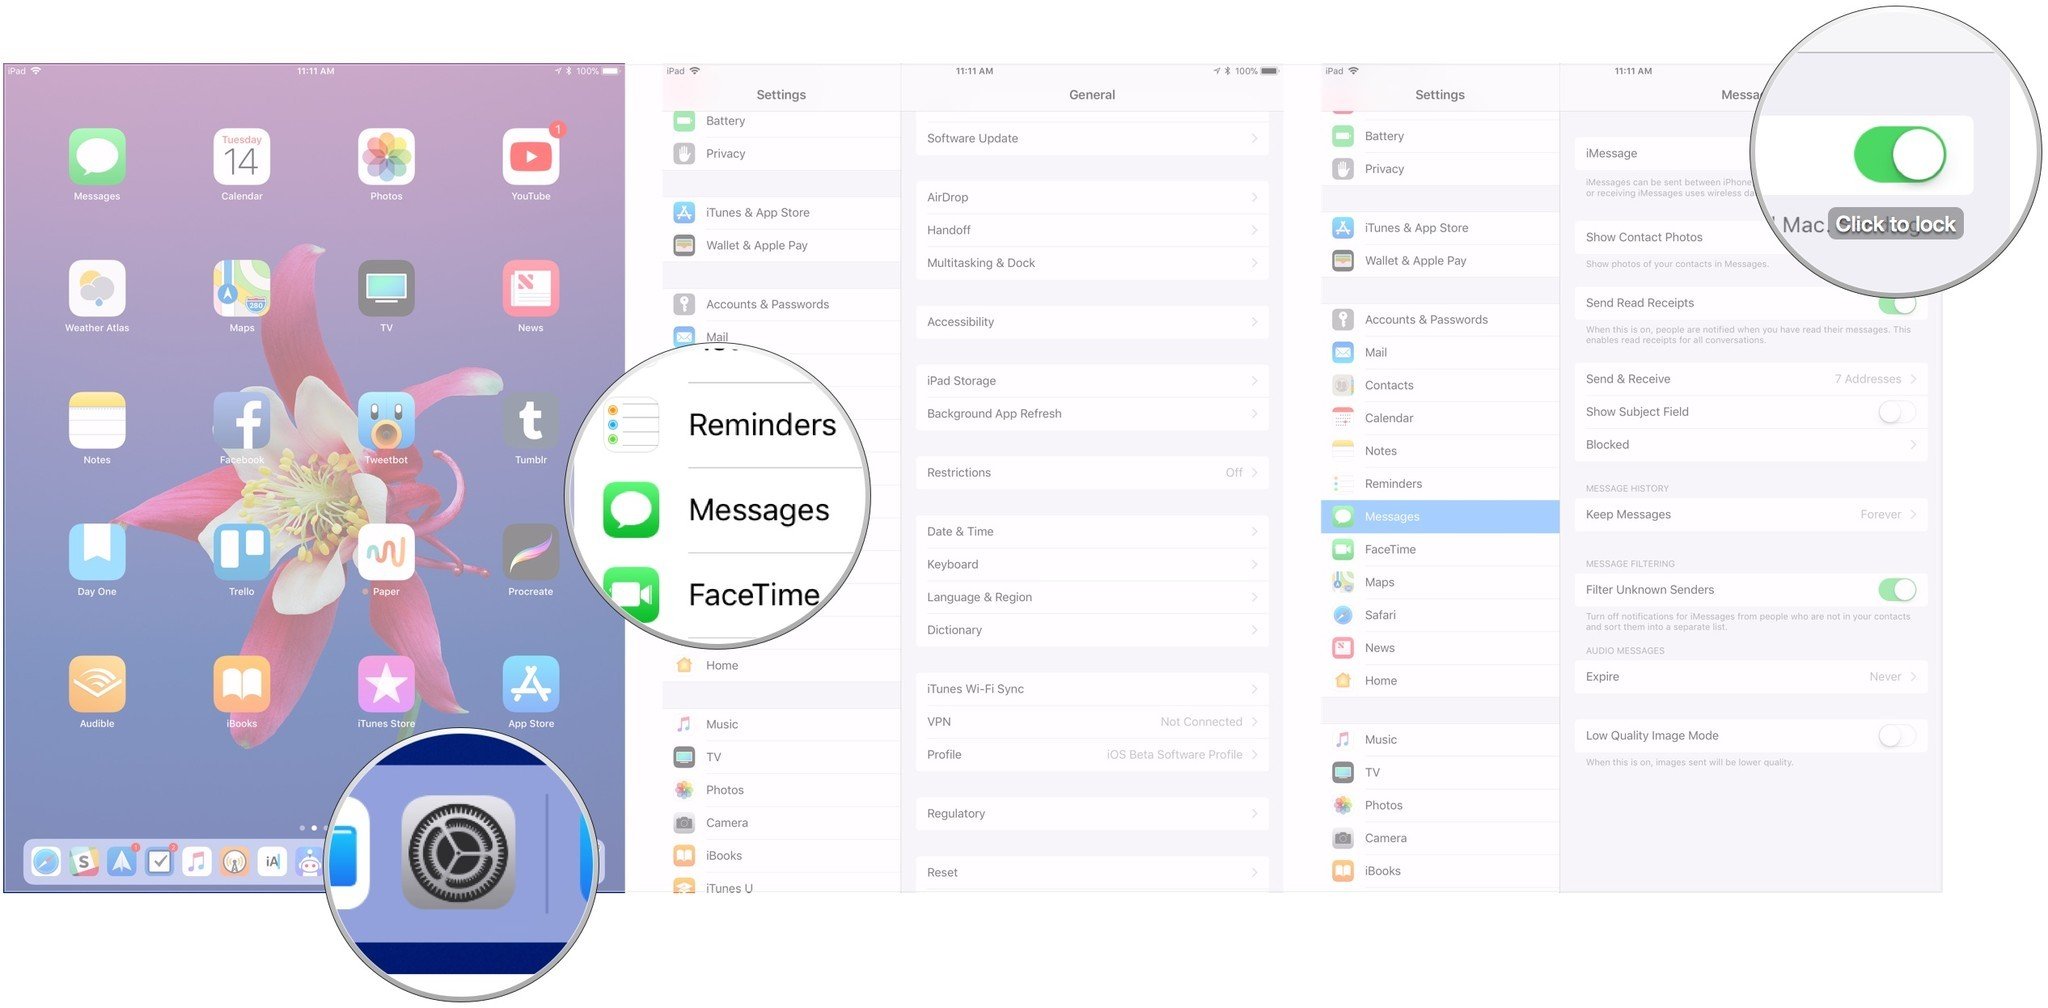
- Open Settings on the shared iPad.
- Tap Messages.
- Turn the iMessage switch to the off position.
How to exclude a phone number from iMessage
You can also exclude a specific phone number from iMessage on your iPad, so you no longer receive messages sent to it.
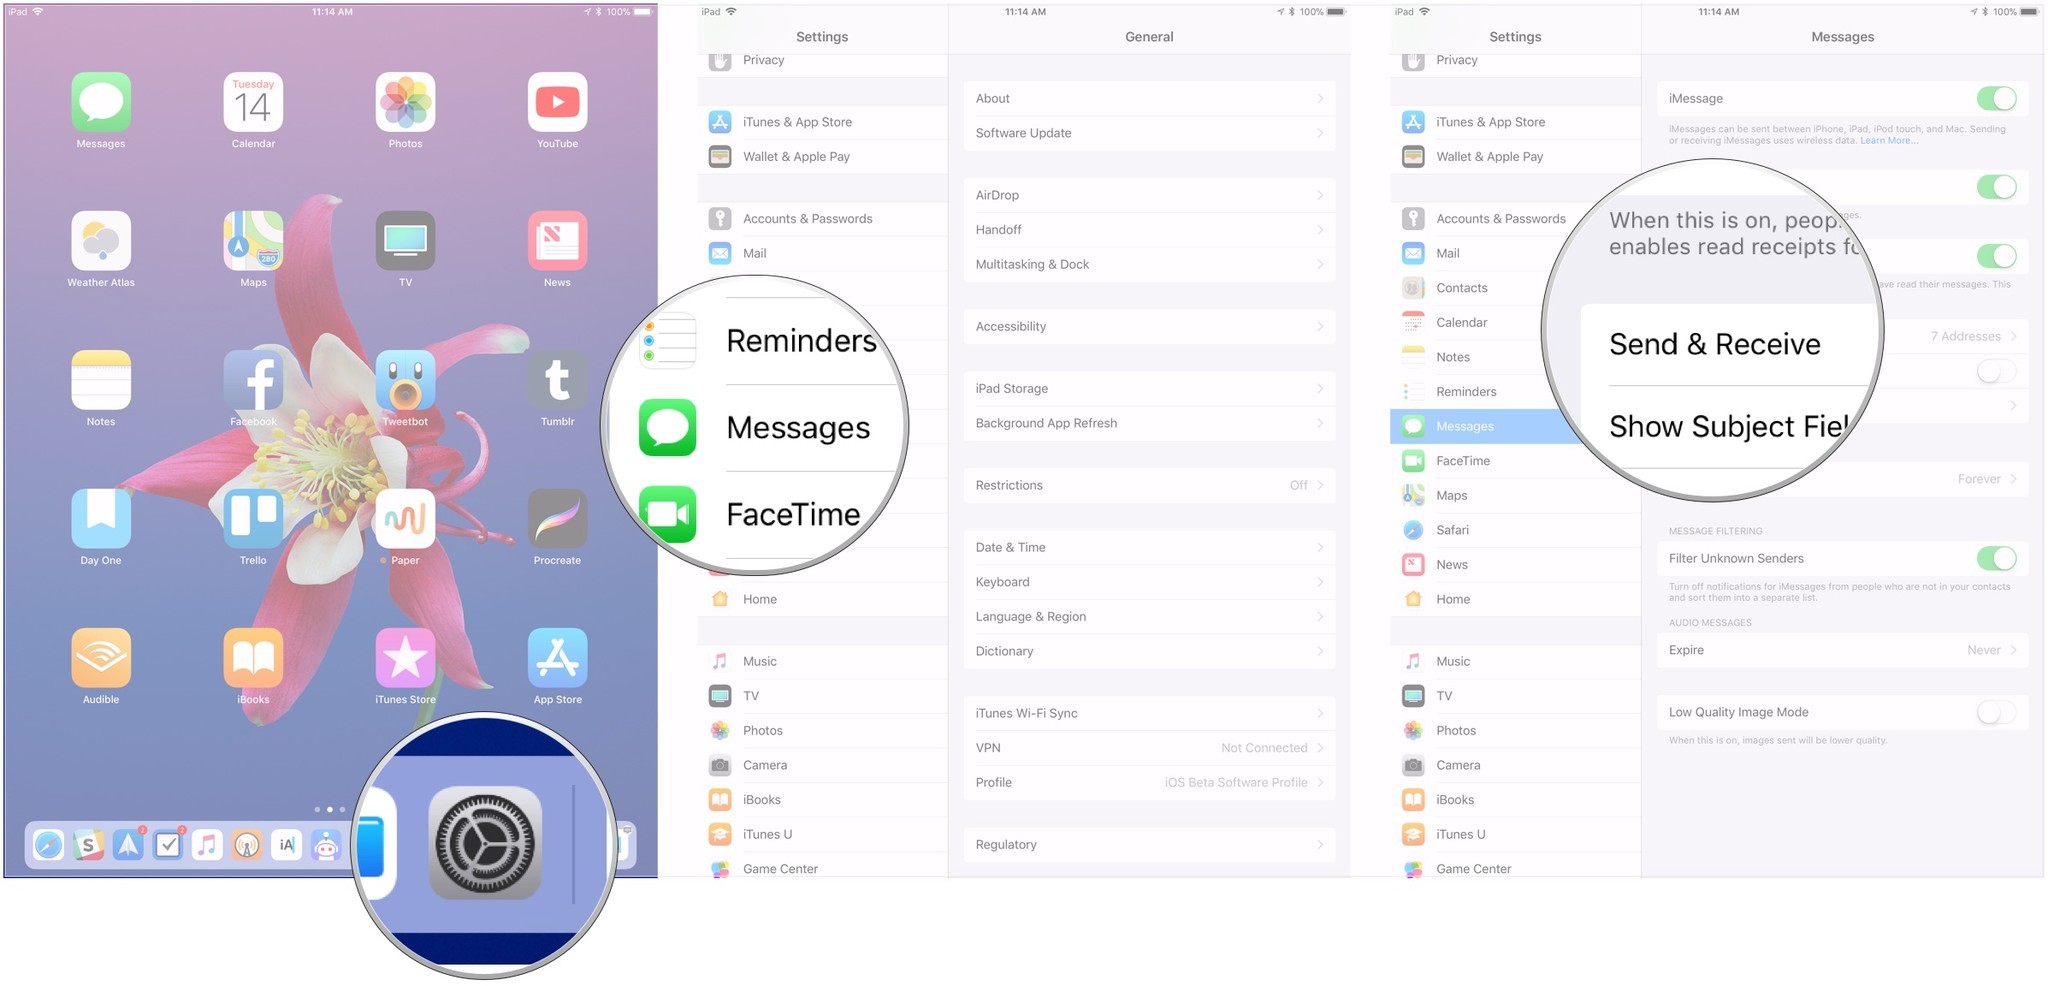
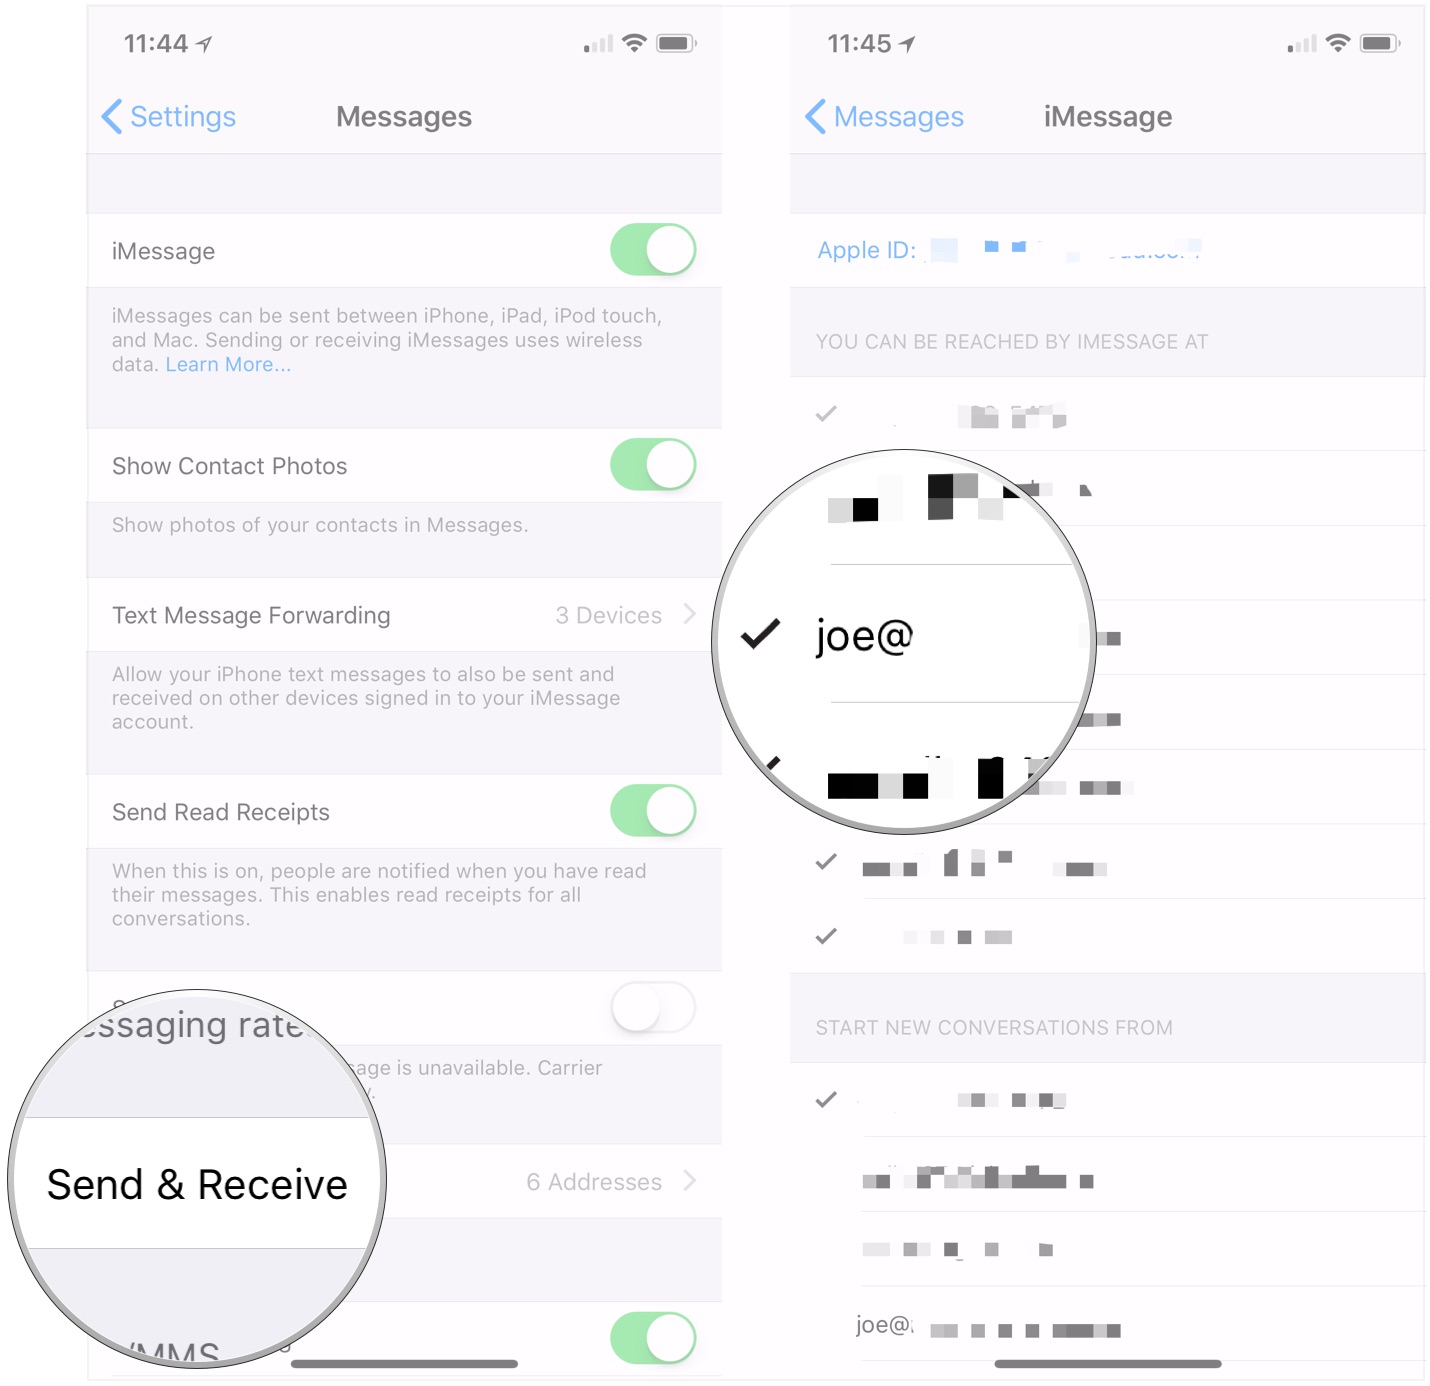
- Open Settings on the shared iPad.
- Tap Messages.
- Tap Send & Receive.
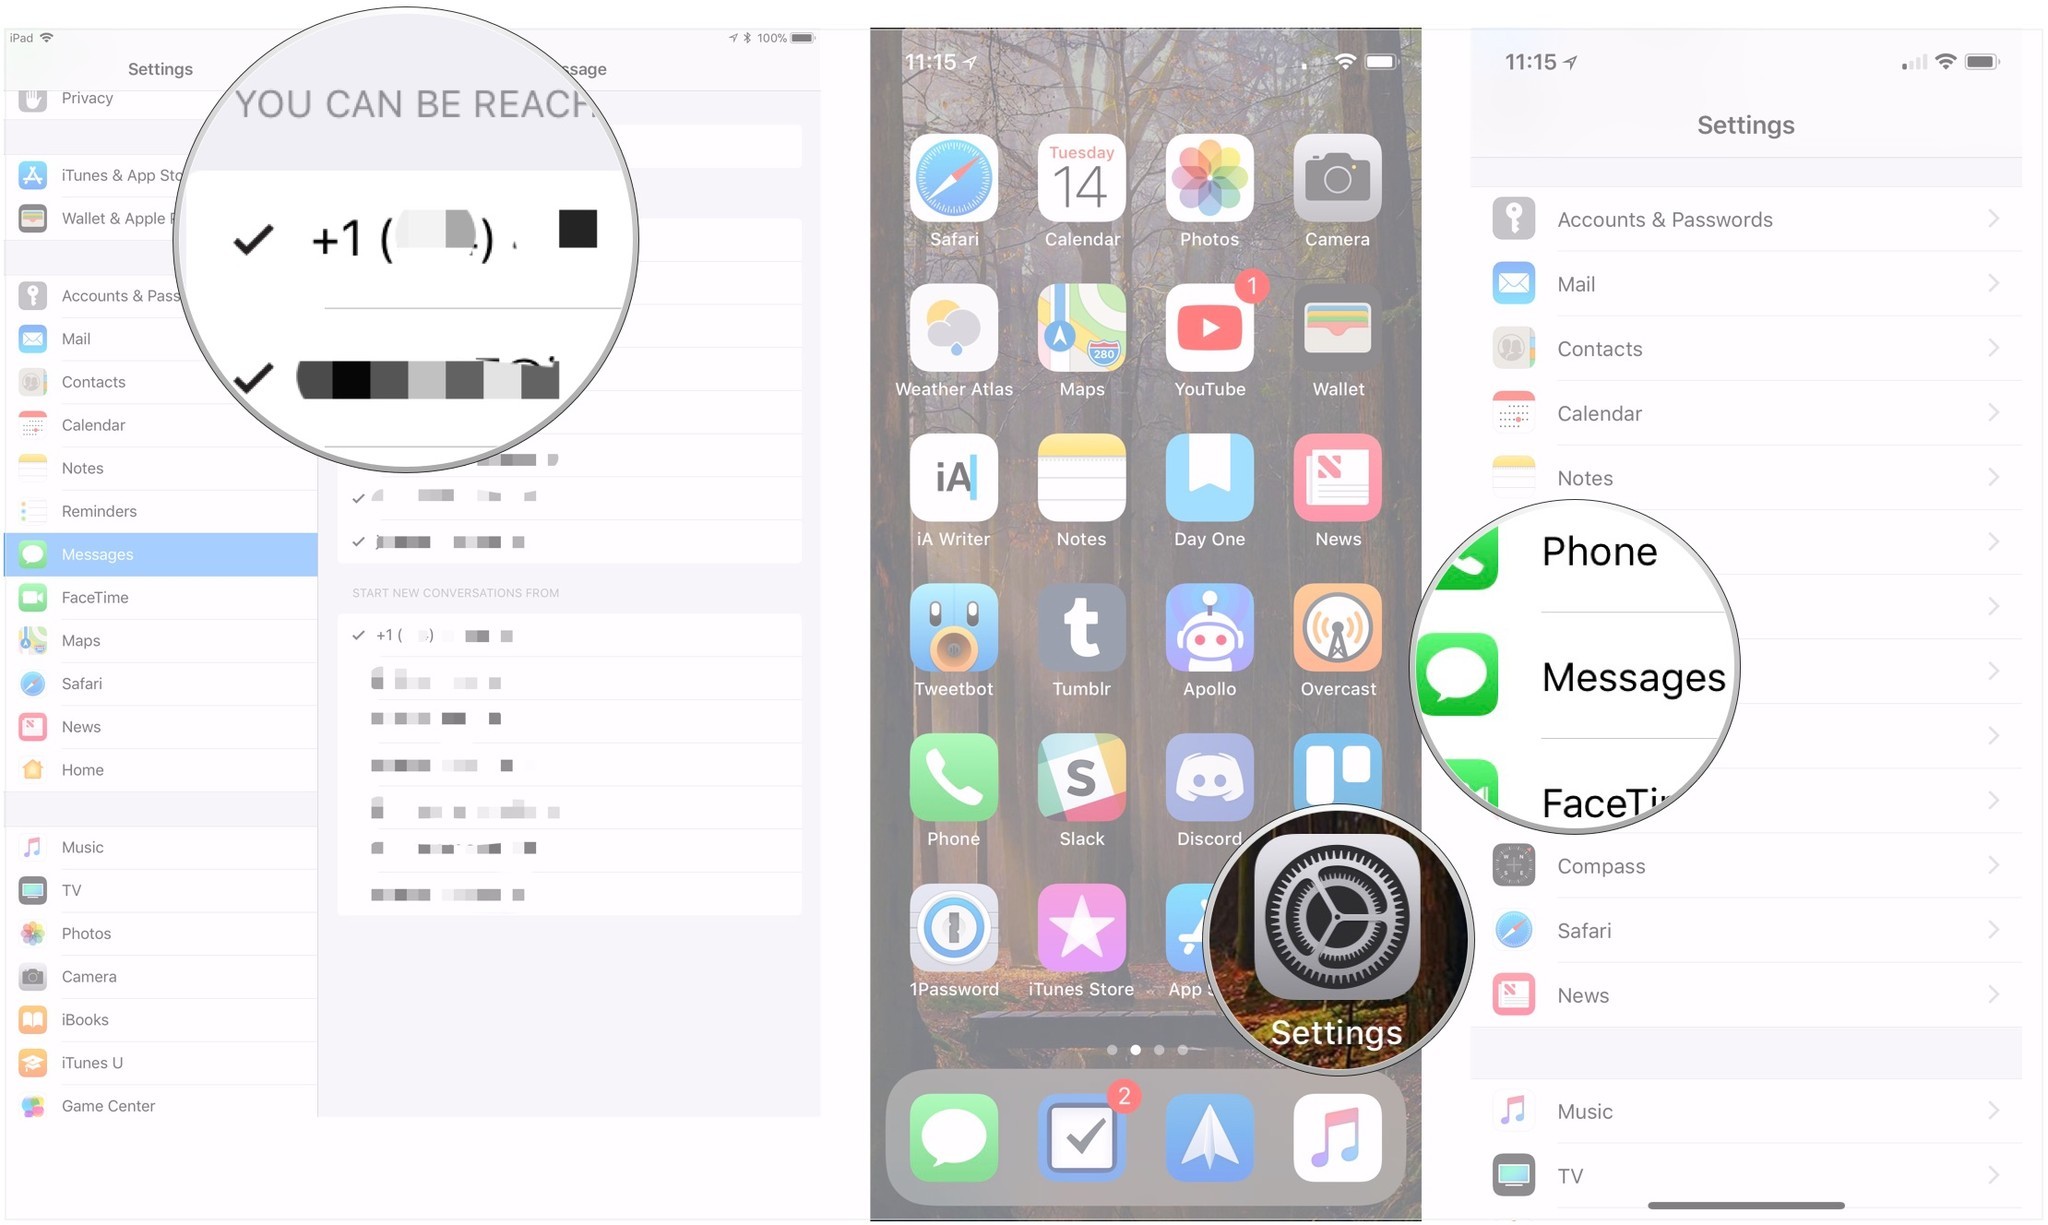
- Tap on the phone number that you want to exclude to uncheck it under You Can Be Reached By iMessage At. This should also cause the phone number under Start New Conversations From to disappear.
- Open Settings on the iPhone with the number that you want to exclude.
- Tap Messages.
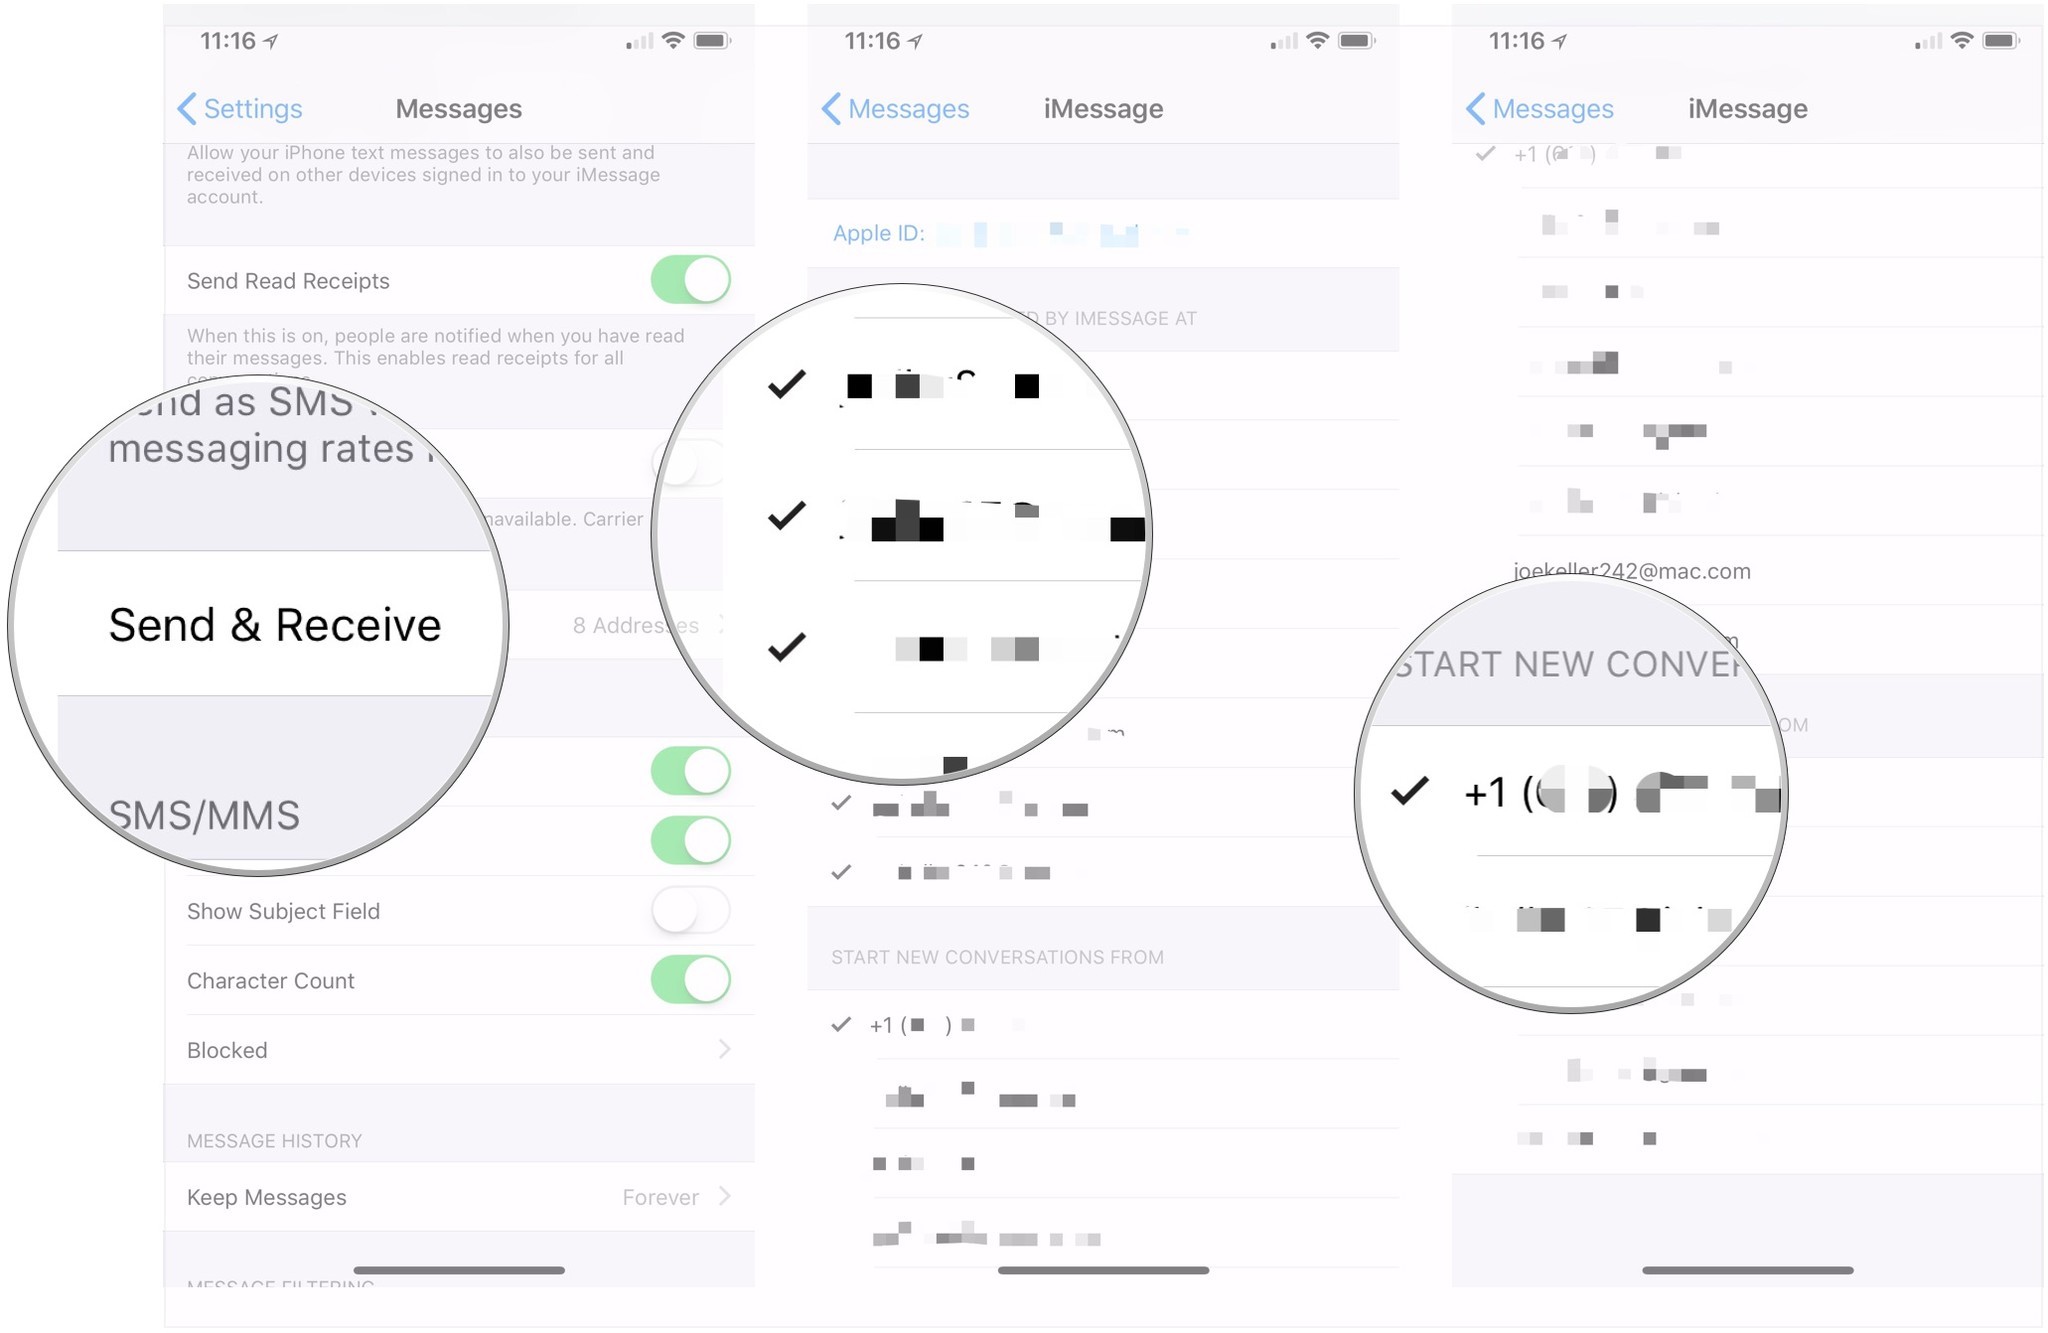
- Tap Send & Receive.
- Tap on the email addresses under You Can Be Reached By iMessage At to uncheck them so the phone only sends and receives iMessages using its phone number.
- Make sure the phone number is checked under Start New Conversations From.
Add another email address to use with iMessage
You can add a new email address at which you can be reached using iMessage, and have it active only on your iPad.
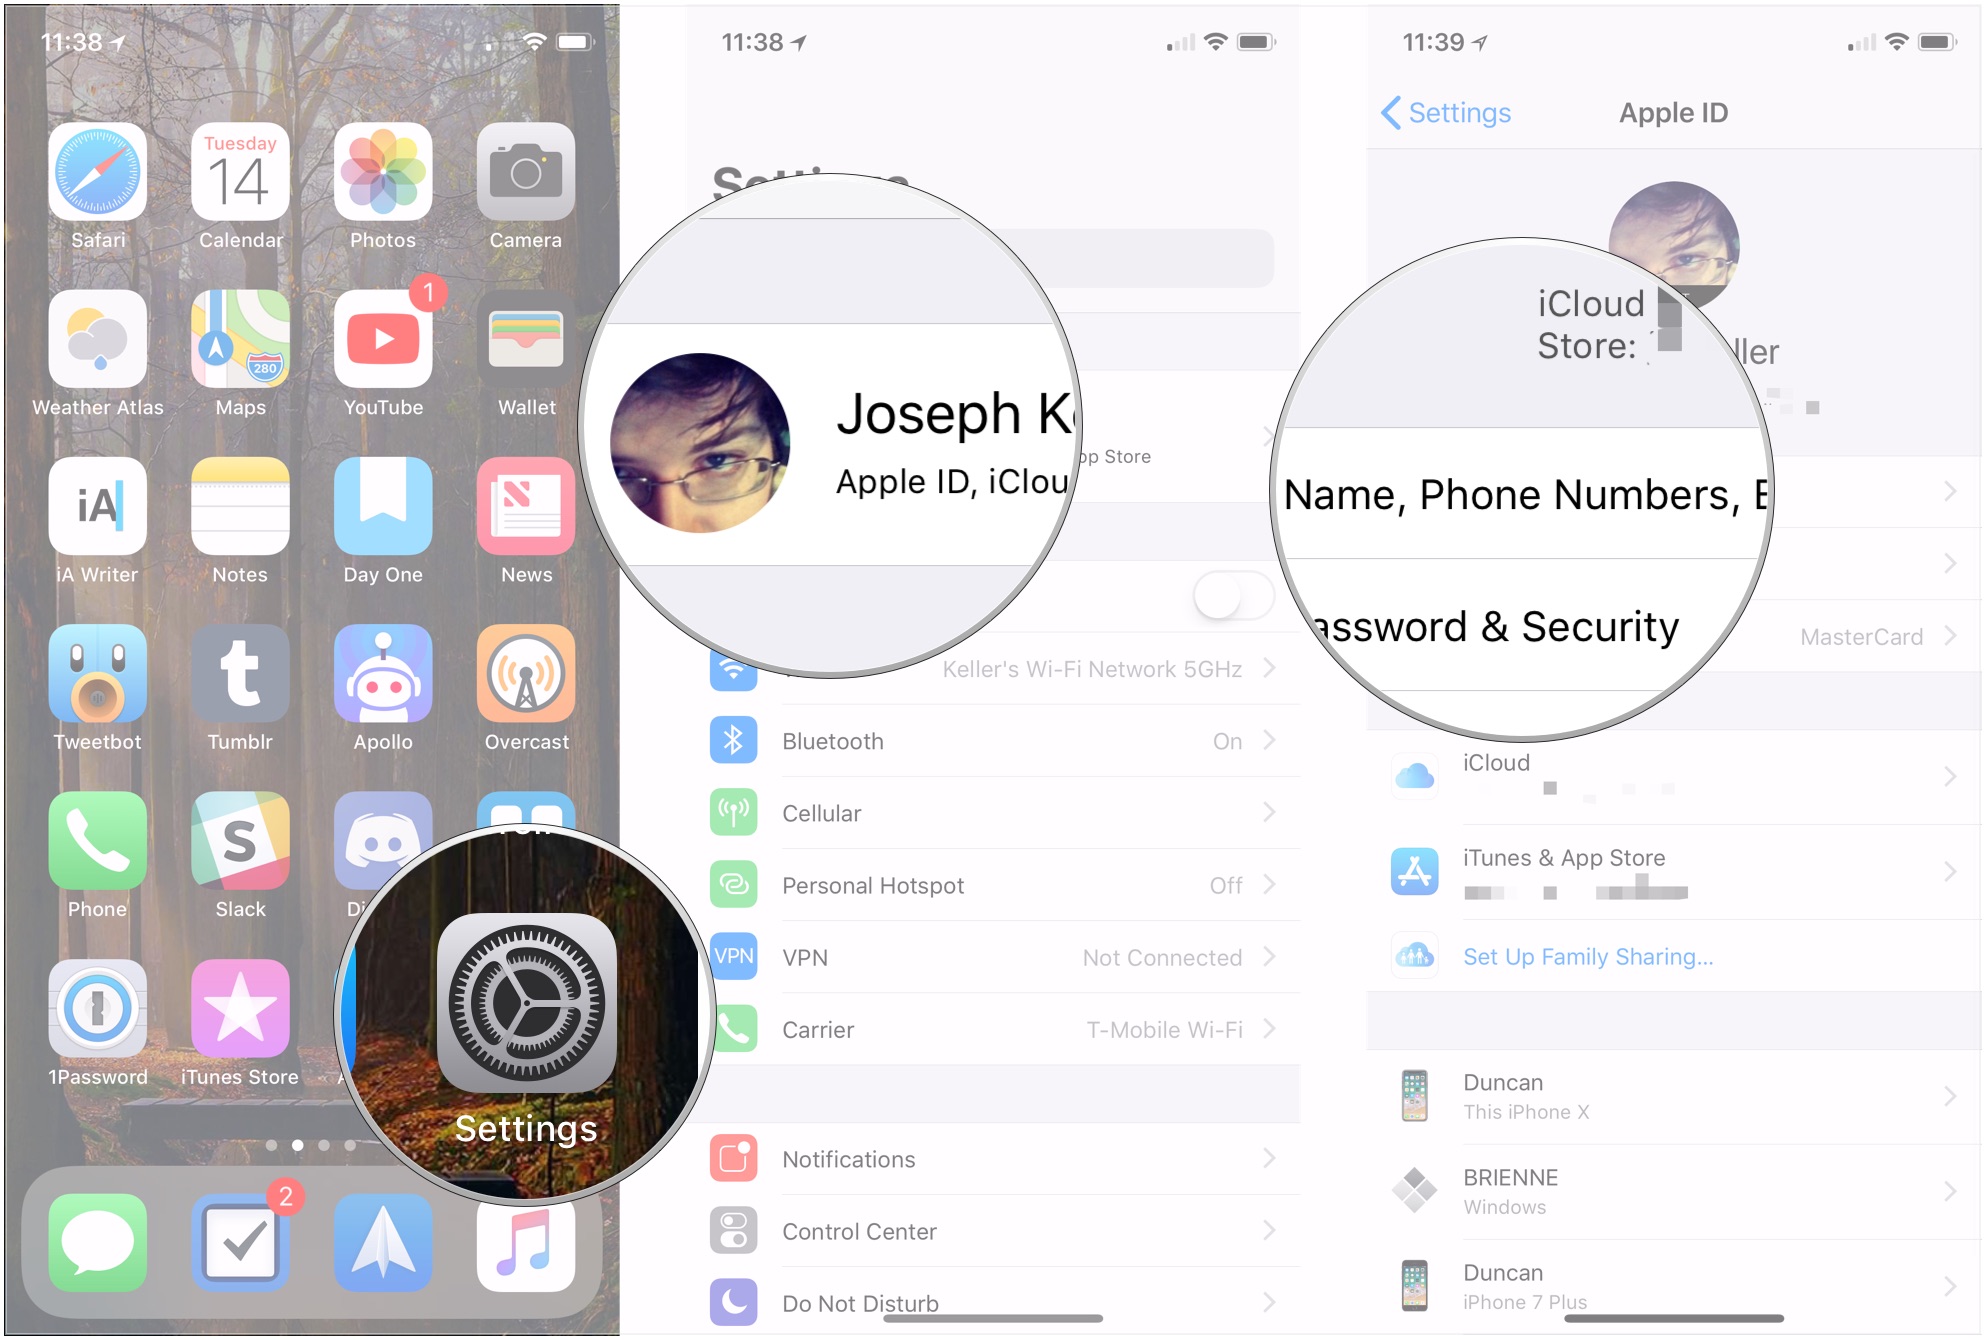
- Open Settings on your iPhone or iPad.
- Tap on the Apple ID banner.
- Tap Name, Phone Numbers, Email.
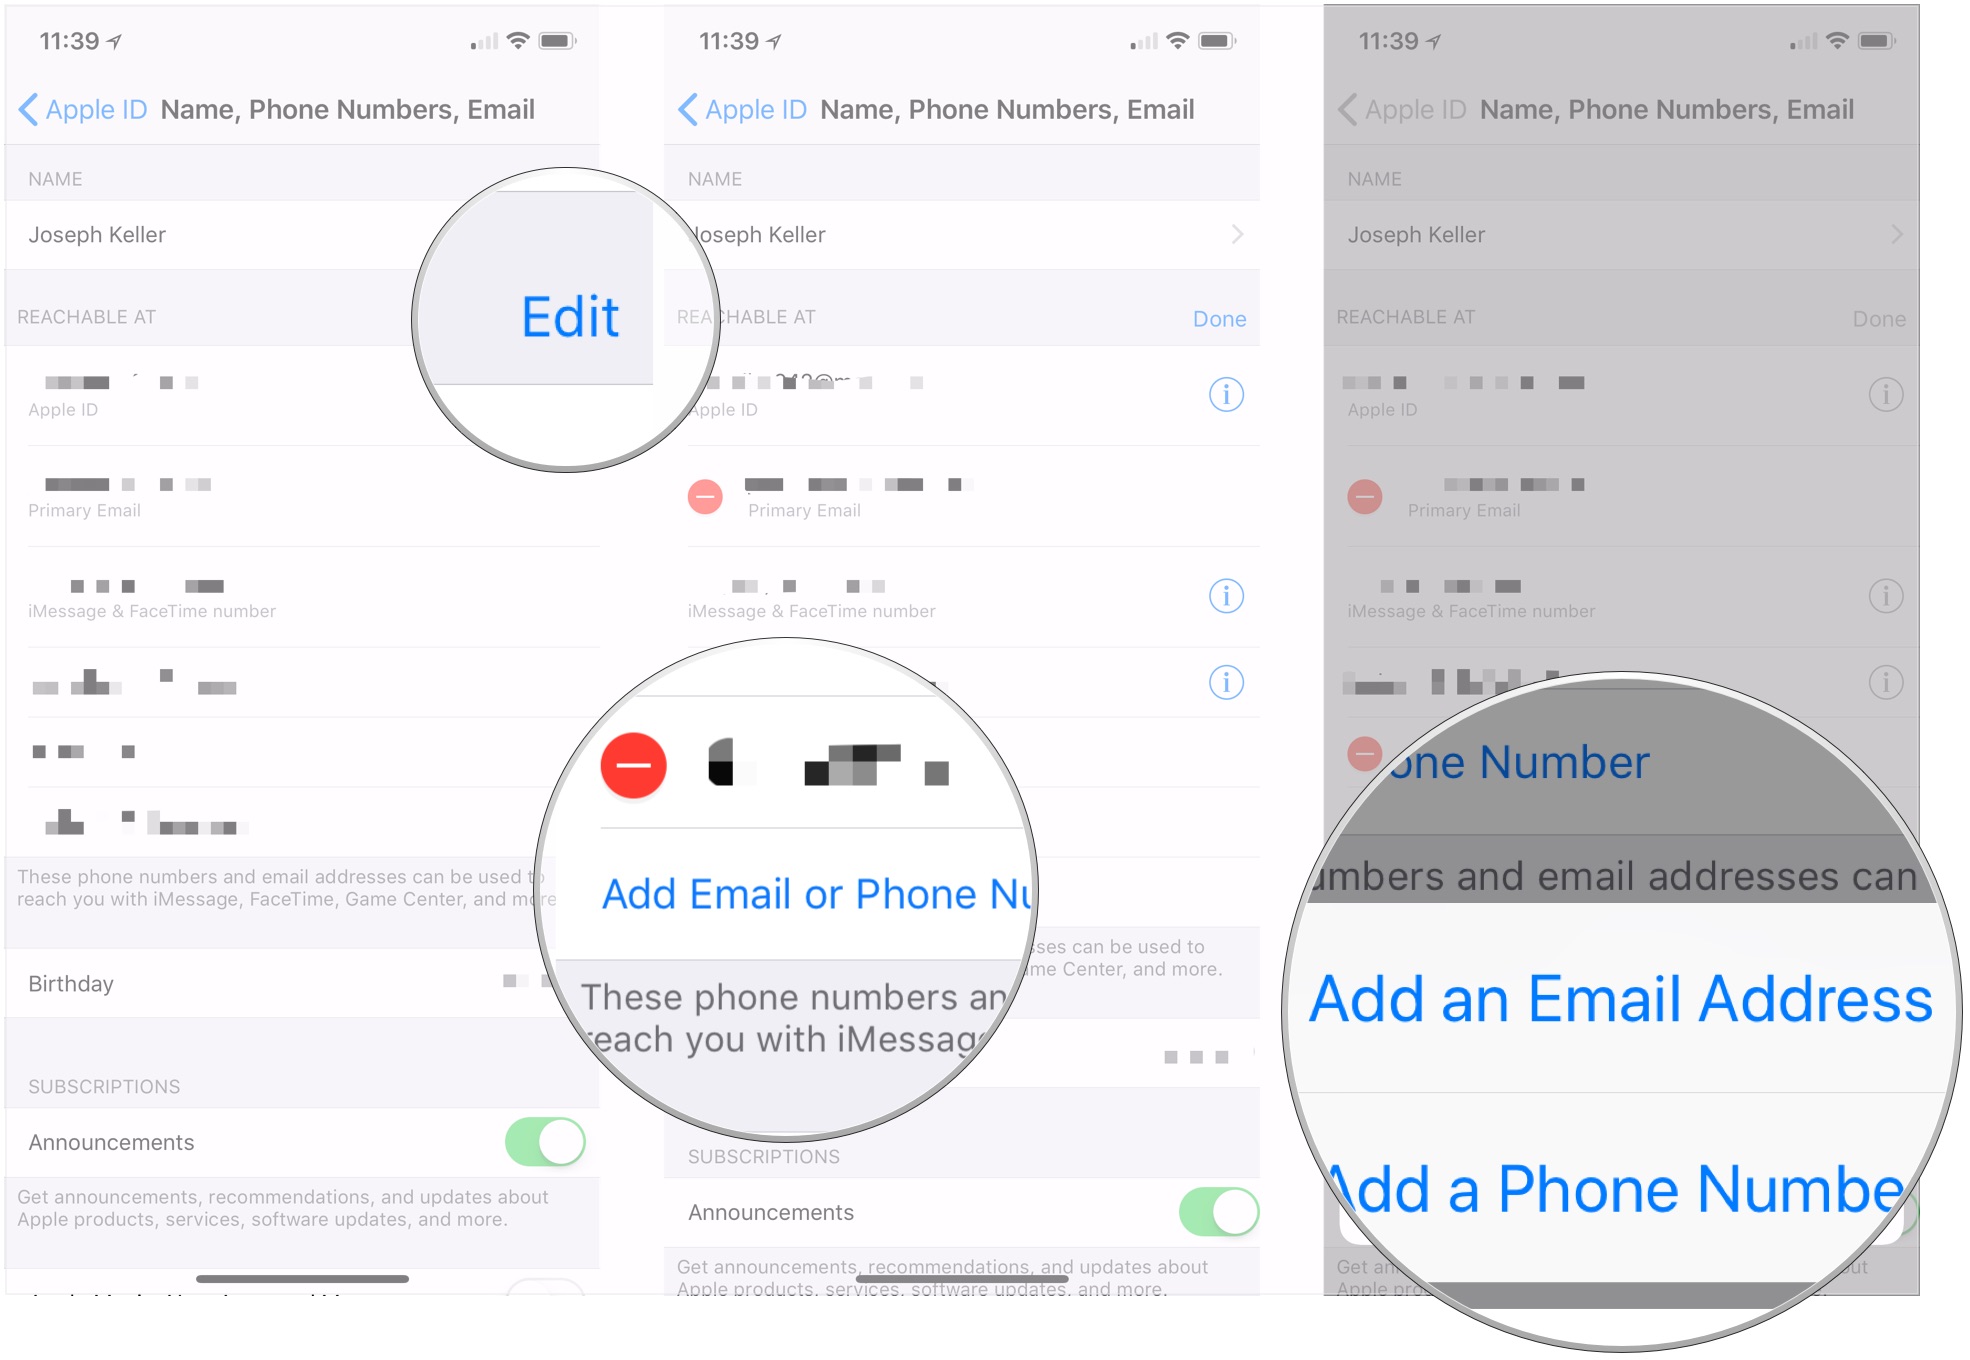
- Tap Edit at the top of the Reachable At list.
- Tap Add email or Phone Number.
- Tap Add an Email Address.
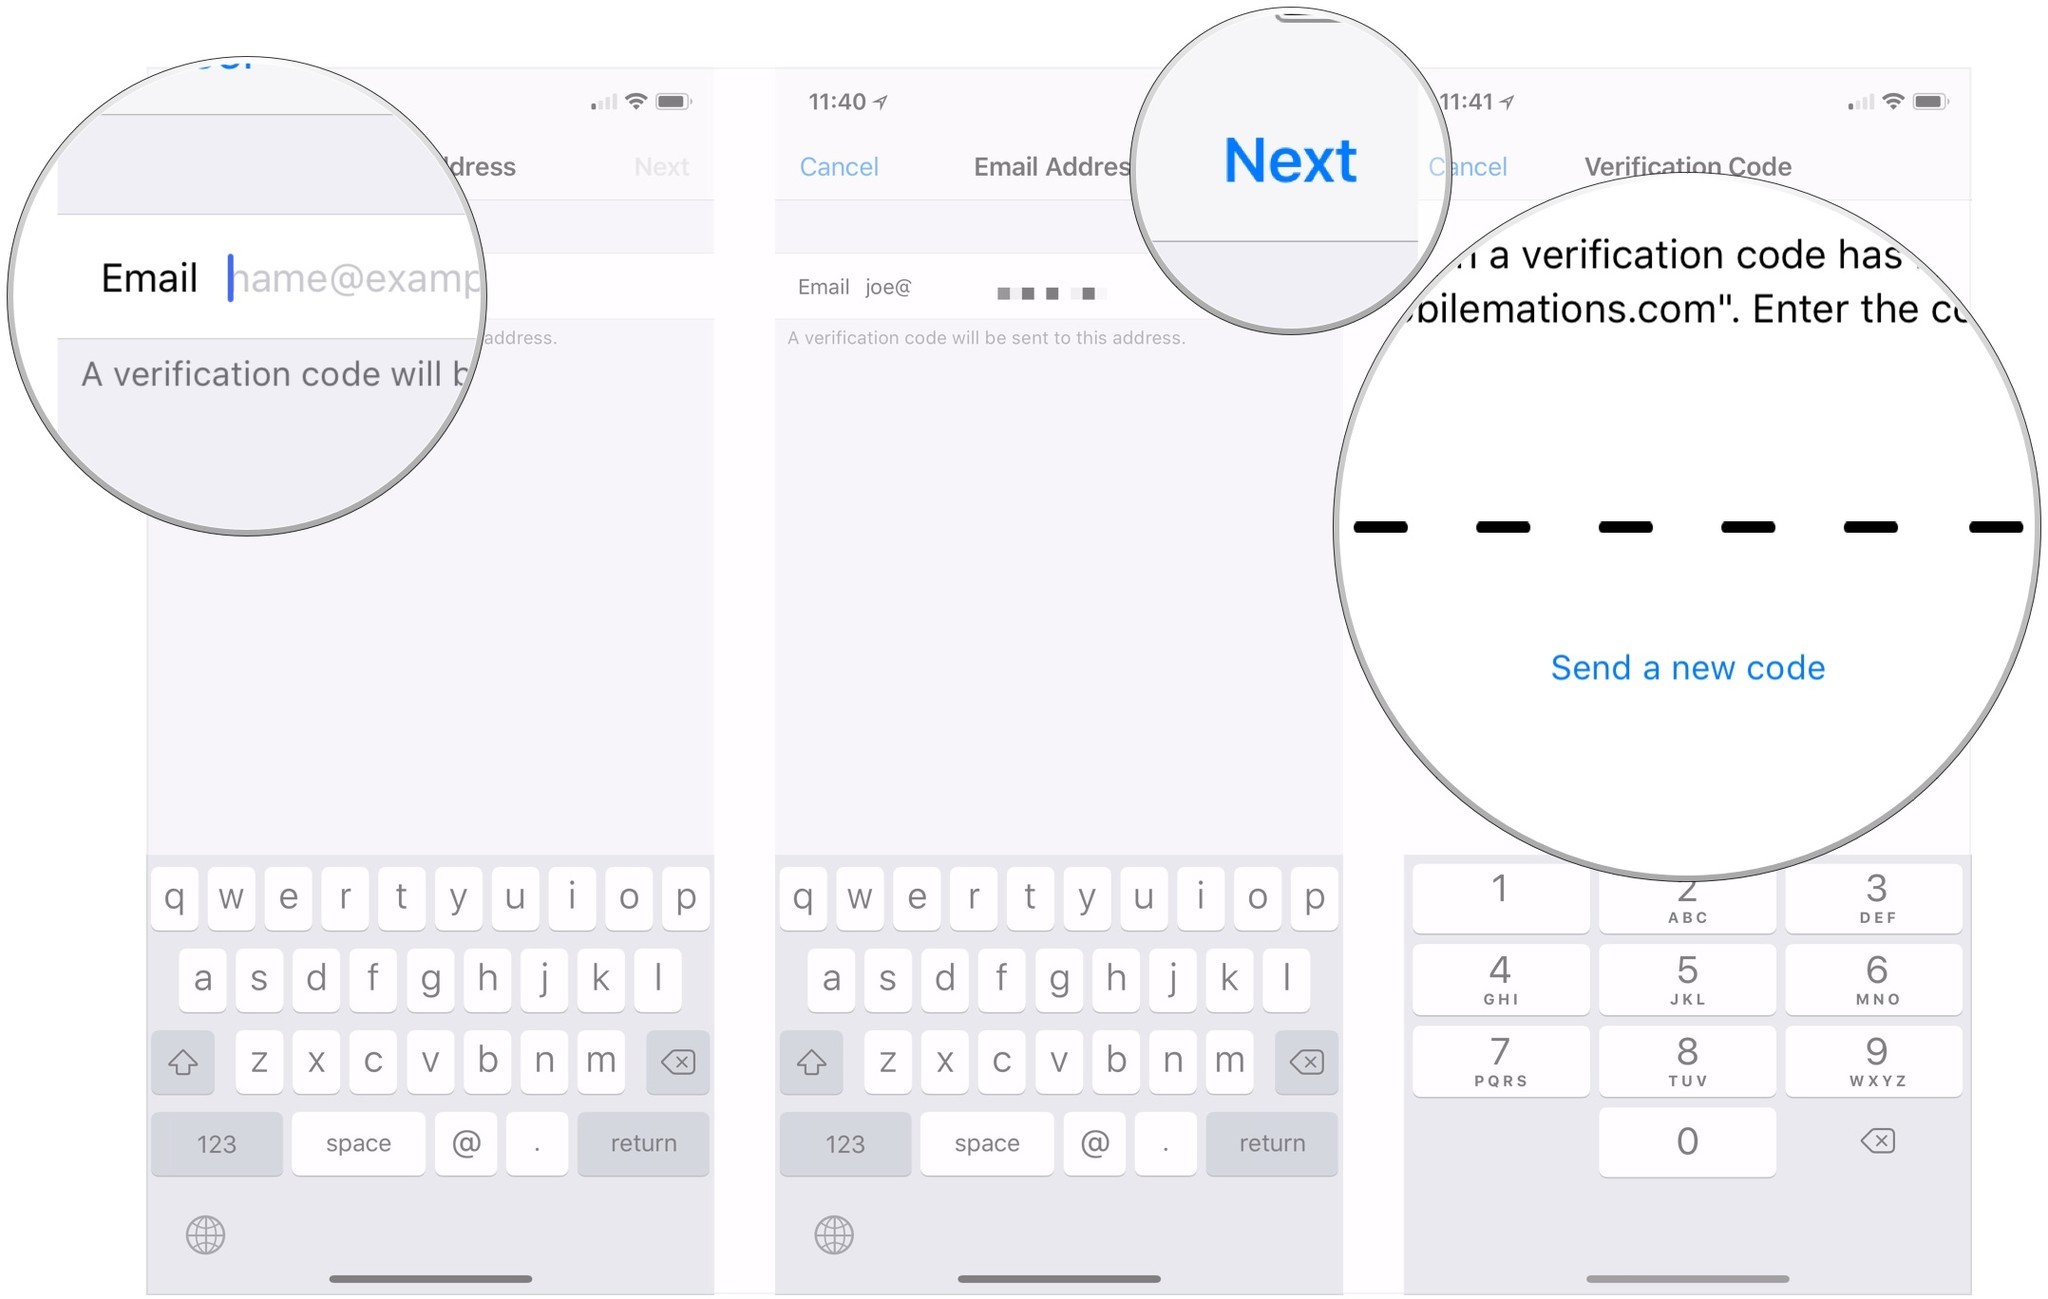
- Enter the email address.
- Tap Next.
- Enter the verification code that was sent to your email address.
If you only want messages sent to that address to go to your shared iPad, you'll need to deactivate the address on your other devices like so:
- Open Settings on your other iOS devices.
- Tap Messages.
- Tap Send & Receive.
- Tap the newly added email address in order to uncheck and deactivate it for iMessage on that device.
- Repeat as many times as necessary on all of the devices that are not your shared iPad.
Create a new Apple ID
The final method for keeping messages confined to a single Apple device is to create a brand new Apple ID. You should only share that ID with people that you want to receive messages from on that shared iPad.
iMore offers spot-on advice and guidance from our team of experts, with decades of Apple device experience to lean on. Learn more with iMore!
It's probably a good idea to let the people that you share this ID with that the device they'll be sending messages to is itself shared with other people.
Questions
If you have any questions about managing personal messages on a shared iPad, let us know in the comments.
Updated July 2018: These are still the steps you take to do all of this.
Joseph Keller is the former Editor in Chief of iMore. An Apple user for almost 20 years, he spends his time learning the ins and outs of iOS and macOS, always finding ways of getting the most out of his iPhone, iPad, Apple Watch, and Mac.
