How to keep using Time Machine when the AirPort Time Capsule is discontinued
iMore offers spot-on advice and guidance from our team of experts, with decades of Apple device experience to lean on. Learn more with iMore!
You are now subscribed
Your newsletter sign-up was successful
The news that Apple is discontinuing the AirPort line, although expected, is a bitter pill to swallow for many Mac enthusiasts that love the no-nonsense, easy to administer backup and recovery features on the Time Capsule series. Even though the Time Capsule will be no more, you can still use Time Machine for your backup and recovery purposes in your post-AirPort world. Here's how!
Discontinued but supported
Apple and authorized resellers will continue to sell AirPort Express, AirPort Extreme, and AirPort Time Capsule while supplies last. Apple is also be helping customers get service and parts for current generation AirPort Base Stations for the next five years. So if you've just picked up a Time Capsule or an Extreme or can get your hands on a new one, you'll can rest assured that you'll be covered, hardware and software, for the next 5 years so using it as your main backup device is still a great way to go.
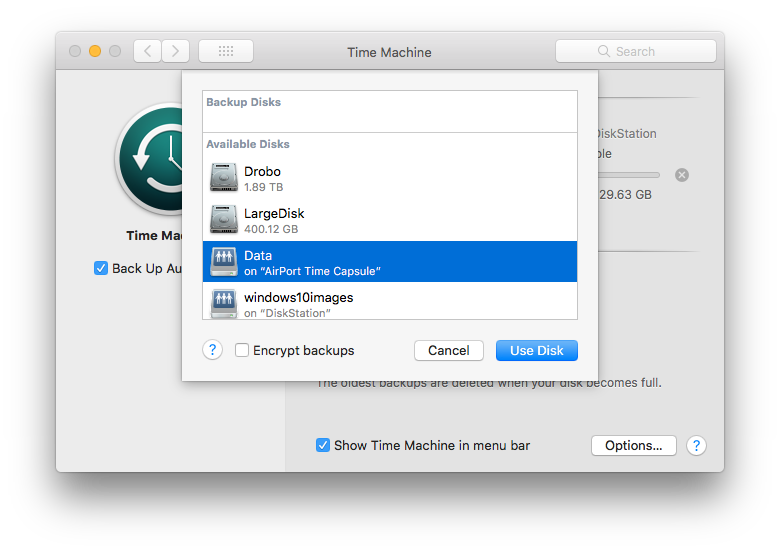
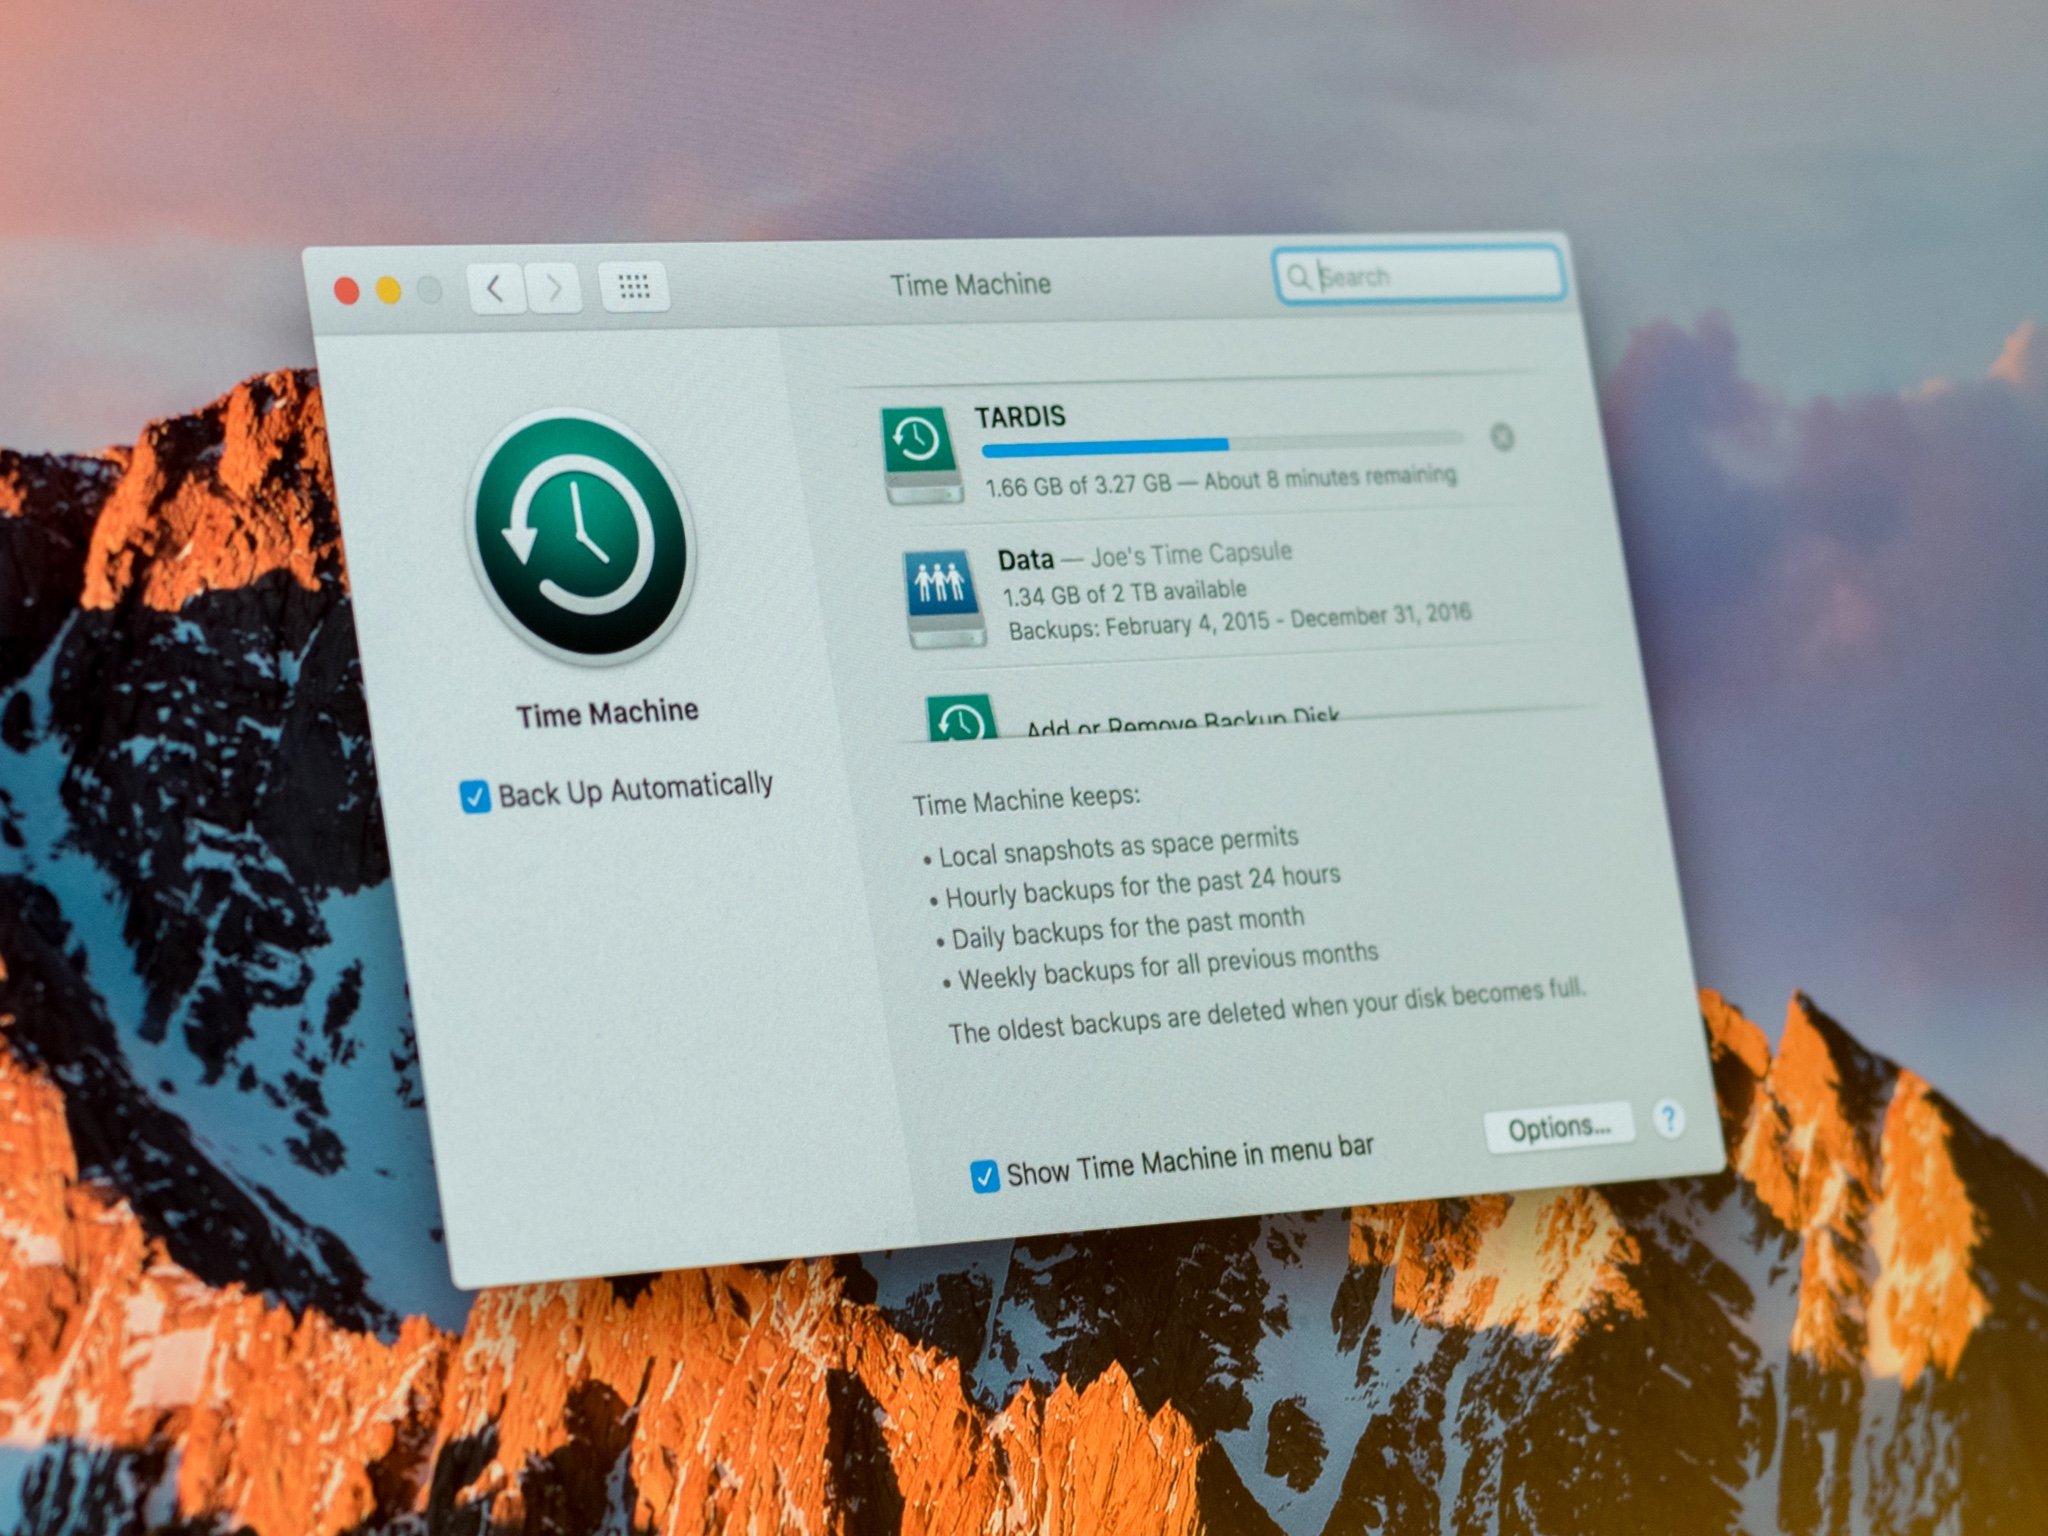
Once your Time Capsule is configured, your Mac will automatically "see" the backup disk in Time Machine preferences as a backup location.
Use an attached disk drive
Apple can format an attached disk device, like those that Western Digital offers, for Time Machine purposes using Time Machine's preferences pane. This method will use the entire drive as a Time Machine backup location.
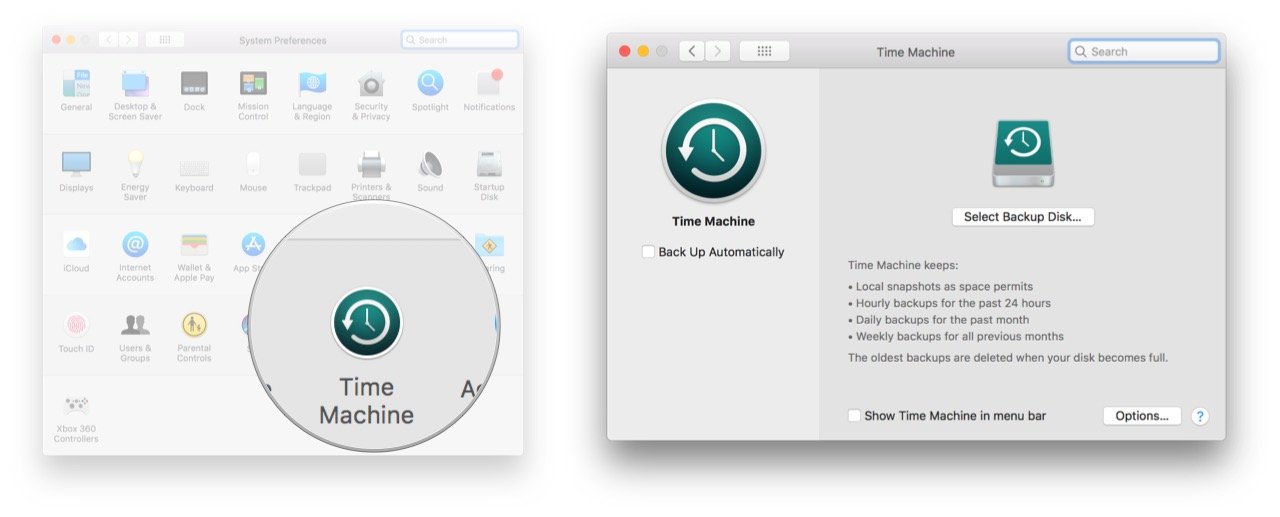
- Start System Preferences.
- Select Time Machine.
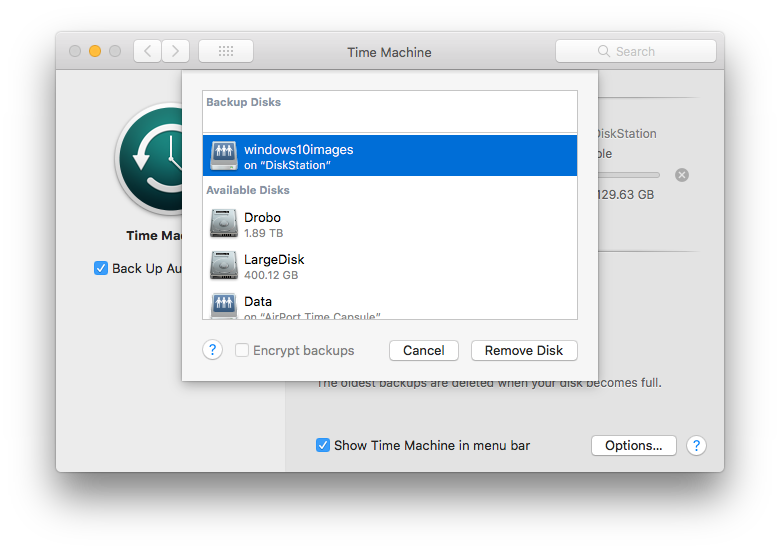
- Click Select Backup Disk.
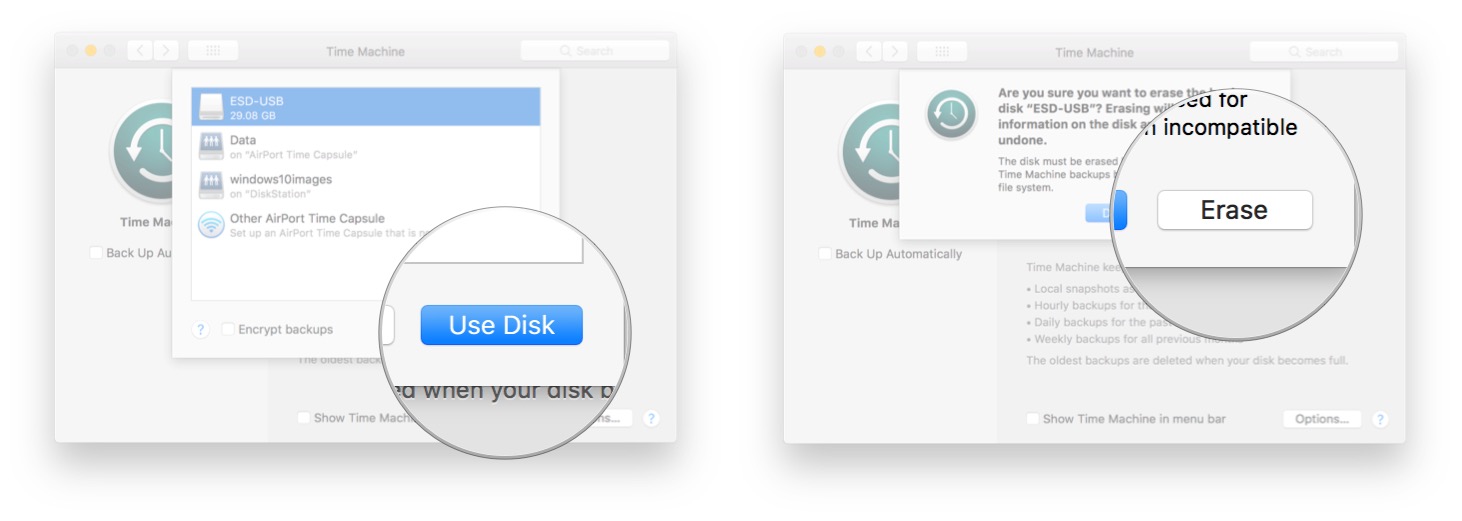
- Select your external Disk Device.
- Click Use Disk.
- Click Erase to format the drive.
Use another Mac
If you are needing a na solution to backup multiple Macs to a single location, you can have one of the Macs become the "repository" of all of the backups for Time Machine via a shared folder.
On the remote Mac:
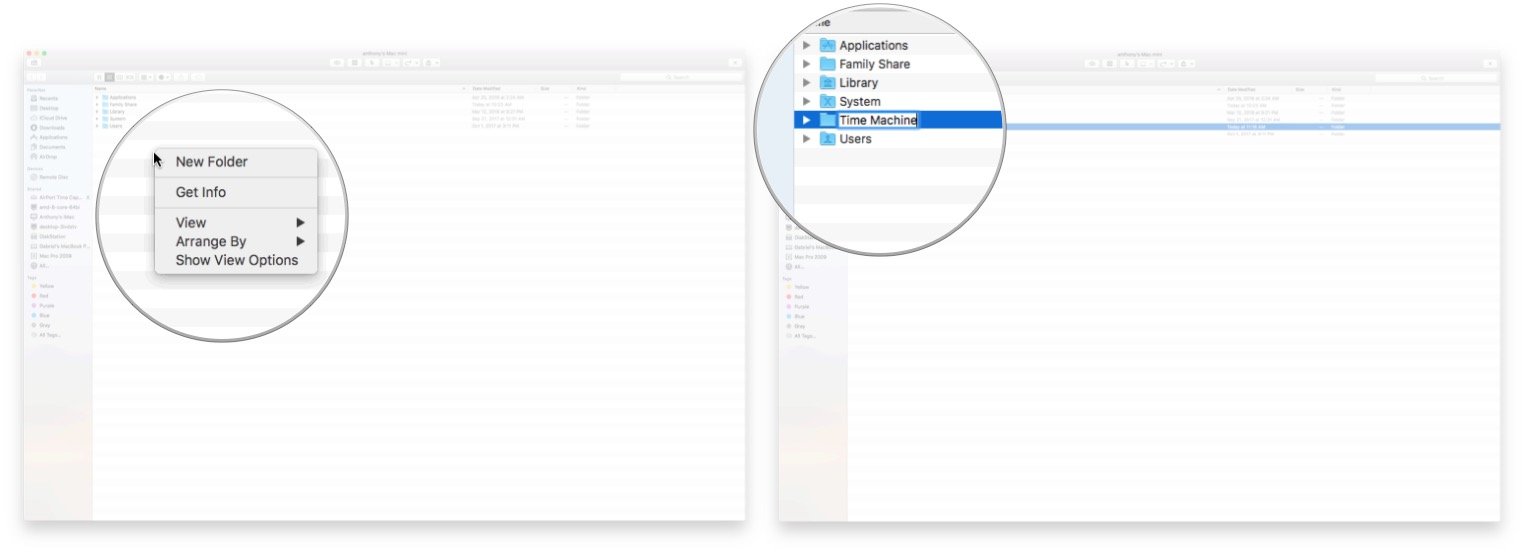
- Open Finder.
- Select one of your hard drives and create a New Folder.
- Rename it to Time Machine.
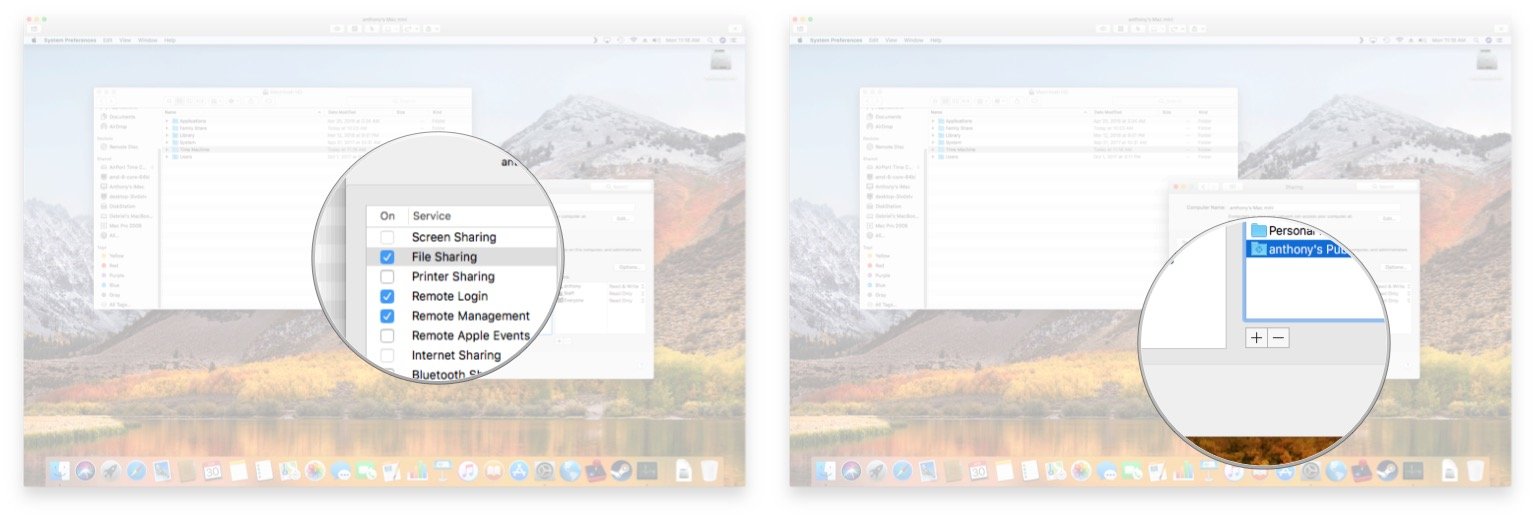
- Open System Preferences.
- Select Sharing.
- Enable File Sharing.
- Click the +.
- Add the newly created folder Time Machine.
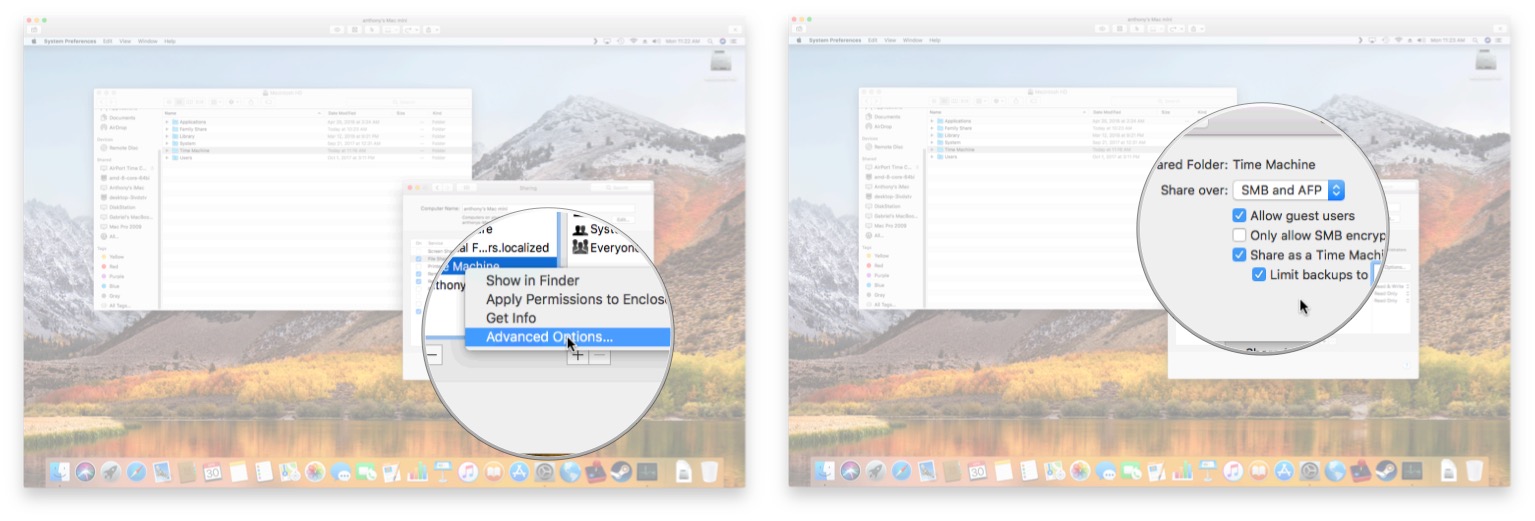
- Control-Click the Time Machine share.
- Select Advanced Options.
- Enable Share as a Time Machine Backup Destination.
- Optionally set the maximum storage size.
- Click OK.
On the Local Mac:
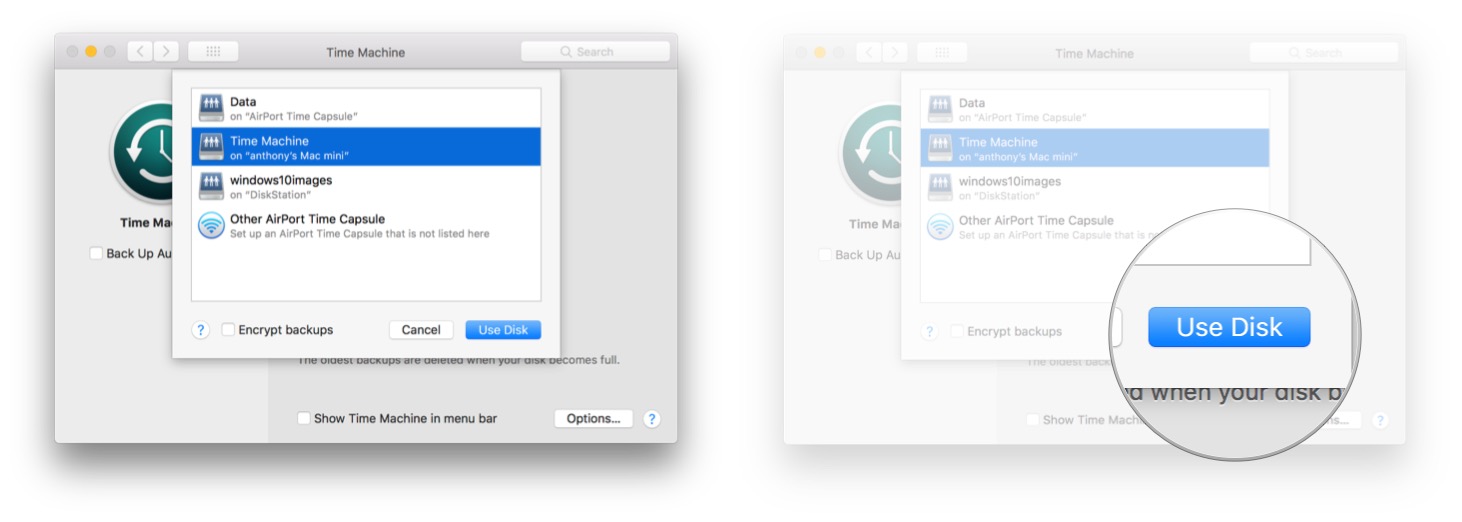
- Start System Preferences.
- Select Time Machine.
- Click Select Backup Disk.
- Select the Time Machine folder we created on the remote machine.
- Select Use Disk.
Use a supported NAS device
If you don't like the idea of using one of your Macs as a storage location because you require more robust storage features, third party NAS devices such as the Diskstation by Synology offer options that allow your Macs to "see" a Time Machine capable "share" for you to backup to.
Final comments
Although I have a 2nd generation Time Capsule, I default my Time Machine backups to my Synology Diskstation NAS device. I prefer my backed-up data to live on a fault tolerant disk system so that when I need to recover, I know the data will be there for me to recover from. What about you? How will you continue to use Time Machine? Or will you use a different backup solution for your Mac? Let us know in the comments!
iMore offers spot-on advice and guidance from our team of experts, with decades of Apple device experience to lean on. Learn more with iMore!
