This clever app gives me Spotify Wrapped stats all year round — here's how to use it to see your music listening trends
No one likes waiting
iMore offers spot-on advice and guidance from our team of experts, with decades of Apple device experience to lean on. Learn more with iMore!
You are now subscribed
Your newsletter sign-up was successful
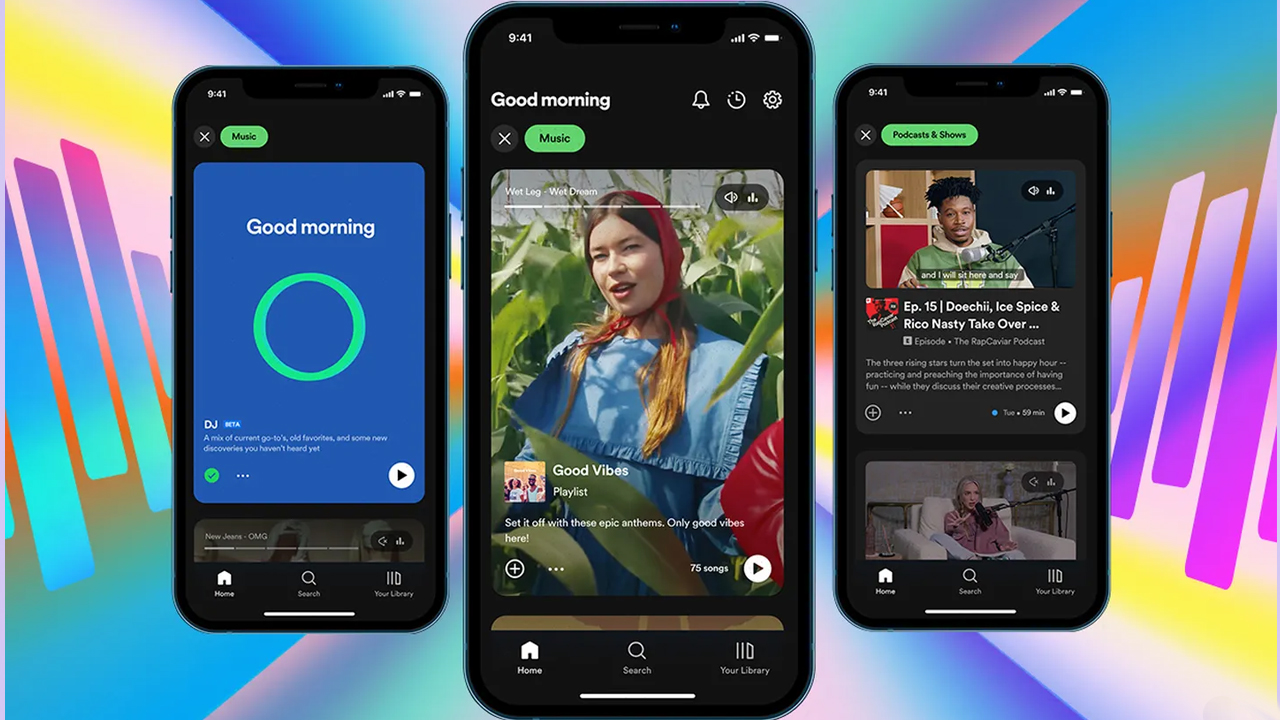
Everyone loves Spotify Wrapped and all the intriguing insights it brings, but it only happens once a year. What if you want to keep track of your Spotify stats all year long on one of the best iPhones?
Fortunately, I’ve found a way to do just that using a third-party app called Stats.fm. OK, it’s not quite the same as Spotify Wrapped – there are no Instagram-style stories backed by your favorite tunes – but it’s a great way to dive into the data if you want to know how many hours you’ve spent indulging your secret love of lo-fi indie pirate metal.
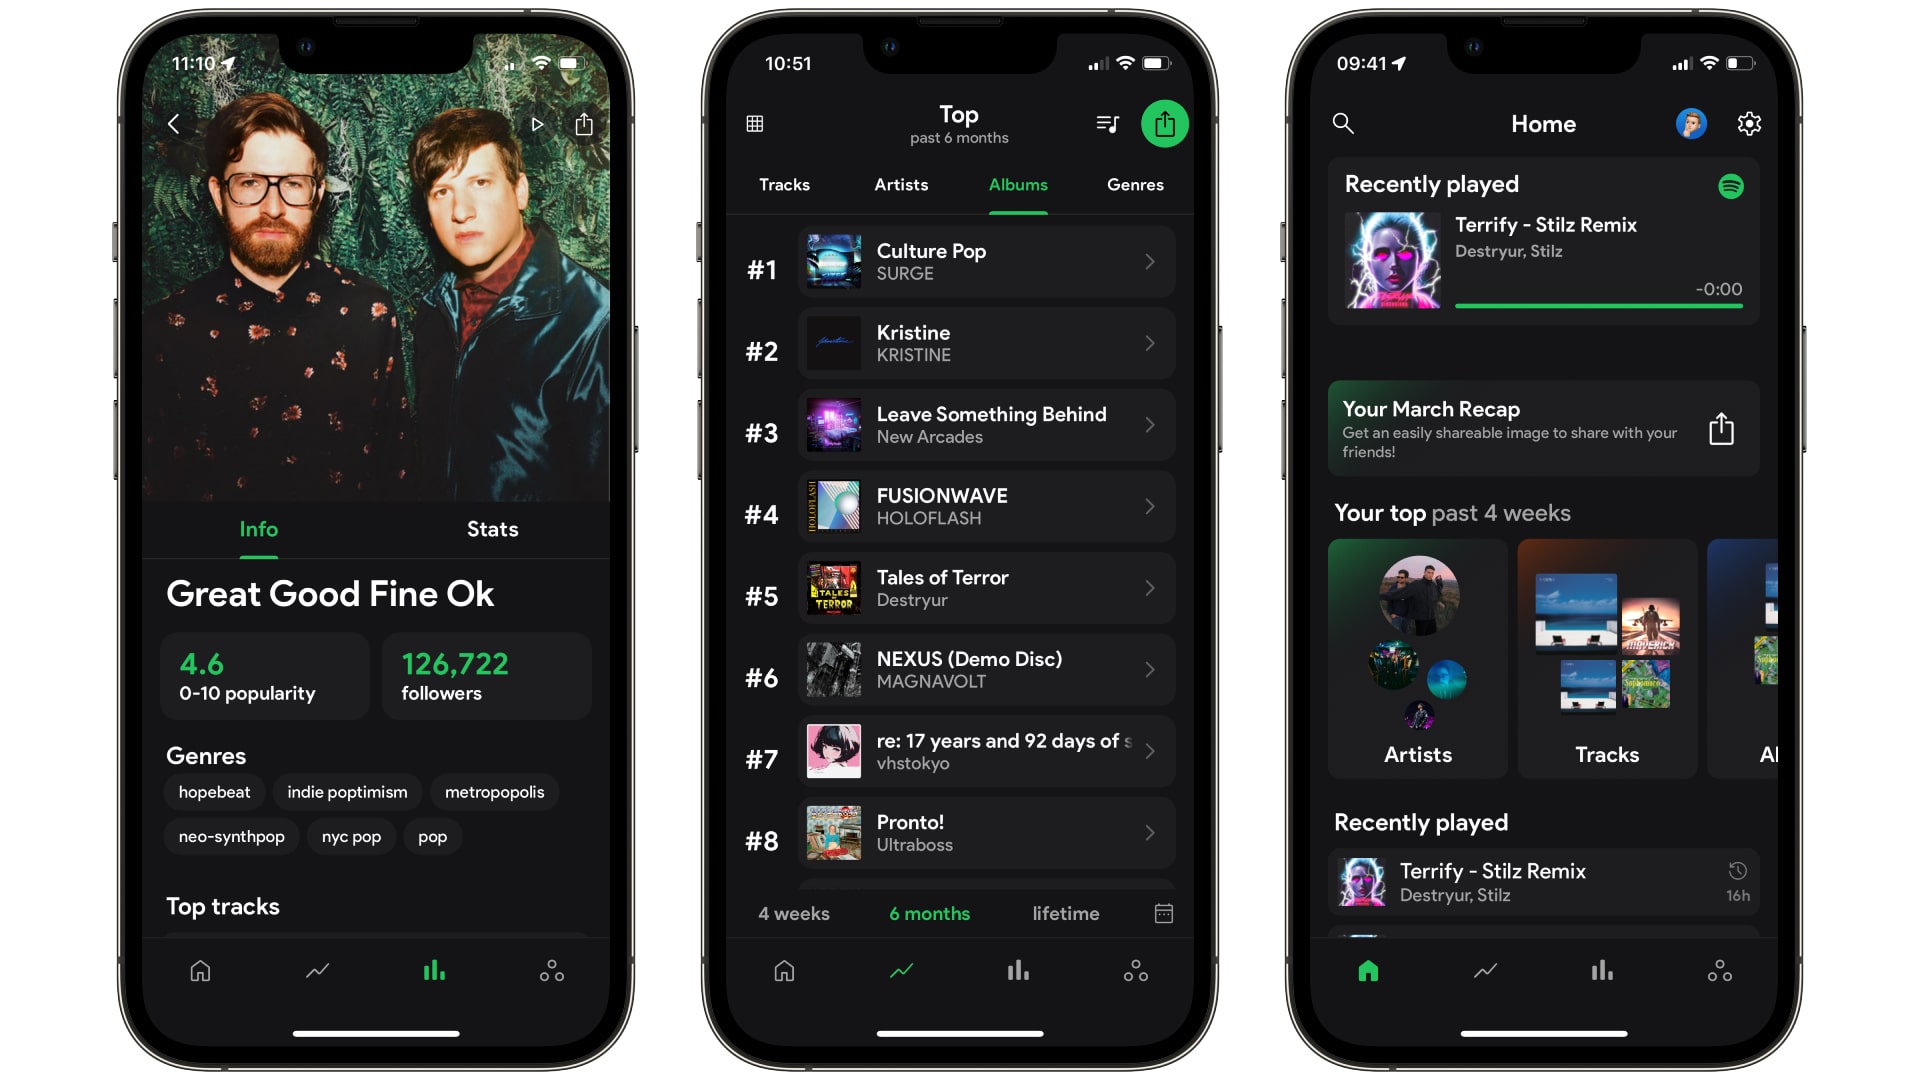
Stats.fm is free to get started and lets you see your top 50 tracks and artists at a glance. Subscribe to its Plus tier ($6 for a lifetime membership on the official website) and you unlock a whole lot more. That includes much deeper info on your top tracks, artists, and albums, as well as insights into the way you listen. As well as that, the paid-for version banishes the ads for good.
There’s another aspect that data nerds will love: your listening history. You need to import this (see the steps below), and that means you might have to wait a few weeks for Spotify or Apple to gather the required data, but it opens up a whole new world of musical insights. You’ll also need the paid version of Stats.fm for this, but a lifetime membership is affordable if you get it directly from the app’s website (it’s cheaper than paying on the App Store).
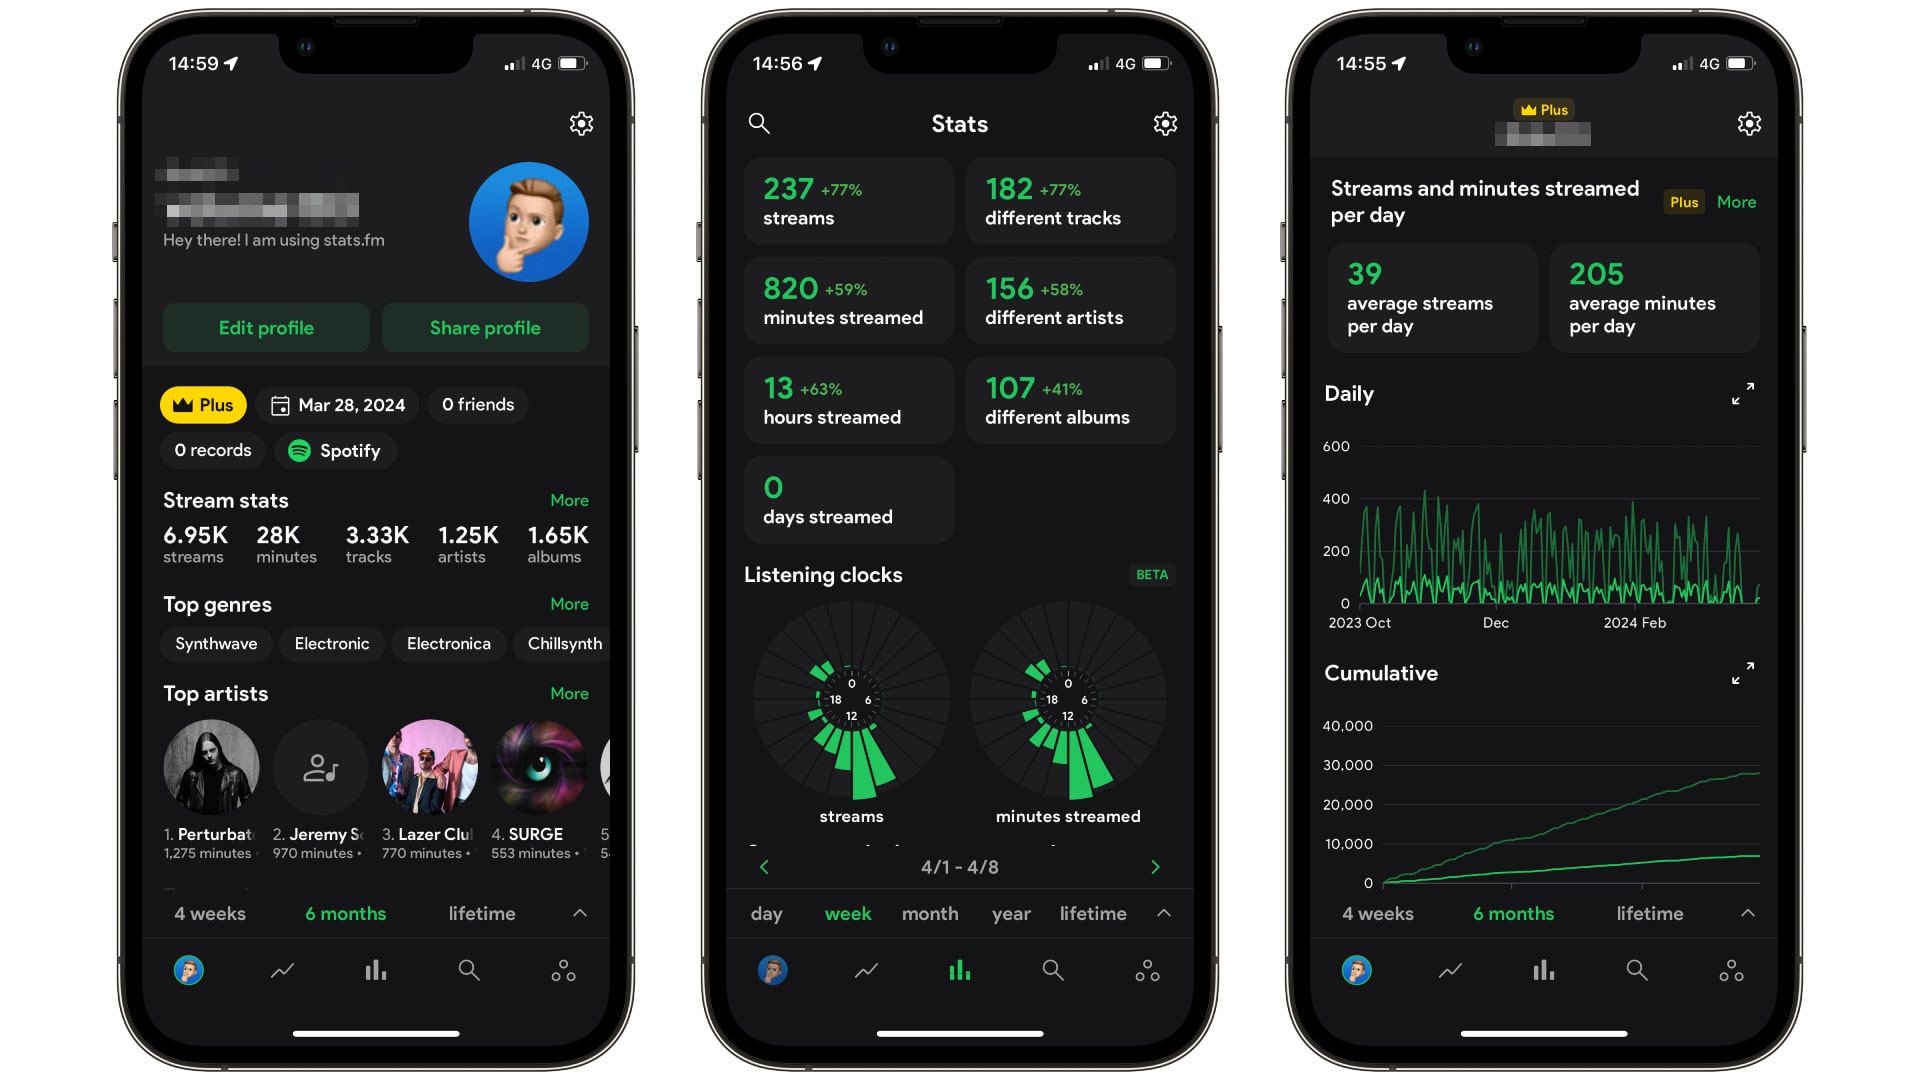
Once your listening history is happily deposited into Stats.fm, you can learn far more about your listening habits than you thought possible. The app will show you your total minutes listened, how many artists you’ve given a spin, how many albums you’ve explored over the past month, and a lot more.
It also rustles up a bunch of interesting visuals to help you easily digest your stats, including streaming charts and “listening clocks” that show you what time of day you spend the most time listening. It’s all absolutely fascinating.
Often, the results can be surprising. I had no idea that 73% of my top tracks are “energetic” but only a mere 5% are “speechful,” for example. If you enjoy data like this and all the associated insights you can glean, you’re going to love this app.
iMore offers spot-on advice and guidance from our team of experts, with decades of Apple device experience to lean on. Learn more with iMore!
How to set up and use Stats.fm
- When you first open Stats.fm, you’ll need to log in using either Spotify or Apple Music. Tap the button for your music service and follow the on-screen prompts to log in.
- You’ll now see the Stats.fm home screen with your data loaded. Here, you can explore various stats, such as your top tracks, artists, and albums from the past month, your recently played songs, a shareable image of your past month’s favorites, and more.
- Tap the Top icon in the bottom toolbar (it looks like an upward chart line). This lets you browse through your most played tracks, artists, albums, and genres. Tap the grid icon in the top left to change the view.
- The Stats tab (found by tapping the chart icon in the bottom toolbar) lets you break down your listening figures into percentages, graphs, and other visualizations. It’s a little limited at first because you have to request extended data from Spotify or Apple, and this can take several weeks in some cases. If you want that extra detail, follow the on-screen prompts to request your Spotify or Apple Music stats. If you don’t, skip to step 9.
- Once you’ve received your data from Spotify or Apple Music, you’ll need to extract the .zip file and upload the resulting .json files to Stats.fm. You can do this on the Stats.fm website or by opening the app and tapping the settings cog on the home screen, then tapping Import Files and following the on-screen prompts (you can learn more about importing on the app’s website). Your files will be uploaded and processed, which will allow the app to understand your listening habits. The whole thing might take a few minutes, but you’ll get notifications keeping you updated on its progress.
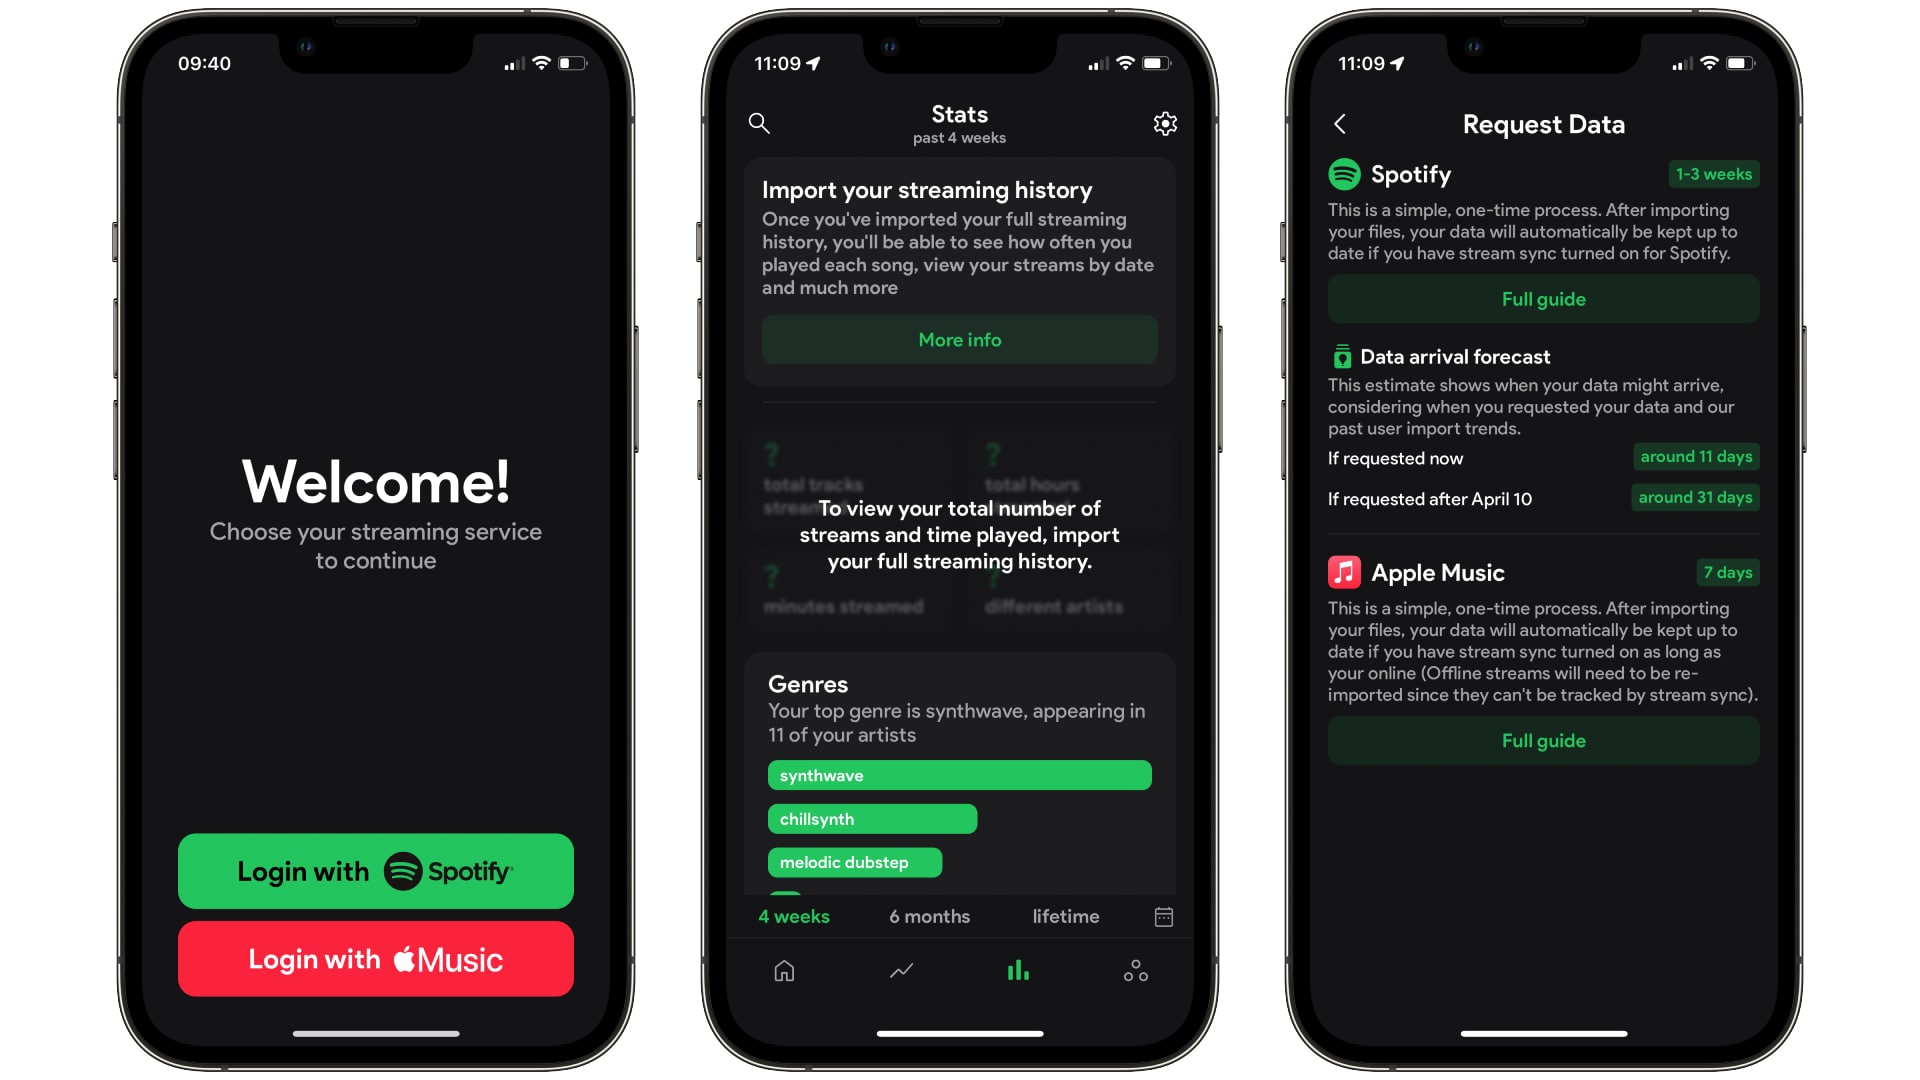
- Once everything has been processed, go back to the Stats.fm app. You’ll now see far more detailed breakdowns of your listening stats on every tab. For example, the Top tab will not only show you your most listened tracks, artists, and albums but how long you spent listening to each and how many streams that encompassed.
- Go back to the Stats tab, where you’ll now find a bunch of info on how the currently selected time period compares to the past. At the bottom of the app, you can see stats on a daily, weekly, monthly, yearly, or lifetime scale – pick one, and then just above it you can change the currently viewed day, week, month, or year. Stats.fm will tell you how that period compares to the one before it in various facts and figures.
- With your uploaded data, the Stats tab also displays a suite of charts, including time clocks that show when you mostly listen to your music, as well as graphs projecting daily and cumulative streams, streams divided by day of the week, and more.
- The Social tab is in the bottom-right corner of the toolbar. It’s where you can chat with other Stats.fm users, and the app matches you with people who share your tastes.

Alex Blake has been messing around with Apple tech ever since he caved to the pressure and bought an iPhone 3G “just to see what all the fuss was about.” He’s spent the subsequent 15 years prattling on about Apple and has somehow managed to do so professionally. Don’t ask him how.
