
Take better photos with the camera in your pocket. iMore's iPhone Photography Week 2024 is filled with great content that will take your iPhone camera-snapping ability to the next level.
- More iPhone Photography Basics
- Check out more iPhone Photography Week 2024
#iMorePhotographyWeek
You can own the best iPhone available right now, but there’s really no shortcut to learning the iPhone photography basics. However, you can fast-track your progress by focusing on a few key aspects that will set you on the right path. Photography is a huge subject and if you start off trying to take in everything at once, you’ll likely end up frustrated and confused.
I’ve compiled a list of essential tips and tricks that can be applied to almost any genre of iPhone photography so you can start making the most of your Apple device straight away. From the importance of composition to dipping your toes into the world of editing to capturing the best natural light, follow the seven steps below, and you’ll see instant results.

Share your results with iMore on X (Twitter) using #iMorePhotographyWeek

I’m Deputy Editor of N-Photo: The Nikon Magazine, but moonlight as iMore’s go-to photography know-it-all. I’ve worked in the photo industry for over six years and have been an avid iPhone photographer since the iPhone 4. I firmly believe that iPhone photography is a great starting point for burgeoning photographers, so I’ve created a series of iPhone photography basics tutorials so you can either firm up your existing iPhone camera skills or embark on a whole new passion.
How to compose an image

Composition is the cornerstone of great photography. If you can’t compose an image, it doesn’t matter how good your editing skills are or how cool your subject is, you’ll always leave the viewer wanting. While composition is an enormous and sometimes contentious topic with no one-size-fits-all solution, there are a few easy tips and tricks that will help you to compose better images almost instantly.
Our guide to composition goes into much more detail, but our top beginner picks are: The rule of thirds. This utilizes your iPhone’s 3x3 grid to position your subject on one of four intersection points where the horizontal and vertical lines meet while placing the horizon on either of the two horizontal lines. Symmetry. It also pays to use the 3x3 grid so you can easily line up symmetrical subjects right in the center of the frame. Foreground interest involves framing something in the foreground of your images to break up the monotony of large areas of blank space. Leading lines, which means using elements such as roads, railings, and hedges to ‘lead’ the viewer towards the subject. And the rule of odds, which suggests that odd numbers of subjects, say, three flowers in a vase, look more visually appealing than even numbers.
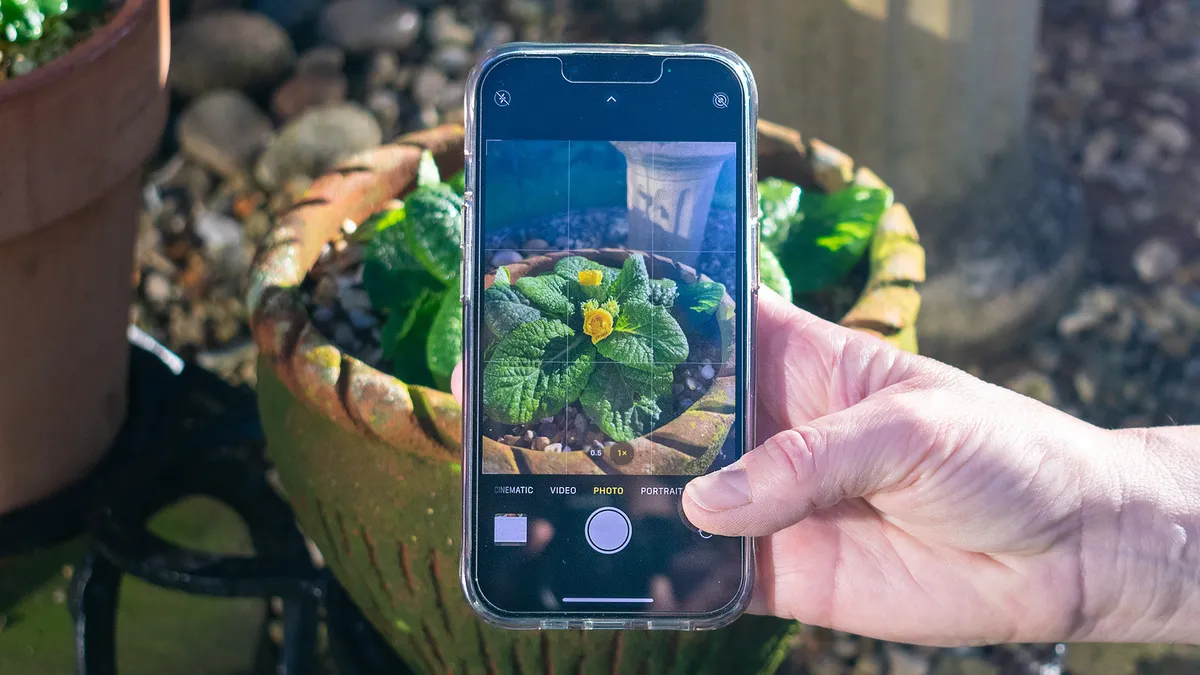
- Tap on Settings and scroll down to Camera
- Ensure Grid is checked
- Open the Camera app to use the 3x3 rule-of-thirds grid
How to edit your iPhone photos

Each generation of iPhone seems to take computational photography to new heights. This AI-driven tech automatically edits each photo you take in a matter of milliseconds. Add the small size of a smartphone screen and the incredible quality of Apple’s Retina displays, and you’re left with jaw-dropping snapshots that will often look more appealing straight out of the camera than unedited shots captured on a DSLR or mirrorless camera.
You see, mid- to high-end cameras are designed to capture as much image data as possible so photographers can really make their mark in the editing suite – especially if they choose to shoot RAW (see the next step). But even if you’re using an iPhone that doesn’t shoot Apple ProRAW, this doesn’t mean you can’t tweak your iPhone images to taste.
If you want to edit iPhone photos the right way, the Edit option in the Photos app is a great place to start. You can add filters, crop images to more pleasing compositions and make finer tweaks to processes such as Exposure, Contrast, and Saturation via the Adjust tab. Just be aware that the computational photography has already done the leg work, so most adjustments are likely to be relatively light.
- Open the Photos app
- Select your desired photo and tap Edit in the top-right corner
- Select the Crop tab to fine-tune your composition
- Use the Adjust tab to edit your image’s tones
When to use Apple ProRAW
An age-old debate between digital photographers is whether to shoot JPEG or RAW. And now, many iPhone photographers are asking themselves a similar question: HEIC/JPEG or Apple ProRAW. Firstly, you can only shoot Apple ProRAW if you have an iPhone 12 Pro or later Pro models. A lot of enthusiast and professional photographers tend to shoot RAW because the files capture as much image data as the sensor can handle. They’re virtually unprocessed, too, making them look flatter and less vibrant than JPEGs. This is because they’re a blank canvas designed to be edited. The available image data means they’re much more pliable in the edit than HEIC or JPEG files, and Apple ProRAW is much the same.
So what’s the catch? Well, RAW files are much larger than HEIC or JPEGs, because of all that lovely image data. This means your iPhone’s storage or iCloud is going to fill up faster, and file transfers will take longer. You may also notice a short delay before you can capture another image as your iPhone handles those big files. In short, for selfies with friends or situations where you just want to keep shooting and capture the moment, I’d opt for shooting in HEIC or JPEG. For anything you shoot with the intention of extensive edits and obtaining the best quality, Apple ProRAW is the way to go. And if your iPhone doesn’t shoot Apple ProRAW, choose HEIC, which is more pliable than JPEG.
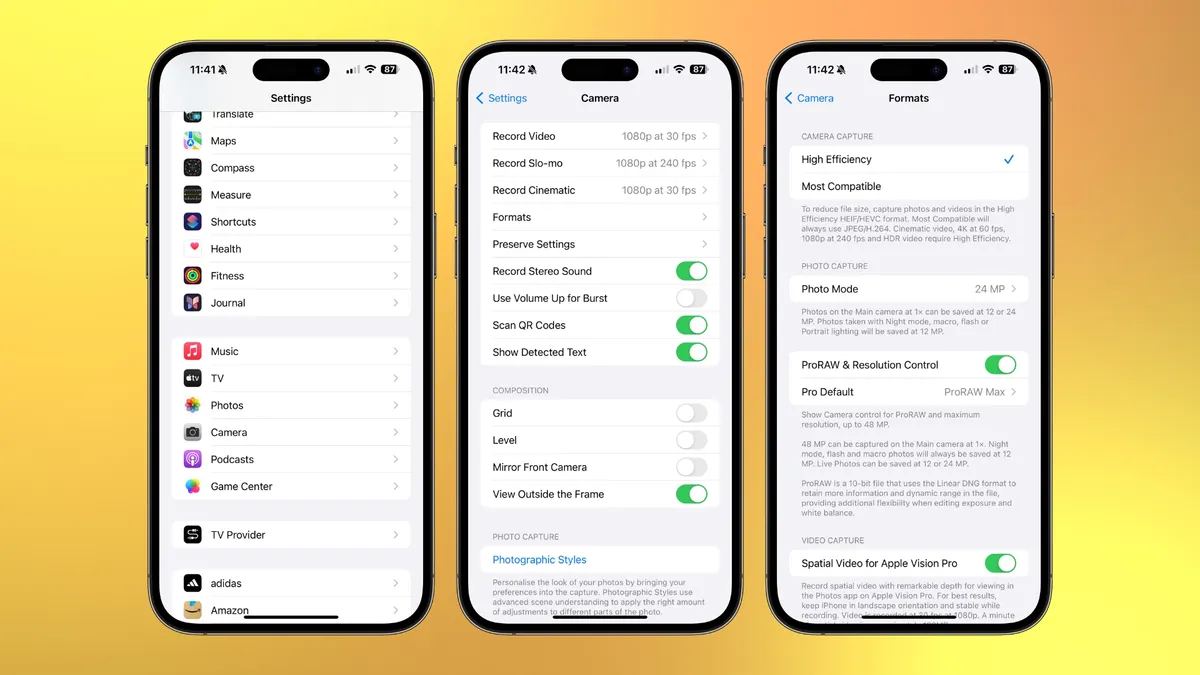
- Go to Settings, scroll down and tap Camera > Format
- Check Apple ProRAW (beneath Photo Capture)
- ProRAW Resolution lets you choose between 12 and 48MP (iPhone 14 Pro or 15 Pro models only)
Take more photos
Well-known photographer, Chase Jarvis, published a book called The Best Camera Is The One That’s With You. What camera was he talking about? His iPhone. I personally think the Nikon Z 8 is the best consumer camera in the world, right now, but it’s roughly 2lb 15.3oz/1340g and that’s without a lens. Take it to a sporting event or photograph wildlife and it’s unbeatable, but it’s not the camera you pop to the shop or stroll along the beach with. And that right there is the biggest case for iPhone photography. It’s the camera that never leaves your side. Heck, it probably even sits on your nightstand when you hit the sack.
Before smartphones, photographers were left with a dilemma every time they left the house: Do I take my camera with me? Carrying a camera everywhere can be a bit of a burden. It’s one reason why street photographers often opt for smaller cameras that can be slipped into a bag or even pocketed.
There is a caveat, though, when considering the iPhone’s unrivaled accessibility. I think that we’re so used to our iPhones’ presence that we don’t always take them seriously as cameras. They’re so easy to use, the temptation is to point and click or point and click, click, click, click. The result is thousands of photos documenting our lives, but very few with any photographic intention. Don’t expect to become a better photographer by casually snapping. Photograph often but with intent, and you’ll get better.
- Every time you step out of your door, remember that your iPhone is the camera you have on you
- Look for photo opportunities throughout the day
- Apply the tips here to make sure you use your iPhone to photograph with intent
How to shoot the golden hour
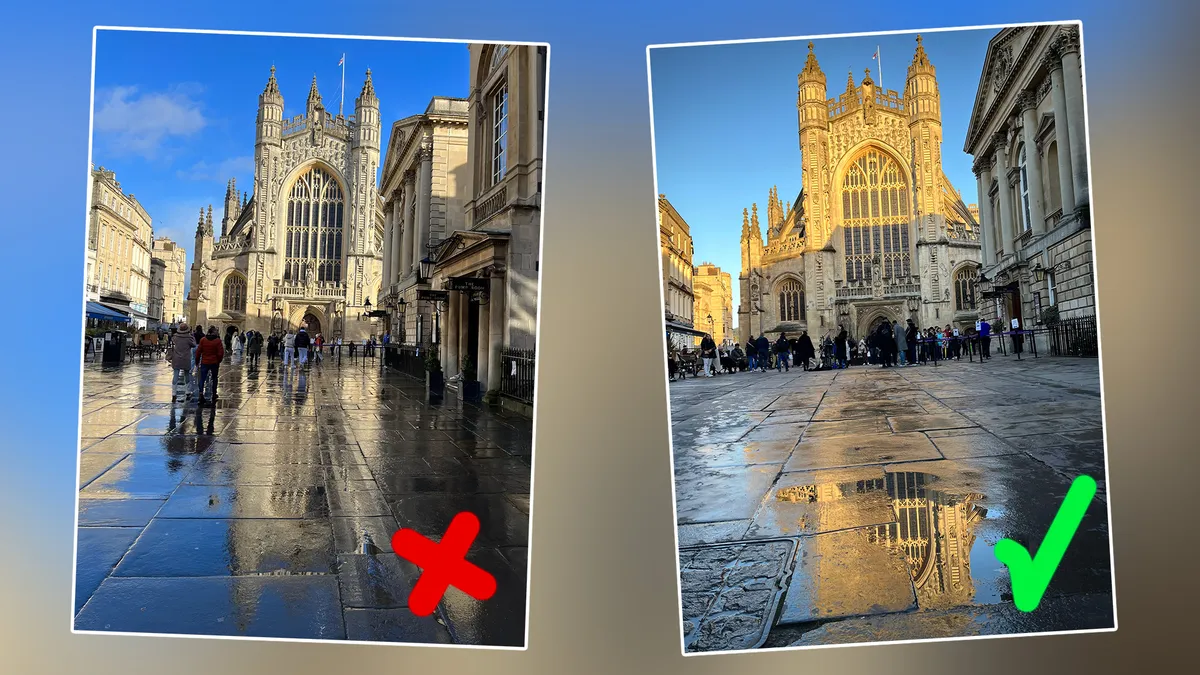
Many photographers will tell you never to shoot in harsh sunlight. It is certainly possible to create incredible images in this kind of lighting, but it suits certain aesthetics better than others, such as stylized portraits or black and white images. The best natural light occurs early in the morning or late in the evening, when the sun is lower in the sky and the light and shadows are softer. Around this time, rays of light take on a very warm appearance, most notably during the hour after sunrise and the hour before sunset. Photographers call this golden hour.
Shooting at golden hour will immediately improve your landscapes and portraits, dappling the land with golden pockets of light. During this time, the sky may display a plethora of warm yellow, orange, and pink hues. If you’re shooting a portrait, try positioning your subject with their back to the sun. This will provide backlighting and create a golden rim light around them. You may need to use a reflector to bounce a little light back onto the face, but we’ll touch upon using a reflector next. Finally, you can find all manner of apps such as The Photographer’s Ephemeris, which will tell you when golden hour will fall on a given day.
- Download a photography planning app like The Photographer’s Ephemeris
- Tap the date at the top of the screen and input the date of your shoot
- Select the Locations icon at the bottom of the screen and input the location of your shoot
- The timeline will now display magic hour timings for that date and location
- You can also use the colored lines to determine which direction the sun will be at during specific times of day
Why you should avoid flash
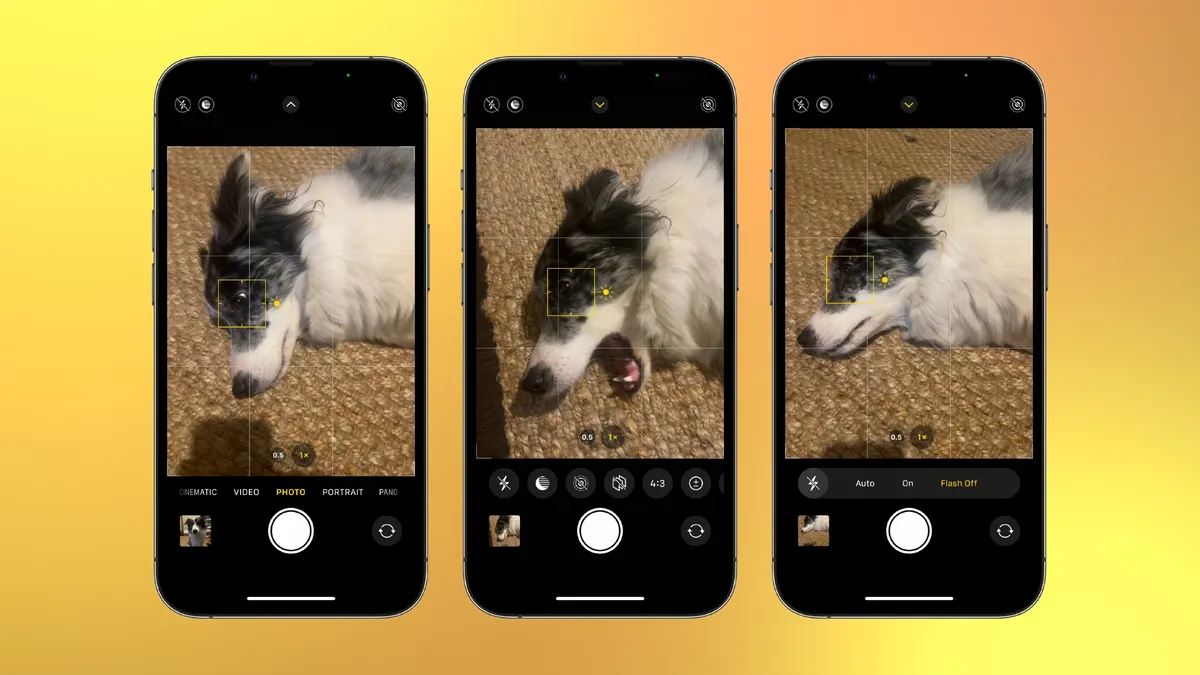
You can enable flash in your iPhone’s Camera app by swiping up in the frame and selecting the flash icon, but I only recommend using it if you're taking snapshots of friends and family on a night out. Pointing flash directly at a subject is rarely flattering. The results are often flat and washed-out, with shiny hotspots on the skin and in the middle of the eyes. Mid- to high-end cameras usually have a hotshoe to mount a flash unit. These can often be articulated to point away from the subject, bouncing light off the ceiling or a nearby wall for a softer effect.
Flash units can also be positioned off-camera to hit the subject from different angles and distances. This isn’t an option when you’re shooting with your iPhone, so you can either use continuous lighting, like an LED panel such as the Lume Cube RGB Panel Pro 2.0 – or even a lamp – or stick to ambient light.
Plenty of portraits are captured outside using only natural light, but you can shoot with natural light inside, too. Set your subject up next to a large window where indirect sunlight is filtering through. You can even shape light using an accessory called a reflector or make your own using a piece of foam board or a sheet of tinfoil. You then direct your reflector so the window light hits it and bounces softer light back onto the subject to make the shadows look less intense.
- Open your iPhone Camera app
- Tap the lightning bolt icon in the top-left corner to turn off the flash
- Alternatively, swipe up on the Camera app’s live view screen so a row of icons appear just above the shutter button
- Select the lightning bolt icon and tap Flash Off
How to change the aspect ratio
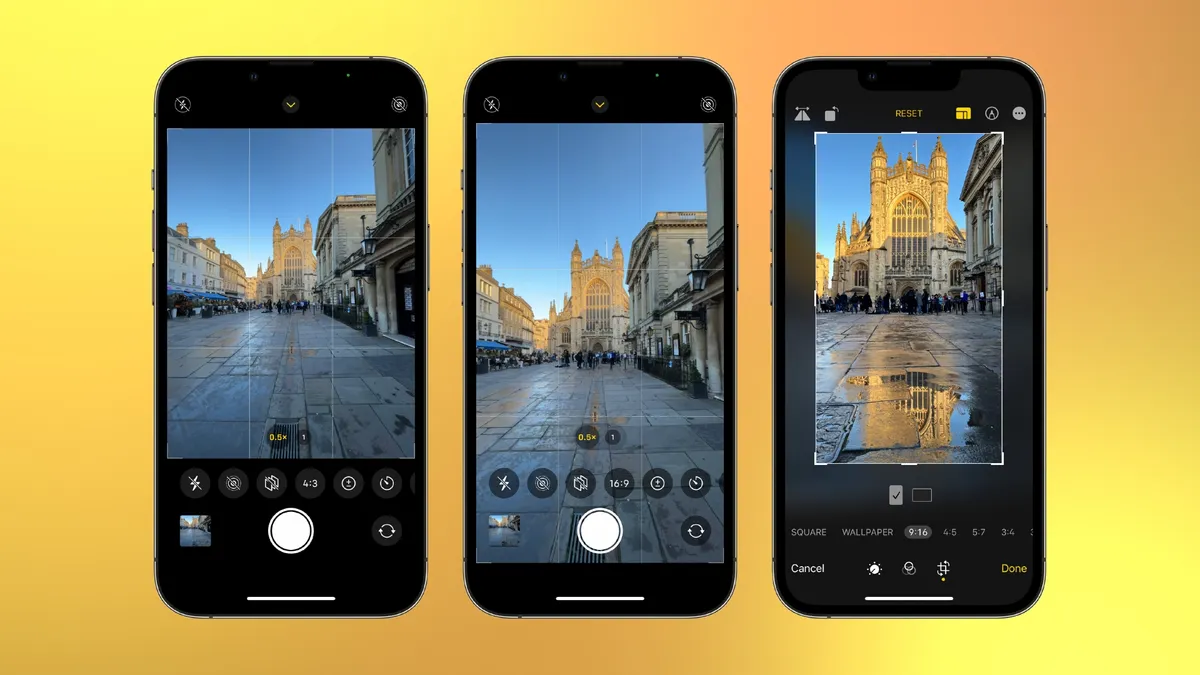
You might be tempted to shoot in 16:9 or 1:1 aspect ratios for use on Instagram Stories or your Feed, even though the aspect ratio of your iPhone’s sensor is 4:3. This means that shooting in any other aspect ratio causes the camera to crop into the sensor digitally. Thankfully, you don’t actually lose any data because you can revert back to the 4:3 crop after you’ve captured the photo. Simply open the image in the Photos app’s editing suite and select the Crop tab. From here, you can restore the full 4:3 aspect ratio.
- Open the Camera app and swipe up with your finger on the frame
- Tap the aspect ratio icon and select your preferred aspect ratio
- Open the image in the Photos app’s editing suite and tap the crop icon
- Select the icon that’s to the left of the marker pen icon
- Hit Original to revert back to the 4:3 crop
What's the best iPhone for photography

Objectively, the iPhone 15 Pro Max is the best iPhone Apple has ever created for taking photos. It boasts a 48-MP sensor, sensor‑shift optical image stabilization, Apple ProRAW, seven lenses (sort of…) and a 5x tetraprism optical zoom. But when you’re learning the photography ropes, it really doesn’t matter whether you’re defiantly holding onto your faithful iPhone 11 or shooting with an iPhone SE.
Strive to compose better images, practice every day, and have fun editing; you’ll see progress. If you’re lucky enough to own a more advanced iPhone, enjoy playing around with everything it has to offer, but also take days where you strip everything back and allow yourself to use only one lens, for example. Self-imposed limitations can be a great way to kickstart your creativity and learn even faster.
Share your photos with iMore on X (Twitter) using #iMorePhotographyWeek
