
HomeKit Secure Routers, the privacy-centric feature that was just recently released for select Eero routers last week, may not be the biggest of deals for most people, but for me, it was the one thing from Apple that I have been the most excited about (so far) for this year. The HomeKit Secure Router feature essentially allows you to create a firewall around your HomeKit accessories, limiting or blocking their access to the internet, which in turn, keeps them from potential attacks that could wreak havoc on not just your network, but others as well.

Despite having a rather large collection of internet-connected smart home accessories that are fully capable of sending my habits and usage patterns off to whomever they want to, I place a large emphasis on privacy on everything that I do. I am definitelythat guy that uses DuckDuckGo over Google, limits ad tracking and personalization through browser and site settings, and has several different email aliases set up that segregate services, retailers, and personal accounts. So needless to say, I installed the HomeKit Secure Router feature the moment it became available, ignoring the general wisdom of skipping initial releases and initial fears that I may have to rebuild my entire HomeKit home.
How did it turn out? Surprisingly well, as I thankfully didn't have to remove or reset any accessories, and everything in my home works pretty much the same as before. However, since everything still works like it always has, it was a little hard to truly know whether or not things had actually changed behind the scenes. It wasn't until a few days later when I reviewed the activity data provided through the Eero Secure service, that I could truly say that it made a difference. Before we get to that though, let's take a walk through the setup process and some of the things we learned along the way.

HomeKit-enabled
The latest generation Eero WiFi Systems are the first routers to receive HomeKit support, giving full control over your accessories. The latest Eero system is also just so happens to be one of the best options around for coverage and affordability.
Setup
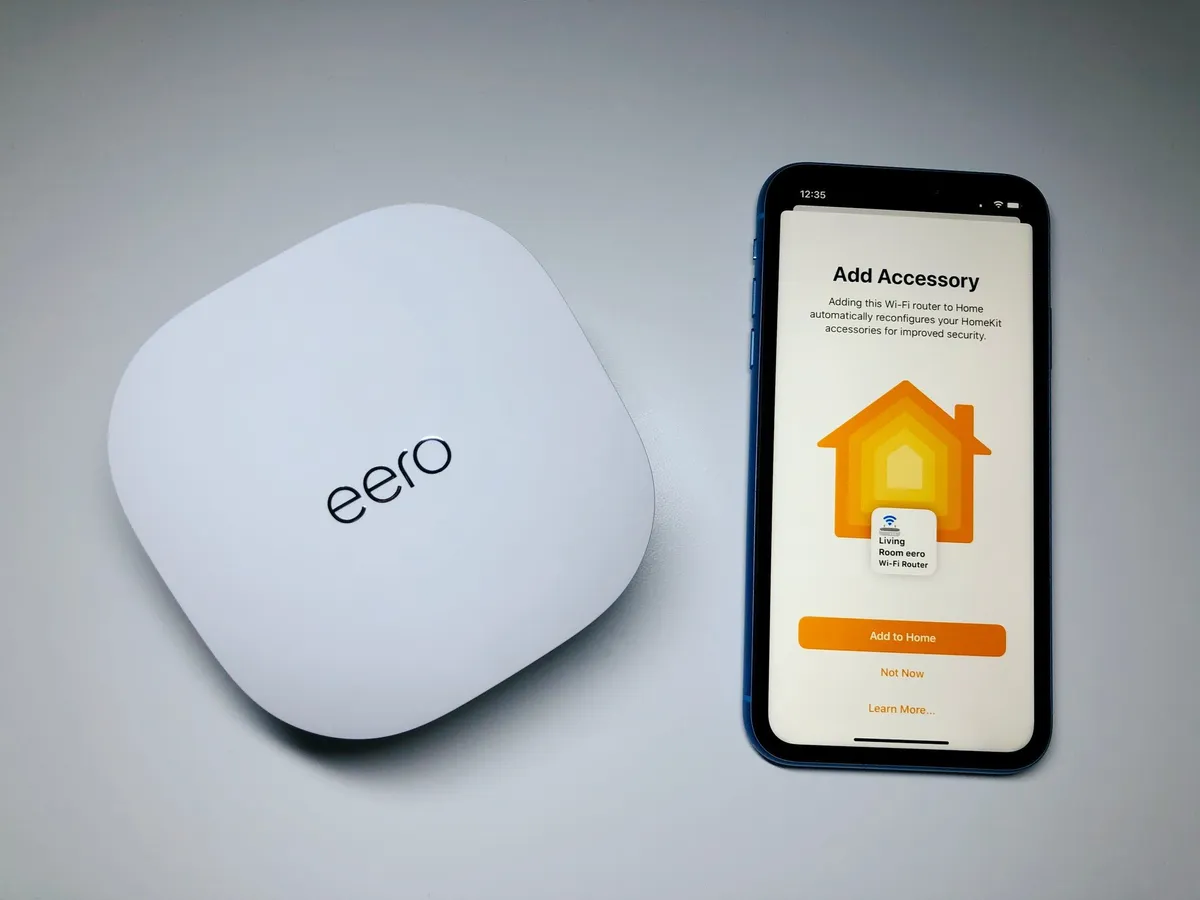
Setting up the HomeKit Secure Router feature was pretty much pain-free with the Eero app walking me through all of the required steps. In-all, I estimate that the whole process, which includes updating the Eero router firmware, then setting up HomeKit along with applying automatic restrictions, took less than 10 minutes. After the process was complete, I saw all of my Wi-Fi accessories and all of my bridges/hubs/gateways as well in the Home settings portion of the Home app. If you need a little help with where to get started, or just want to look at what the upgrade process looks like, you can check out our handy guide below.
How to upgrade your Eero router to a HomeKit Secure Router
Back in the Home app, accessory names in the newly added router section didn't have the names that I assigned to them over the years. Instead, accessories will be shown as the generic names that are assigned by the manufacturer, which can be just their brand name and type, or a combination of brand name, model number, or partial serial numbers. This could definitely make tracking down a specific accessory a little confusing, especially if you have multiple of the same type of accessory from the same manufacturer. Every Wi-Fi accessory is shown, however, for accessories that connect to a bridge, only the bridge itself is shown. This means that whatever access level that you assign to it, will apply to all of of your accessories connected to the bridge.
What works

Much to my surprise, after enabling the highest level of restrictions for all of my Wi-Fi accessories, everything still just worked through HomeKit. Now, I am fully aware that Apple requires local controls to be available for accessories in order to obtain a HomeKit certification, but I had a hunch that one, perhaps the one that is the most inconvenient to reset, would refuse to operate. This wasn't the case at all, and I was still toggling on and off accessories via the Home app and Siri the same as before.
This again, reaffirms the important role that HomeKit plays within the internet of things world, essentially ensuring that your accessories will always work, even if a manufacturer discontinues support or the entire company goes under. If you are looking for a HomeKit security system, then you will be happy to know that Abode's system continued to operate just as before, with Key Fobs able to arm and disarm at will, and notifications will still be sent in case of an alarm event. Some accessories, such as Abode's iota Gateway, store some automations locally on device even if they don't support HomeKit, and these will continue to run as well so some of your non-HomeKit routines may still work.
What broke

As I mentioned, all of my accessories were still available for HomeKit control after enabling restrictions, however, there are some device specific features that did break. Essentially, any settings that are unique to a manufacturer's app will no longer apply, so if you plan on using said feature, then you will need to set it before you restrict access.
The biggest issue that I ran into was that the eufyCam 2, which stores recordings on a local bridge in your home, simply stopped recording. This was certainly strange, as one of the cameras biggest selling points is the privacy angle, but apparently it still needs some sort of connection to relay data to the associated app.
The eufyCam 2's also seemingly lost the ability to detect motion, which is again, strange, so I did have to open it back up to the internet. If you don't use the recording features of the eufyCam 2 and only use the Home app for viewing, you won't see a difference. It is also worth noting that eufy will be supporting Apple's HomeKit Secure Video feature sometime this year, which will negate the issues that I mentioned.
My Philips Hue setup also saw a slight annoyance with restrictions severing the connection to the Hue app. Upon launching the Hue app, you will see a screen asking you to press the button on the bridge, just like you would when using the app on a new device. Pressing the pairing button allowed the app to find the bridge again and would show my lights, but adjustments to them would simply not apply even though the app acts like it is. If you depend on Hue scenes and Hue Labs formulas, you will need to change up the access level to use them again.
In addition, a message is displayed in the app simply stating that it is Unable to connect. Again, my lights continued to work just fine through the Home app and Siri, which is fine as I am not the biggest of fans of the Hue app as it seems to always want to change my accessory names whenever I launch it.

Some additional oddities were to be found after enabling restrictions, but they did not affect performance in any way. One was that the ConnectSense Smart In-Wall Outlet, which I recently reviewed, began to flash its status indicator LED rapidly and never stopped. The green LED light isn't the brightest in the world by any means, but it was noticeable in the dark, leading to a request to fix it from a family member. The only way to stop the light from flashing was to, you guessed it, change the restriction level. Toggling off the LED control in the ConnectSense app apparently doesn't apply to this particular condition.
Moving over to the Home app itself, I found that applying restrictions to Wi-Fi accessories was extremely hit or miss. There were many occasions where I had to initiate them several times before they would actually be sent to devices. I am not quite sure what causes these settings to fail, but it seems like it is something that Apple anticipated happening, as the Home app would display a message stating that it will continue attempts in the background.
Oddly enough, I had more success pushing these settings using the Home app on my iPhone, with the iPad and MacBook attempts failing almost every time. Applying a restriction also does not work for accessories that are showing the dreaded No Response message, which makes sense as the router cannot connect to it, so it is something to double check when your device gets back up and running.
What I learned

Some accessories in the new section of the Home app will display a list of services that they connect to, which was really nice to see, and something that I never thought Apple would actually show to the user. So with that being said, I will most certainly be referring to this list as "services shaming" from now on, just like how we refer to Apple's inclusion of battery percentage usage per app over in Settings.
From my understanding, this list is what HomeKit accessory manufacturers send to Apple as their approved services that their devices can connect to, and if you choose the Auto access level, your device will only connect to these. Unfortunately, it appears that only a few manufacturers have submitted their list, as only 3 accessories in my home show this data at this time.
Signify's list for the Philips Hue Bridge was the most interesting one to see, as the first result that it shows is one for Baidu, which to me, is completely unnecessary, especially considering that I am located in the United States. Signify only lists that this connection is for a Connectivity Check which sounds rather harmless, but it is still a little unnerving. Here are the complete lists of services that I saw from the accessories that reported this data:
Philips Hue Bridge
- Baidu: Connectivity Check
- Google: Connectivity Check and Time Sync
- OpenWRT: Time Sync
- Philips: Connectivity Check and Firmware Update
- Signify: Alternative Home Ecosystem, Analytics, Connectivity Check, Diagnostics, Manufacturer App Remote Access, and Notifications
Logitech Circle 2 Camera
- Logitech: Connectivity Check, Firmware Update, and Time Sync
- NTP.org: Time Sync
Ecobee 3 Lite Thermostat
- MQTT: Notifications
- ecobee: Account Management, Alternative Home Ecosystem, Analytics, Connectivity Check, Diagnostics, Firmware Update, Manufacturer App Remote Access, Notifications, Other, Remote Storage, and Time Sync
Glancing over the list shows that Apple appears to have a standards list of service names, as Connectivity Check shows up often, which is nice for consistency. However, the inclusion of Other provides no relevant information to the end user and could be a crutch for manufacturers to use if they want to obscure connections.
Also of note is that each once of these connections lists included a message at the bottom that states the following: Some unexpected connections were blocked, which again is nice that the user is notified of connections outside of the list, but obviously, it lacks important details.
Results

While the Eero app doesn't provide a whole lot of details regarding your devices connectivity habits, it does provide historical data for Activity Scans if you subscribe to the Eero Secure service. A scan is logged when any internet activity occurs and it will show you the number of scans by day, week, or month, but it only includes a number and a category, which will most likely be listed as Web. With that being said, I am able to see all of the scans for my HomeKit accessories since I subscribed to the service late last year, which means that I can clearly see if the HomeKit Secure Router feature actually works as advertised.
Let's start with the aforementioned Philips Hue Bridge. The week before the HomeKit Secure Router feature was released, a total of 2,917 scans had occurred from this bridge alone over the course of just seven days. Apple and Eero released the HomeKit update on Wednesday February 26th, and I can see that on this day the number of scans dropped dramatically, almost down to a third or so. Since then, my Philips Hue Bridge has not had any additional scans, staying at zero every day since turning the feature on.

Another example of a high amount of activity was with my Kaiterra Laser Egg+CO2. This accessory was scanned 2,829 times in the week before the release, and after enabling the feature, mid-week, they dropped down to 1,421. Since then, it has been silent. Other accessories within my home are were not quite as chatty as those, with most sitting below 1,000 scans a week, but when you add up all of these together, it really shows just how much traffic was going on behind the scenes. This definitely proves that the feature works as intended, and it may not disrupt your current smart home habits and routines, which keeps everything locked down, yet still convenient.
Of course, network monitoring tools and firewalls have existed long before Apple's latest feature, but let's face it, most users simply don't put in the time or effort to use them to review their traffic. In my case, being the privacy-minded person that I am, I had always been interested in seeing the data, but I never actually made it very far because of just how daunting the process can look. So with that being said, I am a big fan of the HomeKit Secure Router feature already, and I hope that Apple has plans to mandate a services listing for each accessory in the future, if it isn't something that is already happening quietly behind the scenes.
What are you seeing?
Did you enable HomeKit Secure Router support? What access levels are you using? Are all of your accessories still working just like before? Let us know in the comments below!

