How to manually manage your macOS High Sierra networking location
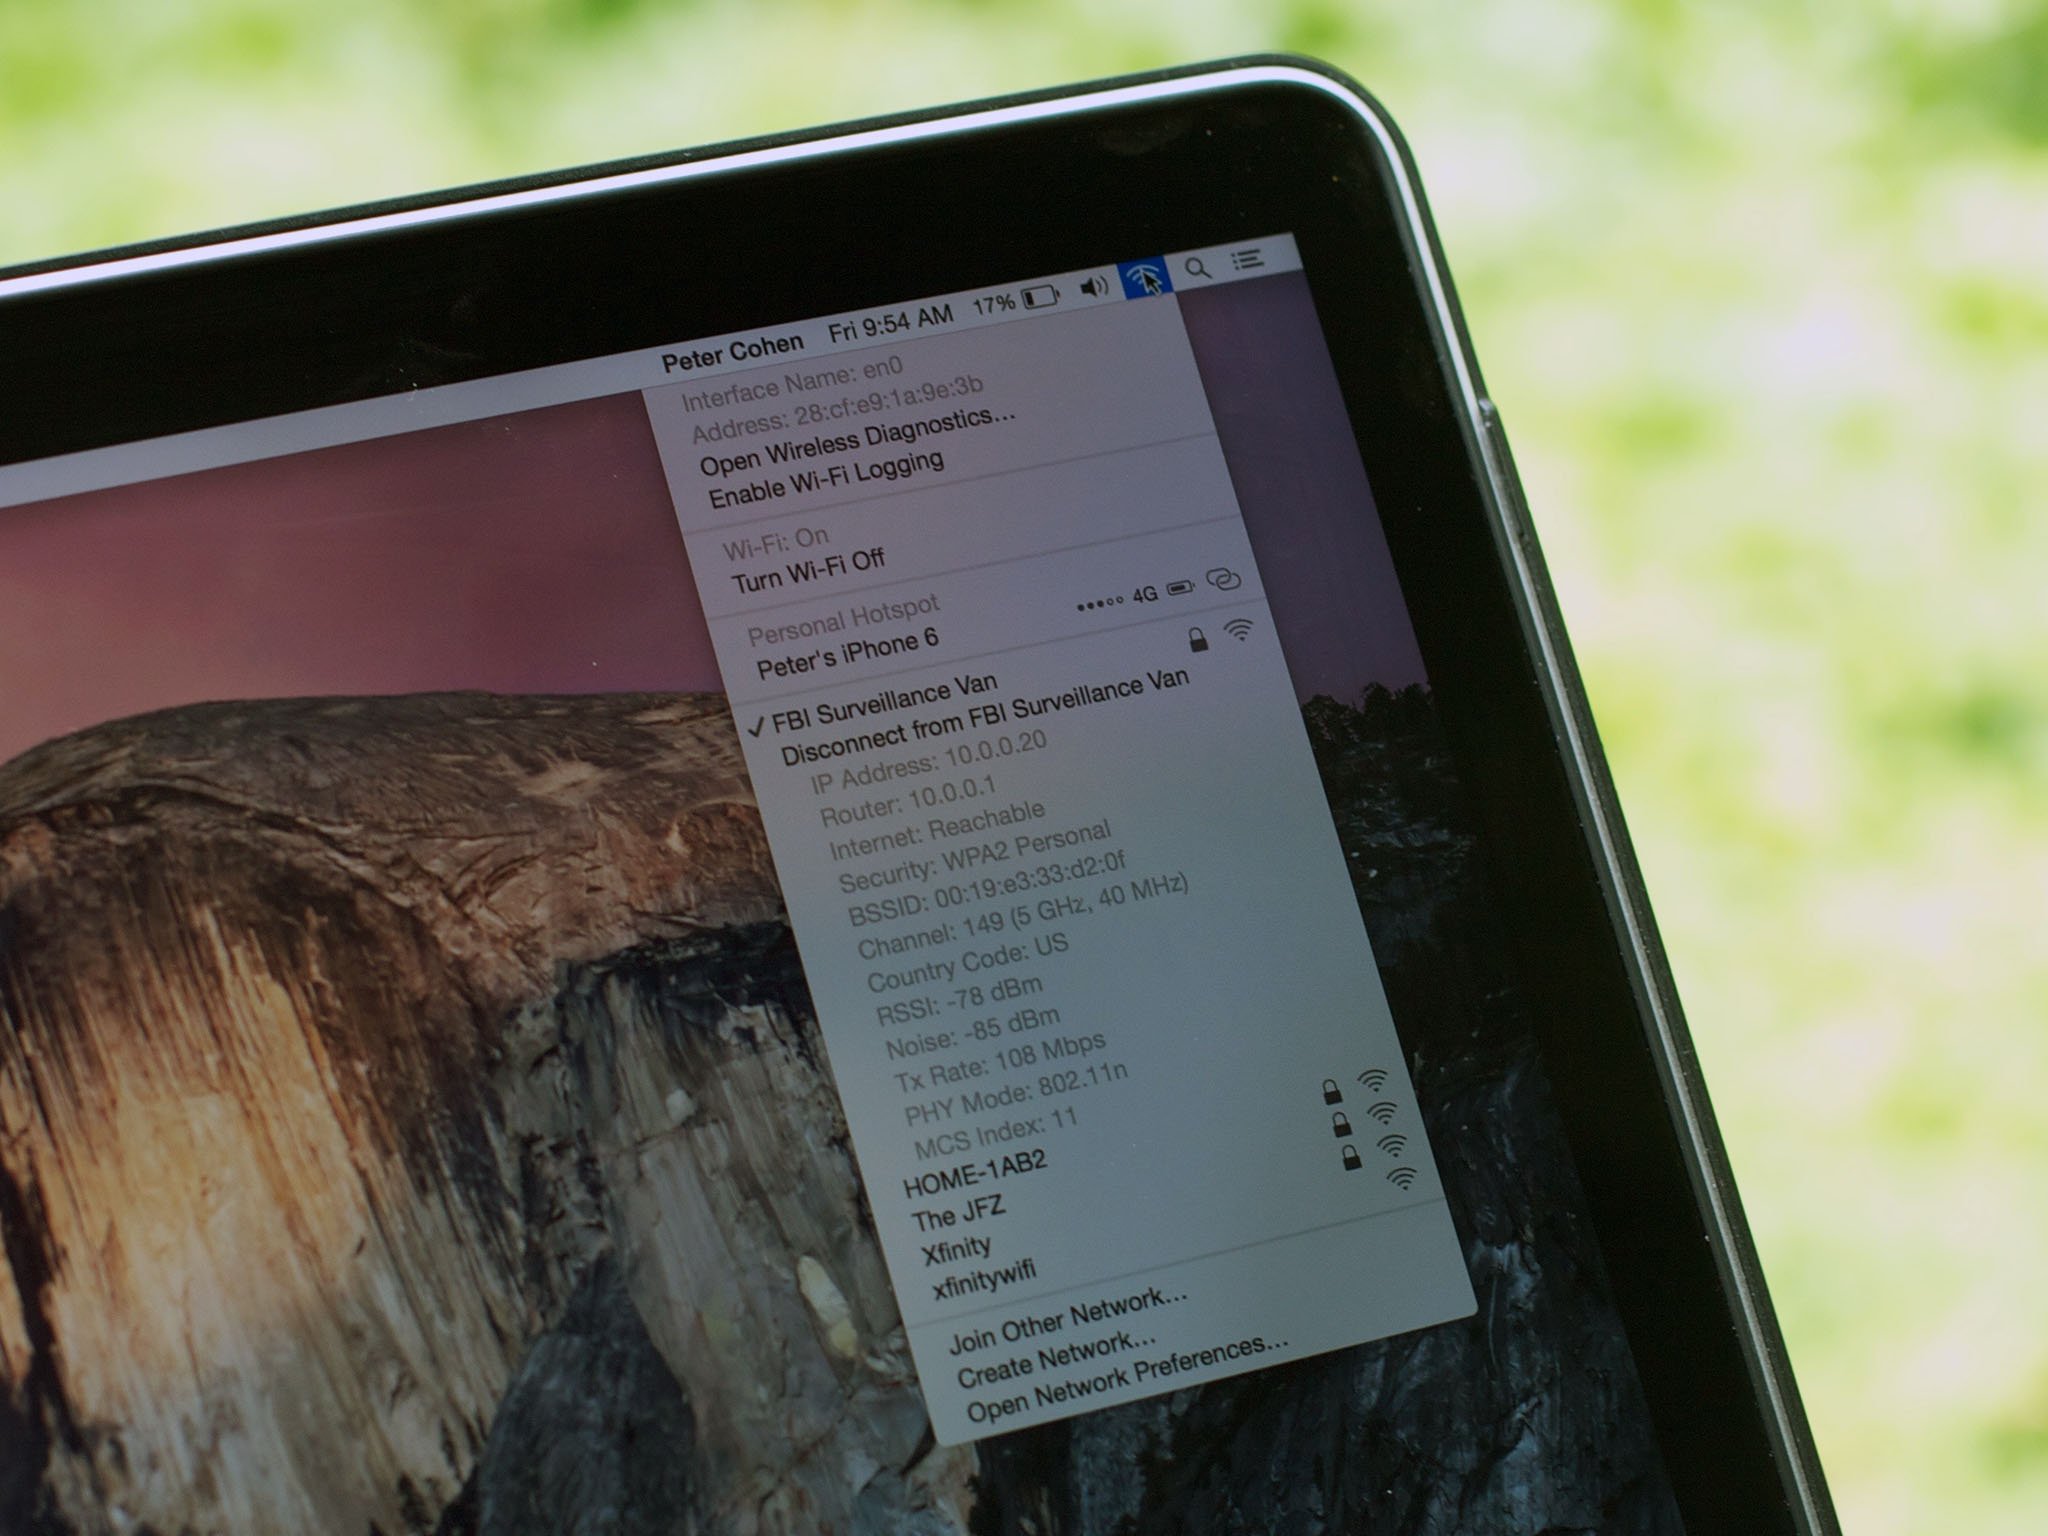
Most people will never have to (or want to) manage their networking profiles or locations. Setting up a connection to a Wi-Fi hotspot is all they'd need to do. However, some users might want or need tighter control over how their computer accesses the network and the internet.
Why would you want to control your network profile?
Depending on your use case, there may never be a reason for you to manage your network profile. If you have a computer that never leaves a particular network, then you can literally set it and forget it.
If you have a MacBook, then you might have access to a privileged network when at one location and need just typical network access when at another location. One such situation would be using a specialized network gateway.
For example, I have a network where my computers with low requirements of secure internet access go out to the internet via one gateway whilst my computers that require a higher level of security go out another gateway that has VPN encryption.
What's the problem?
If I were to take my MacBook that uses the secure gateway to a friend's house, I would not be able to access the internet without making changes to the network settings.
Depending on your network topology, these changes can be complicated and tedious. Adding a new network location would simplify the process of making the transition without having to memorize IPs, gateways, subnet masks and DNS servers. One location would have my secure network settings, the other would have a general connection setup.
How to set up a new network location
Let's start by setting up our various network profiles.
iMore offers spot-on advice and guidance from our team of experts, with decades of Apple device experience to lean on. Learn more with iMore!
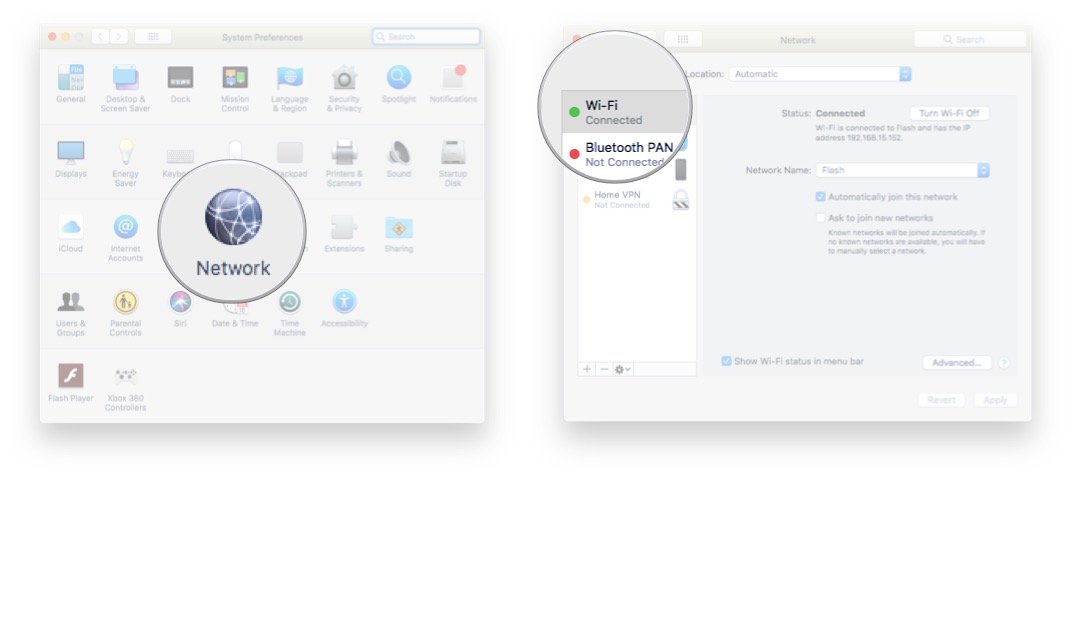
- Start System Preferences.
- Click Network.
- Tap the connection you want to manage. In our example, Wi-Fi.
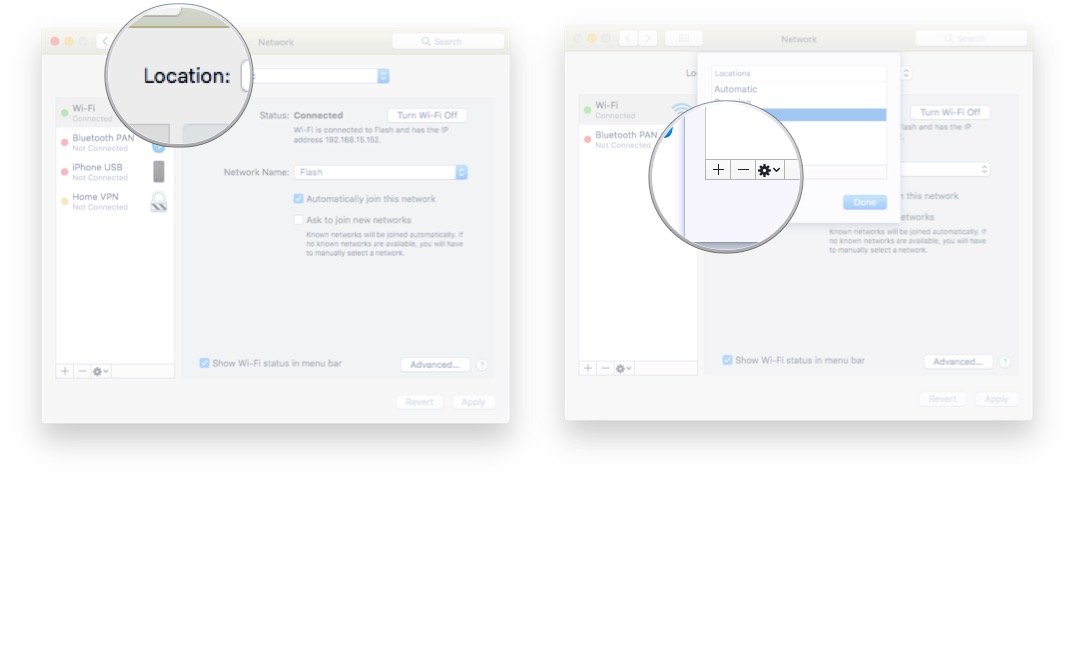
- Click the Location drop down arrow.
- Click Edit Locations.
- Click the + to add a new location and give it a name. In this example this will be our Secure network.
- Click Done.
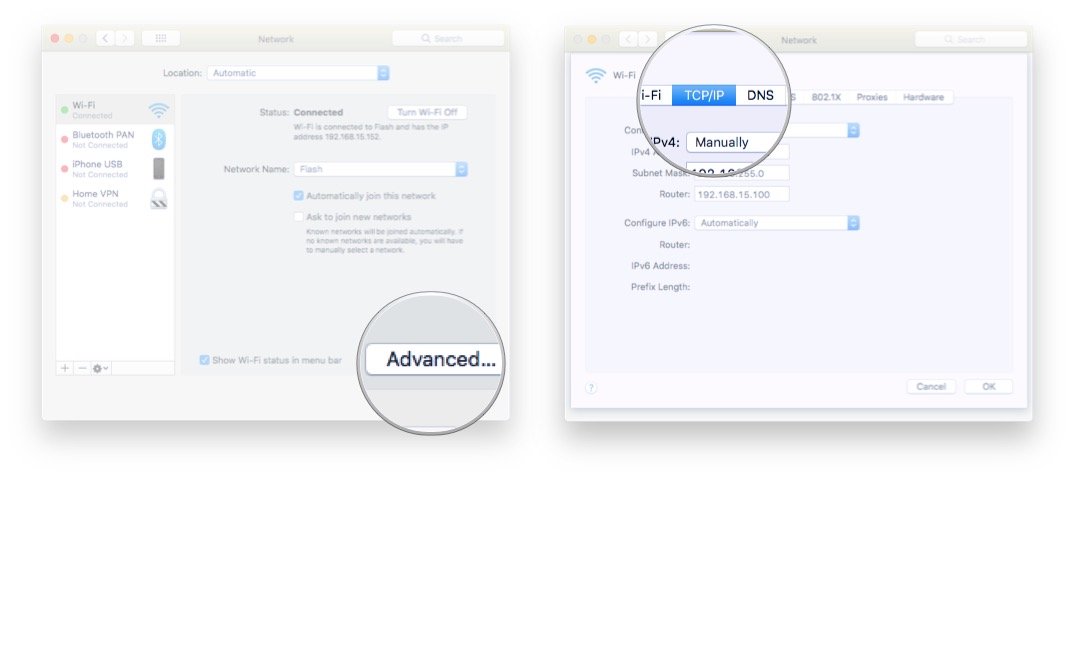
- Click Advanced.
- Setup the network requirements you need for your specialized network location. You can follow our instructions for changing your gateway if you need help with that.
- Click OK.
- If you need more specialized network settings, repeat steps 4 through 10.
How to use your new network profiles
Once you've set everything up, using the locations will be a breeze.
- Start System Preferences.
- Click Network.
- Tap the connection you want to manage. In our example, Wi-Fi.
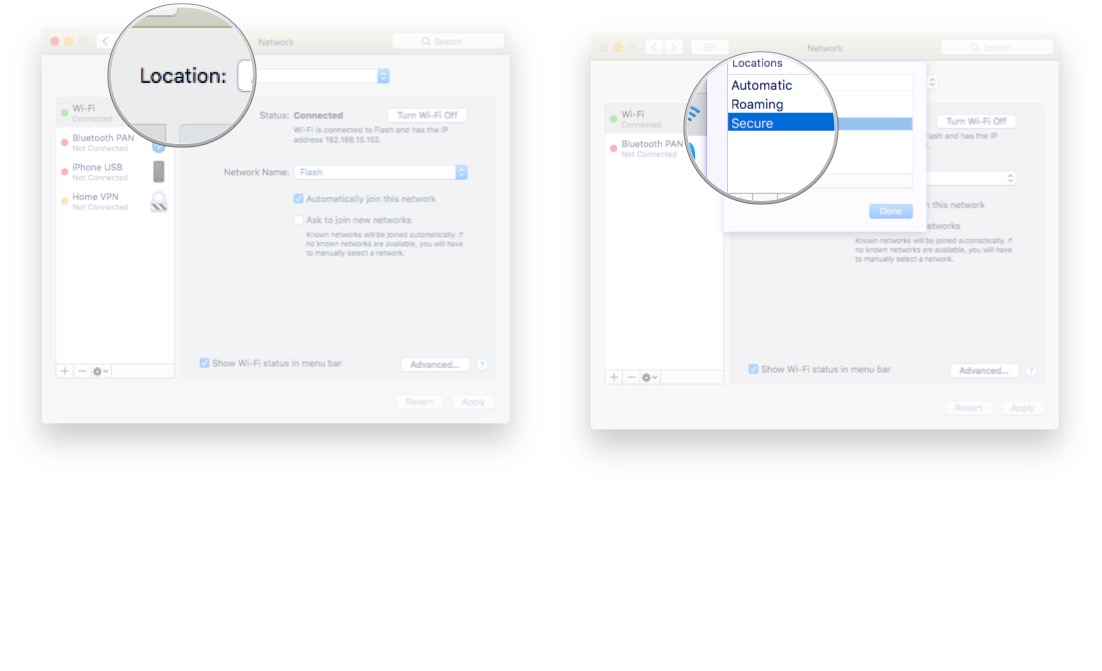
- Click the Location drop down arrow.
- Select the Network Location you need at the moment.
- Click Apply.
What about iOS?
iOS is already setup to "expect" different needs for different Wi-Fi networks. If you make a gateway change on one Wi-Fi network, iOS already knows that you'd need a separate networking profile when changing to a another Wi-Fi network.
Final thoughts and comments
I'd really like it if Apple were to make macOS Wi-Fi networking work similarly to iOS Wi-Fi networking. Case in point, I setup my wife's work laptop to use our encrypted VPN gateway for security purposes. She rarely used that laptop away from home. We once experienced a power outage when she required internet access. She went to a friends home but she couldn't access the internet due to the network settings from our home network. Since I didn't setup a roaming network location on her laptop, she was "stuck" not having access until I explained how to reset her network settings. If her device was an iOS device, she would not have needed anything changed and things would have worked seamlessly.
What are your thoughts? Do you need to change your network locations on your macOS device? Wish it would work similarly to an iOS device? Let us know in the comments!
