How to set up Face ID on iPad Pro

iMore offers spot-on advice and guidance from our team of experts, with decades of Apple device experience to lean on. Learn more with iMore!
You are now subscribed
Your newsletter sign-up was successful
Ever since the iPhone X, Apple has moved away from the Home button-enabled Touch ID for most of its iPhone and iPad devices. In its place is Face ID, which is Apple's biometric facial identity scanner that lets you unlock your iPad Pro, as well as recent iPhone models like the iPhone 13 Pro.
You can also enable Face ID as another layer of security for certain apps, like your password manager or note-taking app, use it for things like Apple Pay, and so much more. Here's how to set up Face ID on an iPad Pro and pretty much any other device that uses Face ID.
How to set up Face ID on iPad Pro
Setting up Face ID is similar to setting up Touch ID, except with your face! When you first set up your iPad Pro, you'll be asked to set up Face ID, but you can also do it at any time from the Settings app.
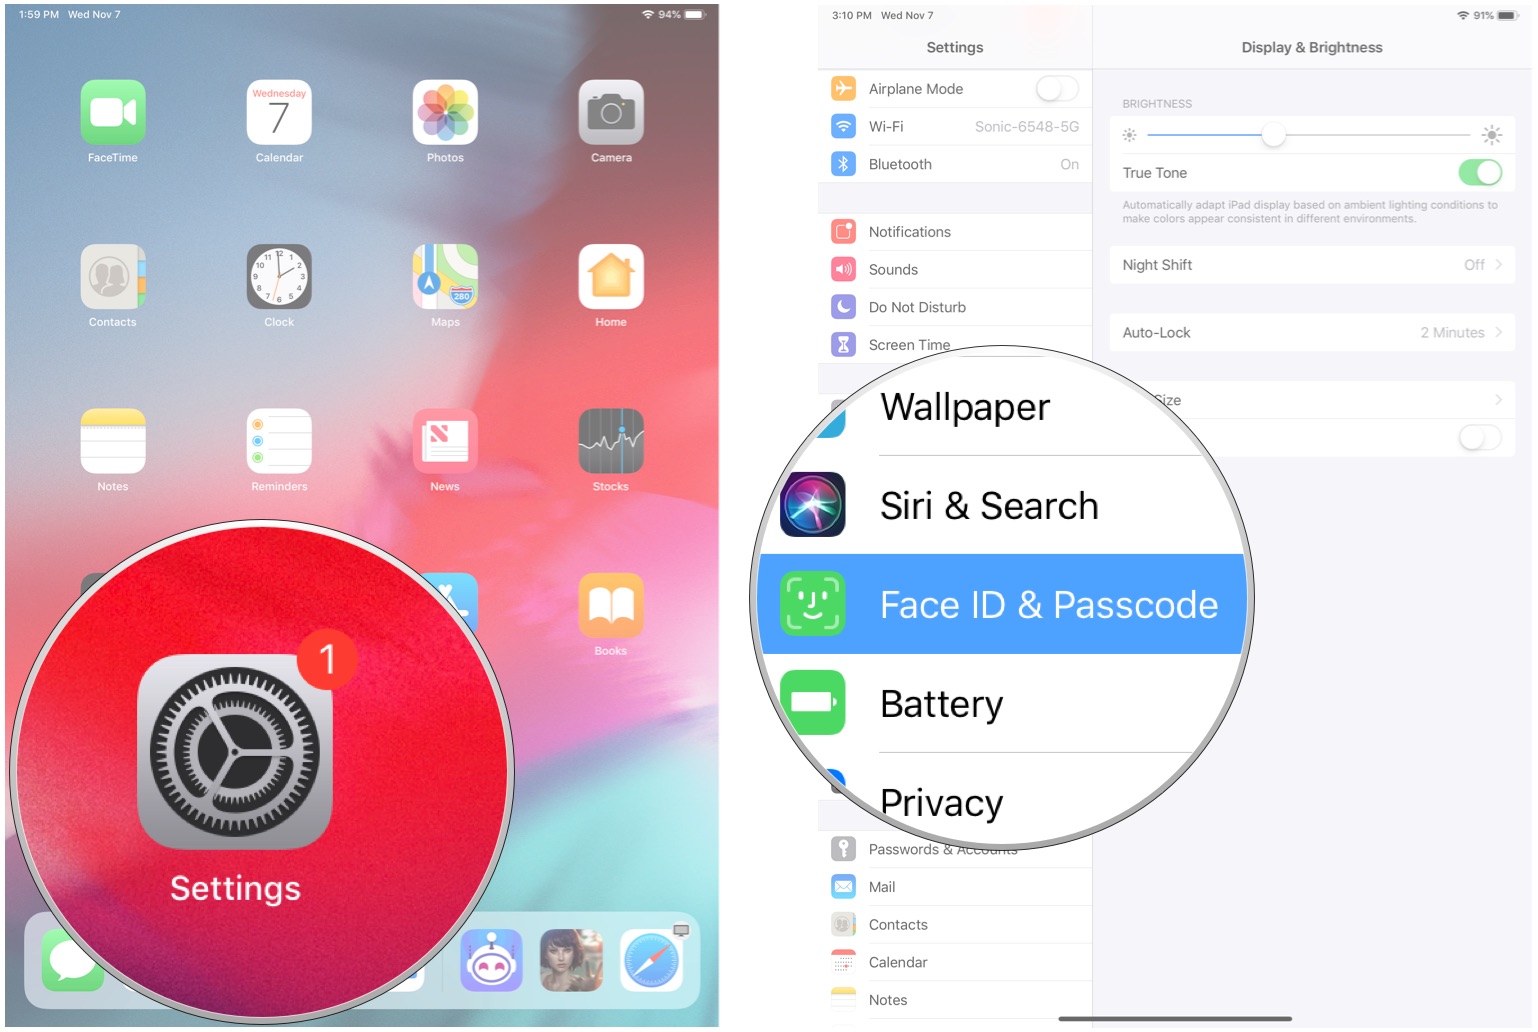
- Launch the Settings app on your iPad Pro.
- Tap Face ID & Passcode.
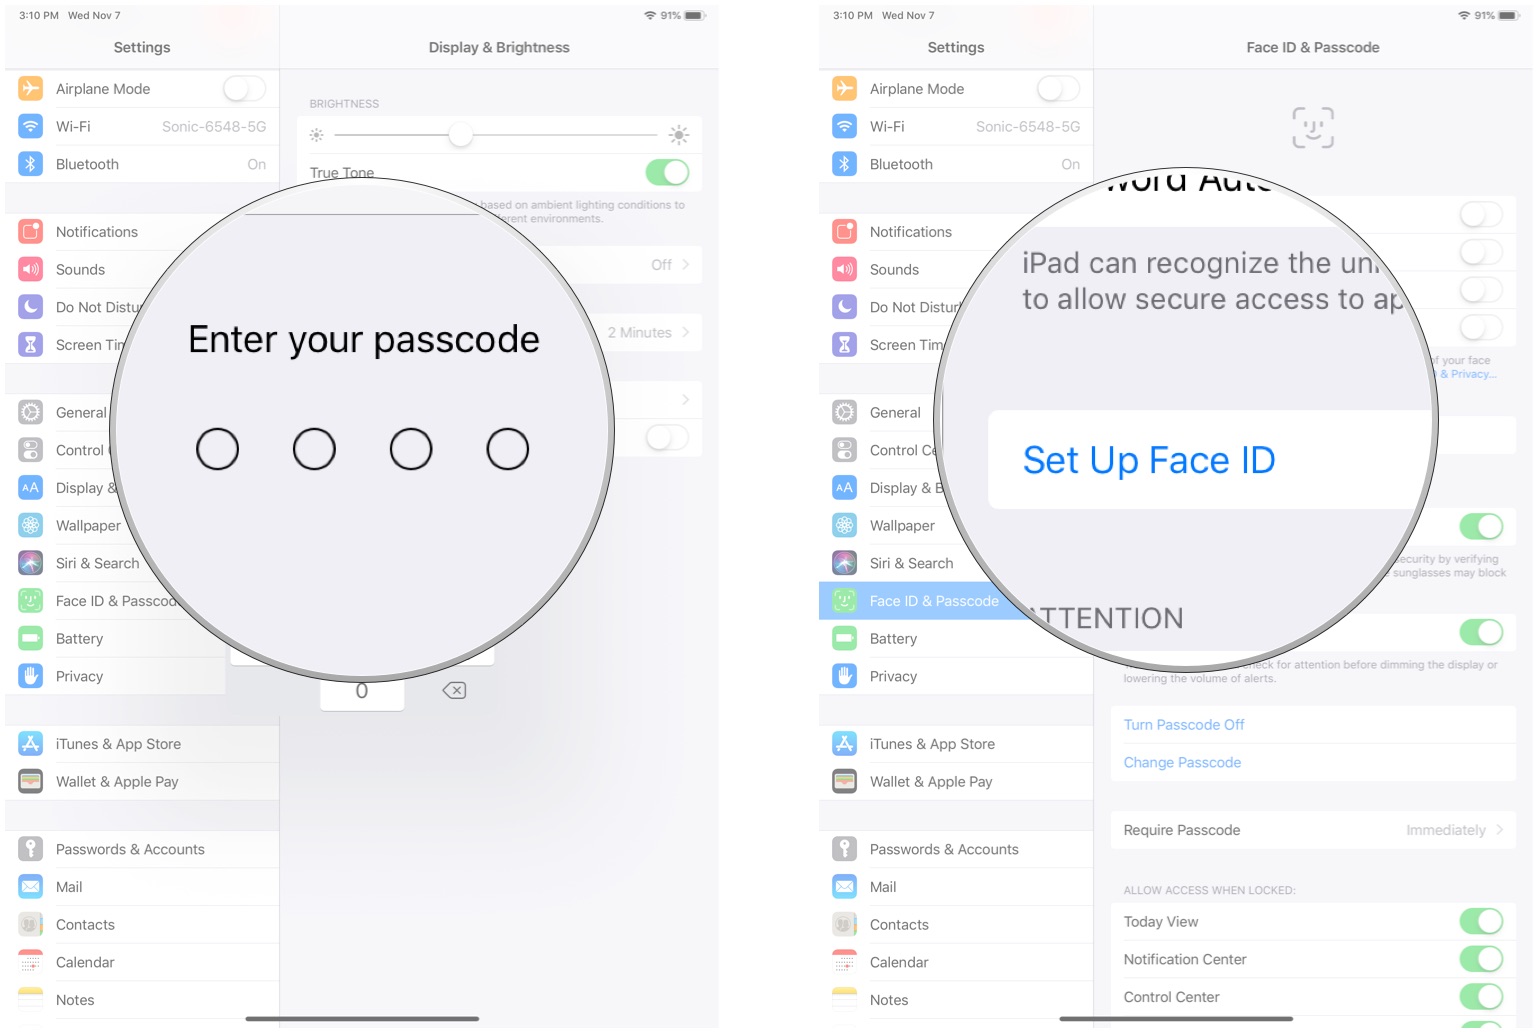
- Enter your Passcode.
- Tap Set Up Face ID.
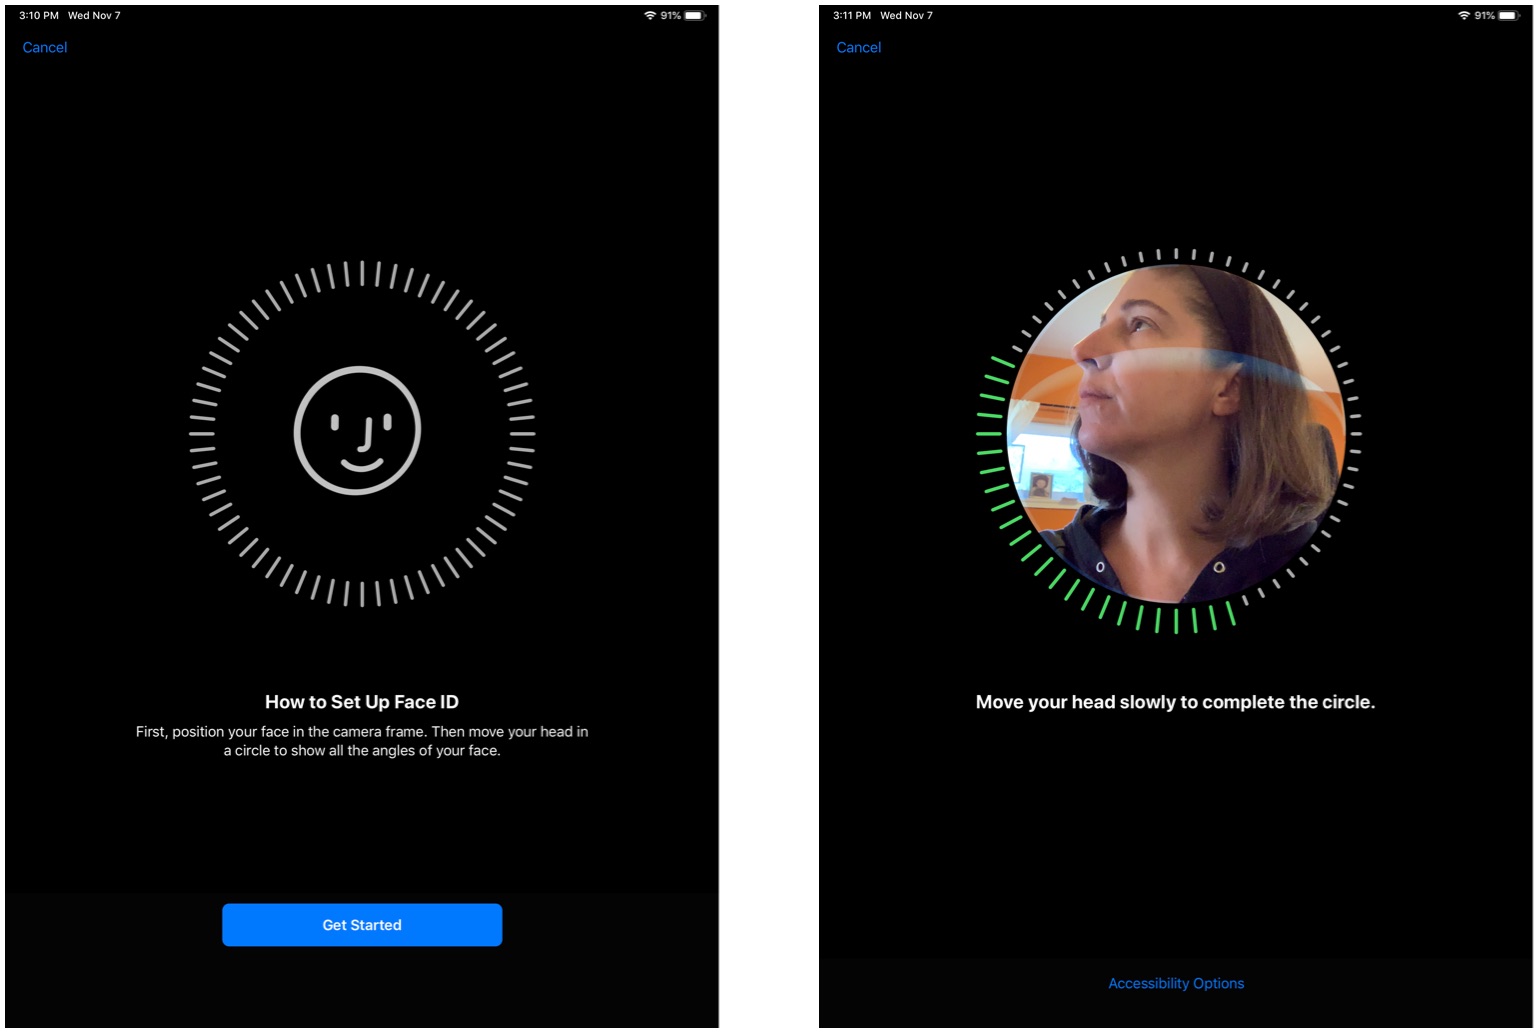
- Tap Get Started.
- Position your face inside the circle.
- Move your head, slowly, in a circle.
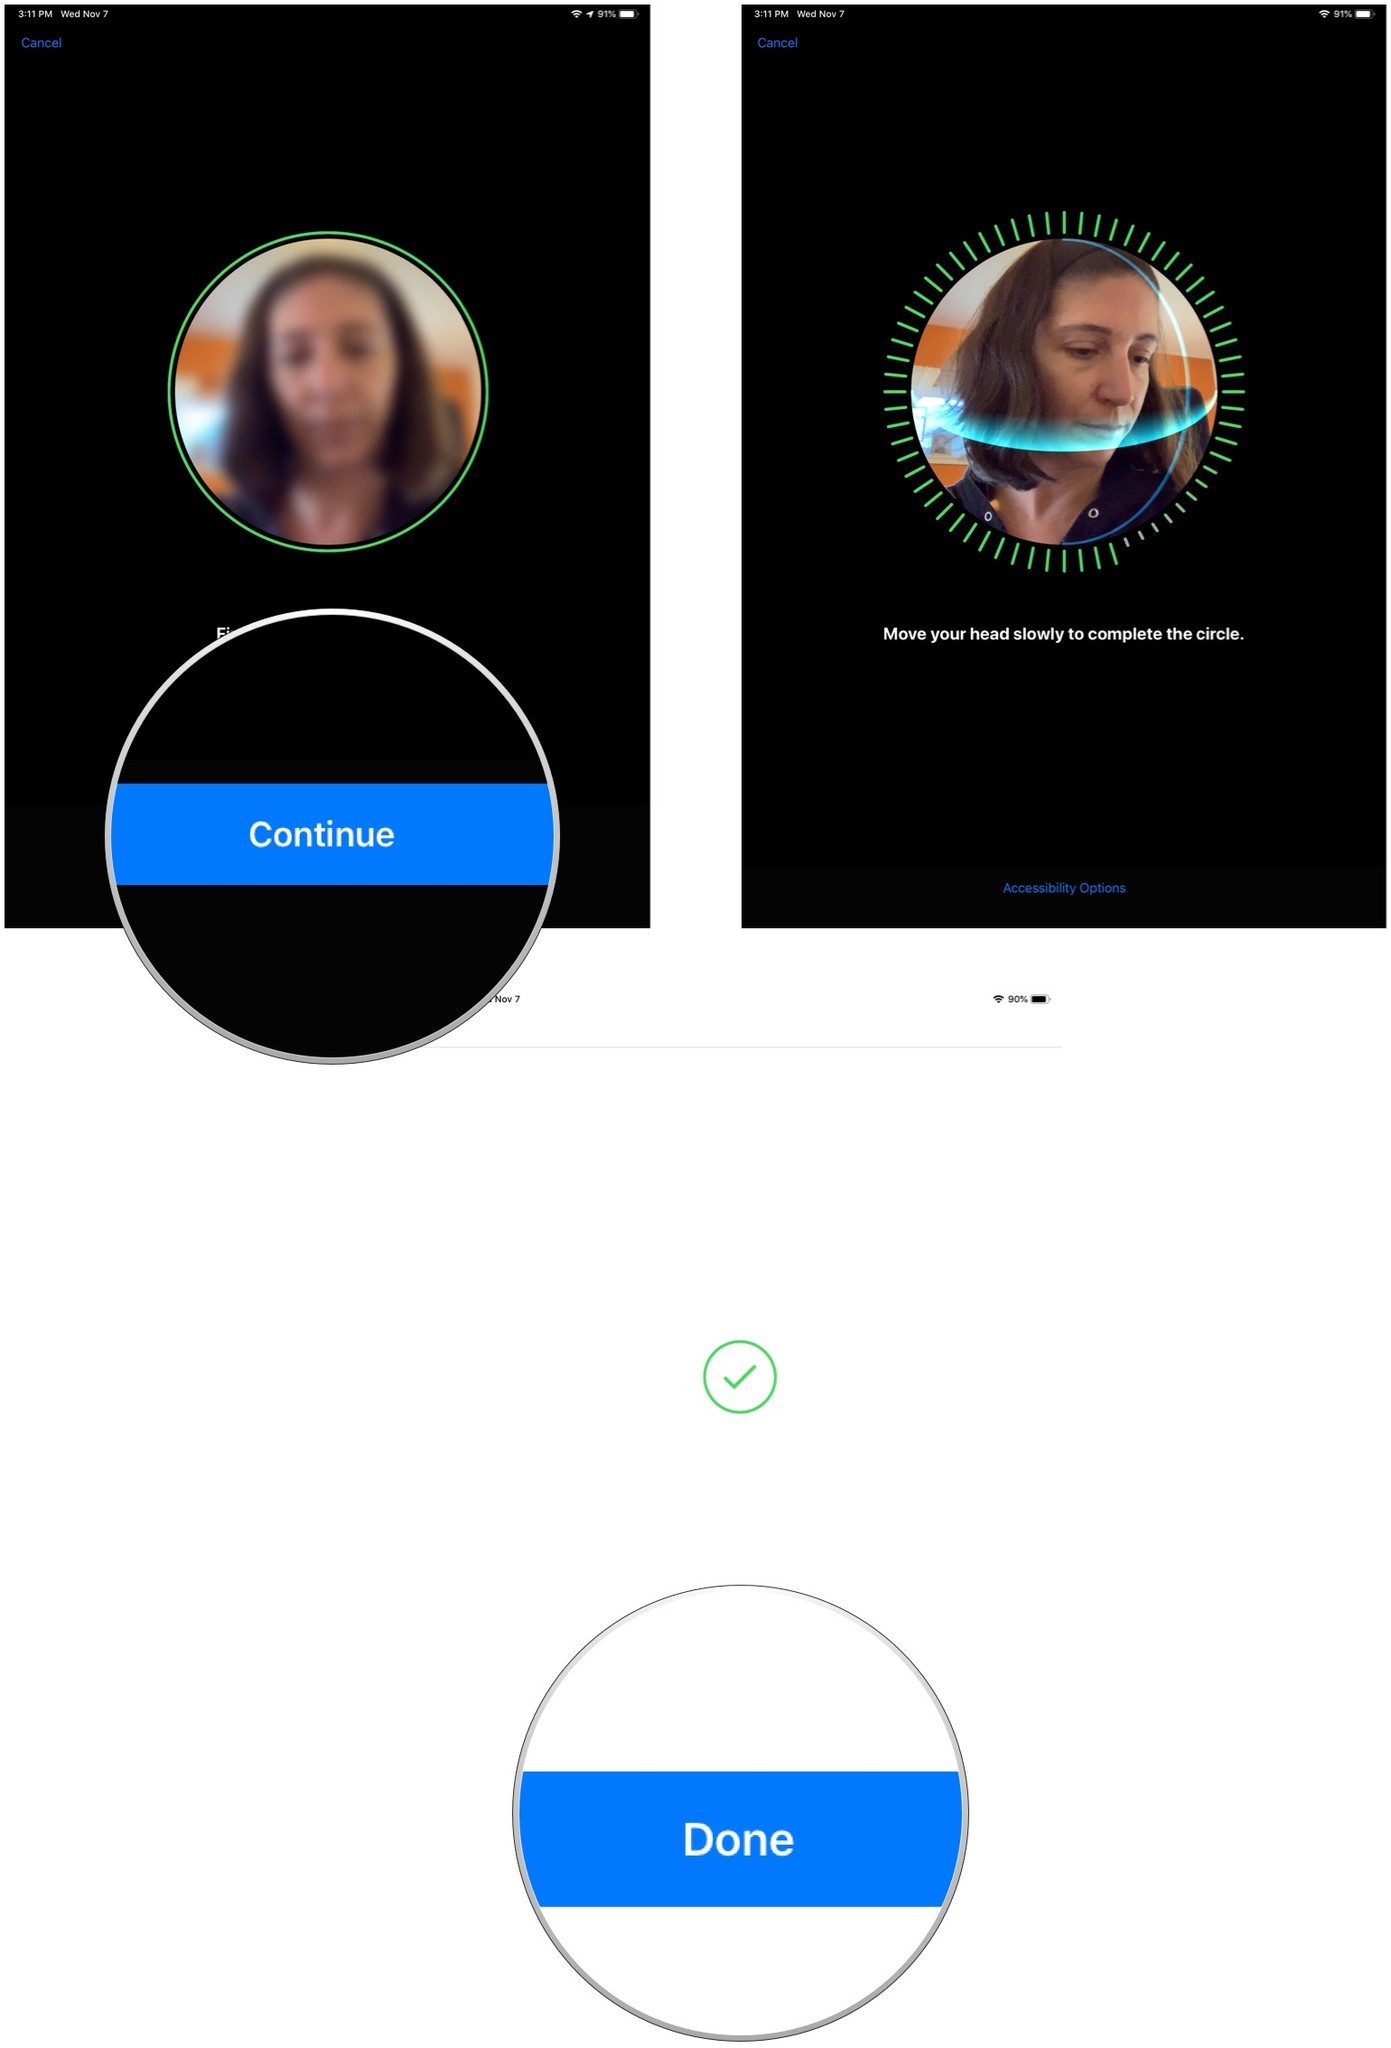
- Tap Continue.
- Move your head, slowly, in a second circle.
- Tap Done.
How to turn off Require Attention for Face ID on iPad Pro
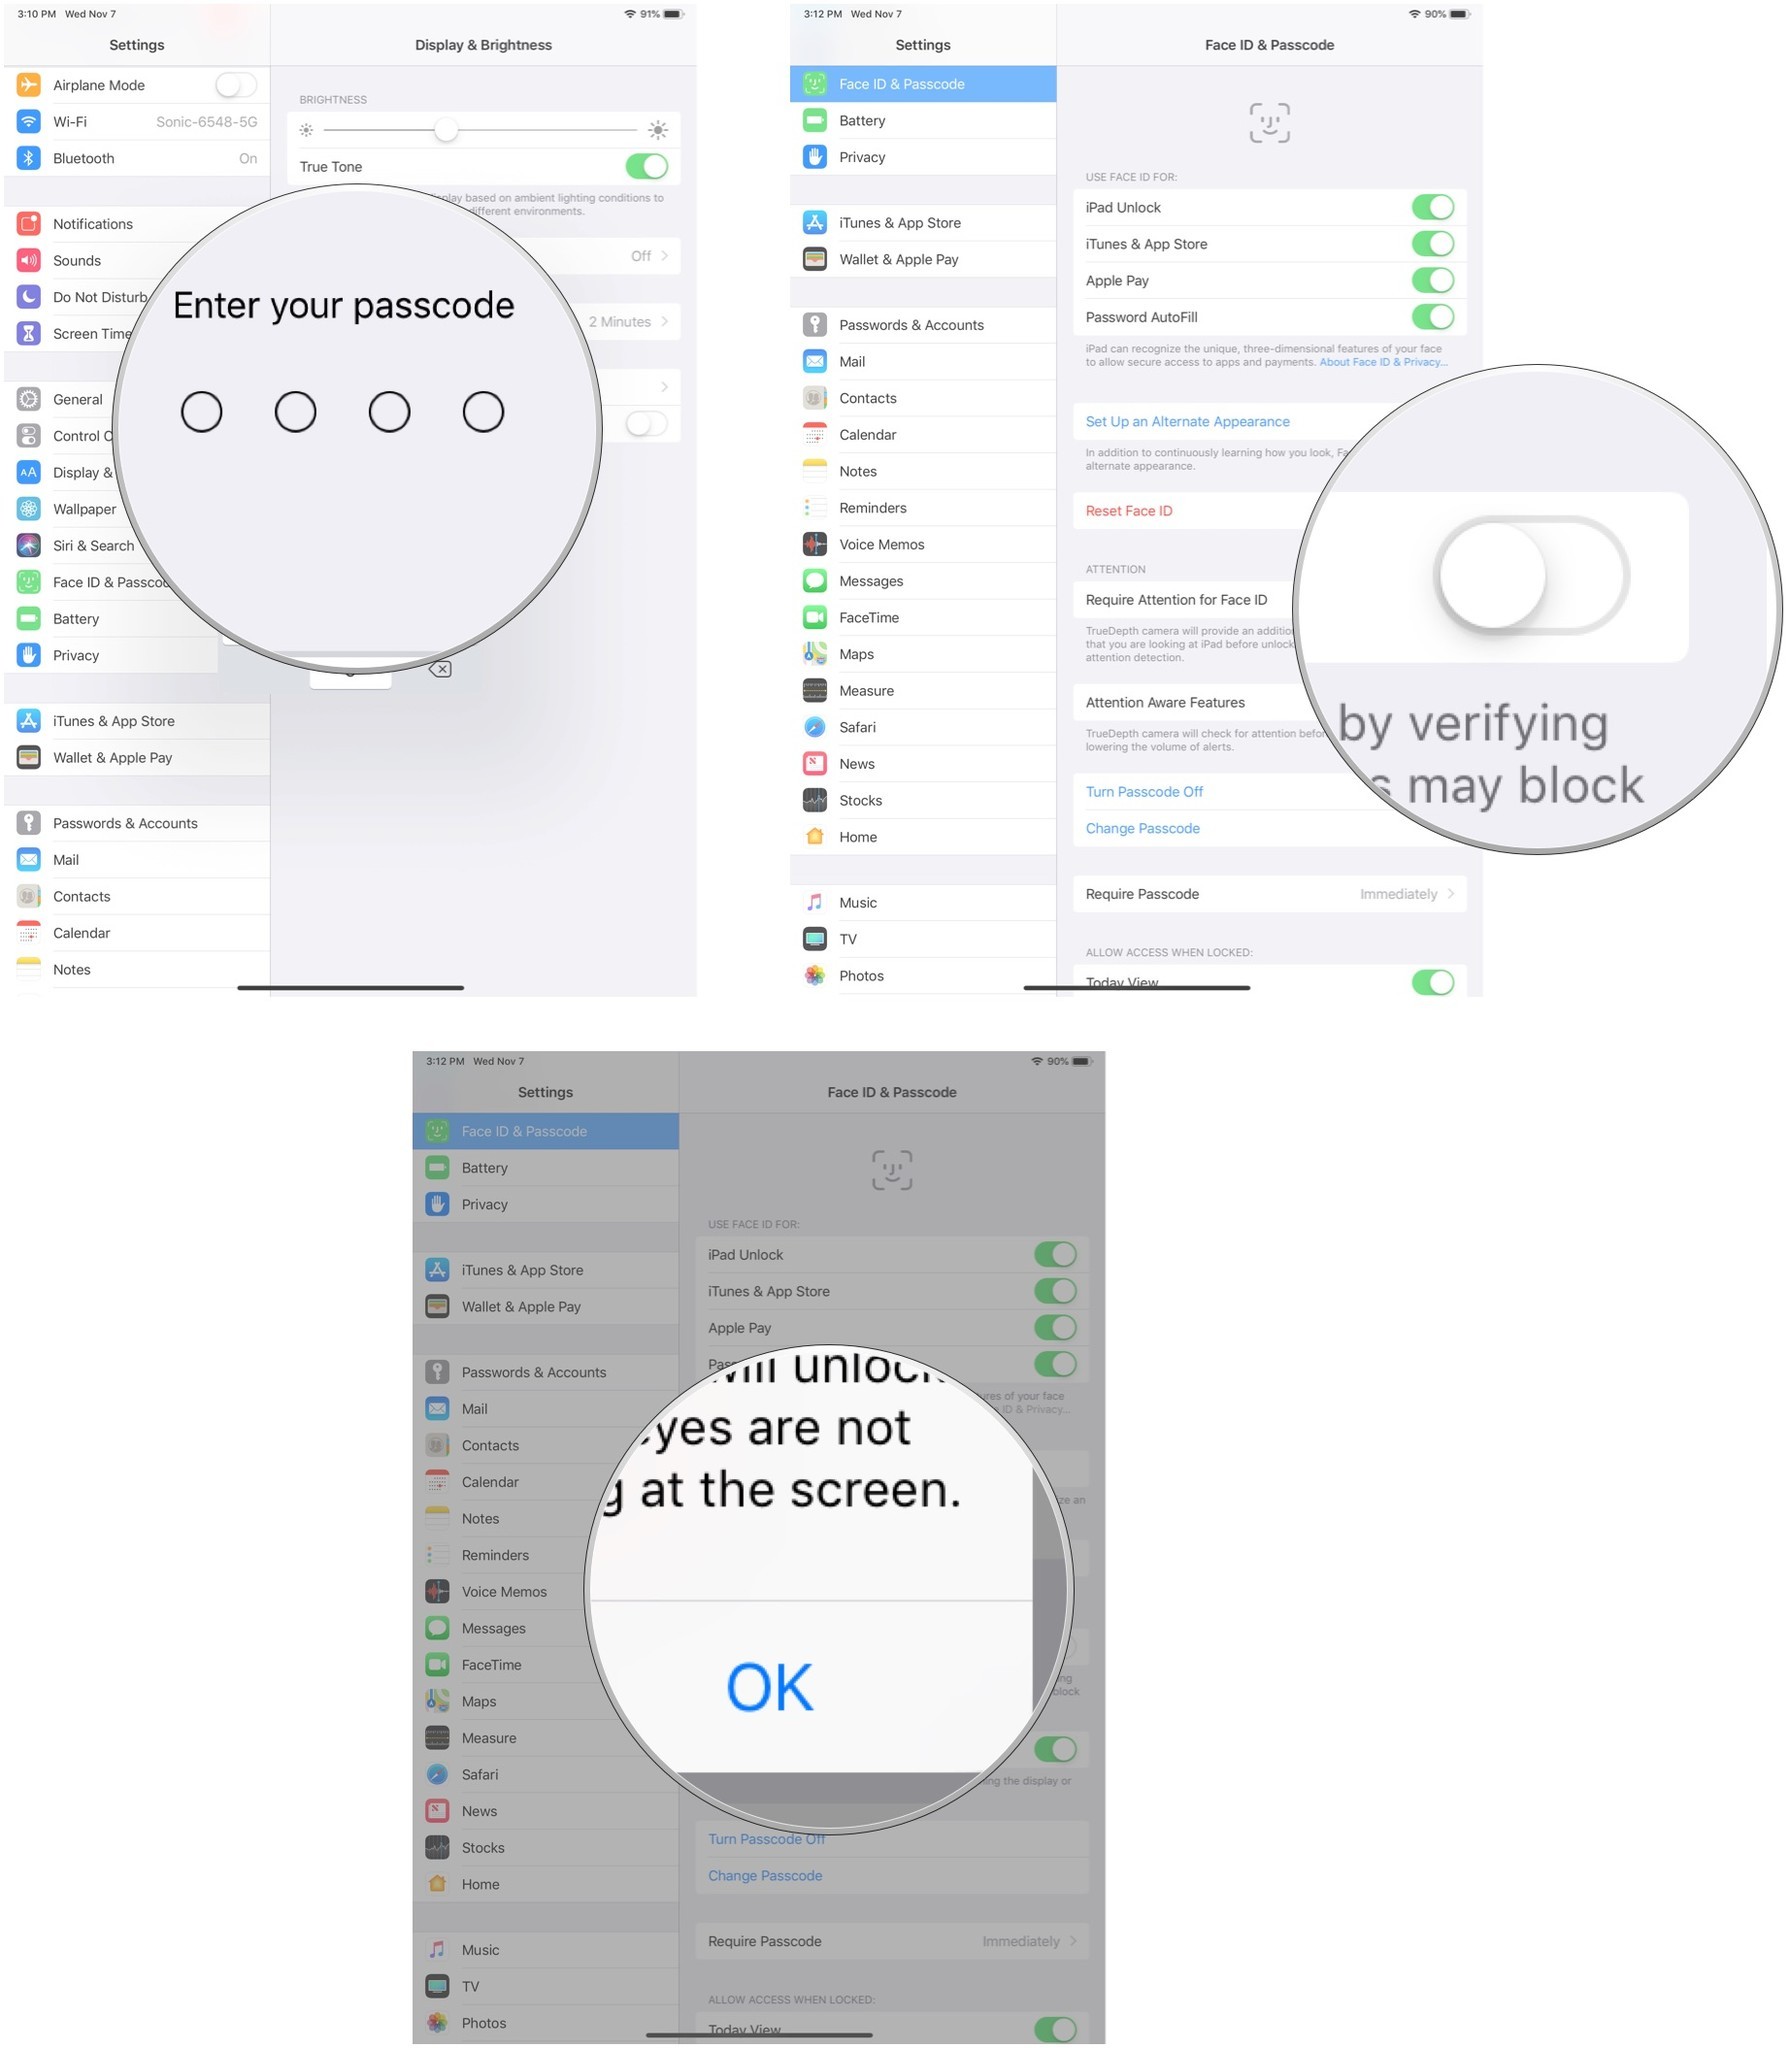
Require Attention means that Face ID won't unlock your iPad Pro or authenticate any logins or purchases without you looking directly at your iPad Pro. If, for any reason, you can't or don't want to look directly at your iPad Pro to trigger Face ID, turn off Require Attention.
- Launch the Settings app on your iPad Pro.
- Tap Face ID & Passcode.
- Enter your Passcode.
- Toggle the Require Attention for Face ID switch off.
- Tap OK to confirm that you want to turn off Require Attention for Face ID.
Should you change your mind about this setting, you can turn it on again by following the same steps as above.
How to turn on Attention Awareness for Face ID on iPad Pro
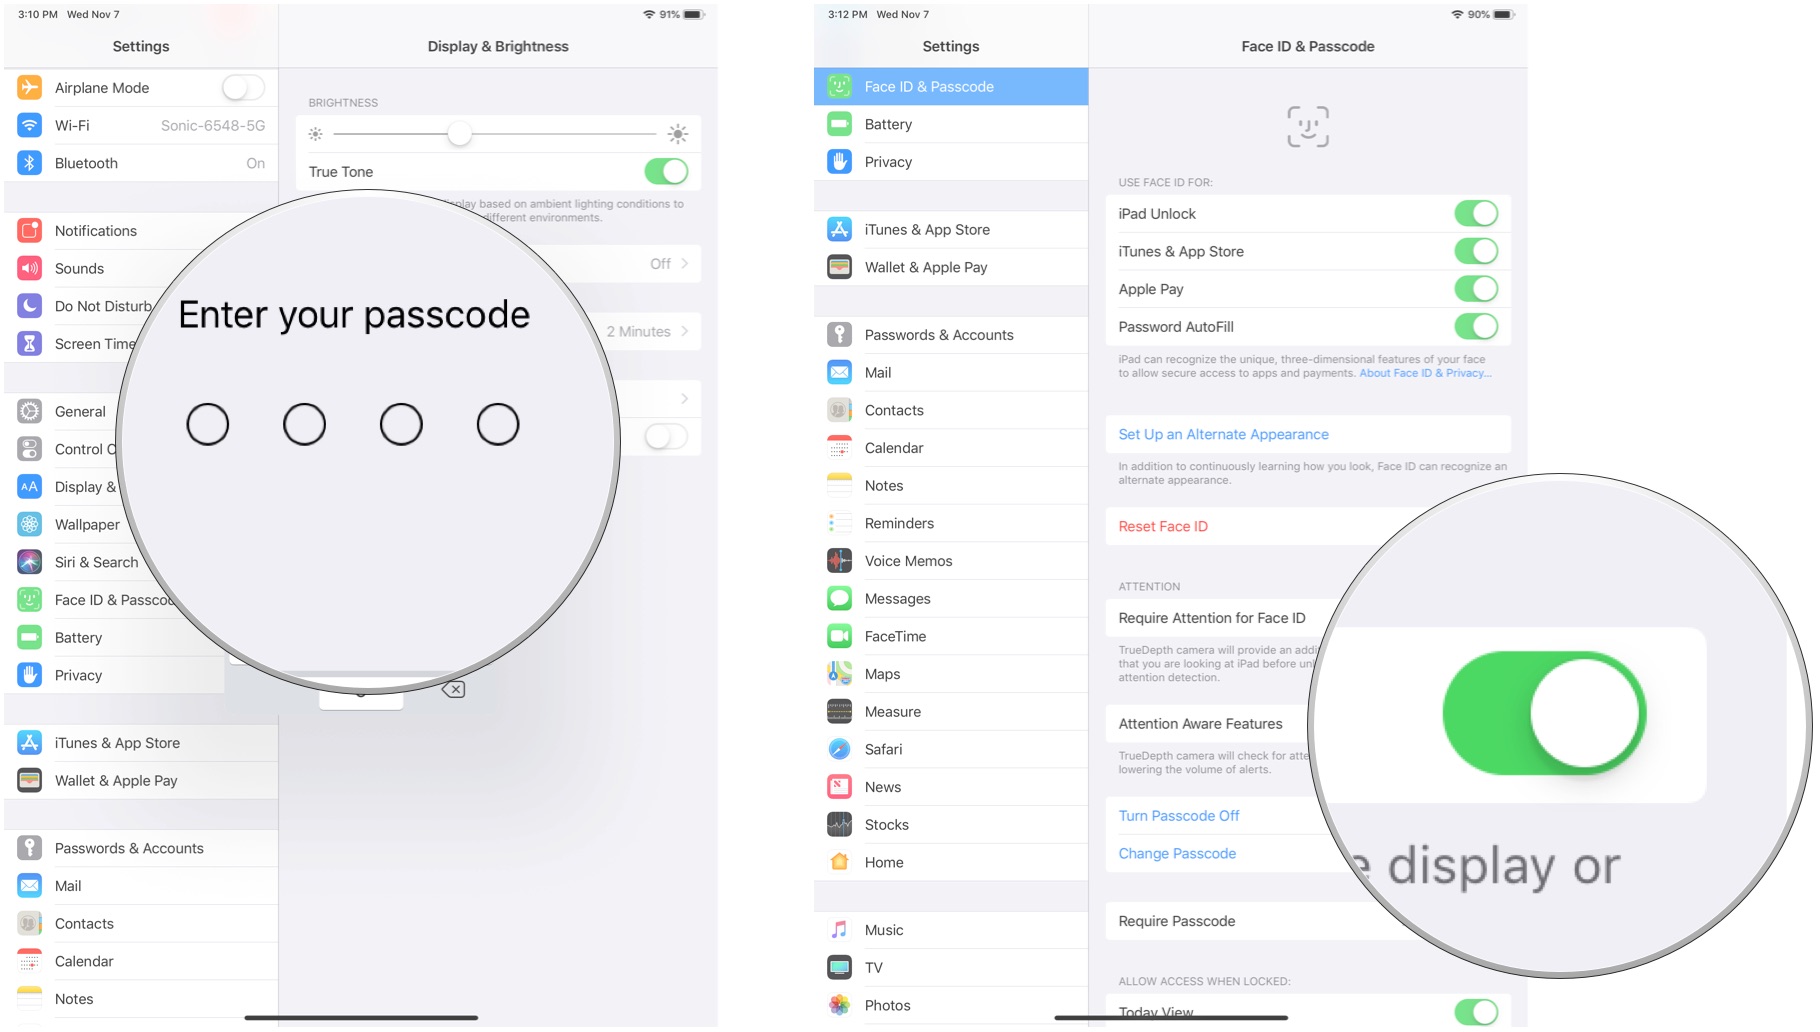
With or without Require Attention on, you can enable Attention Awareness, which checks for your direct attention before dimming the iPad Pro display or lowering the volume of alerts. This is better for both battery consumption and quieter alerts when you're right next to your iPad Pro.
- Launch the Settings app on your iPad Pro.
- Tap Face ID & Passcode.
- Enter your Passcode.
- Toggle the Attention Awareness Features switch on.
Again, if you want to turn this feature off, just follow the same steps as above, except you turn the switch off.
iMore offers spot-on advice and guidance from our team of experts, with decades of Apple device experience to lean on. Learn more with iMore!
How to add a second person to Face ID on iPad Pro
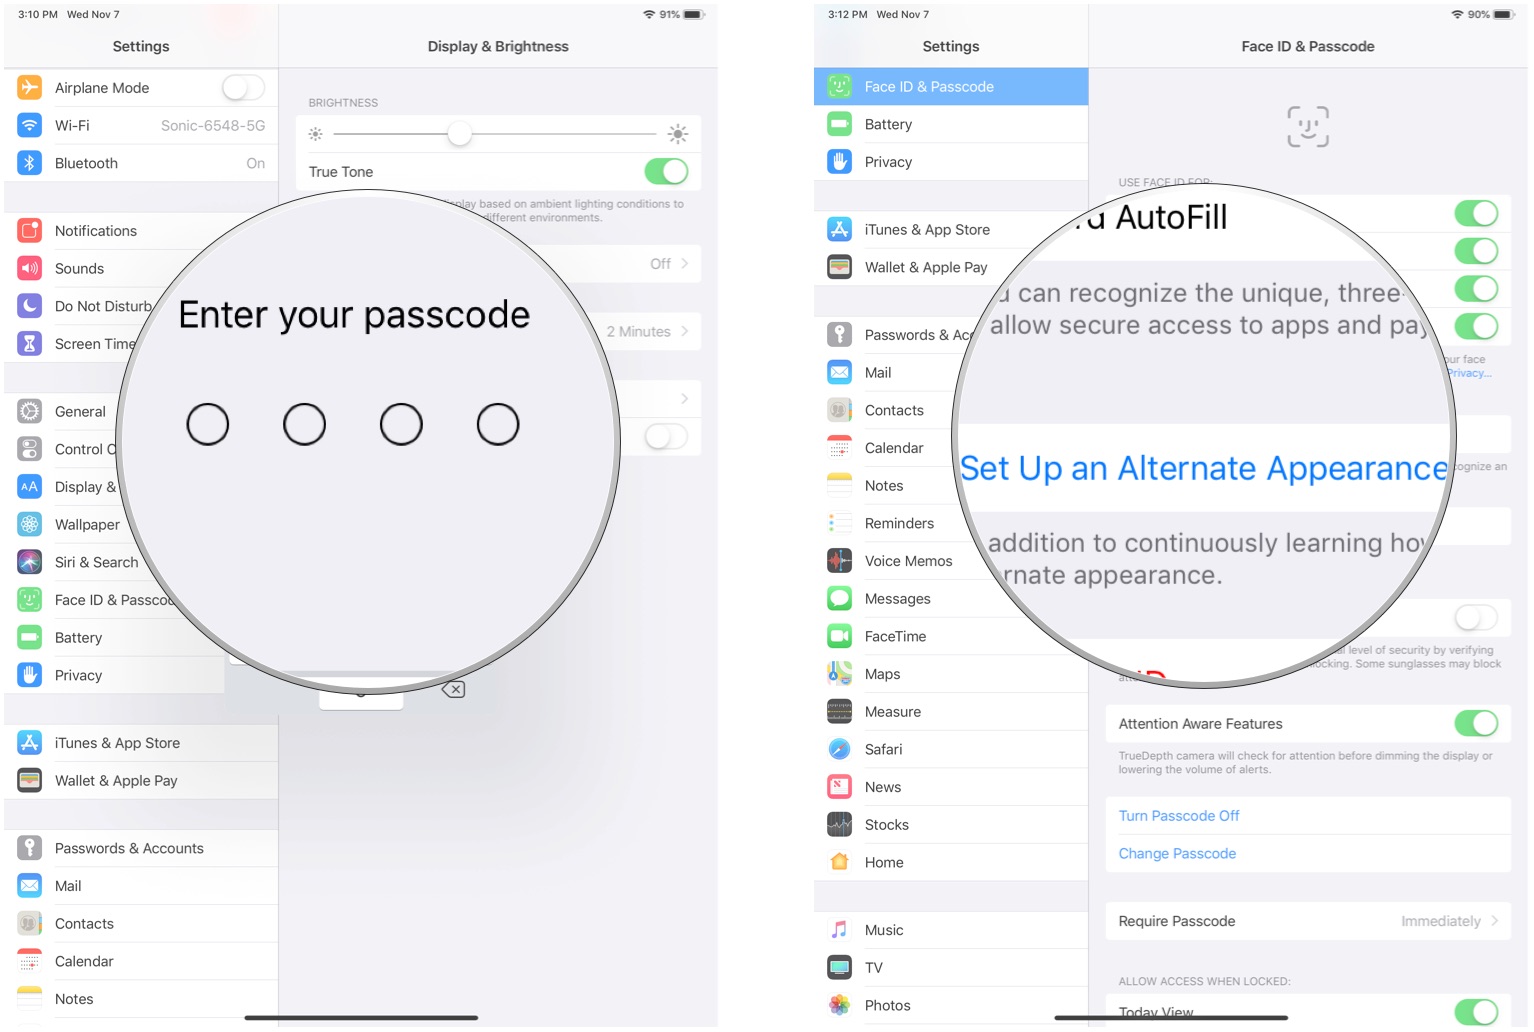
Apple added the ability to set up an Alternative Appearance to devices with Face ID. It's recommended for people that temporarily have a significantly different look and bone structure, like from surgery or another reason that might alter your appearance, like glasses, hats, makeup, or a new hairstyle. But you can also use it to set up a second person, like your significant other, to unlock your iPad Pro with Face ID in case of emergencies.
- Launch the Settings app on your iPad Pro.
- Tap Face ID & Passcode.
- Enter your Passcode.
- Tap Set up an Alternate Appearance.
Follow the instructions the same way you would to set up Face ID.
How to reset Face ID on iPad Pro
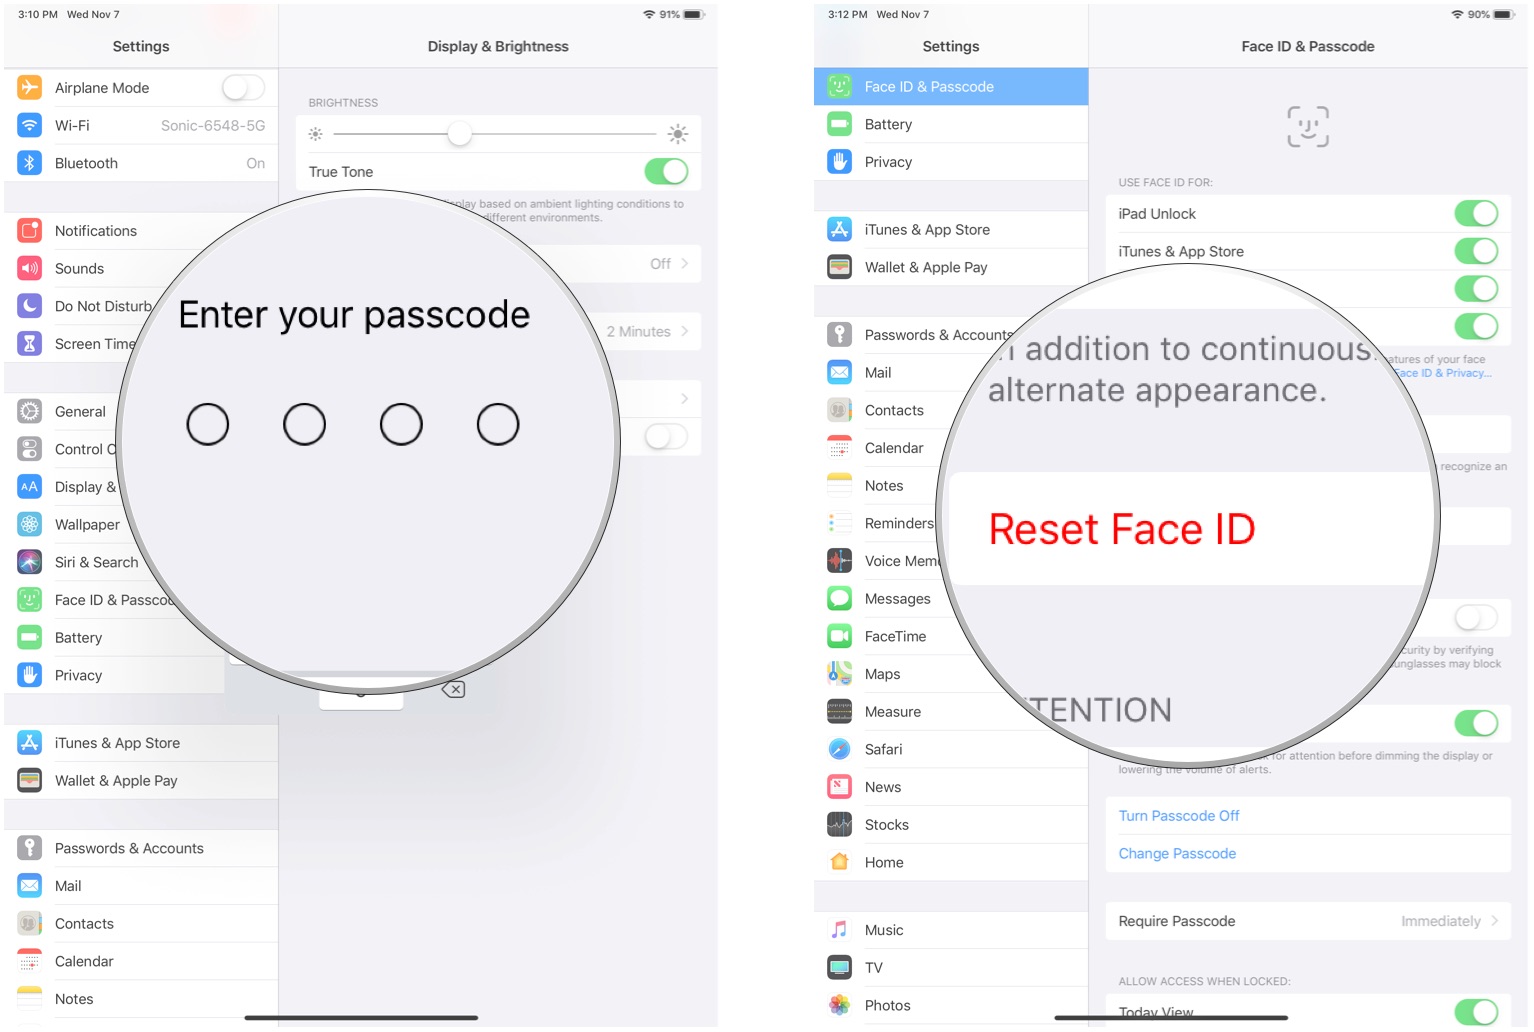
If Face ID stops working for some reason, like your face has changed enough that the scan doesn't recognize you on the first try, you can reset Face ID at any time.
I should take a moment to explain that Face ID learns your appearance over time. So even if it's a bit slow to learn at first, it will eventually recognize you when you've got puffy eyes from just waking up in the morning, as you grow older, when you're resting your face on your hand, and even when you're sneezing (I've tried it, it works). You should rarely need to reset Face ID.
- Launch the Settings app on your iPad Pro.
- Tap Face ID & Passcode.
- Enter your Passcode.
- Tap Reset Face ID.
Be warned that there is NO confirmation before you reset Face ID. So if you do this by accident, you'll need to get it set up again, and have the iPad or iPhone relearn your face over time. Seriously, why is there still no confirmation before you wipe out your Face ID?
A better way of adding security to your iPad or iPhone
As you can see, Face ID has been around since 2017 with the iPhone X, so here at iMore, we're pretty familiar with how it works and the things that it can do. Most of us honestly prefer Face ID, as it is simpler and even faster to get into your device, rather than scanning your fingerprint.
Updated April 2022: These steps are up-to-date with the latest versions of iPadOS 15 and iOS 15.

Christine Romero-Chan was formerly a Senior Editor for iMore. She has been writing about technology, specifically Apple, for over a decade at a variety of websites. She is currently part of the Digital Trends team, and has been using Apple’s smartphone since the original iPhone back in 2007. While her main speciality is the iPhone, she also covers Apple Watch, iPad, and Mac when needed.
When she isn’t writing about Apple, Christine can often be found at Disneyland in Anaheim, California, as she is a passholder and obsessed with all things Disney, especially Star Wars. Christine also enjoys coffee, food, photography, mechanical keyboards, and spending as much time with her new daughter as possible.
