How to capture today's solar eclipse with an iPhone — take the best shot possible without damaging your eyes or your camera
Total eclipse of the heart.
iMore offers spot-on advice and guidance from our team of experts, with decades of Apple device experience to lean on. Learn more with iMore!
You are now subscribed
Your newsletter sign-up was successful
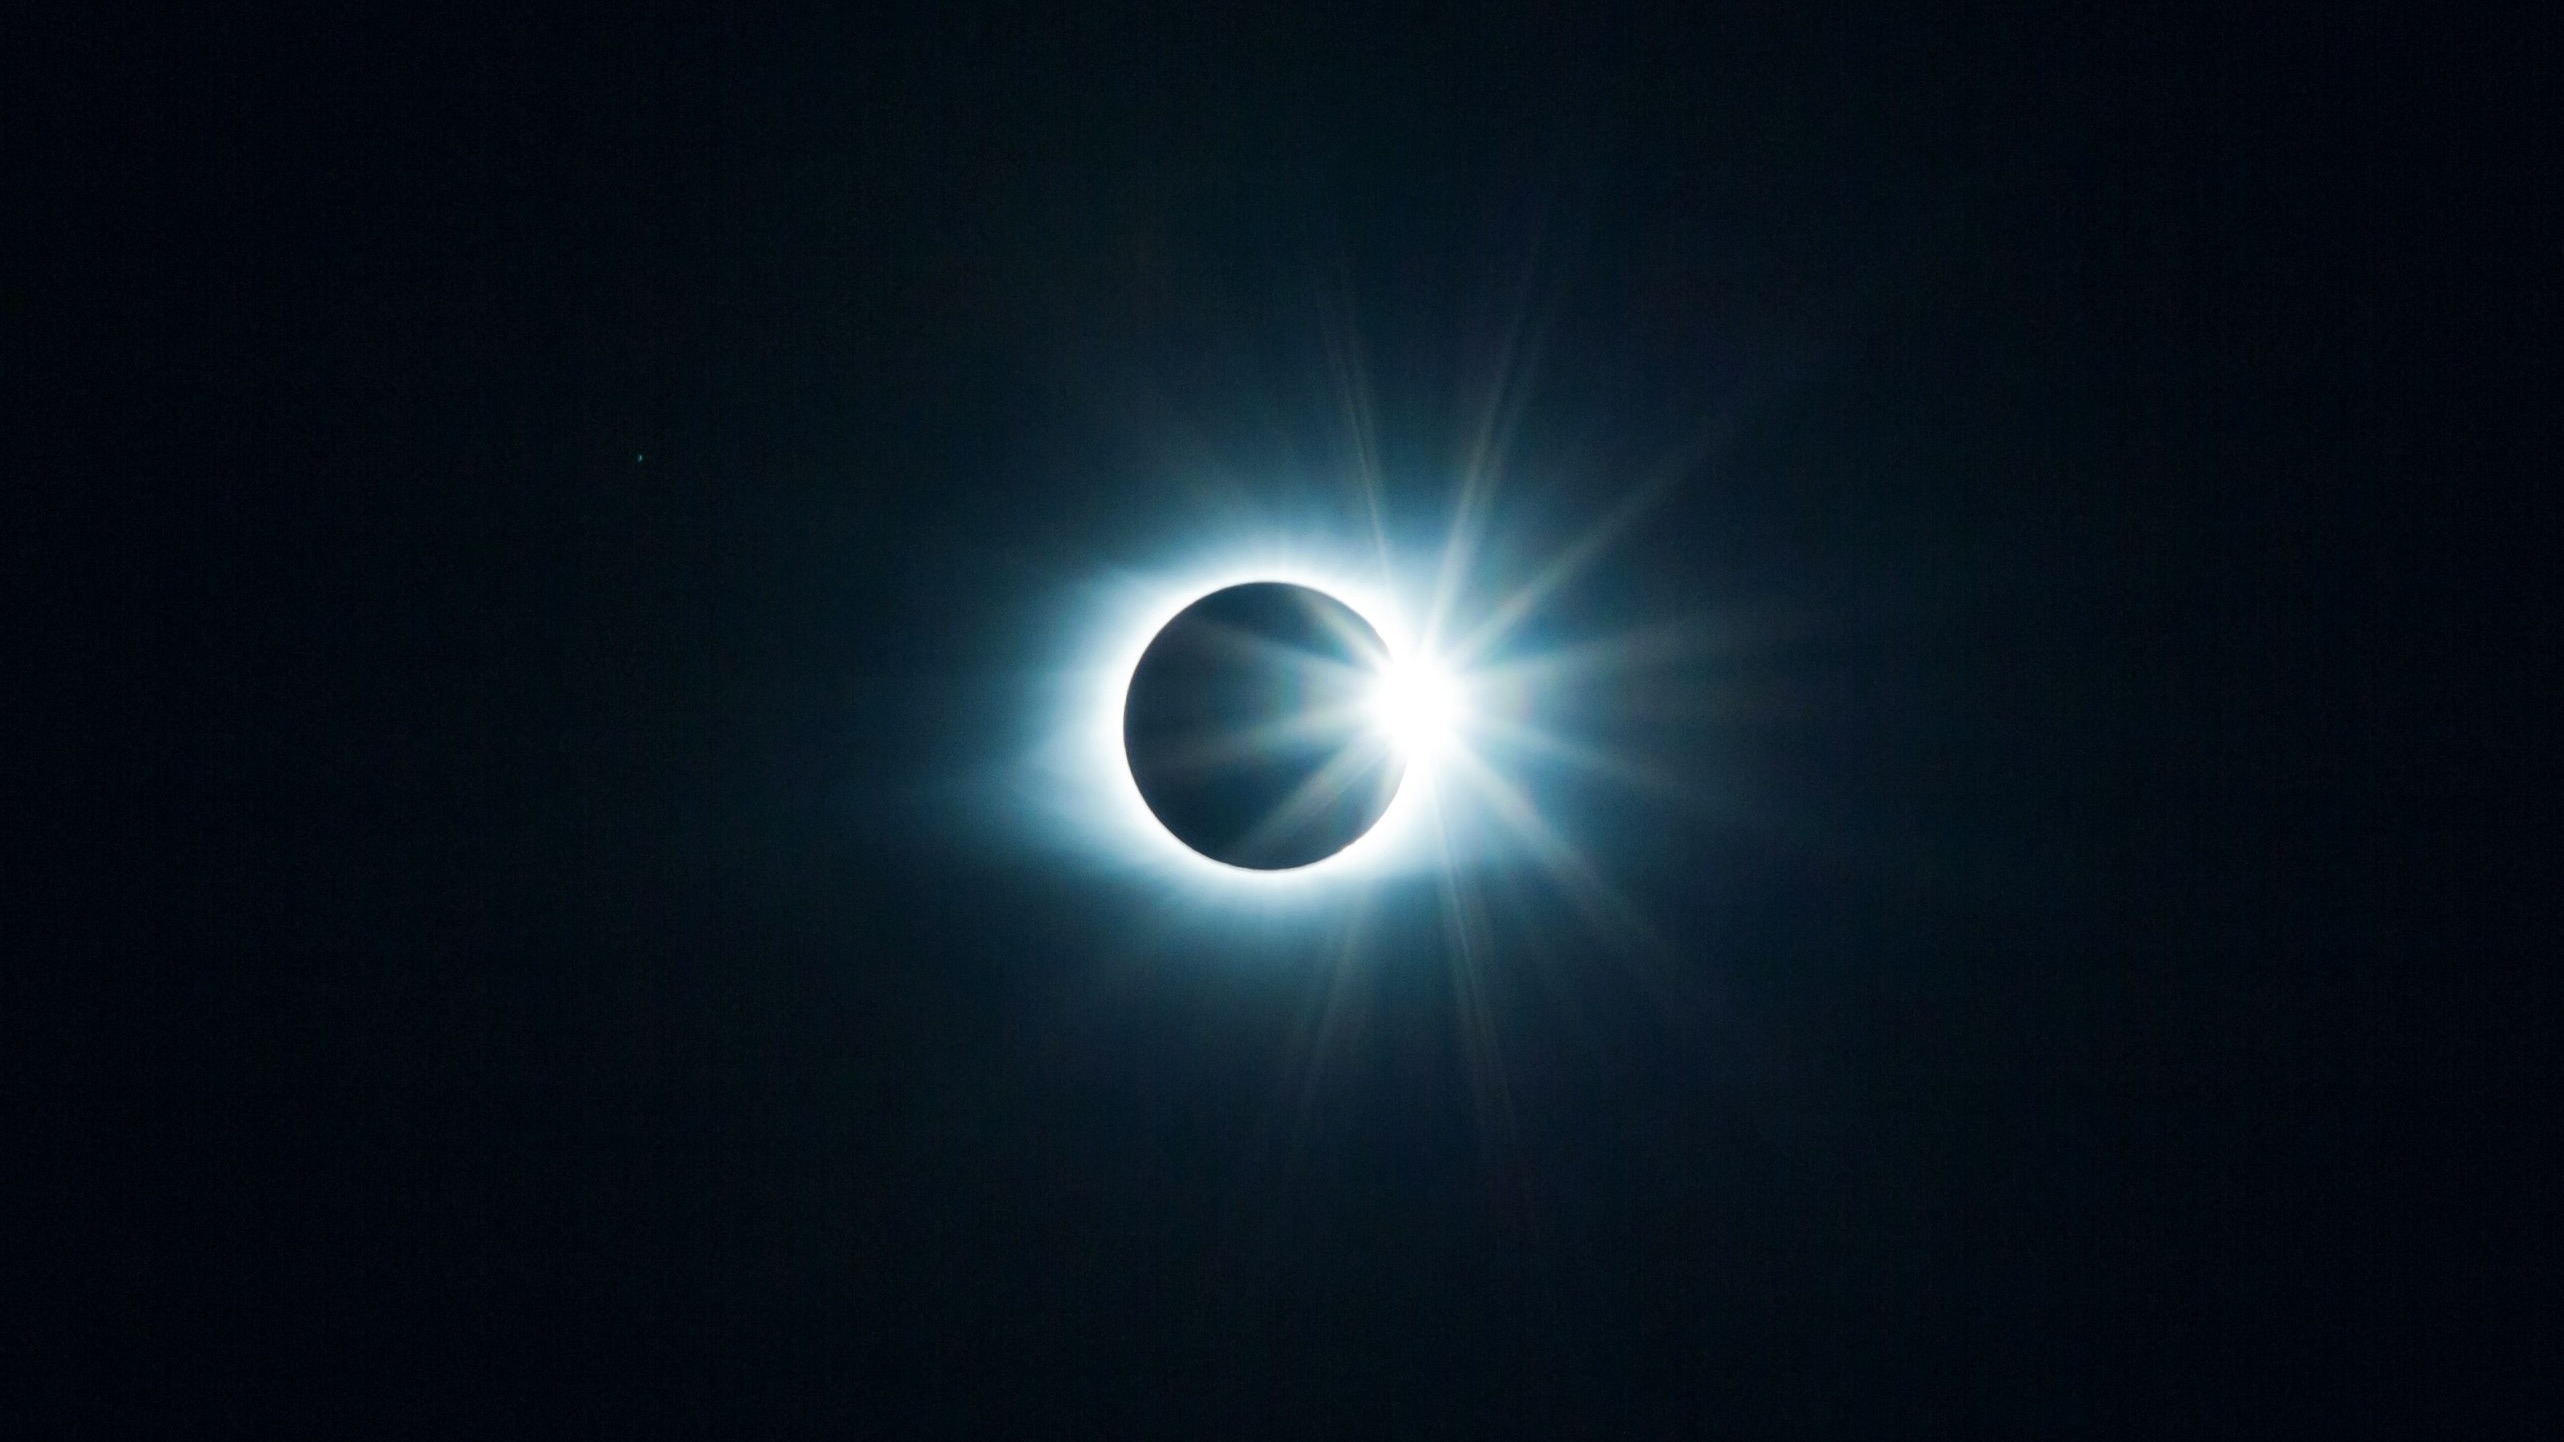
A full solar eclipse is a rare event, and there will be one making its way across North America today, April 8. I happen to live directly in the path of totality, which means I’ll get to see the sun completely blocked by the moon for several minutes just by stepping outside of my house. I’m very excited about this; the last solar eclipse in my area was just partial and it was still pretty cool. Whether you’re in the path of totality or you’ll be getting a partial view, it’s still something you’re likely going to want to document. I’m no expert photographer, but I did take an online iPhone photography class to level up my shutterbug skills.
Yes, you could just point your iPhone at the sun and maybe get something interesting, but preparing ahead of time will likely get you better images and keep your eyes and your iPhone safe. Map out what you’re going to do, maybe even do some practice shoots in the days ahead of the eclipse. You might even want to choose something besides the sun itself to focus on in order to get images more unique to your experience. Here are some tips to maximize the eclipse experience with your iPhone.
Prepare to set up the perfect shot
Protect your eyes and lenses
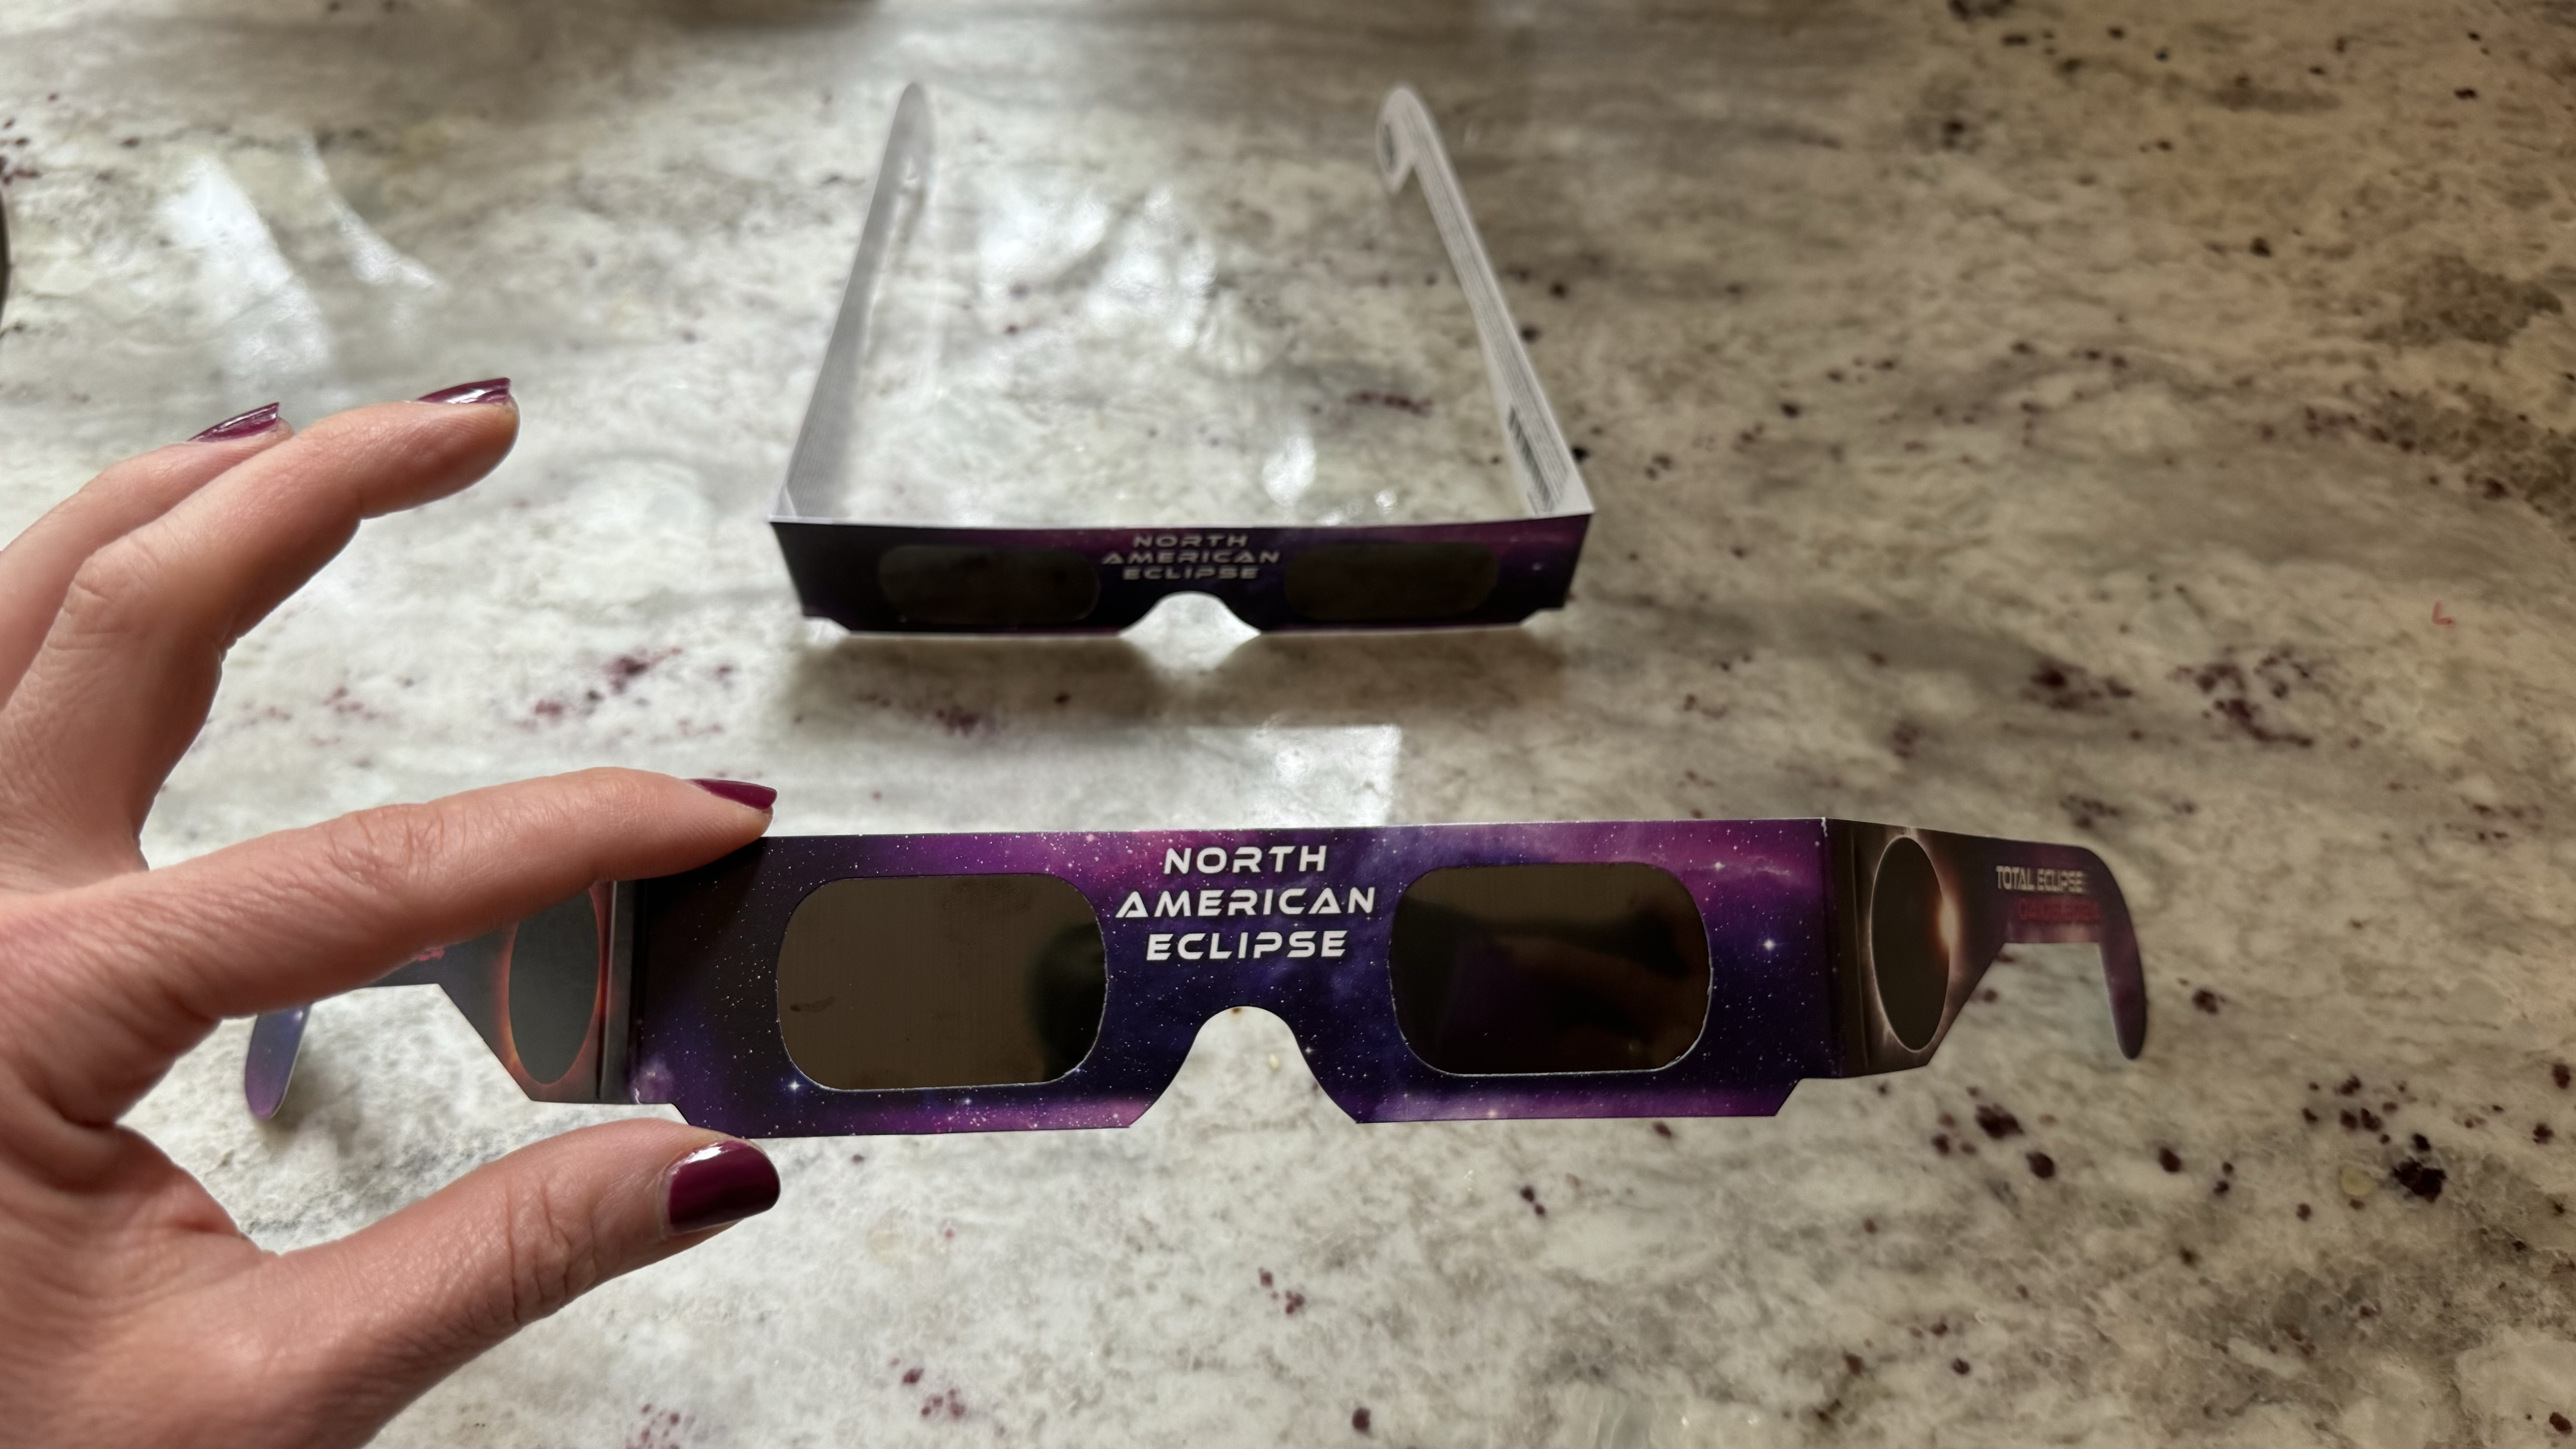
First and foremost, you need to wear eclipse glasses to prevent vision loss. Even high-end sunglasses are not sufficient protection. Surprisingly, even your iPhone's optics are at risk if you're pointing your camera directly at the sun. You can purchase solar filters for your iPhone camera lenses, or put a spare pair of eclipse glasses over them.
Many libraries are giving eclipse glasses out for free. They are readily available to purchase online at Amazon and other sites. You can also pick them up for a dollar or two at many opticians, toy stores, and other local stores in your area.
Scout your location
Choose a location that has a good view of the sky where the sun will be at that time. Look for minimal obstruction and as little light pollution as possible. You also might consider finding a spot that has appealing elements in the foreground to add more visual interest to your photos.
A tripod is ideal
If possible, you’ll want to pick up an iPhone tripod to ensure the best photos. Anytime you’re shooting in low light, images can get blurry if your iPhone moves even the slightest bit. If you don’t have a tripod, you’ll want to find a spot to prop up your iPhone so you can get steady shots. At the very least, brace your shooting arm against a wall or your body to steady yourself. This is especially important if you’re taking a video, as the experience of watching a jerky video will be unpleasant.
Remote control
You also might consider getting an iPhone camera remote, which actually comes included with a lot of tripods. If you have an Apple Watch, you’re in luck: the Camera Remote app does the trick.
iMore offers spot-on advice and guidance from our team of experts, with decades of Apple device experience to lean on. Learn more with iMore!
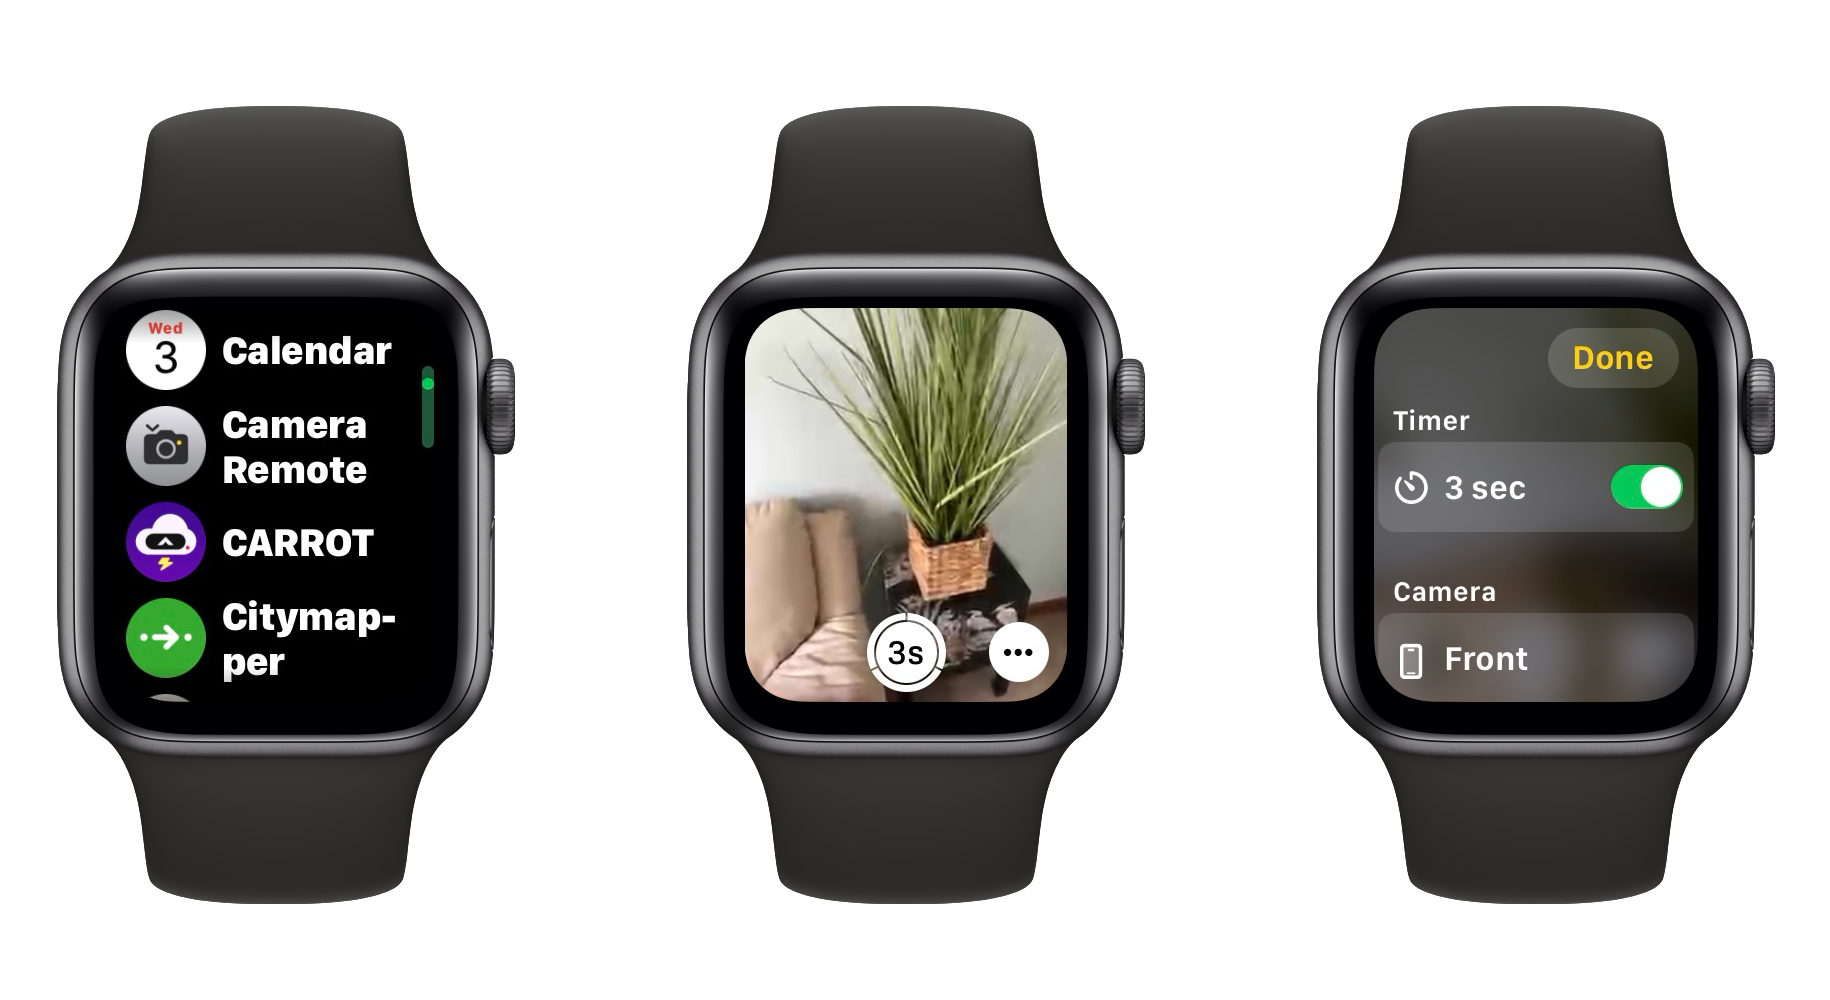
- Open the Camera app on your iPhone
- Open the Camera Remote app on your Apple Watch
- Tap the … button to set up your remote exactly how you want it
Disable the flash
Flash only throws light a few feet in front of you. It’s not going to improve your photos of the distant sun at all, and in fact will make them worse. Not to mention you’ll ruin the eclipse experience for everyone around you. So make sure your flash is disabled before you get ready to shoot the eclipse.
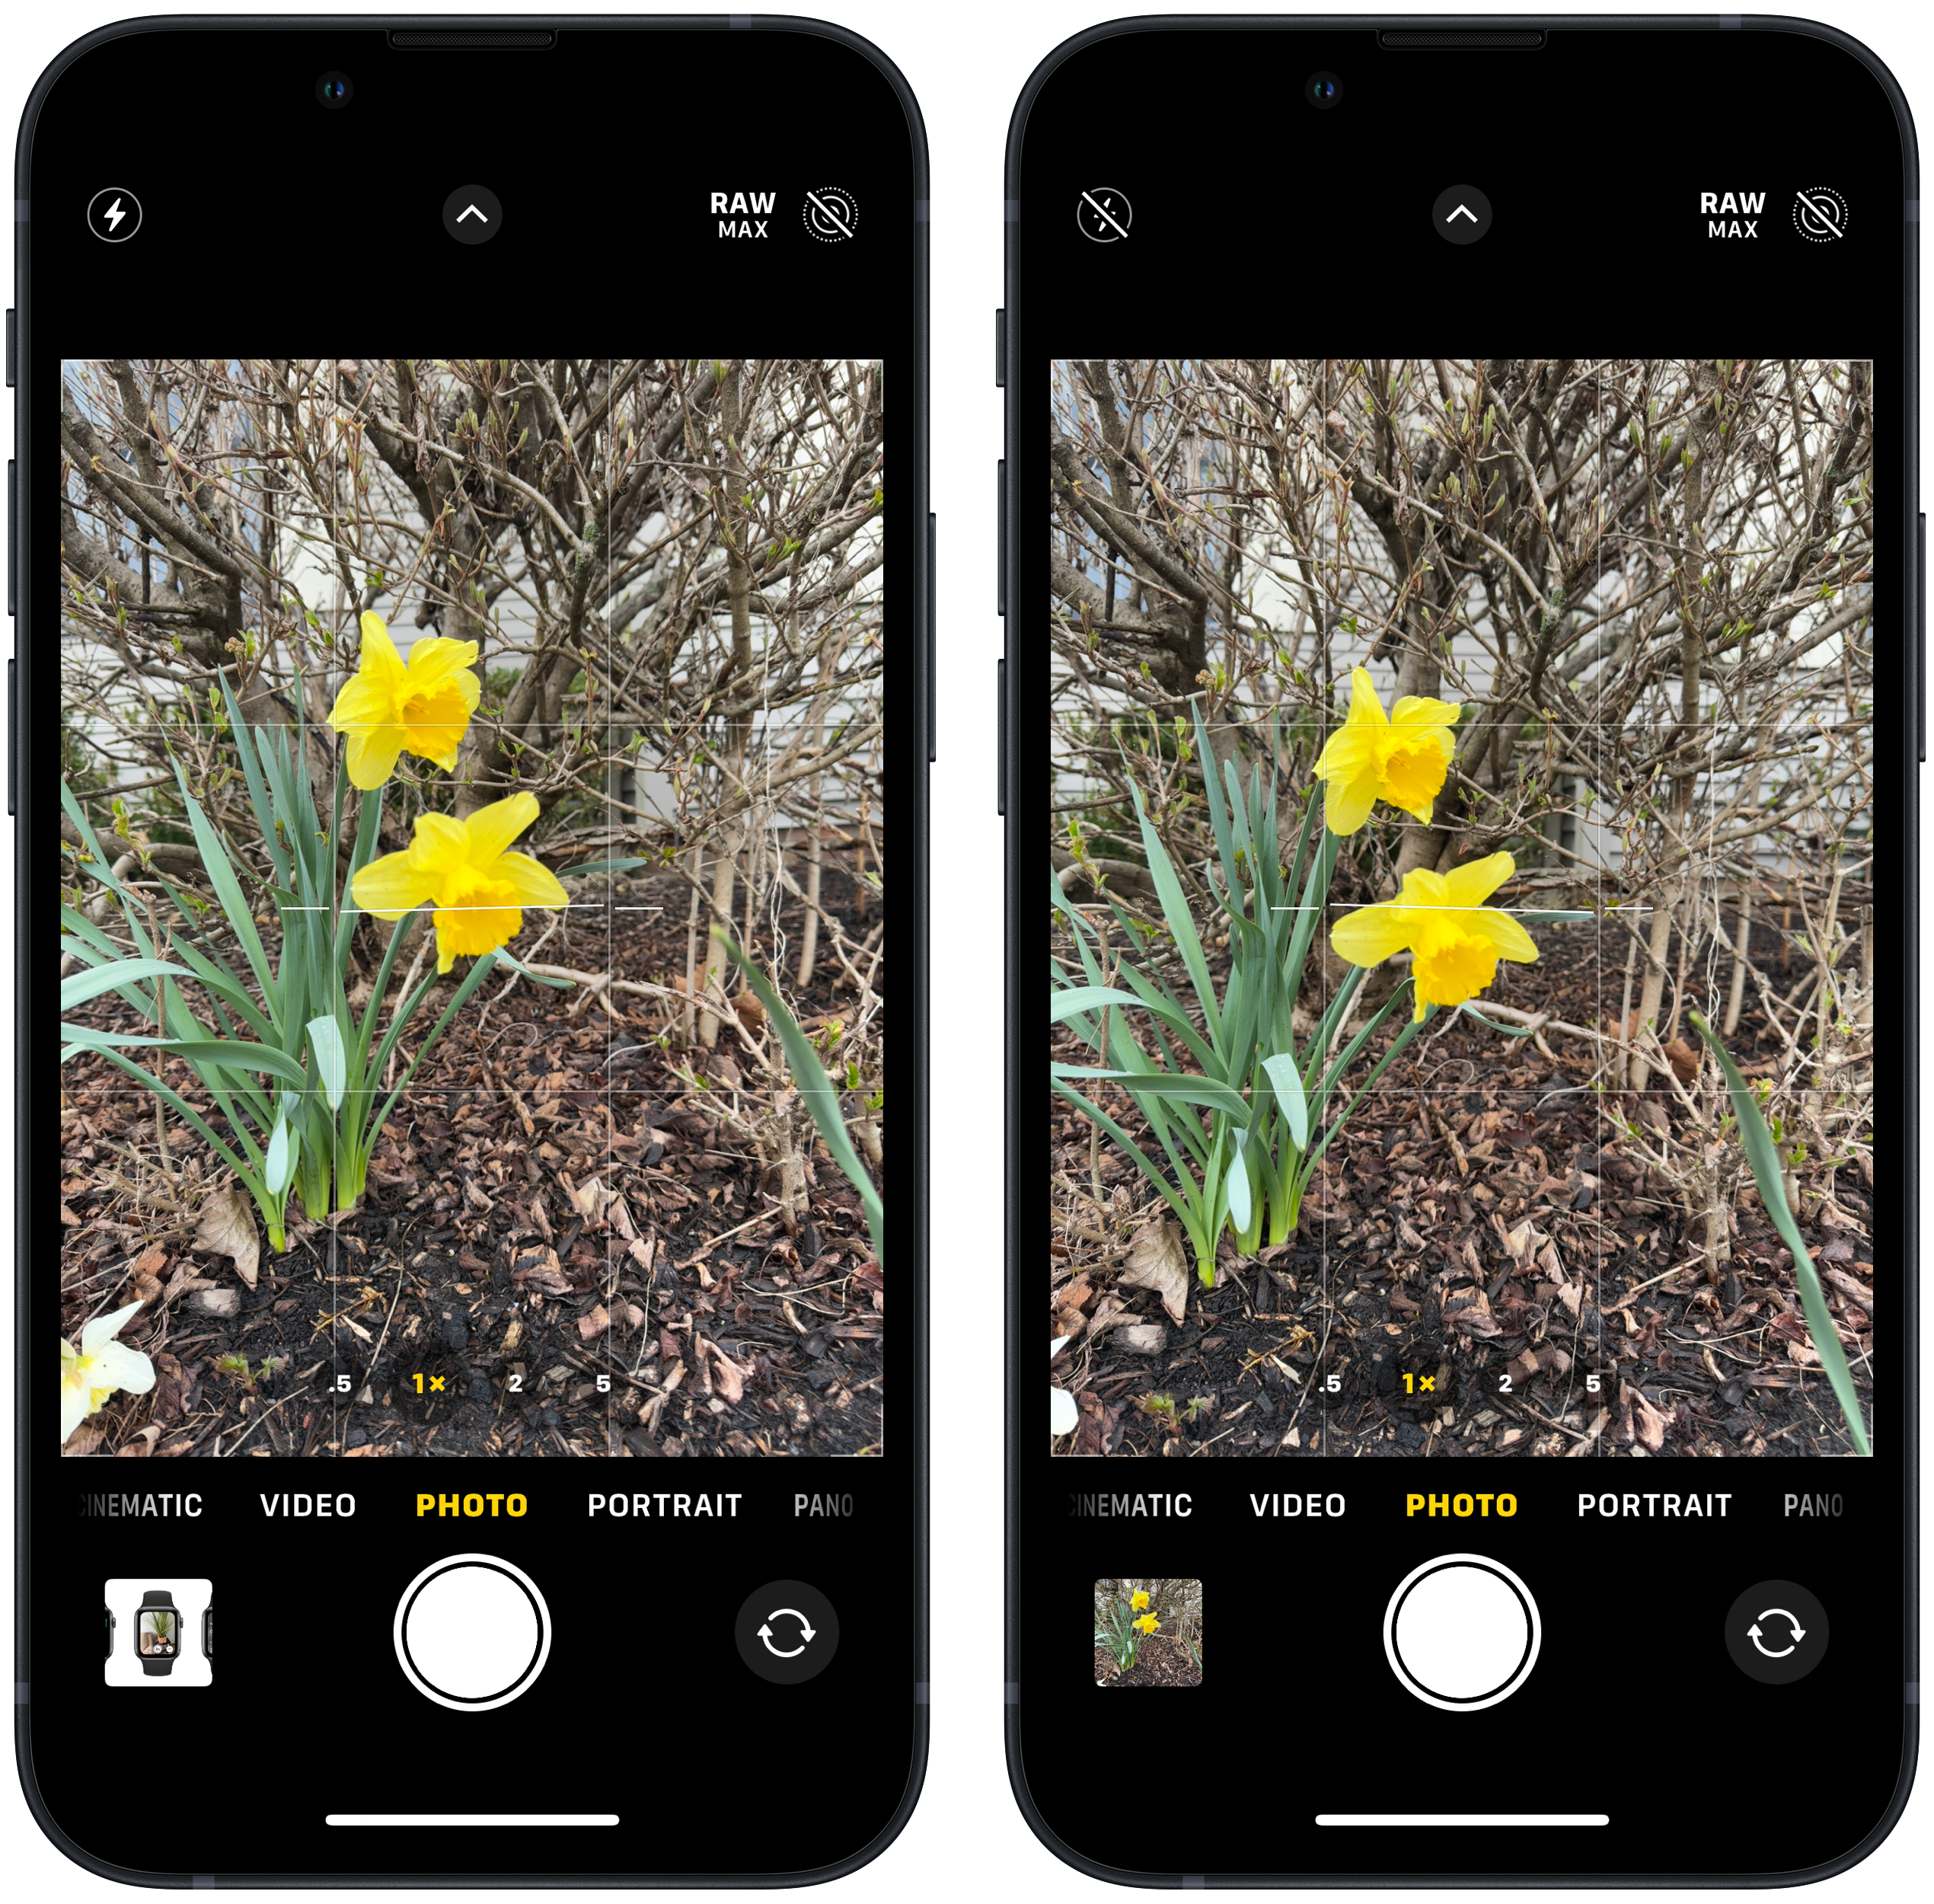
- Open your iPhone’s Camera app
- Tap the Flash icon at the top left of your screen within the Camera app
- Check to be sure that there is a line through it
Optical vs. digital zoom
Optical zoom or digital zoom? Optical zoom is what you want here. The best iPhone, the iPhone 15 Pro Max has a 5X zoom lens, other models max out at 2X or 3X. Use what you’ve got to get the closest, sharpest image you can. You might even consider adding on a third-party telephoto lens. However, don’t bother using your digital zoom. That essentially just pre-crops your image and often results in grainy or blurry images. You’re better off just taking the photo without any digital zoom and then cropping it after the fact.
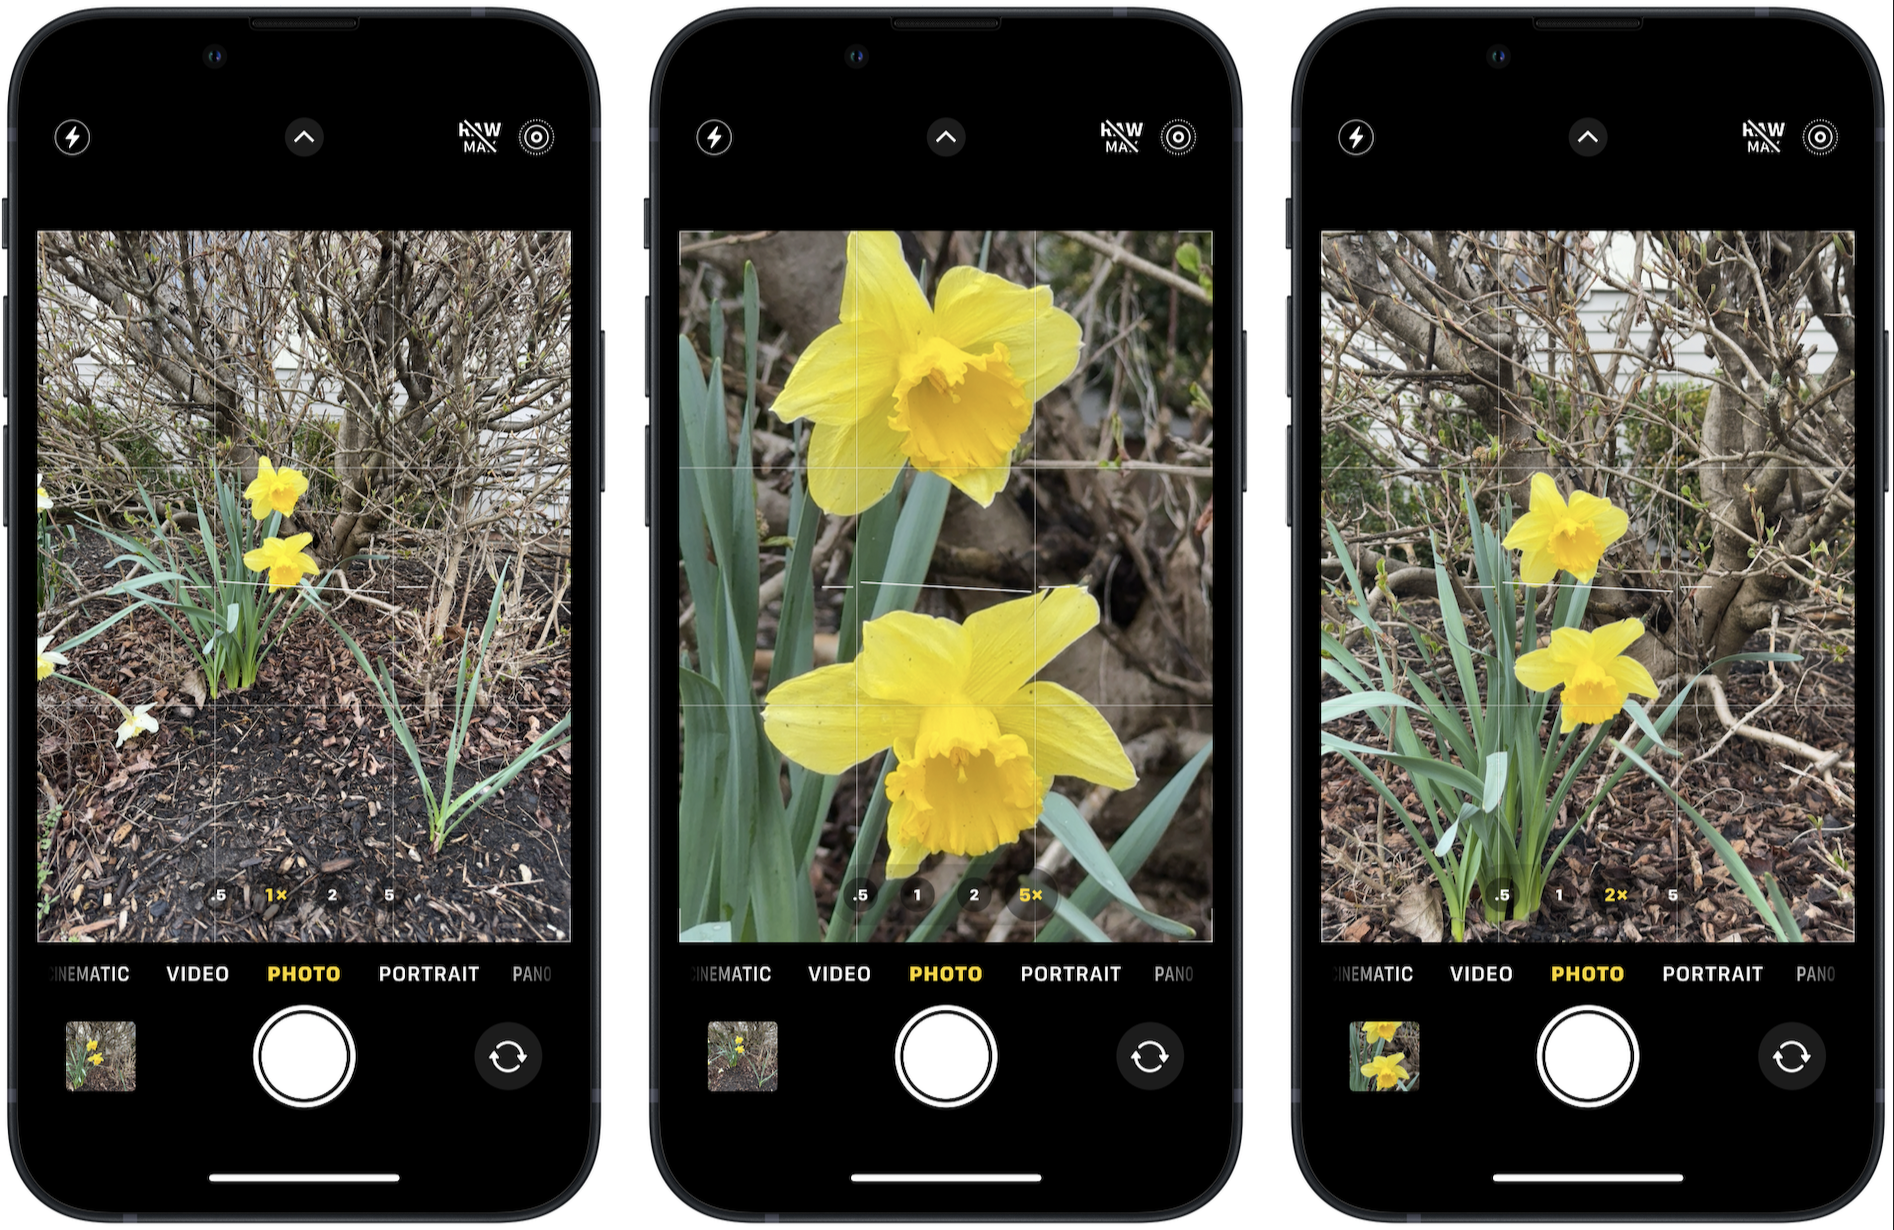
- Open your iPhone Camera app
- Select 2X, 3X, or 5X from the choices at the bottom of the viewfinder
Experiment with camera modes
Depending on where you are in the eclipse’s path, you might get more interesting photos using different camera modes. Try using the wide angle lens (.5 in your zoom options) to capture the entire landscape, or Portrait Mode to capture an interesting foreground.
Manually focus and exposure if you like
In challenging light situations, your iPhone may struggle to find something to focus on. Plus, the lighting will be changing constantly over the course of the eclipse. If you want to control the focus and exposure, you can adjust them manually rather than letting the iPhone choose for you.
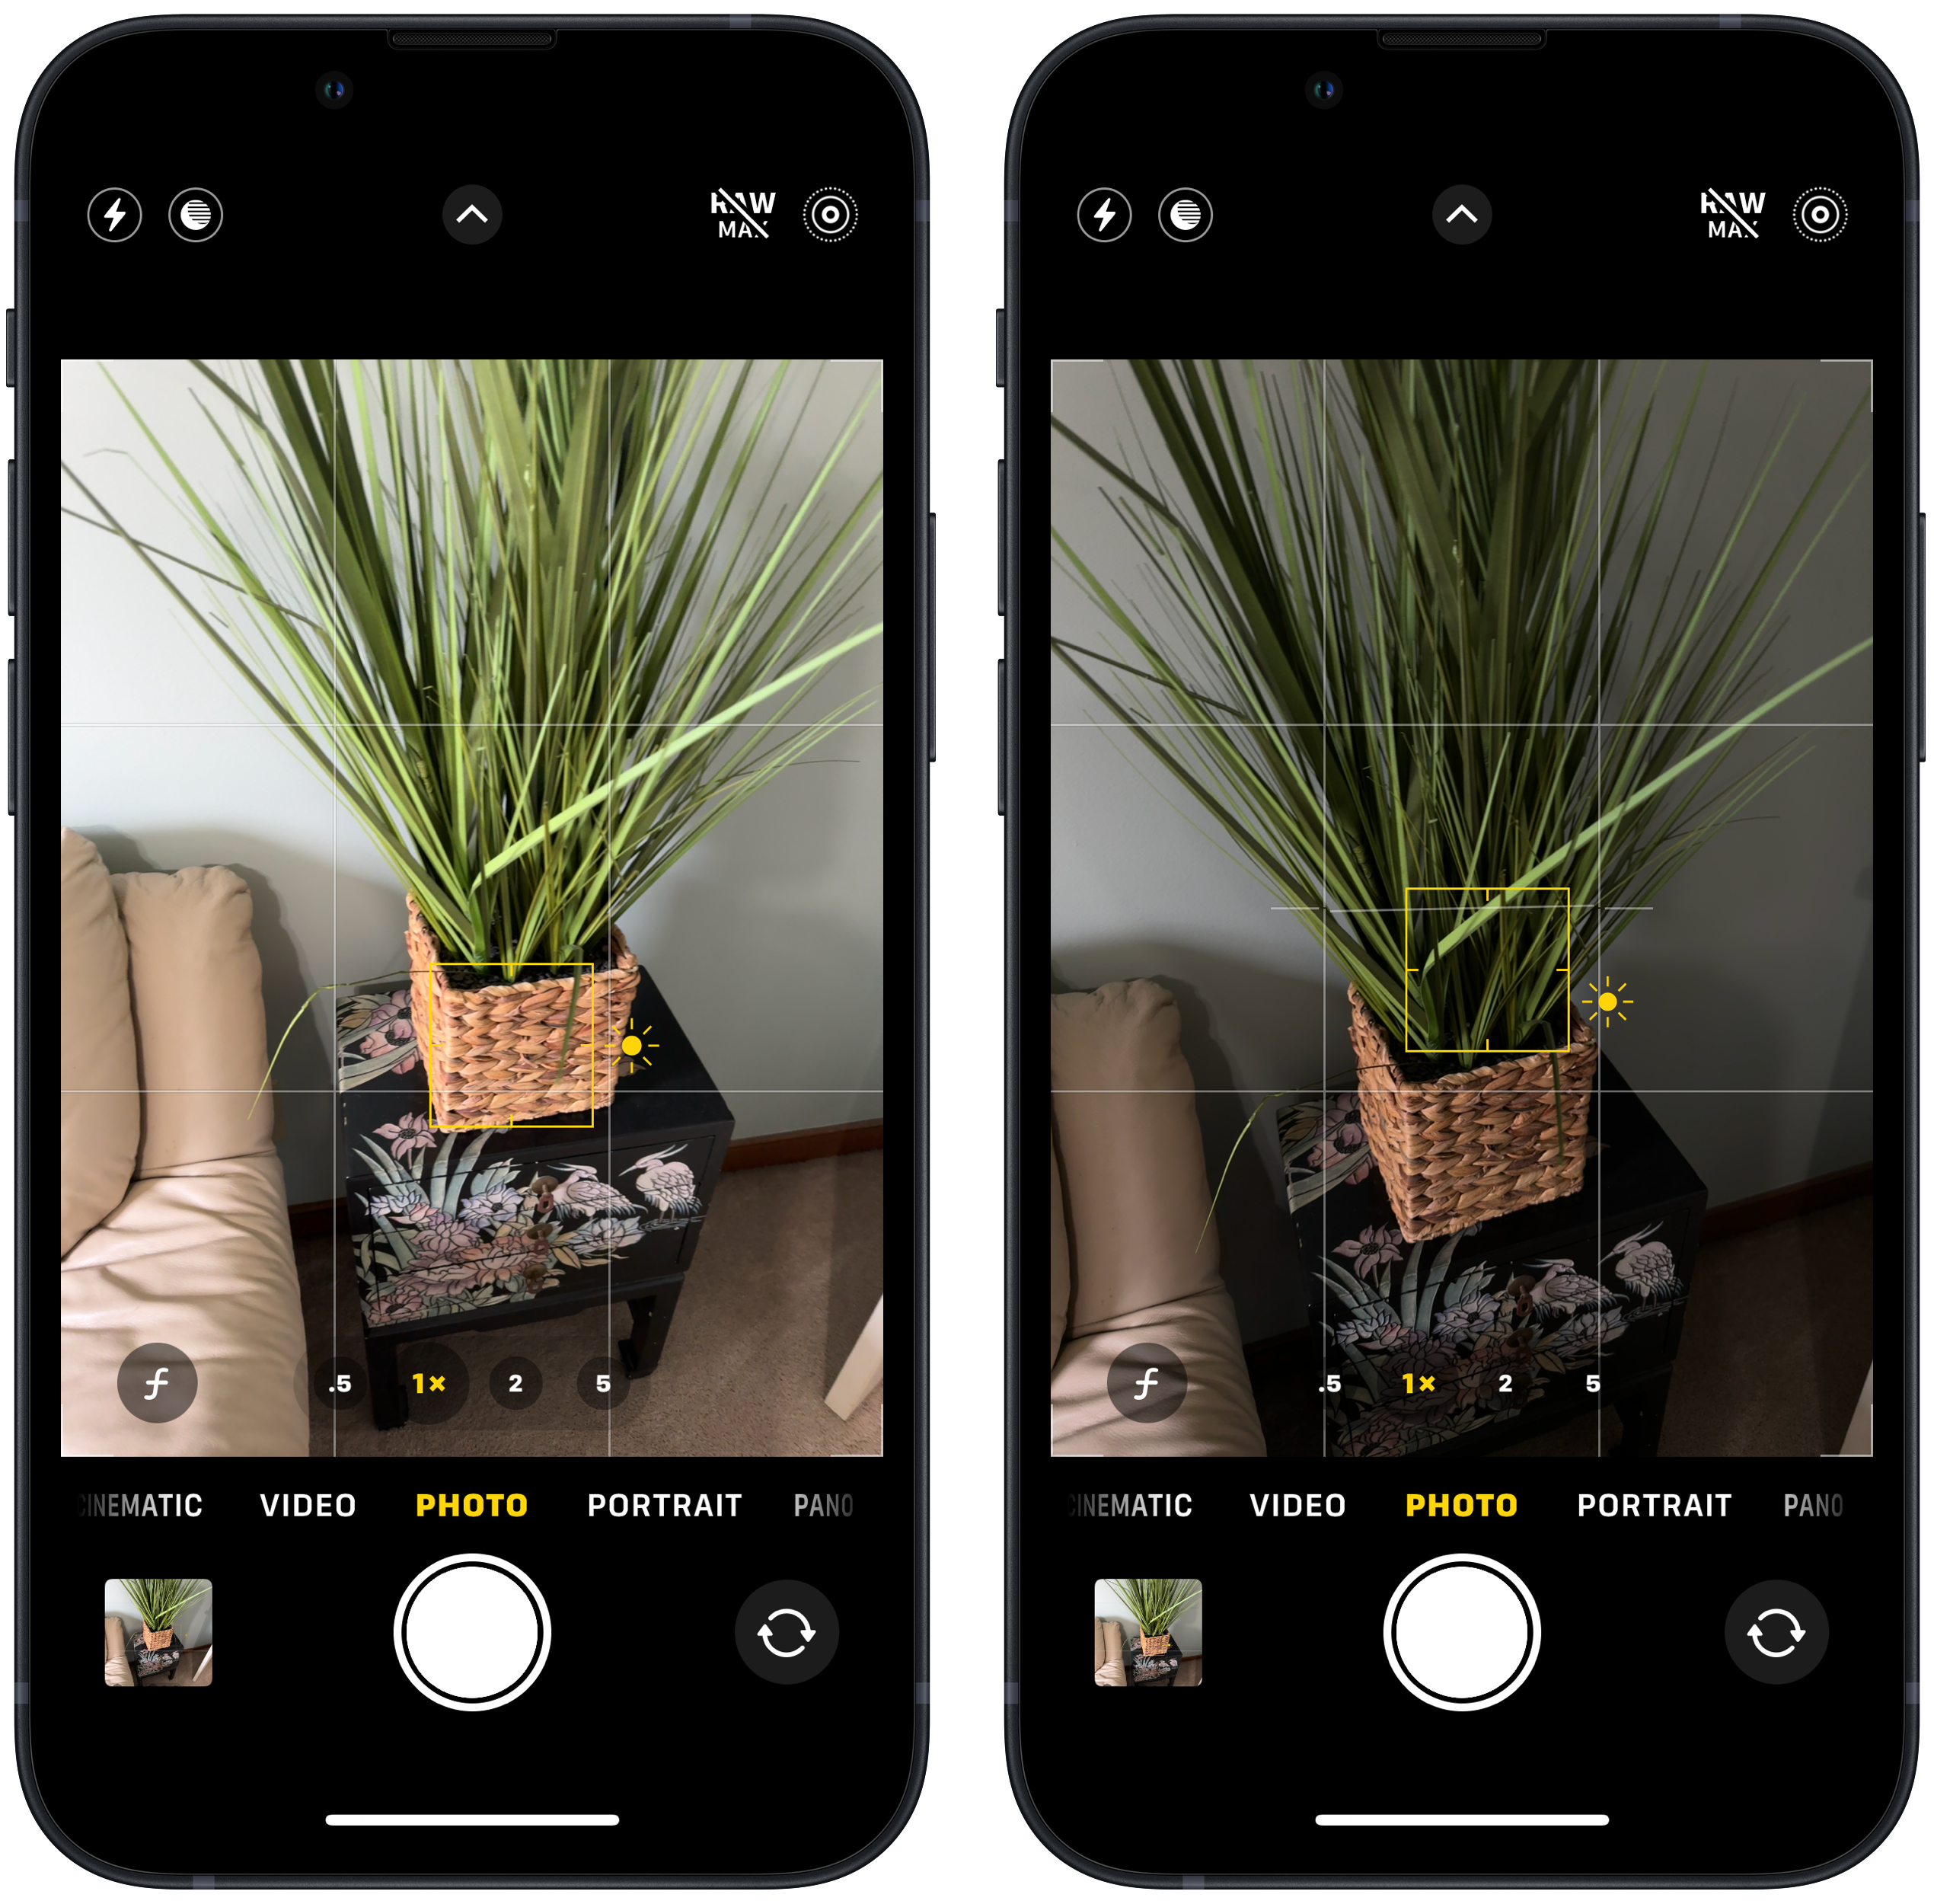
- Open the Camera app
- Tap and hold on desired spot on the screen
- Move the slider up or down as needed
An easy hack: shoot in Burst Mode
One way to be sure to capture that perfect split-second view of the eclipse is to shoot in burst mode. Simply swipe the shutter button to the left and hold your finger there to take a rapid-fire series of photos.
Do I need a special app to photograph the eclipse?
If you have a favorite camera app you already use, you can certainly use it. Otherwise, your iPhone’s Camera app will do you just fine. Note that if you want to shoot in RAW, popular photography apps like Halide, Afterlight, and VSCO have RAW options and might be helpful. If you have an iPhone 11 or older model iPhone, or a non-Pro phone, it’s the only way to do so.
Shoot in RAW
If you’re a Pro model user, you might want to shoot your eclipse photos in RAW. This allows the iPhone to store more information from your photos. RAW photos give you more leeway for editing after the fact. You can use an app that supports RAW as mentioned above, but if you have an iPhone 12 Pro or newer Pro model iPhone, you don’t need an app to do so.
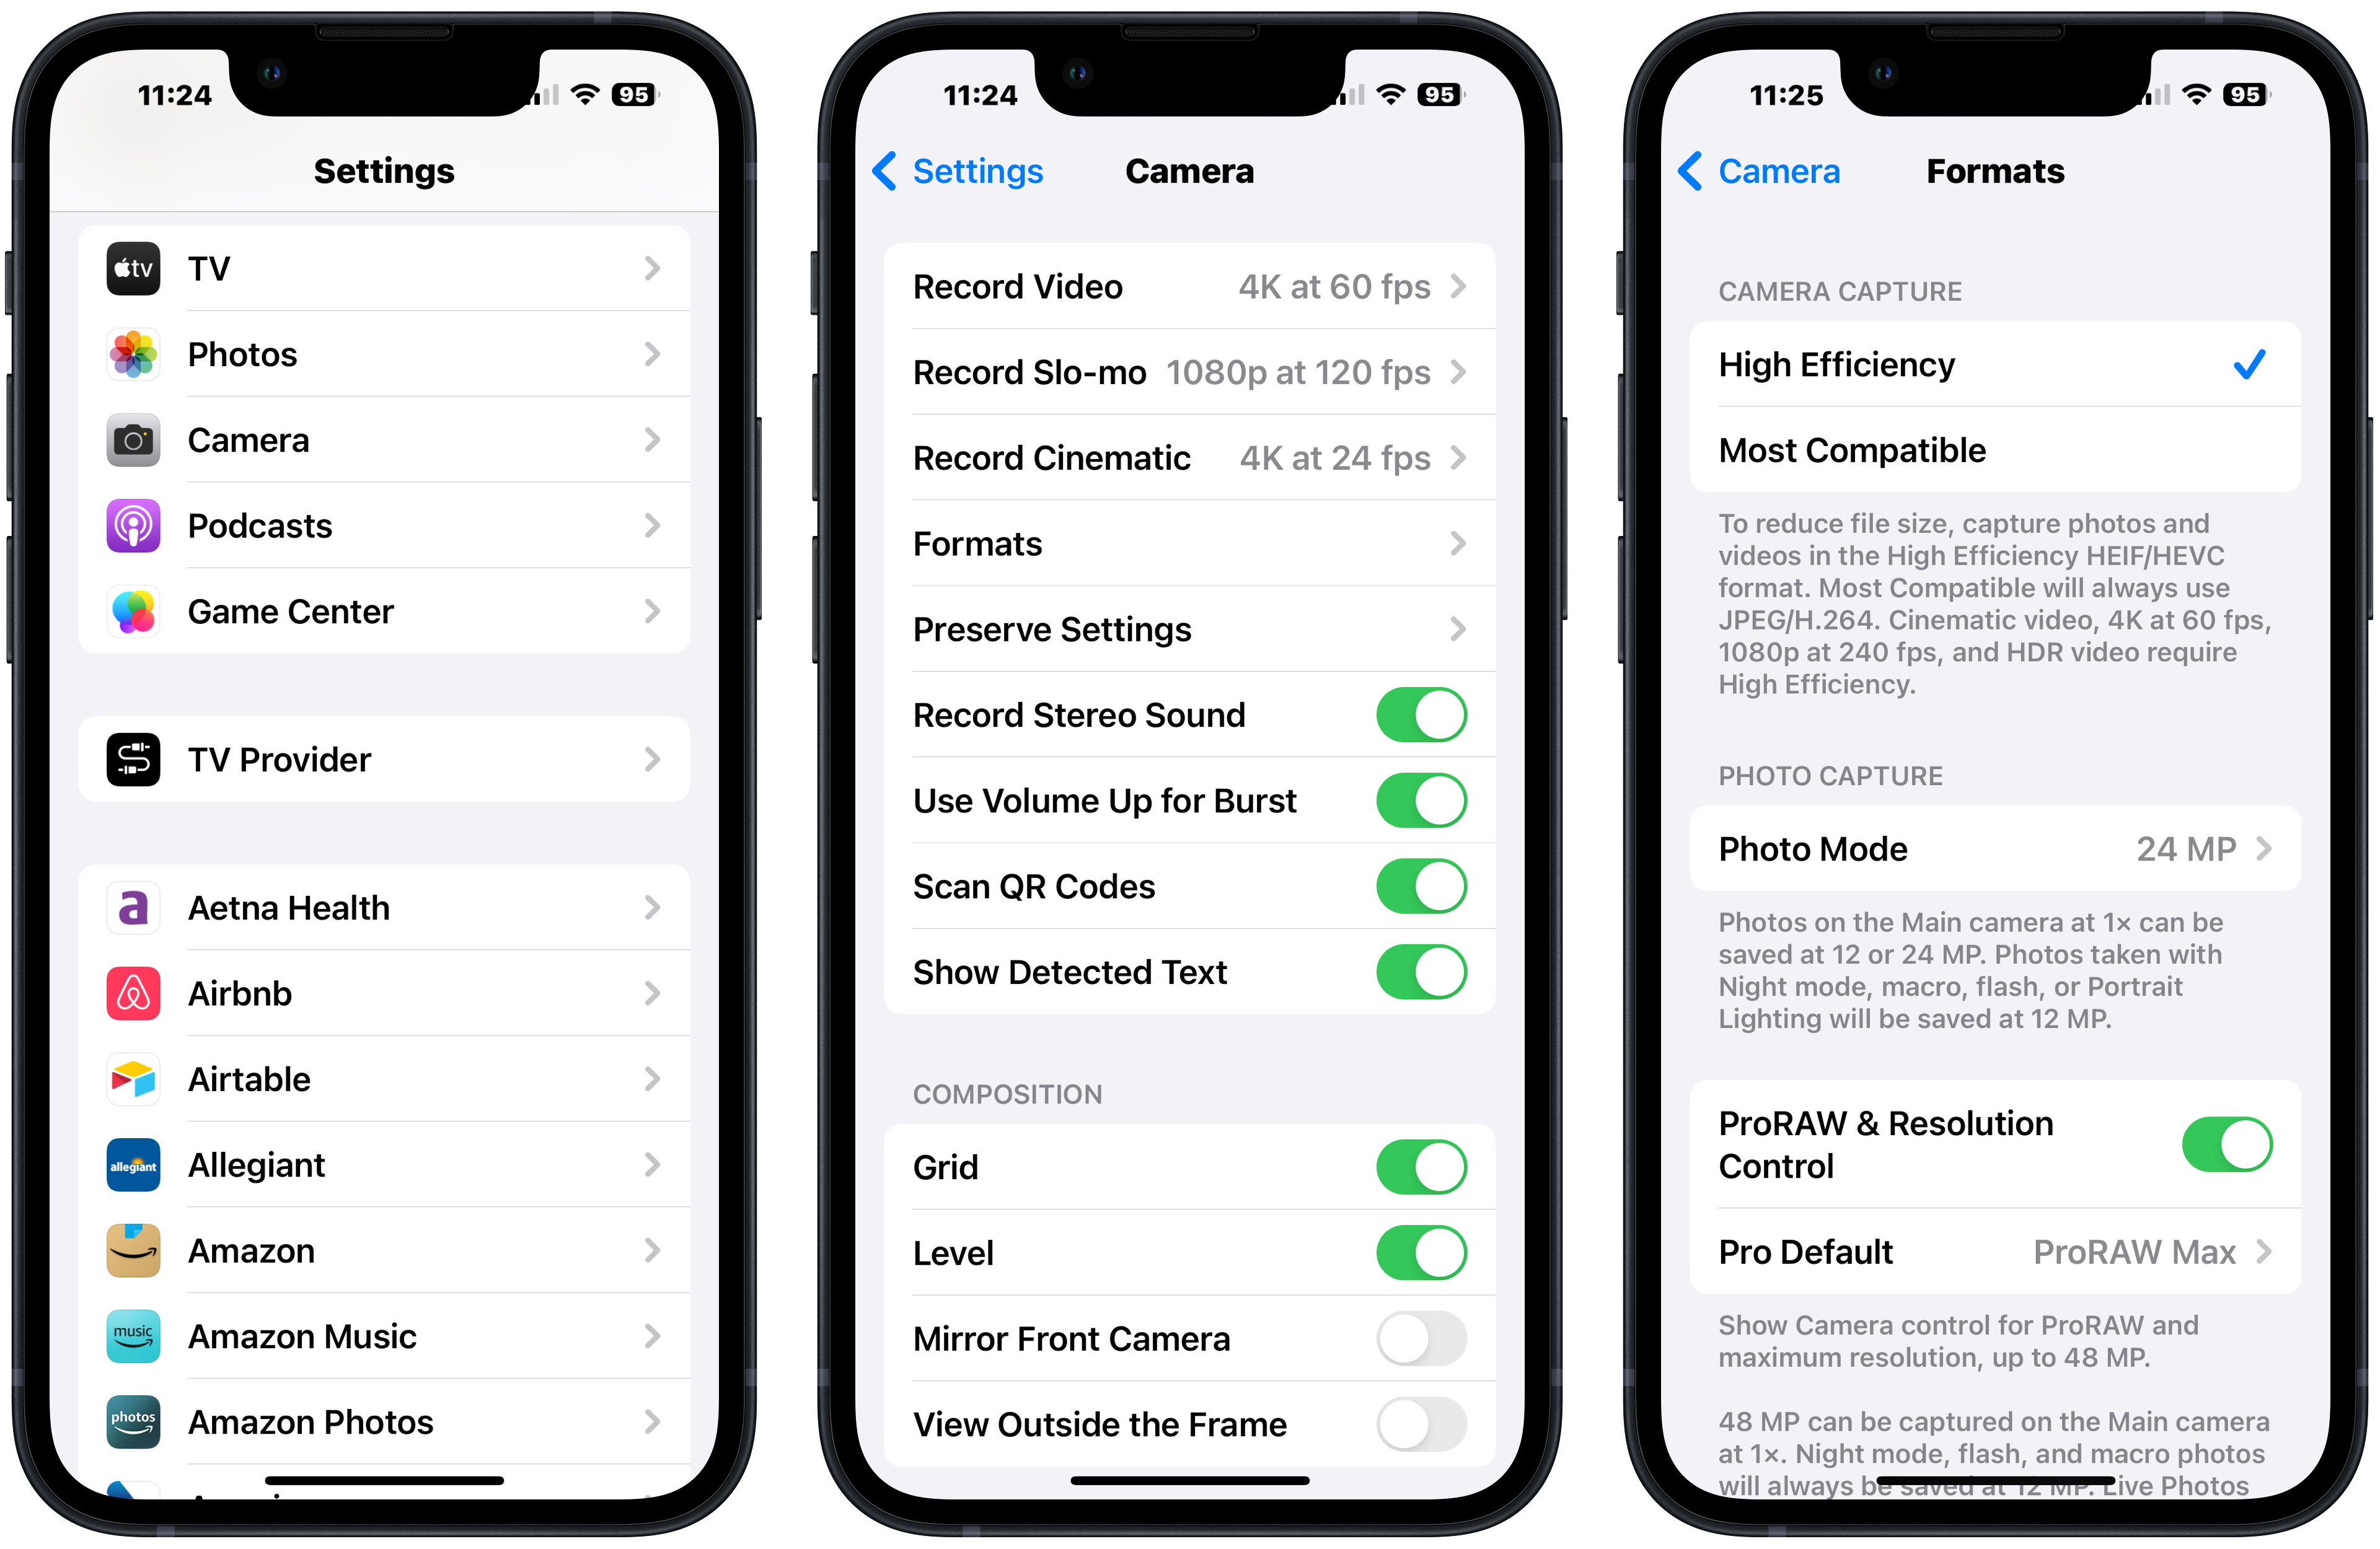
- Open the Settings app on your iPhone
- Scroll down to Camera and tap it
- Tap Formats
- Choose ProRAW
If it’s an option on your model, you can just tap the RAWMAX icon at the top right of the screen in the Camera app. Note that RAW images take up a lot of storage on your iPhone, so make sure you have plenty or use a flash drive as a third-party storage solution.
Don't lose sight of the fun factor
Get creative
When all is said and done, I doubt I'm going to get anything like a professional photo of the eclipse itself. There are plenty of other ways to capture the moment besides attempting a direct sun photo. For example, you can punch a hole in a piece of paper, grab a colander, or place yourself near literally anything with holes. Then check out the shapes of the shadows they cast, and watch them change as the moon moves in front of the sun. Bizarre shadows on the ground can make for some fun photos.
Go enjoy!
If you do nothing else I’ve mentioned here, please wear eclipse glasses! Don’t get too wrapped up in taking photos, remember to be in the moment and enjoy this rare event. Even if you don’t get fantastic photos yourself, there will be plenty of professional photos and videos to see afterwards.

Karen is a contributor to iMore.com as a writer and co-host of the iMore Show. She’s been writing about Apple since 2010 with a year-long break to work at an Apple Store as a product specialist. She's also a contributor at TechRadar and Tom's Guide. Before joining iMore in 2018, Karen wrote for Macworld, CNET, AppAdvice, and WatchAware. She’s an early adopter who used to wait in long lines on release days before pre-ordering made things much easier. Karen is also a part-time teacher and occasional movie extra. She loves to spend time with her family, travel the world, and is always looking for portable tech and accessories so she can work from anywhere.
