
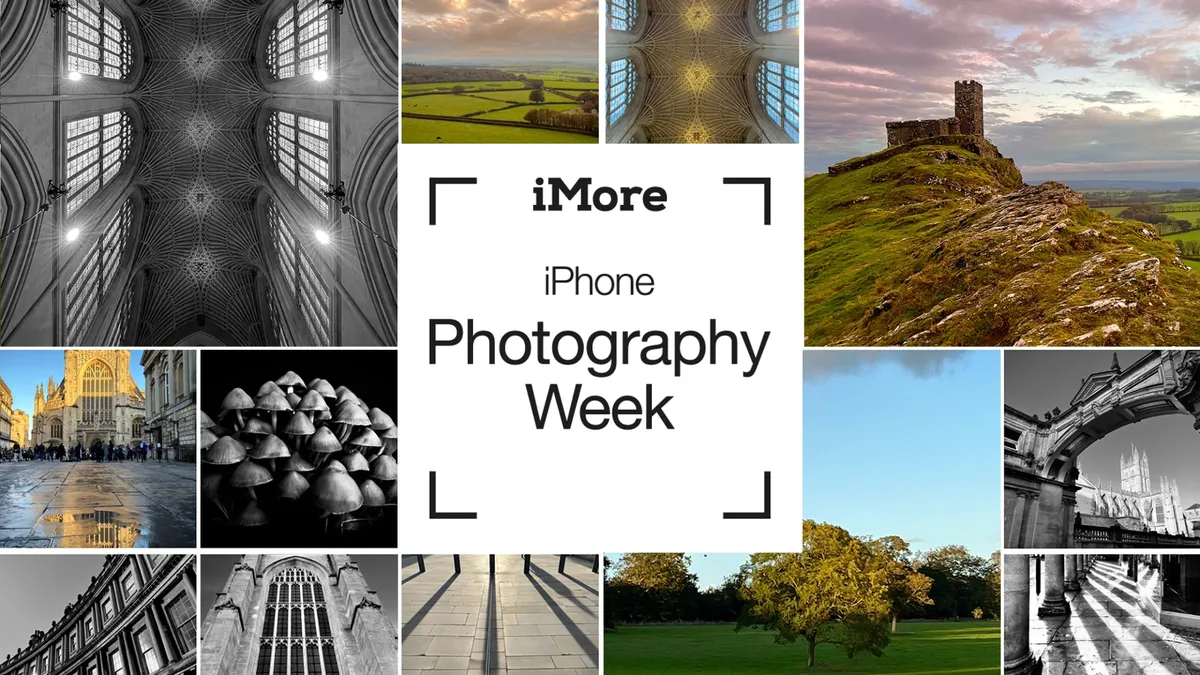
Take better photos with the camera in your pocket. iMore's iPhone Photography Week 2024 is filled with great content that will take your iPhone camera-snapping ability to the next level.
- More iPhone Photography Basics
- Check out more iPhone Photography Week 2024
#iMorePhotographyWeek
Image editing is a topic that’s as large in scale as photography itself, but how to edit iPhone photos the right way doesn’t have to be at all daunting. While dedicated editing apps such as Pixelmator Pro are likely where you’ll end up once you grow in confidence, the humble Photos app has everything you need to get started.
But rather than simply tapping Edit and hitting the Auto icon, I’m going to break down the Photos app’s image editor so you can navigate your way through its menus and tools and apply your own manual edits like a pro. Editing is your chance to really stamp your mark on your photos. And as you advance your skills, you’ll begin to develop your own style. Here’s how to get started…

Share your results with iMore on X (Twitter) using #iMorePhotographyWeek

I’m Deputy Editor of N-Photo: The Nikon Magazine, but moonlight as iMore’s go-to photography know-it-all. I’ve worked in the photo industry for over six years and have been an avid iPhone photographer since the iPhone 4. I’m a firm believer that iPhone photography is a great starting point for burgeoning photographers, which is why I’ve created a series of iPhone photography basics tutorials, so you can either firm up your existing iPhone Camera skills or embark on a whole new passion.
Consider a light touch
The best iPhones are brimming with AI-powered computational photography tech that allows your iPhone to perform an incredible number of processes in a split second, such as sharpening, noise reduction, color edits, and increased dynamic range to create a more balanced exposure. There’s an argument that it does too much, but there’s no denying how impressive it is. However, this does mean that editing iPhone images requires a much lighter touch than normal.
It’s tempting to set about lifting shadows, reducing highlights, and adding generous dollops of saturation, but if you’re not careful, your images will look fabricated. Take a moment to examine each image, fresh from the camera, to really consider every edit you make. Shooting in Apple ProRAW will reduce the level of computational photography applied, but it’s still there. A good tip is to keep revisiting the original image. This will help make your changes more obvious, so you’re more likely to tell if it needs toning down.
- In the Photos app’s editing suite, apply your chosen edits
- Tap the image to revert back to the original photo so you can quickly gauge the impact of your edits
How to make a duplicate image
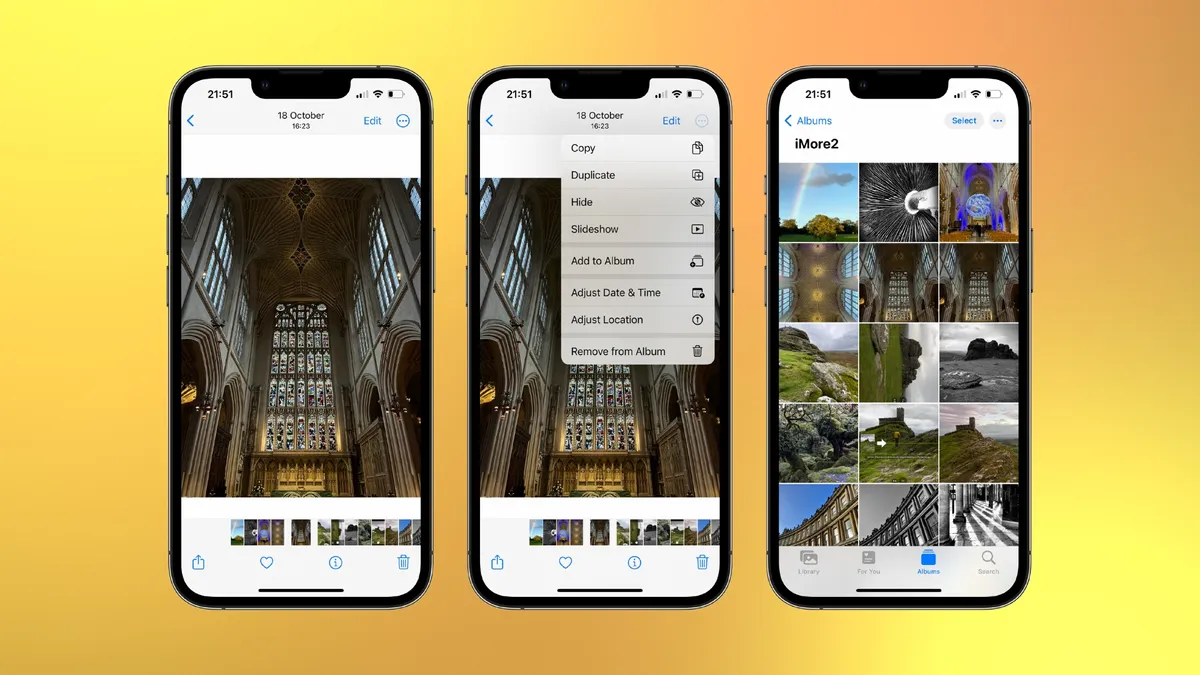
Once you’ve edited an image in the Photos app’s editing suite and tapped Done, you can recover your original image by entering the editing suite once again and tapping Revert. However, to be absolutely certain I don’t lose my original image, in case I want to edit it again in the future, I like to make a duplicate.
View your chosen image in the Photos app and select the three-dot icon in the top-right corner of the screen then tap Duplicate. You’ll find the duplicate at the very bottom of your Recents Album or next to the duplicated image in any other Album. While you’re in the middle of an edit, it can be useful to see the original image to ensure you haven’t gone overboard with your edits (see the previous step).
- Open the Photos app and find your desired image
- Tap the three-dotted icon in the top-right corner of the screen
- Select Duplicate to create a duplicate at the bottom of your Album
How to crop
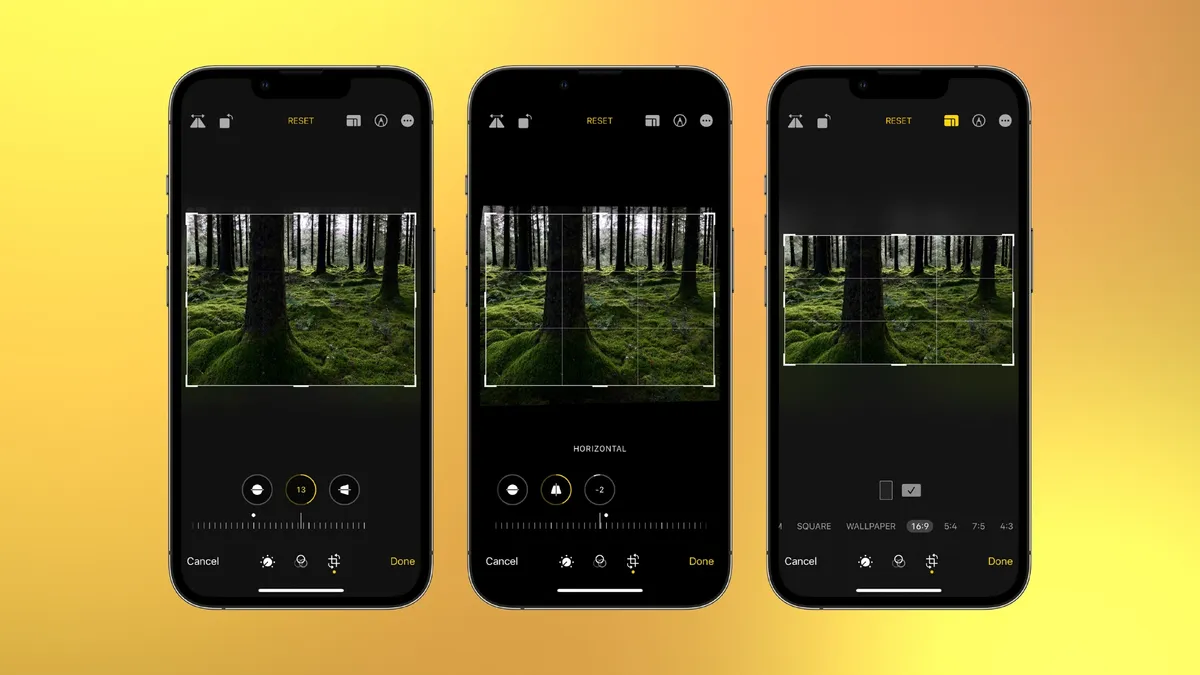
It’s good practice to crop your image before performing any other edits, so you are working with the final image. This is imperative when applying processes like noise reduction or sharpening because the size of the image may affect how much or how little you choose to apply. Cropping reduces an image’s size and quality. Ideally, you want to get the composition as perfect as possible in-camera, using the cropping tool sparingly to tidy up the composition or straighten the horizon.
Of course, you may wish to crop an image for a specific platform, such as 16:9 or 1:1 for Instagram. If you make a mistake when cropping, you can tap the yellow Reset button that appears immediately after you’ve cropped an image. You can also use the Straighten, Vertical, and Horizontal tools when cropping to straighten the horizon or line up verticals, like interior walls.
- Open your chosen image in the Photos app’s editing suite and select the crop tab
- Tap the Straighten, Vertical or Horizontal icons to rotate the image or change the perspective of the verticals and horizontals, respectively
- Select the icon to the left of the marker icon and choose from a variety of cropping presets near the bottom of the screen
- Hit Reset to revert to the original crop
Fix your exposure
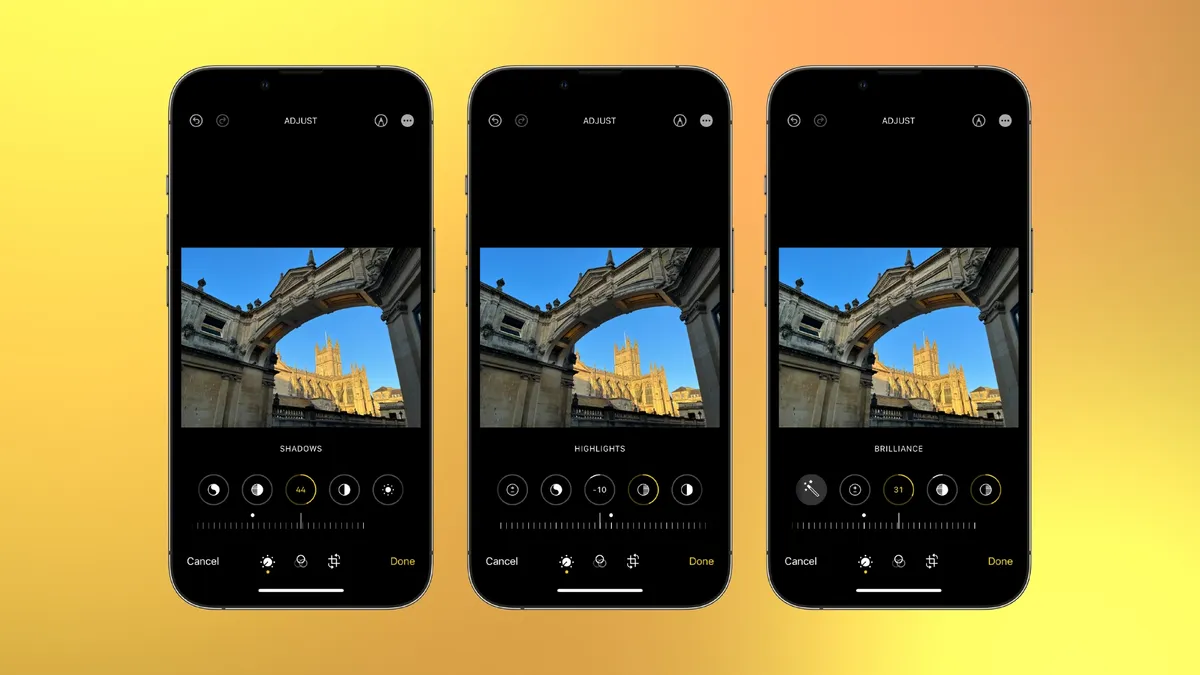
Next you’ll want to adjust the overall exposure of your image. Your iPhone’s computational photography has probably already done most of the legwork here, but if parts of the image are looking a little too dark or bright, you can boost the Shadows and reduce the Highlights sliders to bring back some of the detail. Always remember, you can bring back more detail when lifting shadows than reducing highlights.
If the entire frame is too dark or too light, you can adjust the Exposure slider to make the entire image lighter or darker. This is a particularly powerful tool, so use it sparingly. Brightness works very similarly to Exposure, but the effect isn’t as intense. While it affects the shadows and mid-tones rather comparatively, it doesn't affect the highlights quite as much.
Brilliance is an interesting tool that’s used to brighten or darken an image without affecting the highlights. Slide it to the right to brighten the frame with less chance of clipping (losing detail when the whites get too bright or the shadows get too dark) and slide it to the left to darken the shadows but retain the brightest highlights.
- In the Photos app’s editing suite, ensure you have the Adjust icon selected
- Scroll through and tap on one of the various adjustment icons to bring up the corresponding slider
- Move the slider left or right and watch as it affects the image
How to add contrast
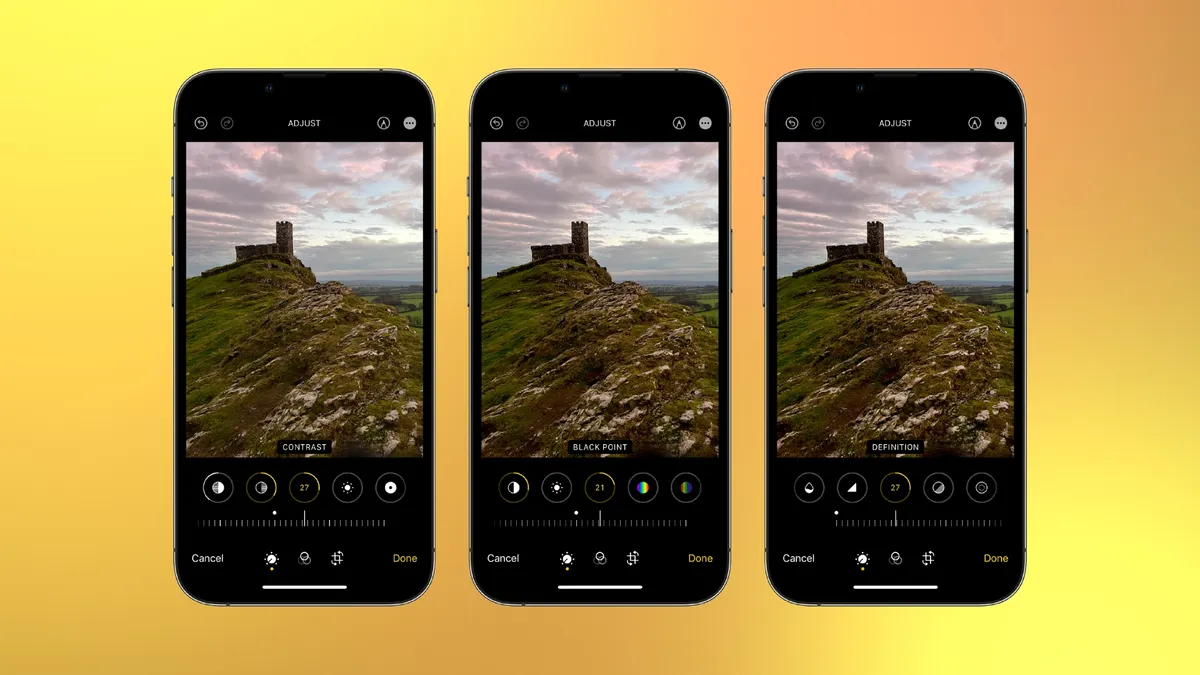
Contrast regards the difference between light and dark portions of the image. A high-contrast image will have darker blacks and brighter whites, while a low-contrast image will display softer gray-toned blacks and whites. There’s nothing wrong with either but extremes at either end rarely look good. Too much contrast can leave an image appearing fabricated and overly intense, and too little contrast can leave it looking dull and flat.
The Contrast slider can be used to increase or decrease the contrast of the entire image, so the blacks get darker and the whites get brighter. Black Point is useful if you just want to increase or decrease the intensity of the blacks. Another slider you can use to alter the contrast of your image is Definition. This adds contrast to the midtones and contours edges within the image. The bold lines formed via the latter creates a kind of sharpening effect that’s very easy to overdo, so use it sparingly.
- Scroll through the Photos app’s Adjust tab in the editing suite
- Use Contrast to increase/decrease contrast across the whole image
- Use Black Point to increase/decrease the intensity of the blacks
- Definition will add contrast to the mid tones and definition to edges
How to edit color
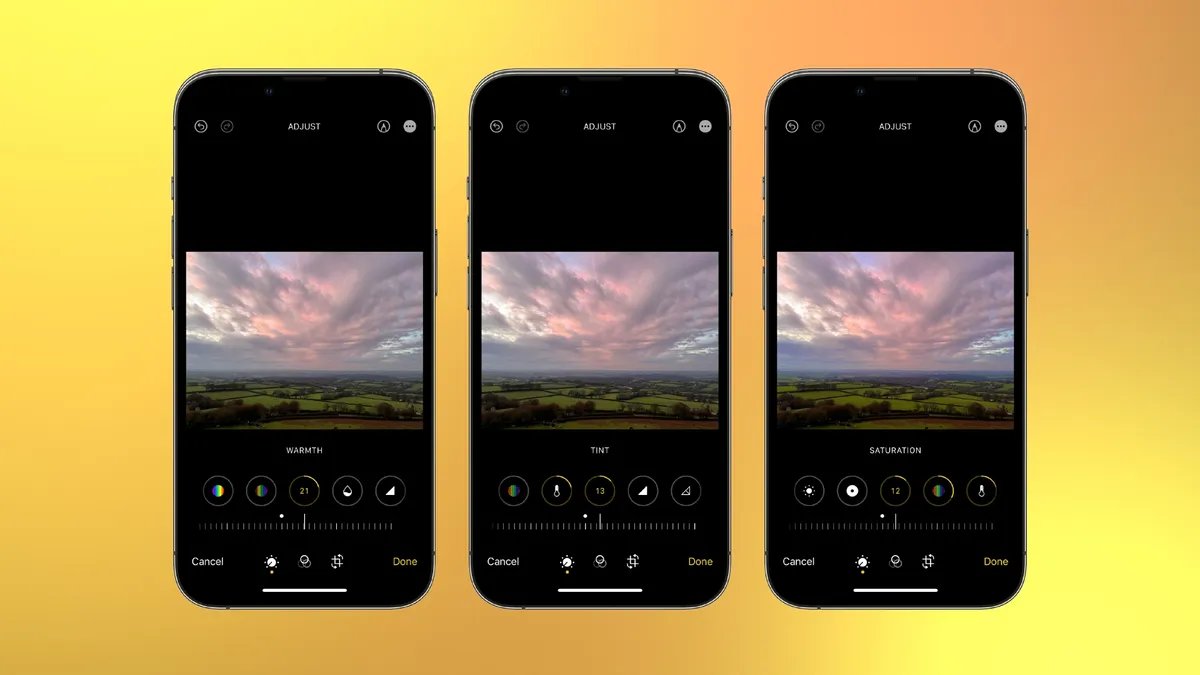
You have four color tools at your disposal: Warmth, Tint, Vibrance and Saturation. Warmth changes the color temperature of your image. Drag the slider to the right and the warm colors (such as reds and yellows) will intensify, drag the slider to the left and the cool colors (such as blues and cooler greens) will intensify. Boosting Warmth is a great way to intensify the effects of golden hour or a fiery sunset, while decreasing the warmth may add mood to a stormy seascape or winter portrait.
Tint is used to correct for any green or magenta color casts. If you spot a subtle green hue on a portrait subject’s skin for example, moving the slider right will add magenta to combat the green cast. If you’re not careful, though, you can end up going too far the other way, so if you’re unsure or simply can’t see anything wrong with the image, this is best left alone.
Saturation increases or decreases the intensity of all colors and when decreased to -100 will leave the image black and white. Vibrance works similarly to Saturation, with an emphasis on the less dominant colors within an image. This can be used to help balance the saturation of an image, with less chance of colors clipping.
- Use Warmth to adjust the color temperature of an image
- Drag it left to make it cooler and right to make it warmer
- Use Tint to remove color casts
- Move it left to add green and right to add magenta
- Use Vibrance to boost or reduce less-dominant colors
- Use Saturation to boost or reduce all colors
How to finish off an edit

The only tools I haven’t talked about are Sharpness, Noise Reduction and Vignette. A professional photographer would typically sharpen an image right before it’s exported. But iPhone’s computational photography already sharpens images, arguably, too much and if you’re only going to be posting your images on Instagram or looking at them via your iPhone’s display, there’s really no need to sharpen them. Noise Reduction removes noise, tiny colorful specks that hamper image quality and become increasingly prominent the more a camera’s sensor is required to compensate in low-light conditions.
This is something I’d recommend performing near the beginning of an edit, but again, your iPhone already applies a decent dose of noise reduction by default. If you do ever need to use it, the further you push the slider the more the noise will decrease, but the softer the image will become, so it’s a bit of a balancing act. And finally, Vignette allows you to darken the edges of your image. It can be used a little like a frame-within-a-frame to draw the viewer’s attention towards your subject or a stylistic choice to replicate the less advanced optics of older lenses that were more susceptible to noticeable vignetting than modern ones
- Use Sharpness very sparingly, if at all, to sharpen an image prior to exporting
- Noise Reduction should be used sparingly too, it reduces noise but soften images in the process
- Add a dark vignette by pushing the slider to the right and a light vignette by sliding it to the left
- Use Vignette to draw attention to subjects in the center of the frame
How can I improve my editing further?
If you have an iPhone that can capture Apple ProRAW files, then you’ll find images are much more pliable. This is because a RAW file is designed to capture as much image data as possible. Our tips to improve your iPhone photography instantly guide explains this in more detail. But beyond the hardware that you’re using, you’ll find there’s a plethora of dedicated editing apps available on the App Store, such as Photoshop Express, Lightroom, and Snapseed, that boast additional editing capabilities so you can take your photo editing skills to the next level. However, the bulk of editing is done using the tonal adjustment tools available in the Photos app. So make sure you understand how to use it thoroughly before progressing.
Share your photos with iMore on X (Twitter) using #iMorePhotographyWeek
