How to create and use automations in Shortcuts on iPhone and iPad
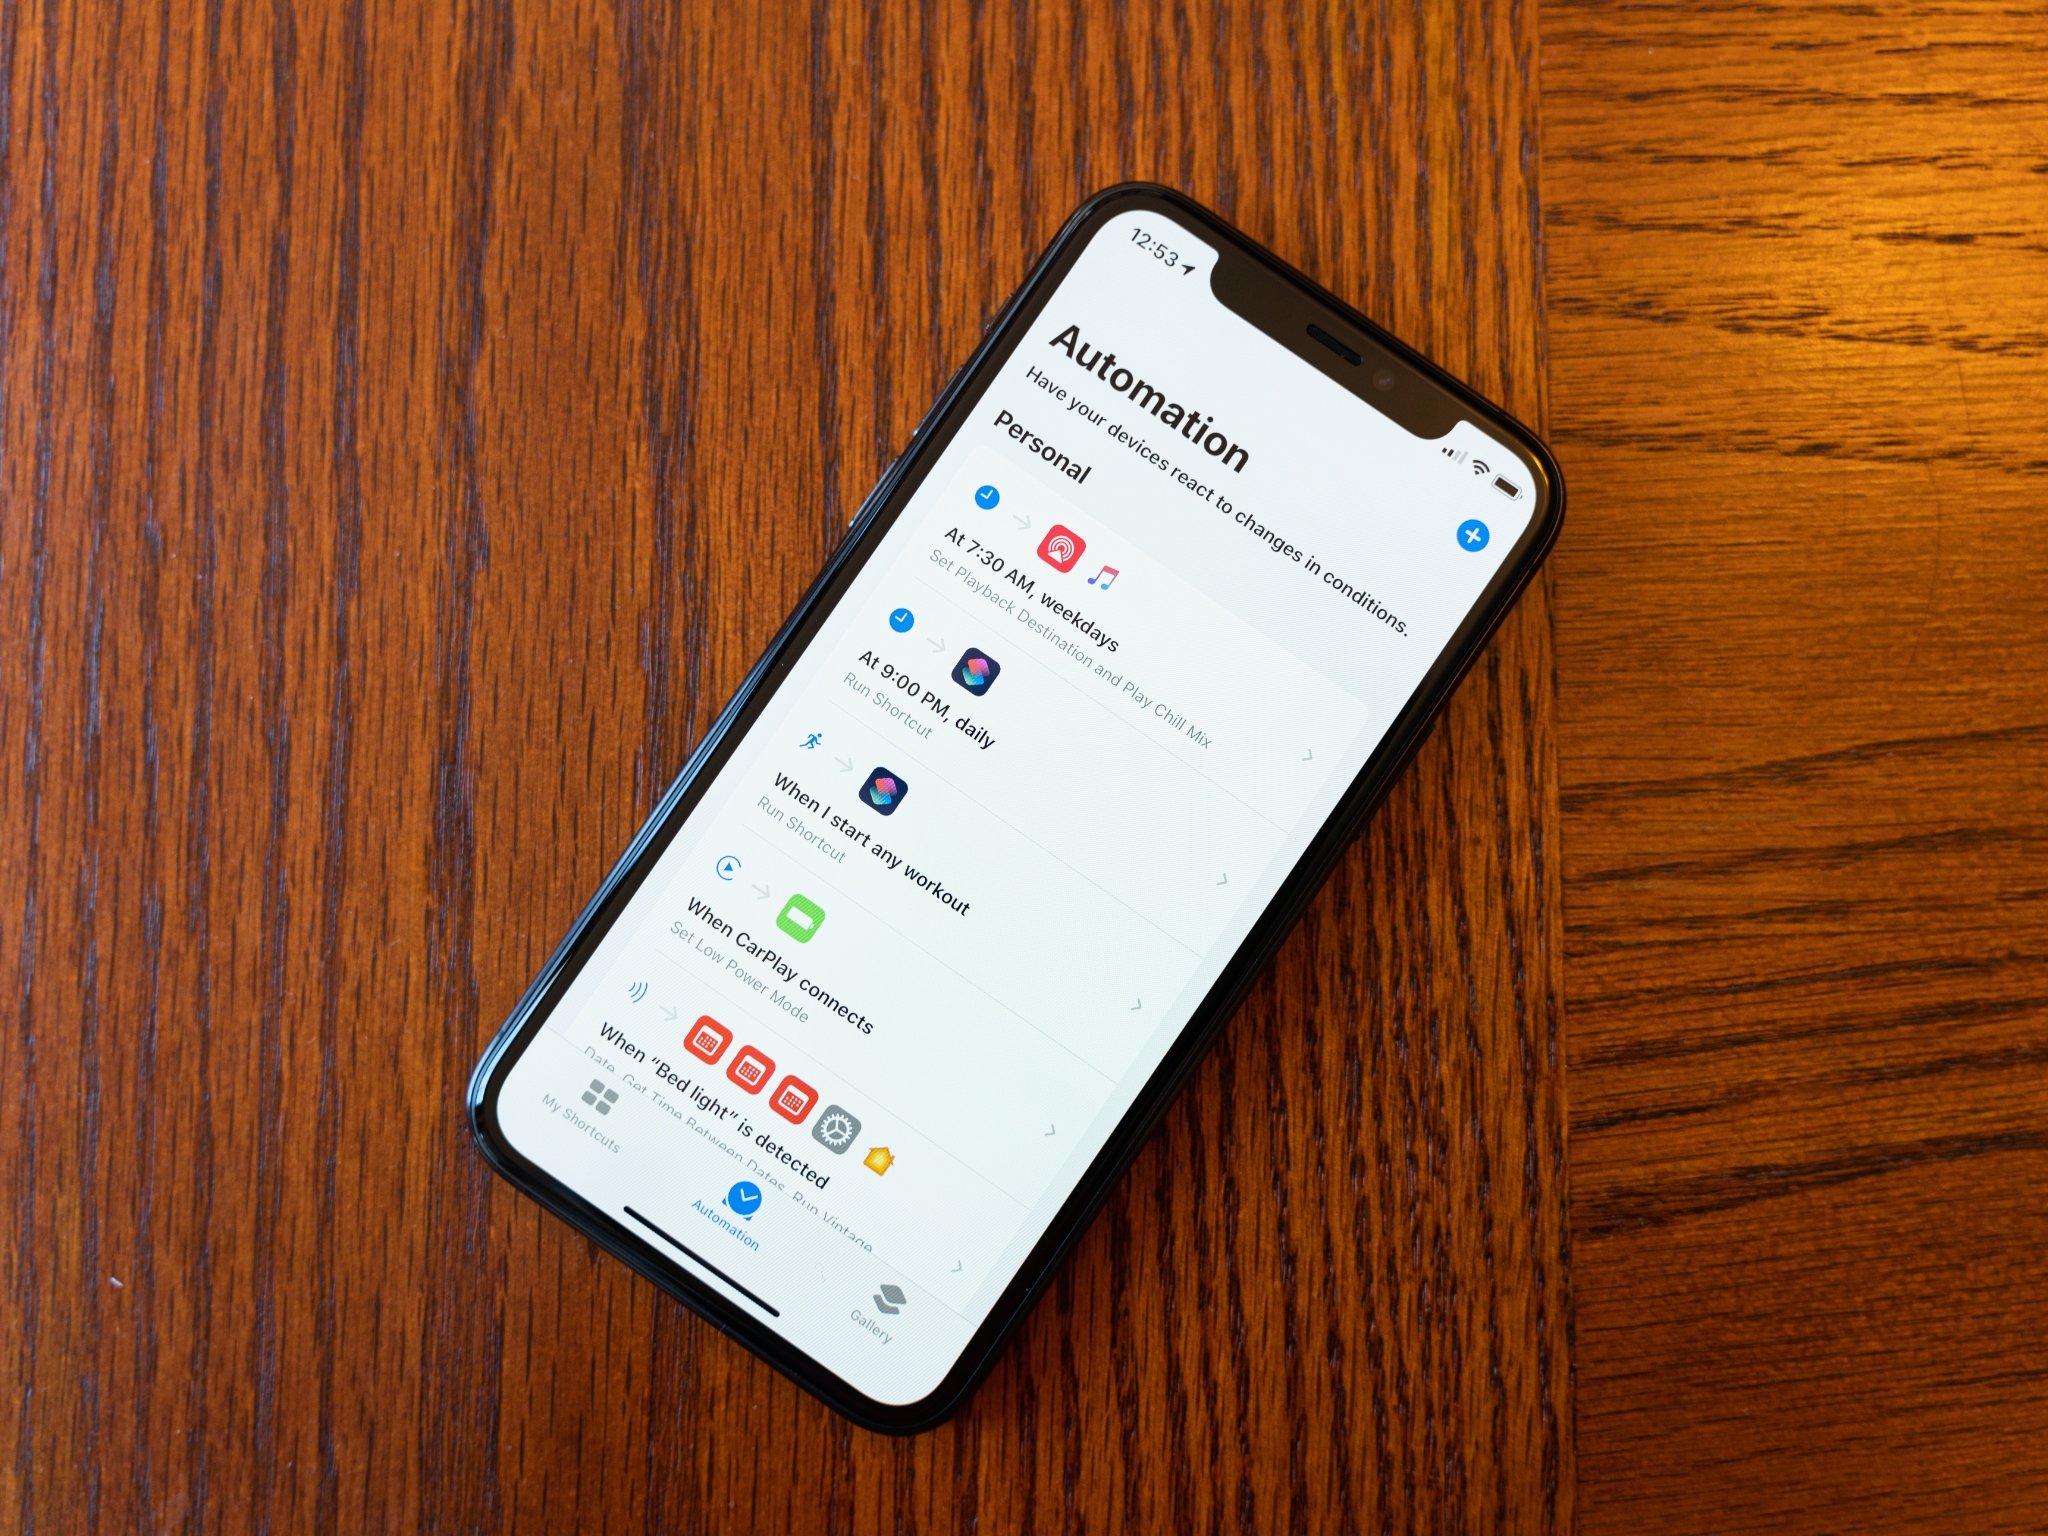
Automations are one of the best features in the Shortcuts app for iPhone and iPad. Automations are essentially shortcuts with a single specific trigger. Whereas a standard shortcut can be activated with Siri, by pressing its button in the app, or through the widget, an automation has one method of activation.
An automation can be triggered by something like the time of day, arrival at or departure from a location, activating low power mode, and more. Once the condition is met, the automation will either run or surface a notification to let you start running it. If you have a lot of recurring tasks or habits (maybe you play the same Apple Music playlist whenever you get in the car), automations can be especially useful.
This is what you need to know about automations, and how to work with them.
Automation triggers
Automation triggers are broken up into three categories: Events, Travel, and Settings. Each trigger is also either what I call "active" or "passive" in nature. An active trigger is one that is the result of a user's deliberate action, like plugging your iPhone into your CarPlay-enabled vehicle or tapping an NFC tag. At some point, you deliberately did something to or with your iPhone to start your automation.
A passive trigger, like the time of day or arriving at or leaving a location, is one where you're not actively doing something to or with your phone. While you might leave a location with your iPhone in your pocket, for instance, your phone is passive at that moment. Ironically, most automations with this type of trigger ultimately require your active consent to run. When their trigger is activated, you'll get a notification. Tapping that notification will show you a "Run" button. Tap that, and your automation will run.
Here's how the different automation trigger categories break down.
Events:
iMore offers spot-on advice and guidance from our team of experts, with decades of Apple device experience to lean on. Learn more with iMore!
- Time of Day: A passive trigger that activates at a certain time of day, optionally on a particular day or days of the week.
- Alarm: An active trigger that starts when you stop a designated (or any) alarm on your iPhone or iPad.
- Apple Watch Workout: An active trigger that starts an automation when you start a workout on your Apple Watch.
Travel:
- Arrive: A passive trigger for arriving at a location.
- Leave: A passive trigger for leaving a location.
- Before I Commute: A passive trigger that can be set to activate at or before your regular travel time to home or from work.
- CarPlay: An active trigger that starts your automation when you successfully connect to CarPlay.
Settings:
- Airplane Mode: An active trigger that starts your automation when you turn Airplane Mode on or off.
- Wi-Fi: A passive trigger that activates when you join a particular Wi-Fi network, such as your home network.
- Bluetooth: A passive trigger that activates when you connect to a specific Bluetooth accessory such as AirPods.
- Do Not Disturb: An active trigger that starts when you turn Do Not Disturb on or off.
- Low Power Mode: An active trigger that starts when you turn Low Power Mode on or off.
- NFC: An active trigger that starts your automation when you tap an NFC (near-field communication) tag or sticker.
- Open App: An active trigger that starts your automation when you open an app.
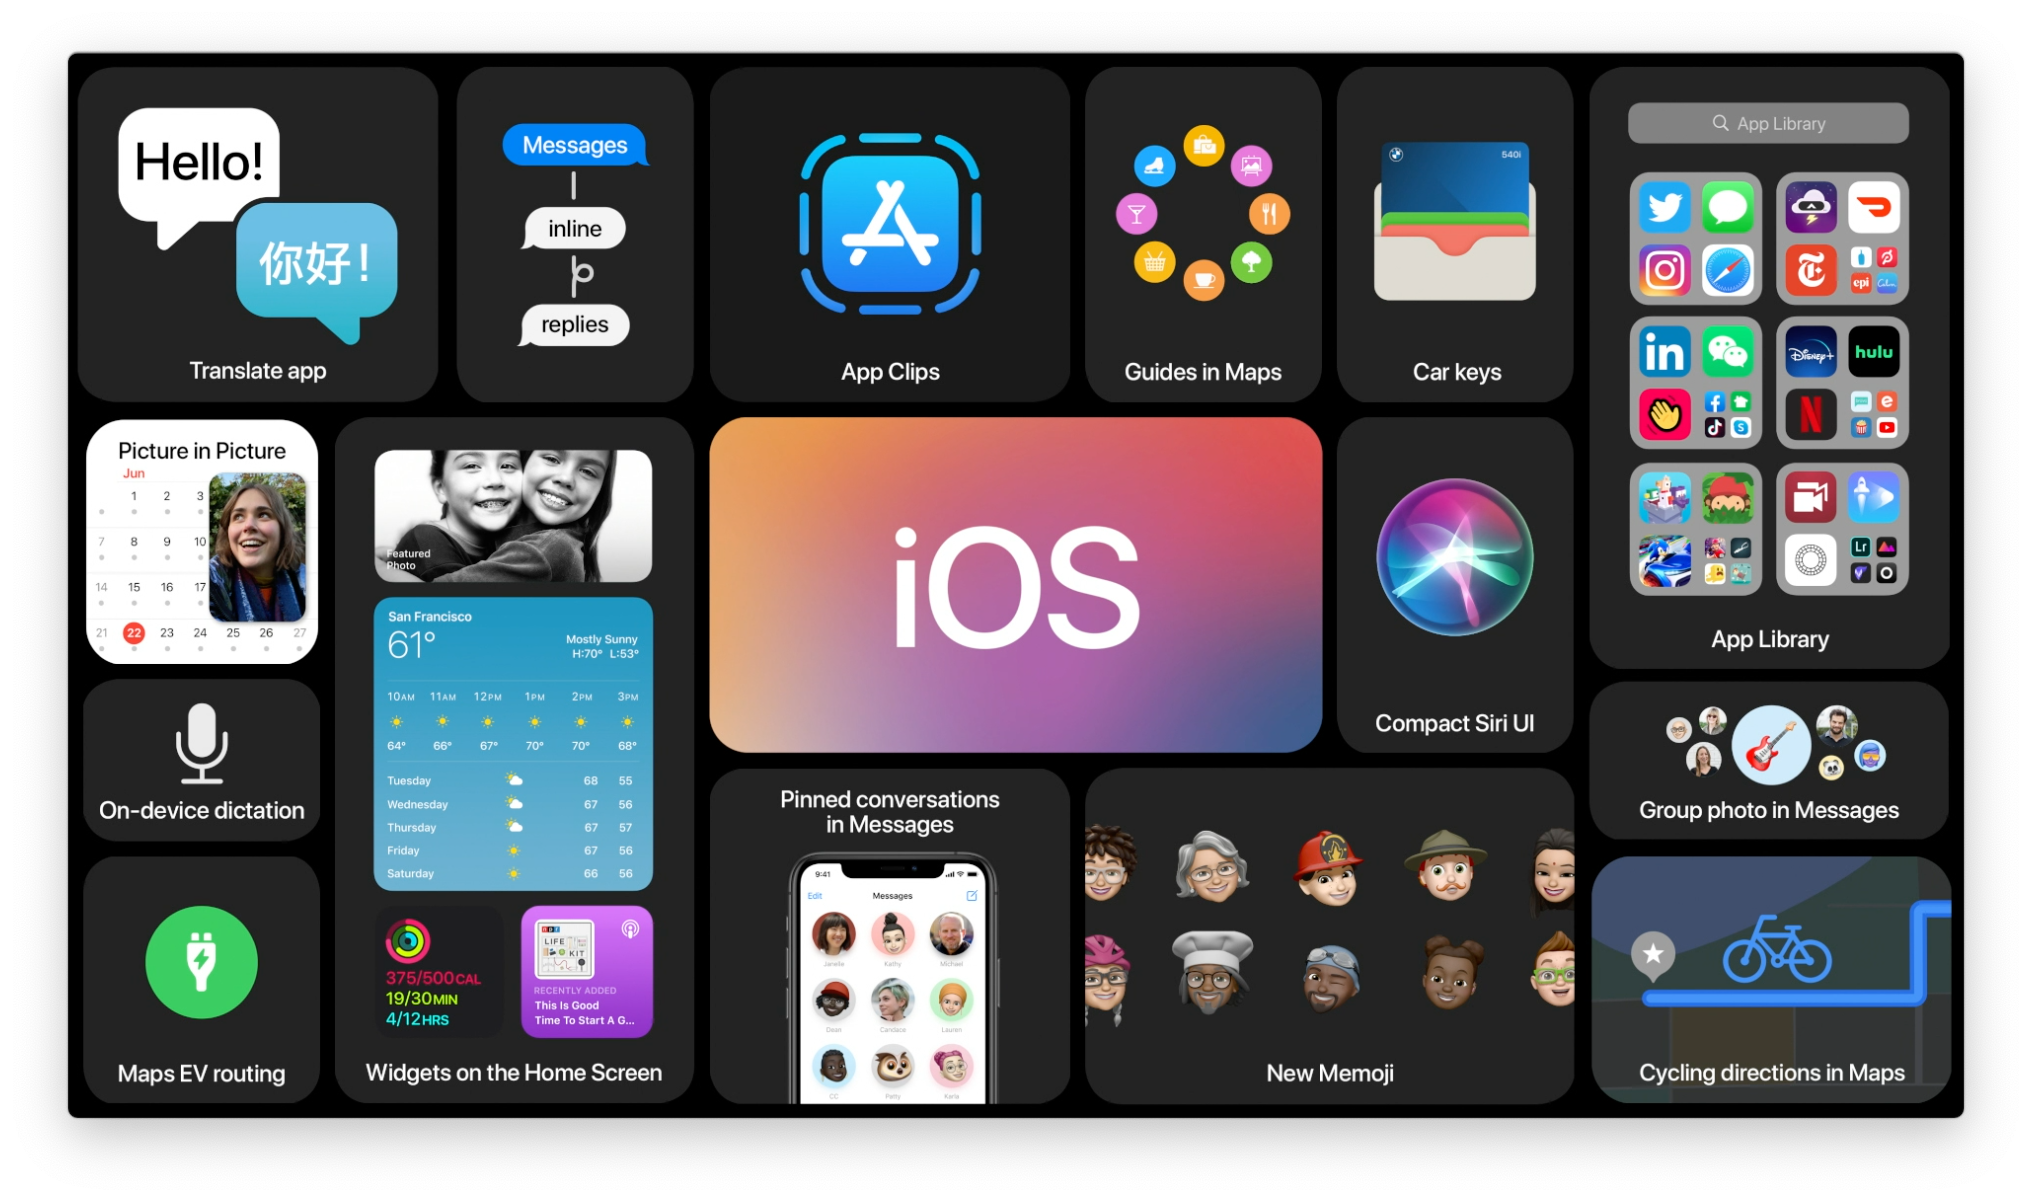
iOS 14 adds several new trigger options:
- Sleep: A passive trigger that can be set off when your Wind Down process starts, when your Bedtime begins, or when waking up using iOS 14's new sleep features.
- Email: A passive trigger that activates when you get an email that meets certain parameters, such as sender, subject, or accont at which you received it.
- Messages: Like the email trigger, but for SMS and iMessages.
- Battery level: A passive trigger that activates an automation when your iPhone's battery level equals, falls past, or rises above a threshold that you set.
- Charger: An active trigger that starts an automation when you connect your iPhone to or disconnect it from a charger.
There are other changes to existing triggers in iOS 14. In iOS 14, not all passive triggers require you to interact with a notification in order to start. Automations triggered by the time of day can now be set to run on their own, rather than waiting for user input. Additionally, the new triggers for sleep, and battery level can also be set to run without user input.
There are also updates to existing triggers from iOS 13. The Apple Watch Workout trigger can be employed for either starting or ending a workout, instead of just starting, and you can now start an automation when you close an app, instead of just when you open one.
How to create a shortcut automation
If you've already created your own shortcuts, building an automation isn't that different. Except for the beginning, when you choose your trigger, building an automation is exactly like building a shortcut, and an automation can do anything a standard shortcut can do.
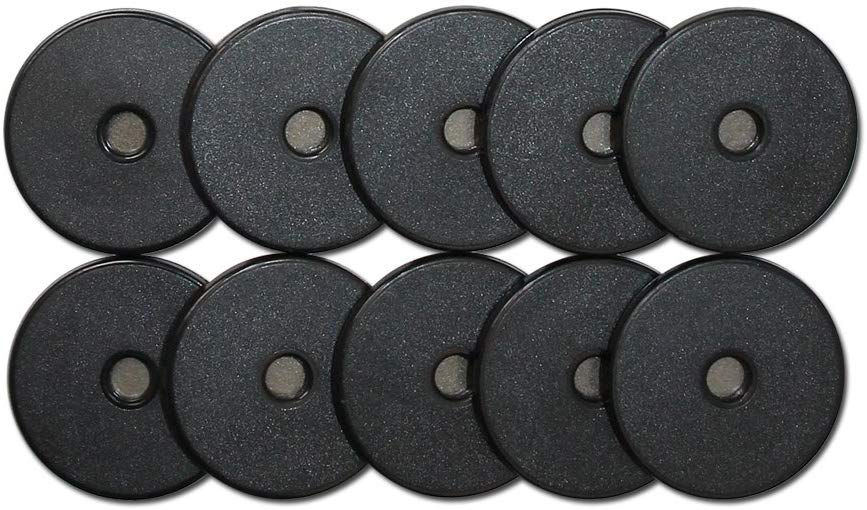
As an example, here we're going to build a simple automation that works with an NFC tag. An NFC tag or sticker is generally a small object or sticker with an embedded digital signature that your iPhone recognizes when you bring it near a tag. In the case of Shortcuts automation, your iPhone reads the information identifying the particular sticker or tag, then performs an action based on the tag you read. In short, you set up your automation by scanning a particular NFC tag, then when you tap your iPhone to that tag, and your automation runs.
You can purchase NFC tags and stickers on Amazon, and they often come in packs at affordable prices. For use with Shortcuts, any NFC stickers will do. I use these.
NFC works with the iPhone X or later.
Since we're using NFC, the beginning of the instructions will be fairly specific for that, but setting up any trigger is fairly self-explanatory once you get started.
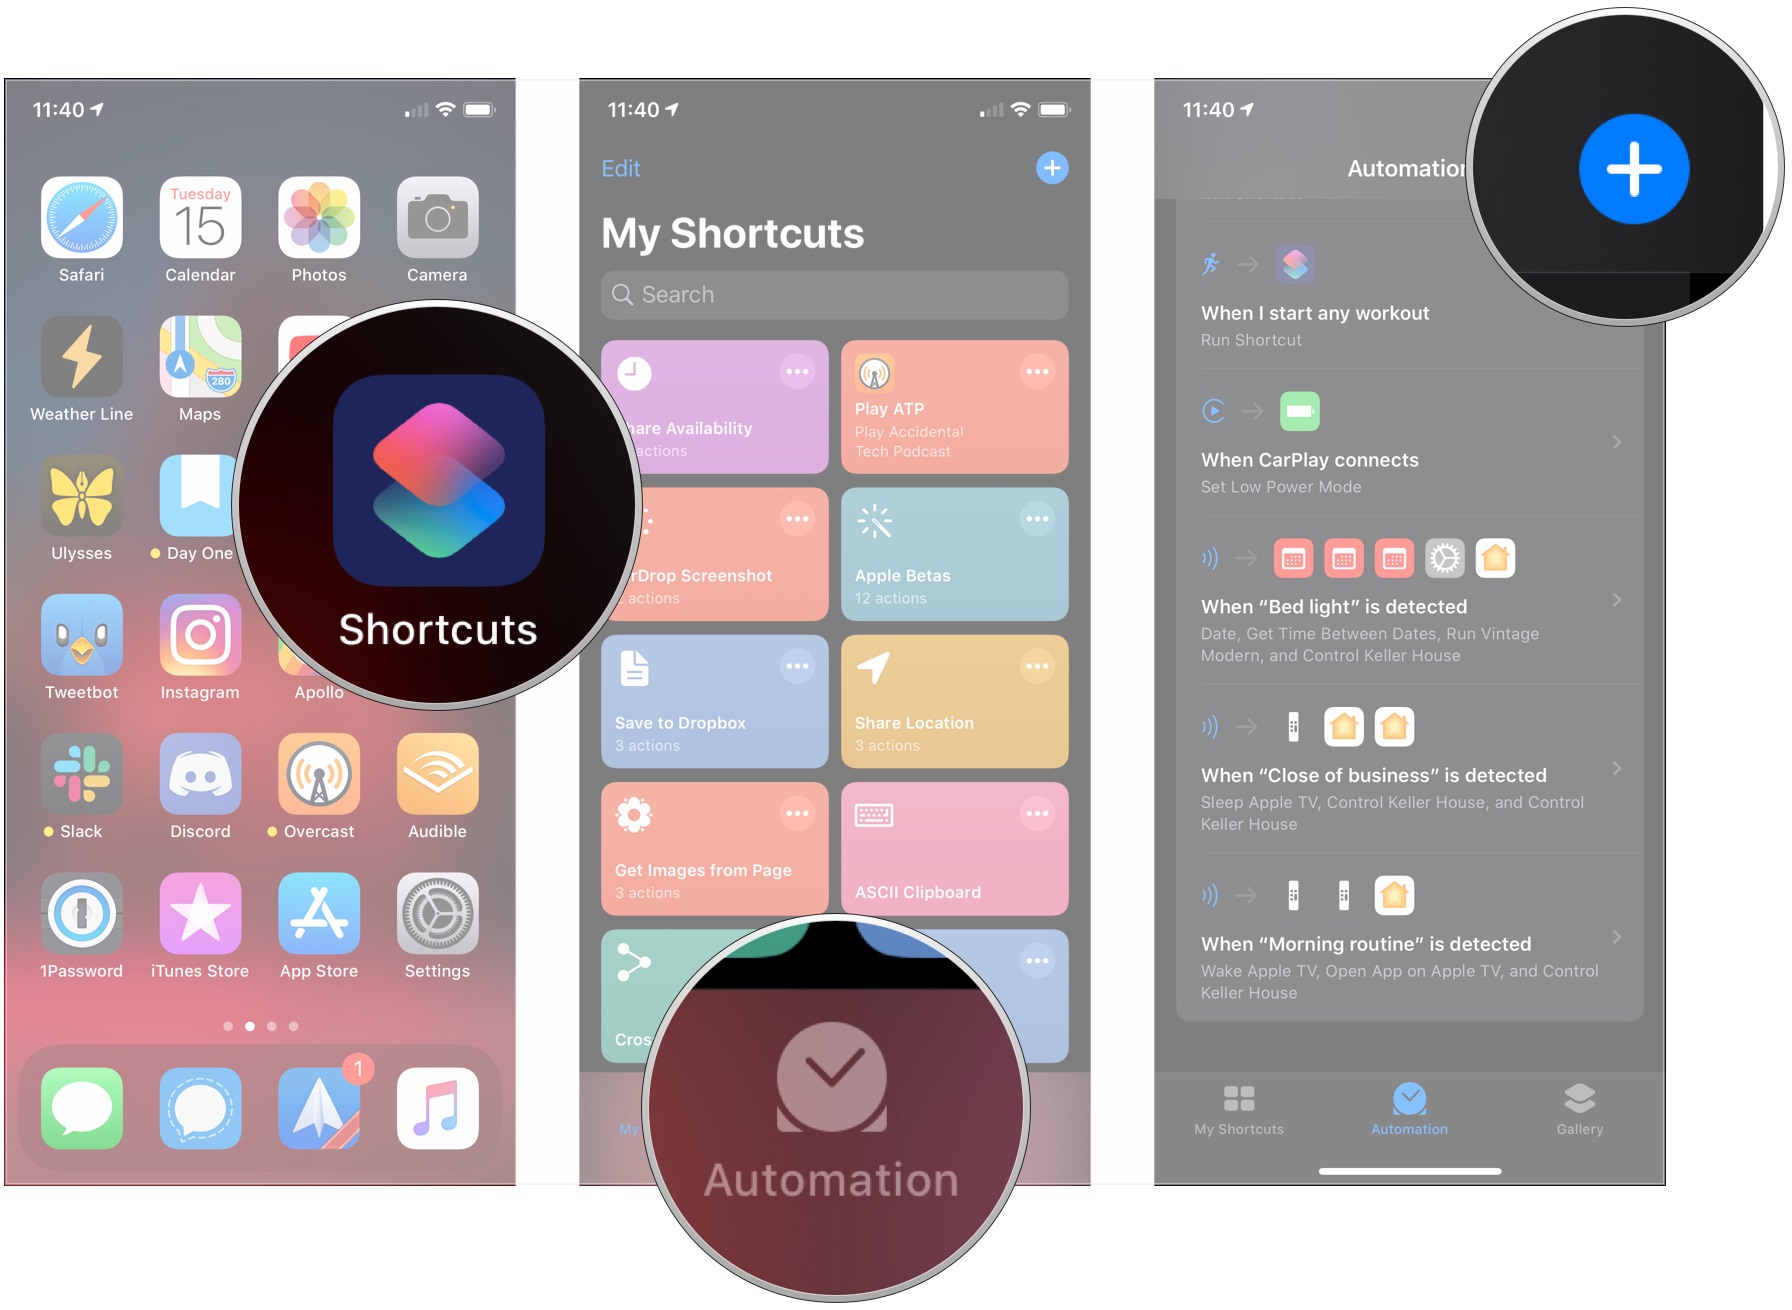
- Open Shortcuts on your iPhone.
- Tap the Automation tab.
- If you already have other automations, tap the + button.
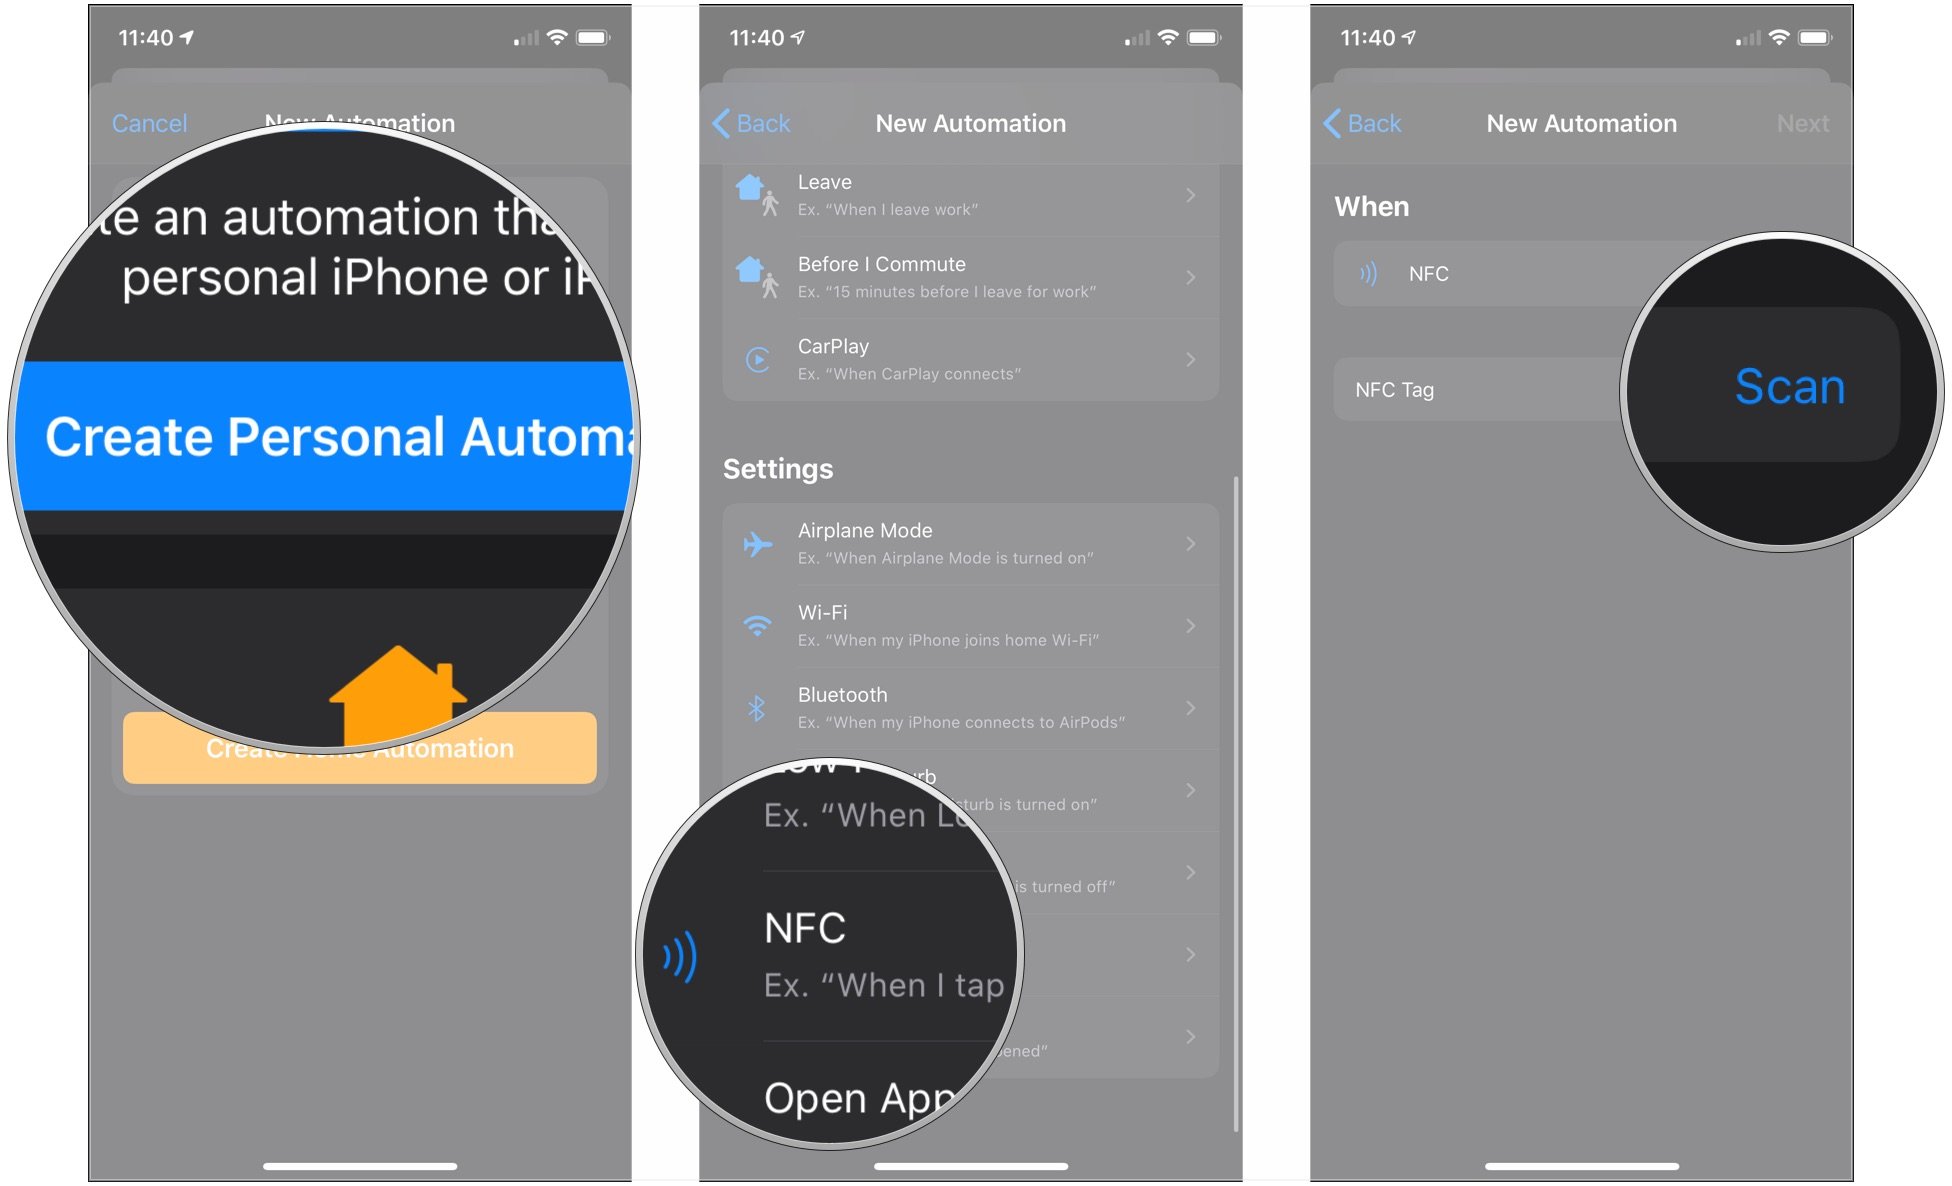
- Tap Create Personal Automation.
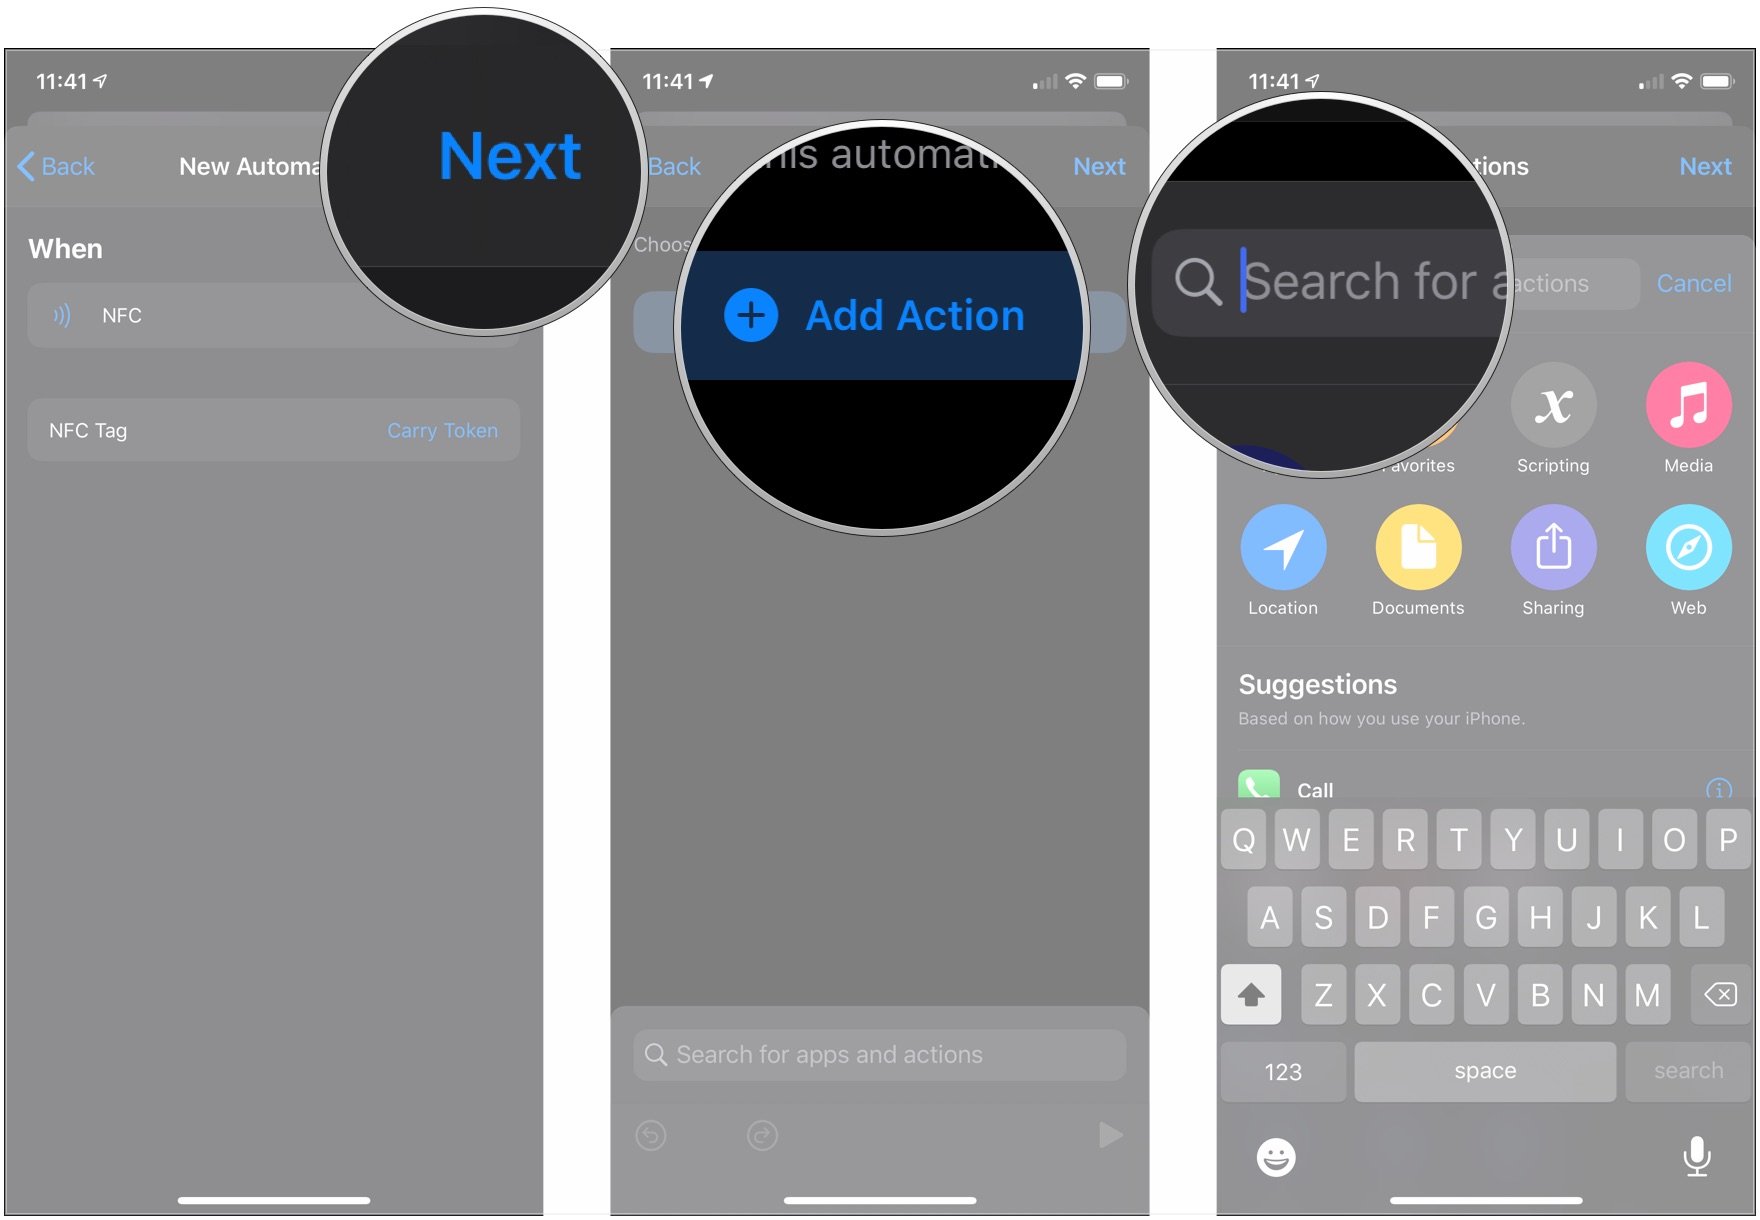
- Tap the trigger you want to use. In this example, we'll tap NFC.
- Tap Scan on NFC Tag.
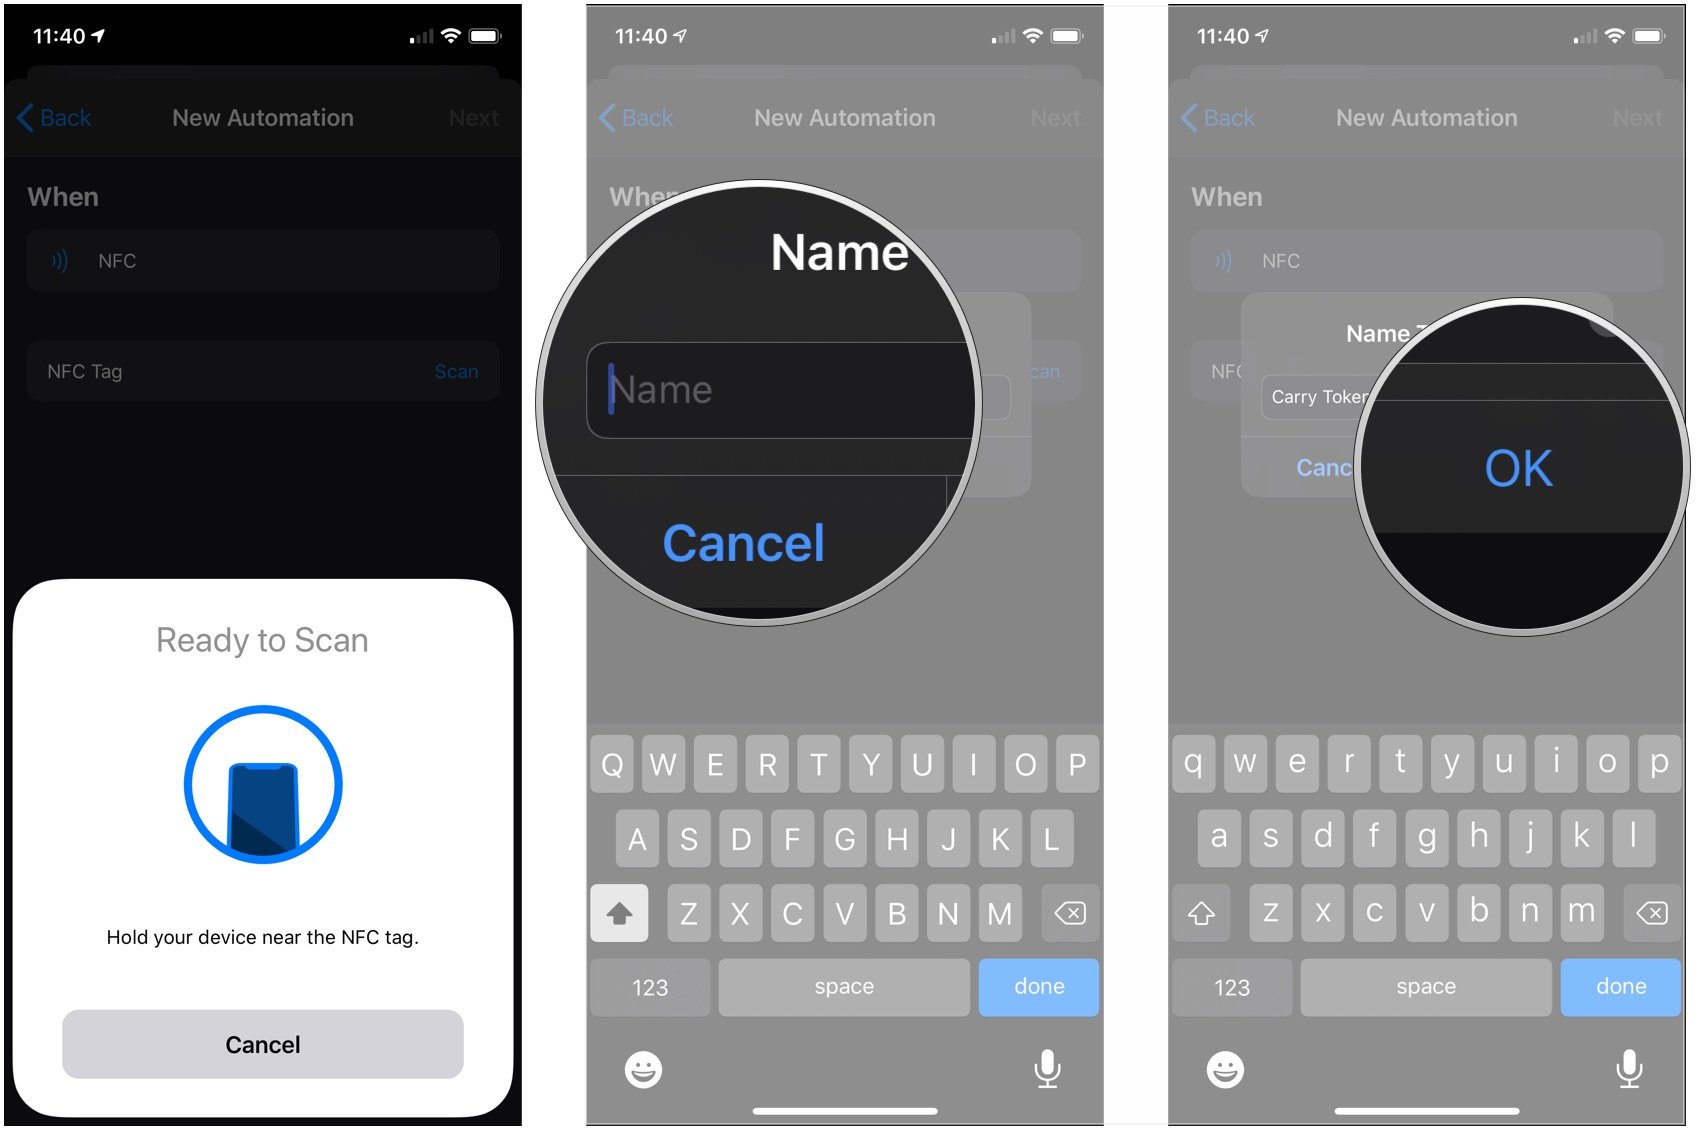
- Scan your NFC tag with your iPhone.
- Name your NFC tag.
- Tap OK. After this, the instructions generally apply to all automations.
- Tap Next.
- Tap Add Action.
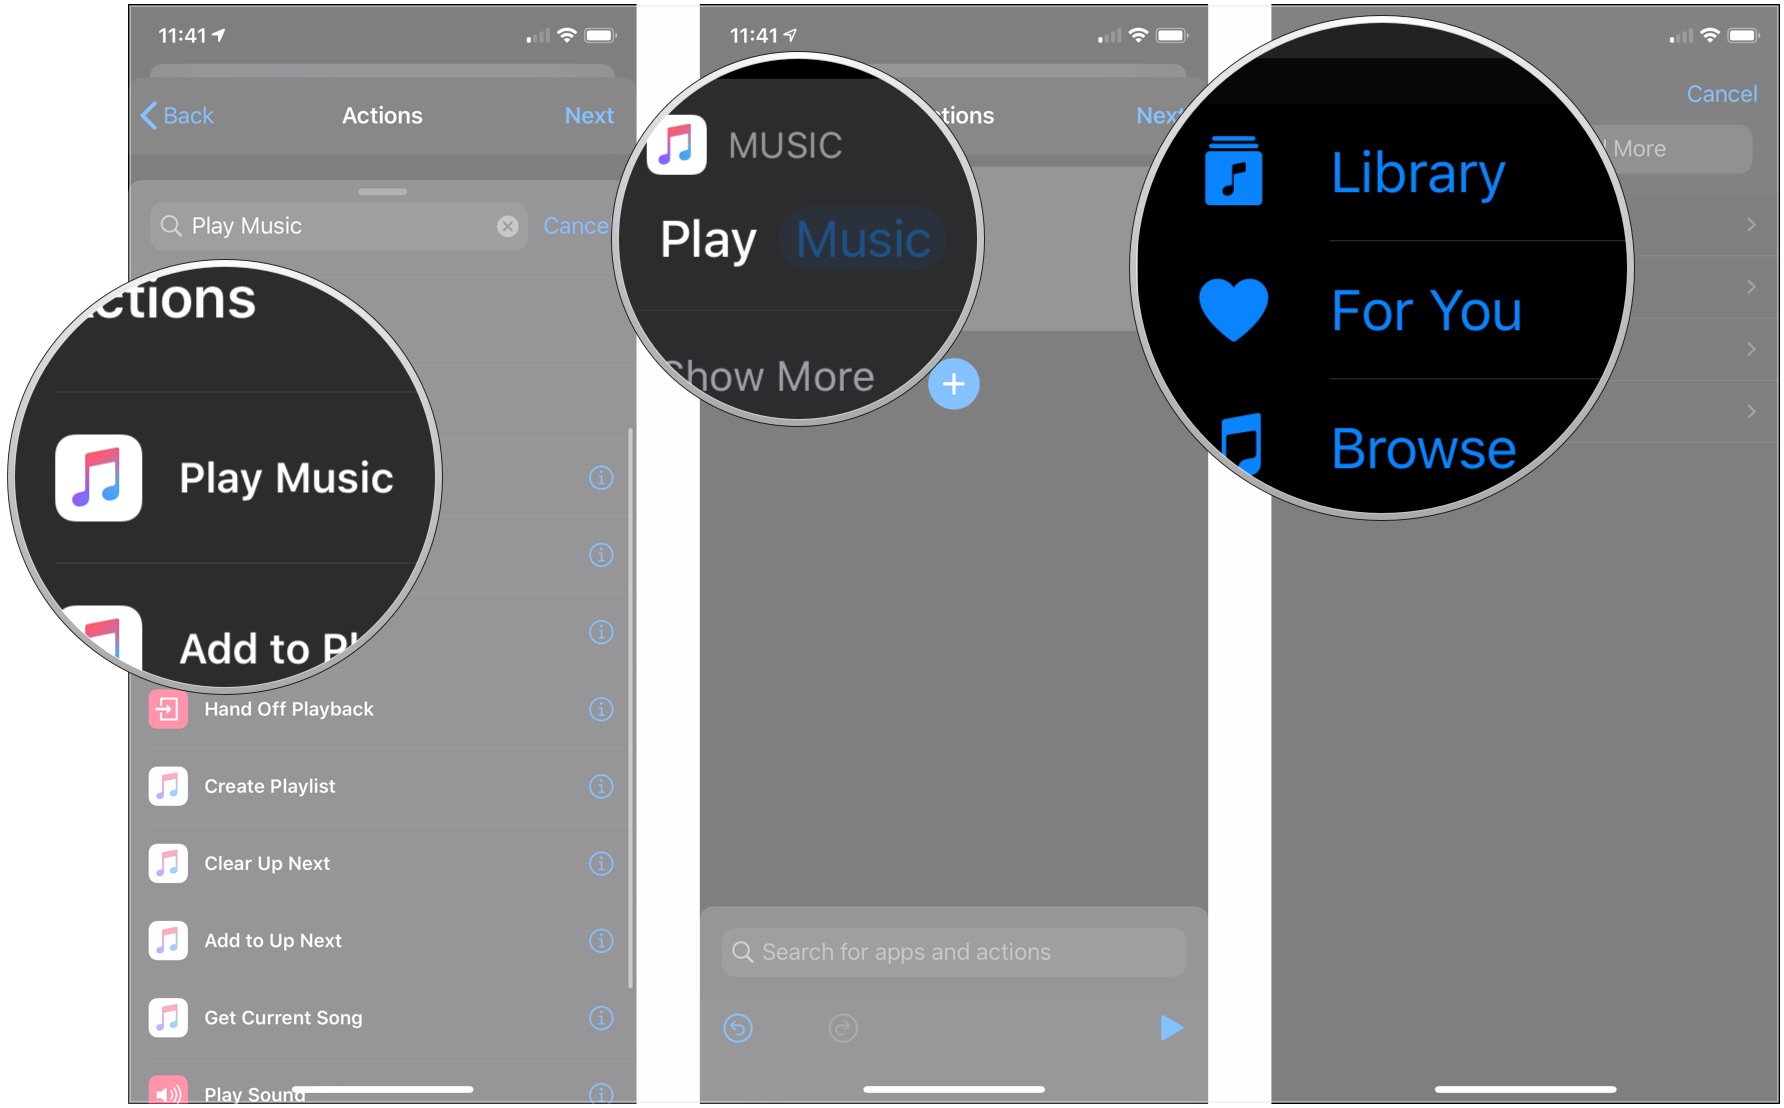
- Tap one of the options presented to you, such as Apps, Favorites, Location, a suggestion, or search for the action you want to use.
- Tap on the action you want to add to your automation.
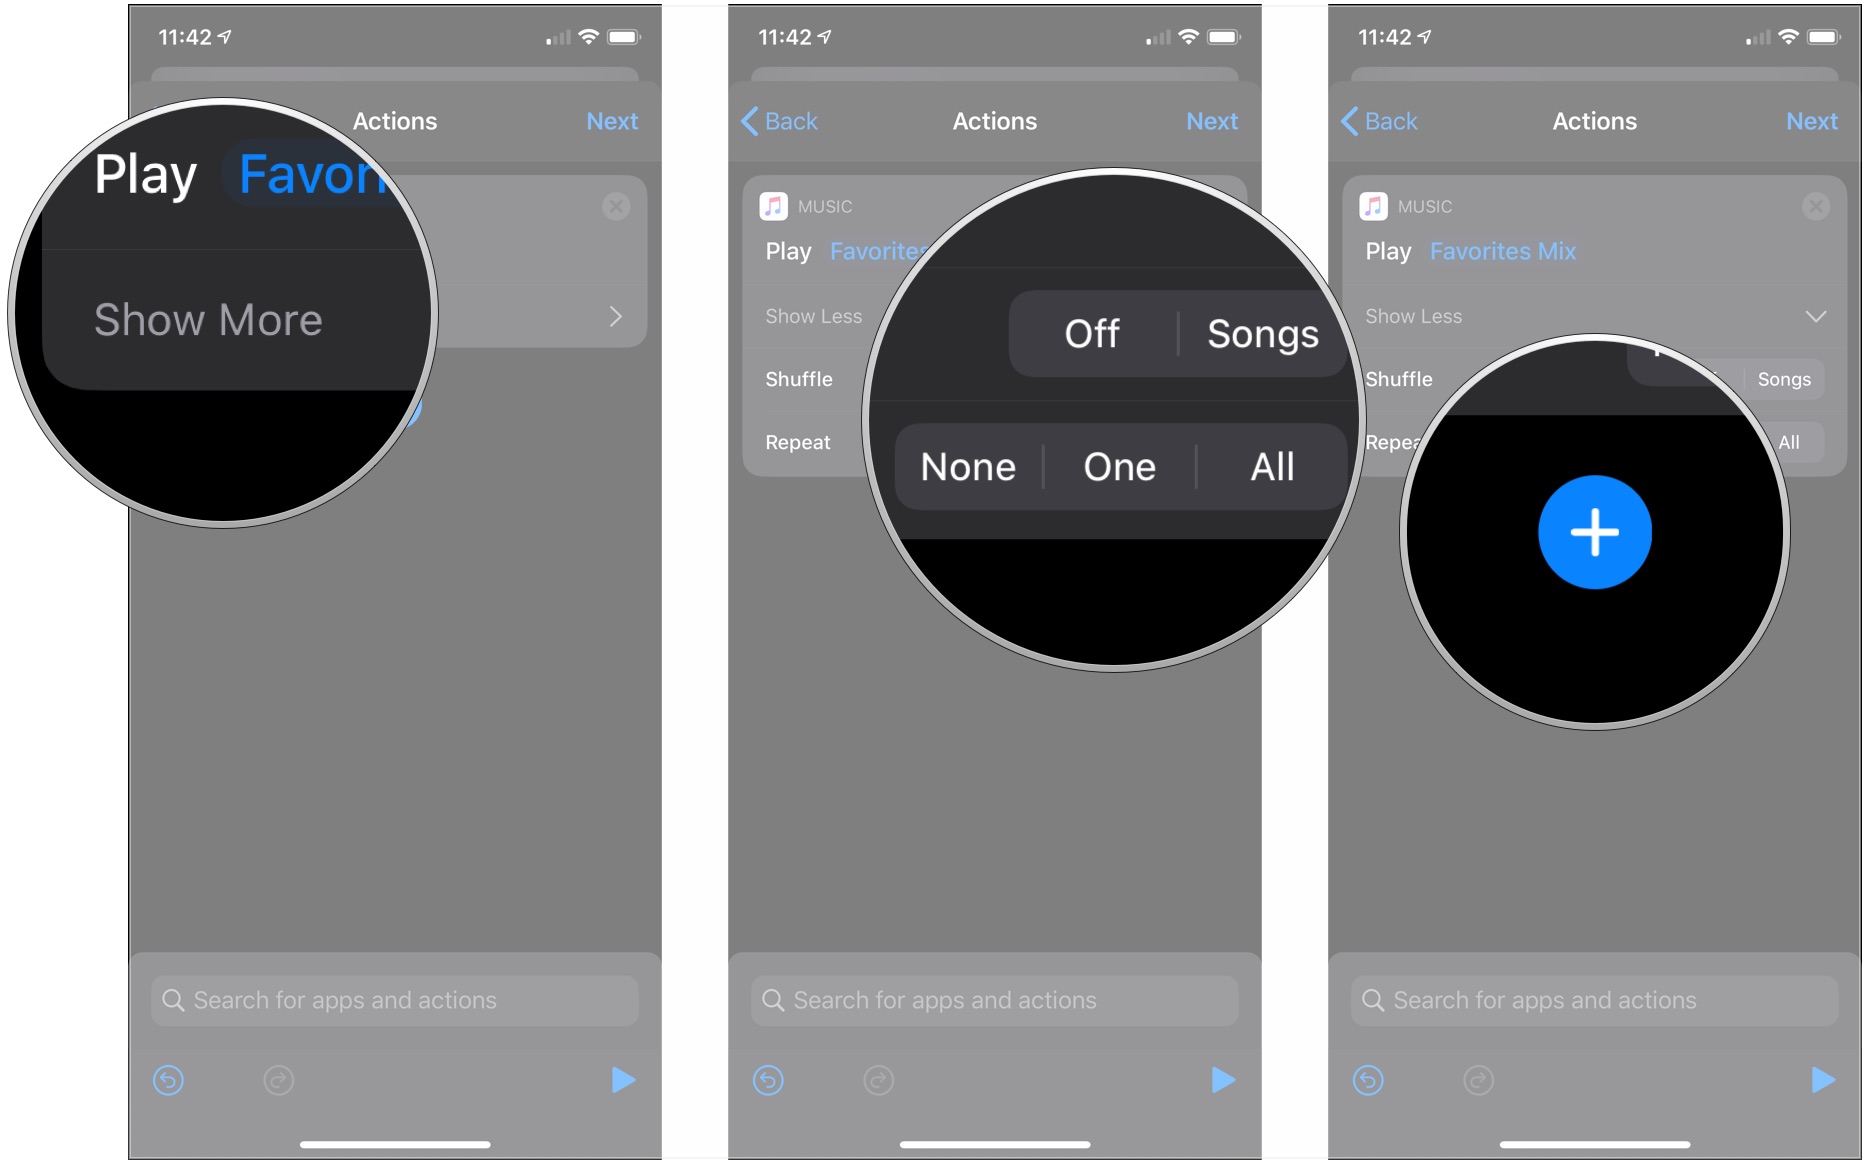
- Tap on a blue parameter to change it.
- Select an option for your parameter.
- Tap Show More if it's available.
- Tap any parameters or buttons to change them.
- Tap the + button if you want to continue adding actions to your shortcut.
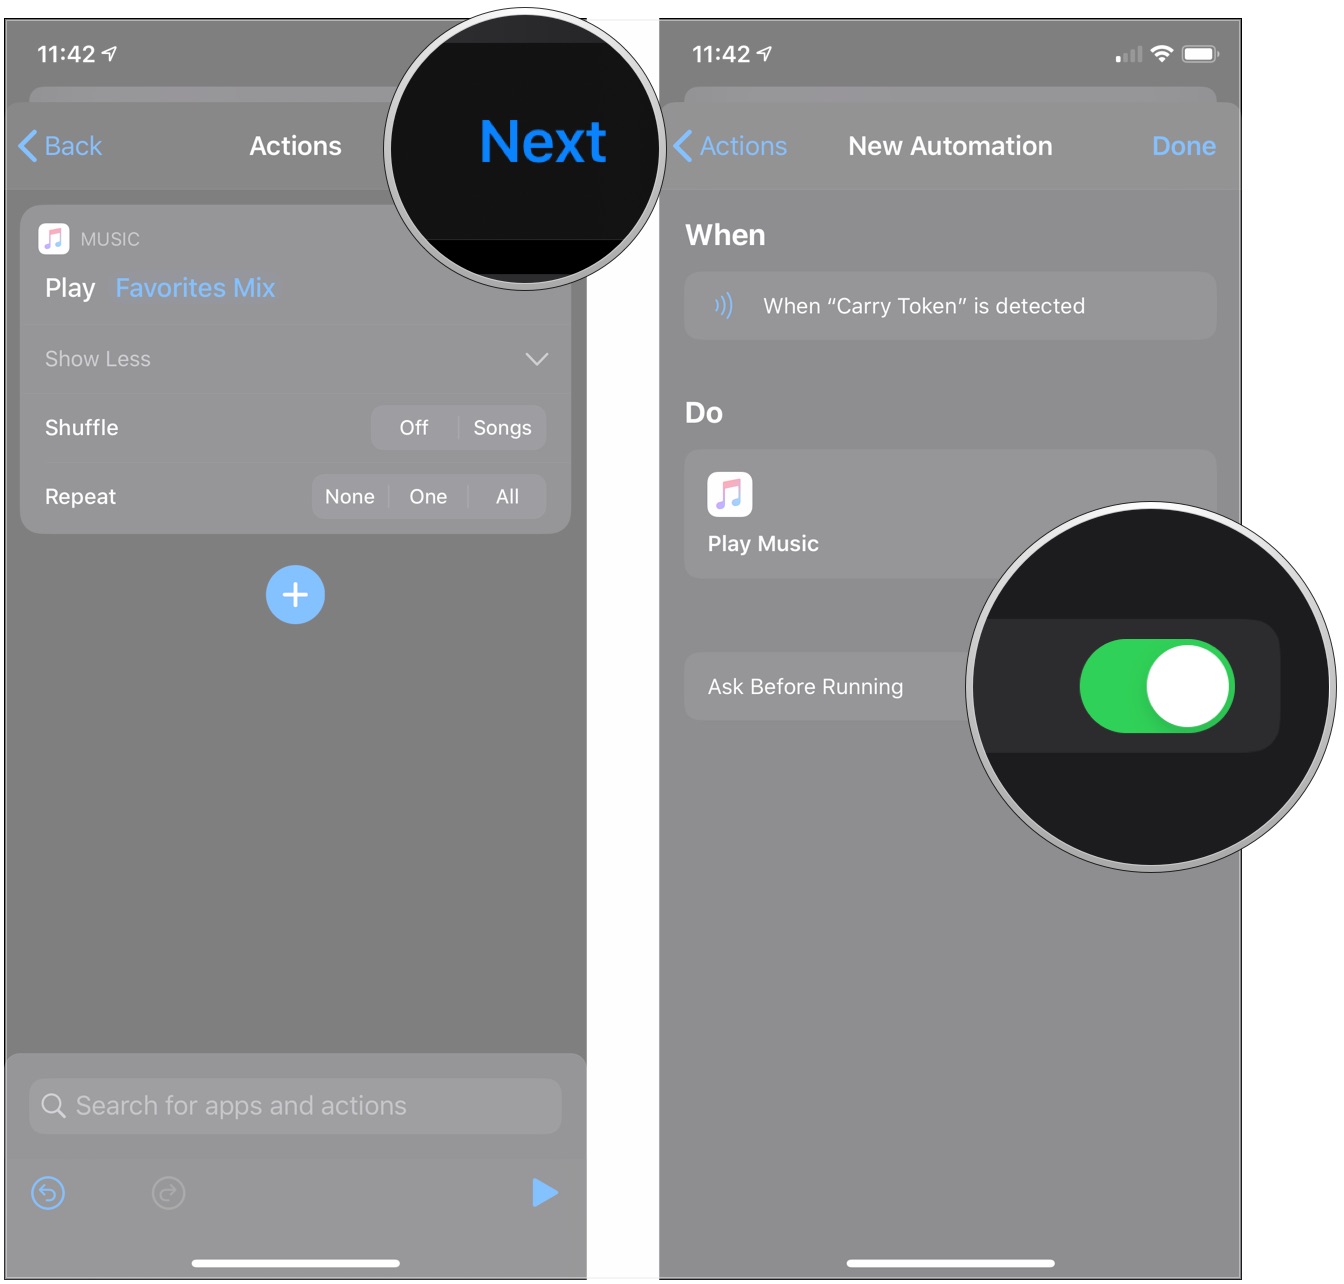
- Tap Next when you're done adding actions.
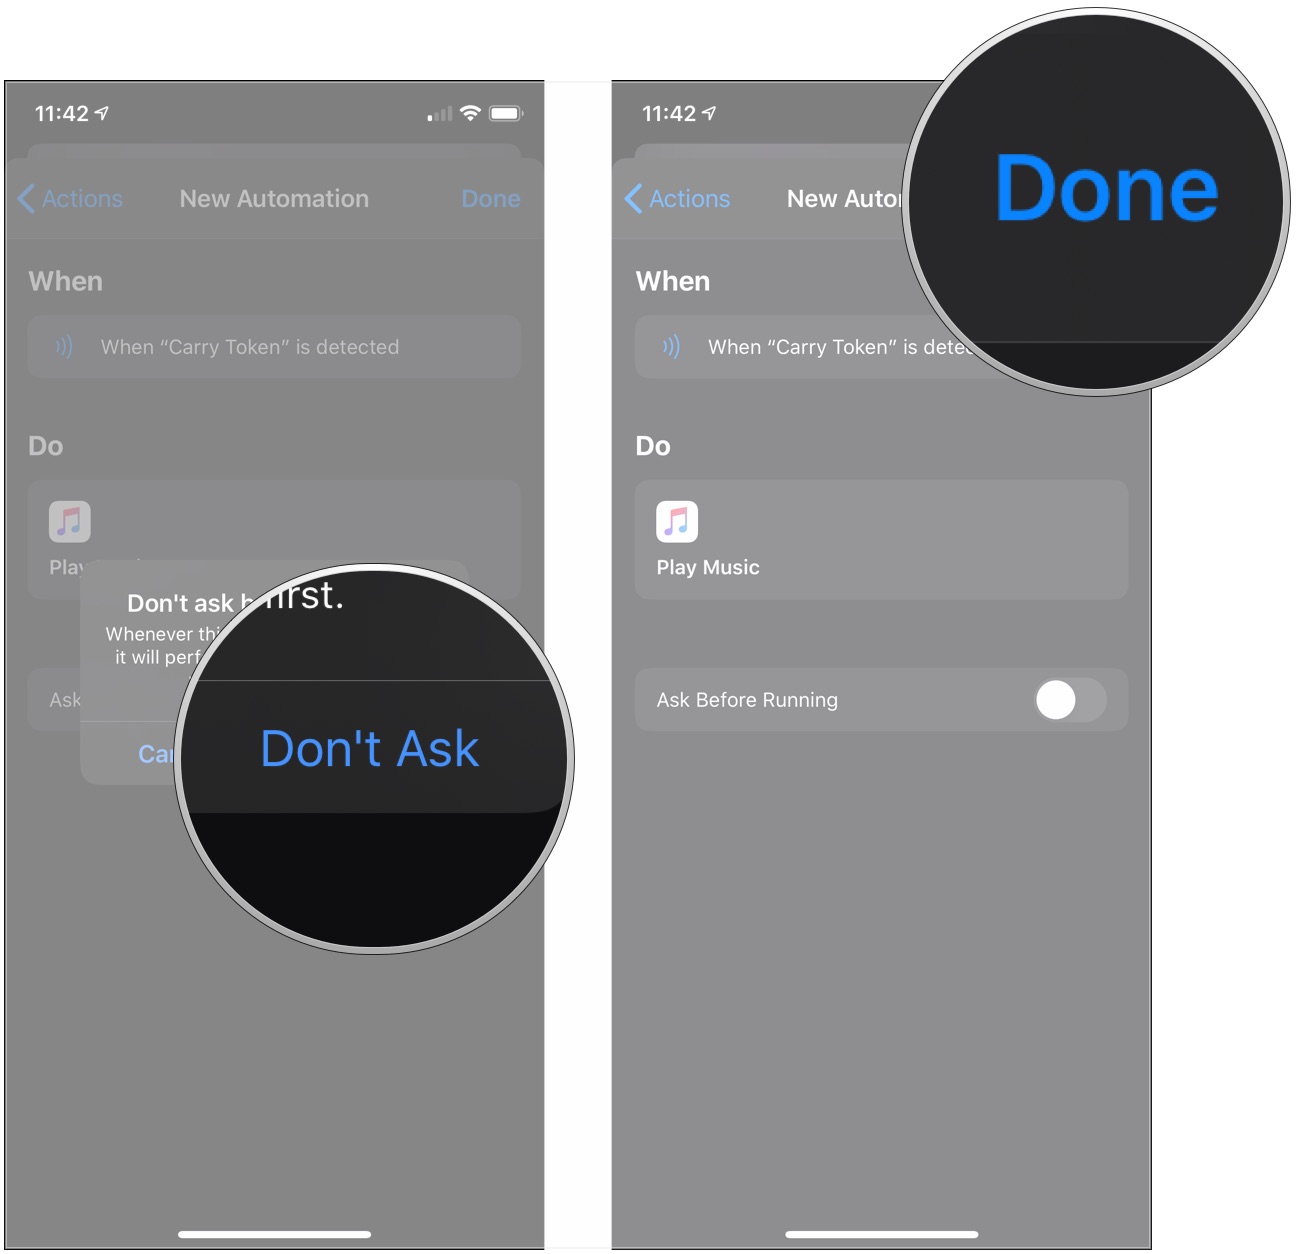
- Tap the switch for Ask Before Running (if available) to the gray "off" position if you want this automation to run without any further input once you trigger it.
- Tap Don't Ask if you tapped to switch off.
- Tap Done.
Once you've created your automation, using it is a simple matter of either waiting for its trigger to activate. Whether you're tapping an NFC tag, plugging your iPhone into a CarPlay unit, or waiting for an appointed time, once the trigger condition is met, your automation will either start or send you a notification asking for your approval.
How to create a HomeKit automation
In addition to shortcut automations, the Shortcuts app also lets you set up HomeKit-specific automations from within the app, too. This is the same functionality that you'll find in the Home app and works the exact same way. In the shortcuts app, instead of tapping Create Personal Automation, instead, tap Create Home Automation.
How to setup Home automations on iOS and iPadOS
Questions?
If you have any questions about setting up an automation in Shortcuts, ask away in the comments.
Joseph Keller is the former Editor in Chief of iMore. An Apple user for almost 20 years, he spends his time learning the ins and outs of iOS and macOS, always finding ways of getting the most out of his iPhone, iPad, Apple Watch, and Mac.
