How to use Hide My Email on Mac
iMore offers spot-on advice and guidance from our team of experts, with decades of Apple device experience to lean on. Learn more with iMore!
You are now subscribed
Your newsletter sign-up was successful
Hide My Email is a new tool in iCloud+ that makes it possible to use random email addresses that are then forwarded to your personal inbox. You can hide your actual details when filling out a form on the web or signing up for a newsletter.
Hide My Email is available on iPhone and iPad in iOS 15 and iPadOS 15 respectively, and also on macOS Monterey. The software supports all of the best Macs.
What is iCloud+
Announced at the Worldwide Developers Conference (WWDC) in June, iCloud+ is a mixture of a rebrand of the existing paid iCloud service plus new features. Like iCloud itself, iCloud+ is available on iPhone, iPad, and Mac.
Besides Hide My Email, iCloud+ brings to the table for the first time iCloud Private Relay, custom email domains for iCloud Mail, and expanded HomeKit Secure Video support.
Setting up Hide My Email on Mac
To enable Hide My Email on macOS Monterey:
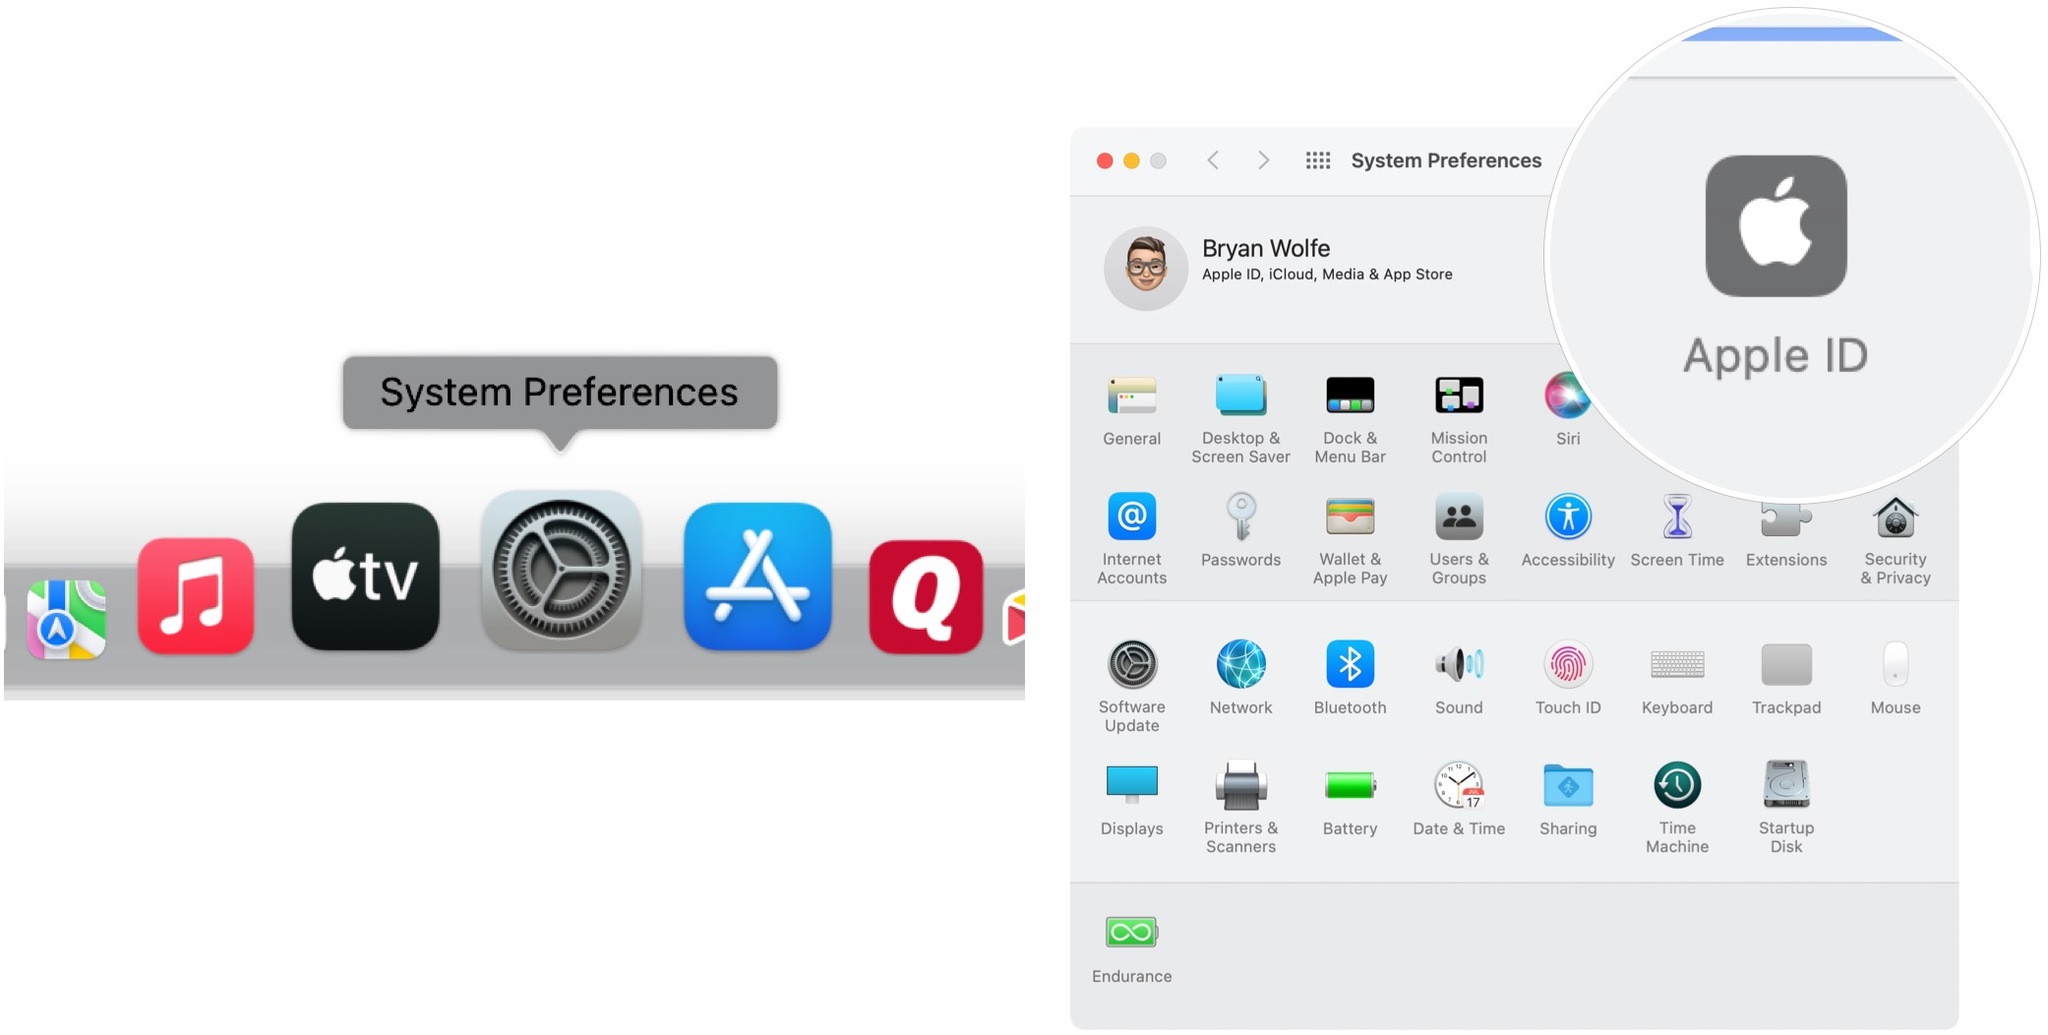
- Choose System Preferences from the Mac Dock.
- Select Apple ID.
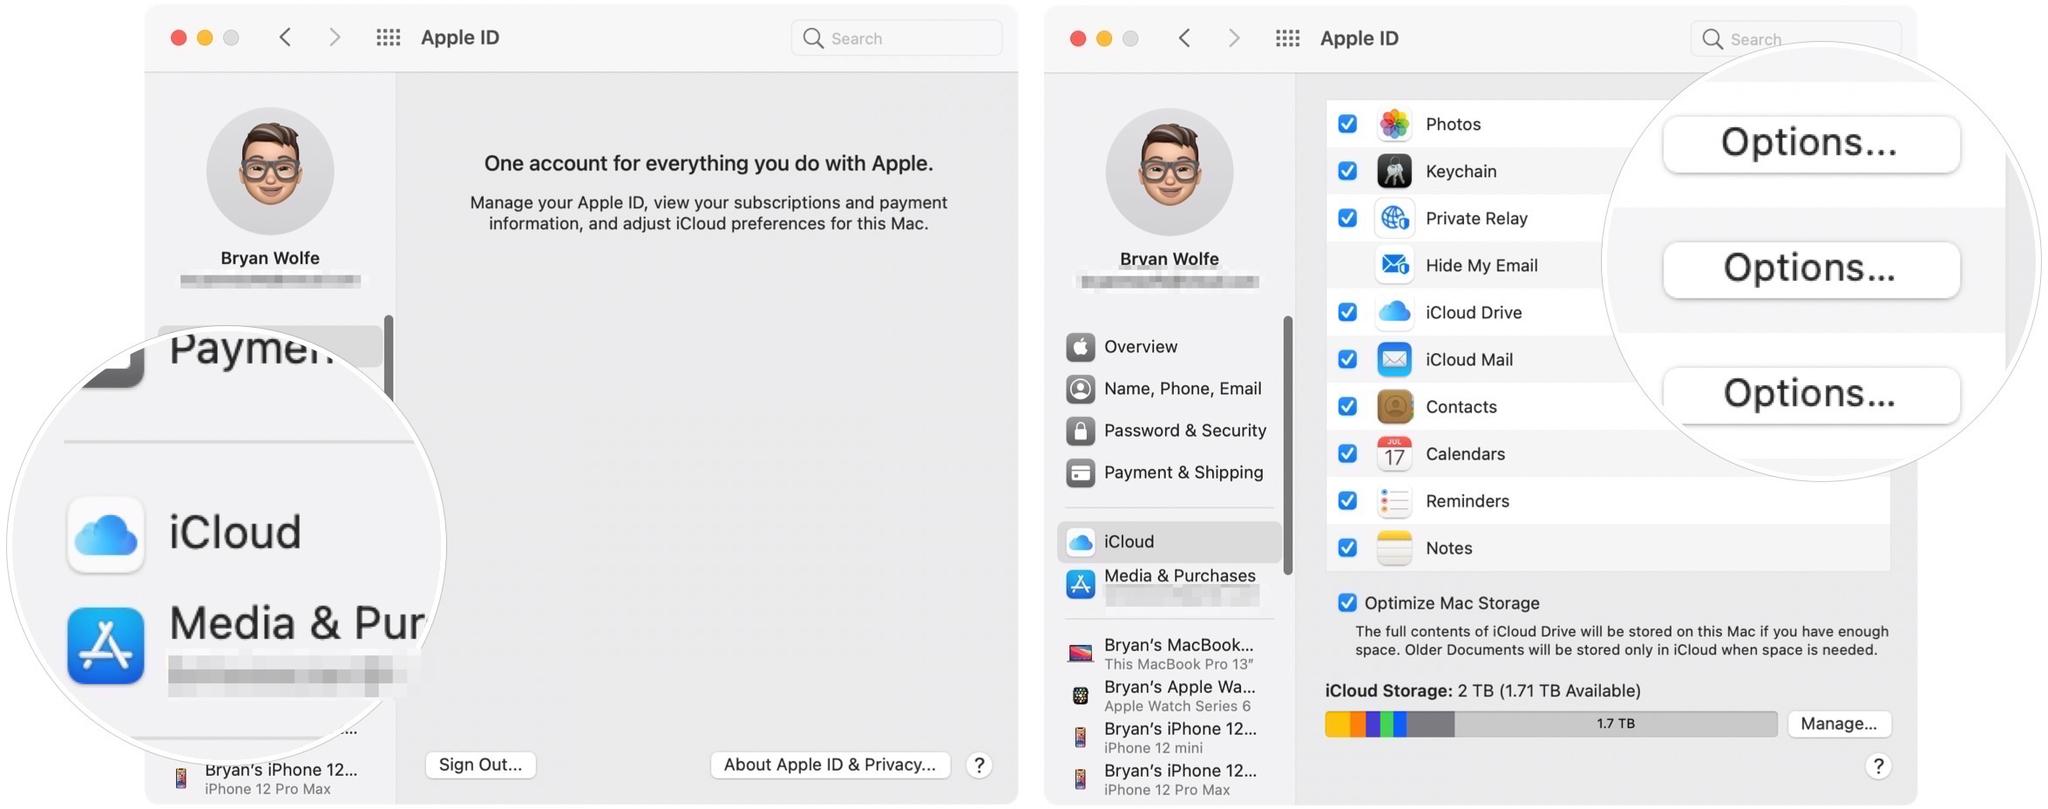
- Click iCloud.
- Choose the Options... button to the right of Hide My Email.
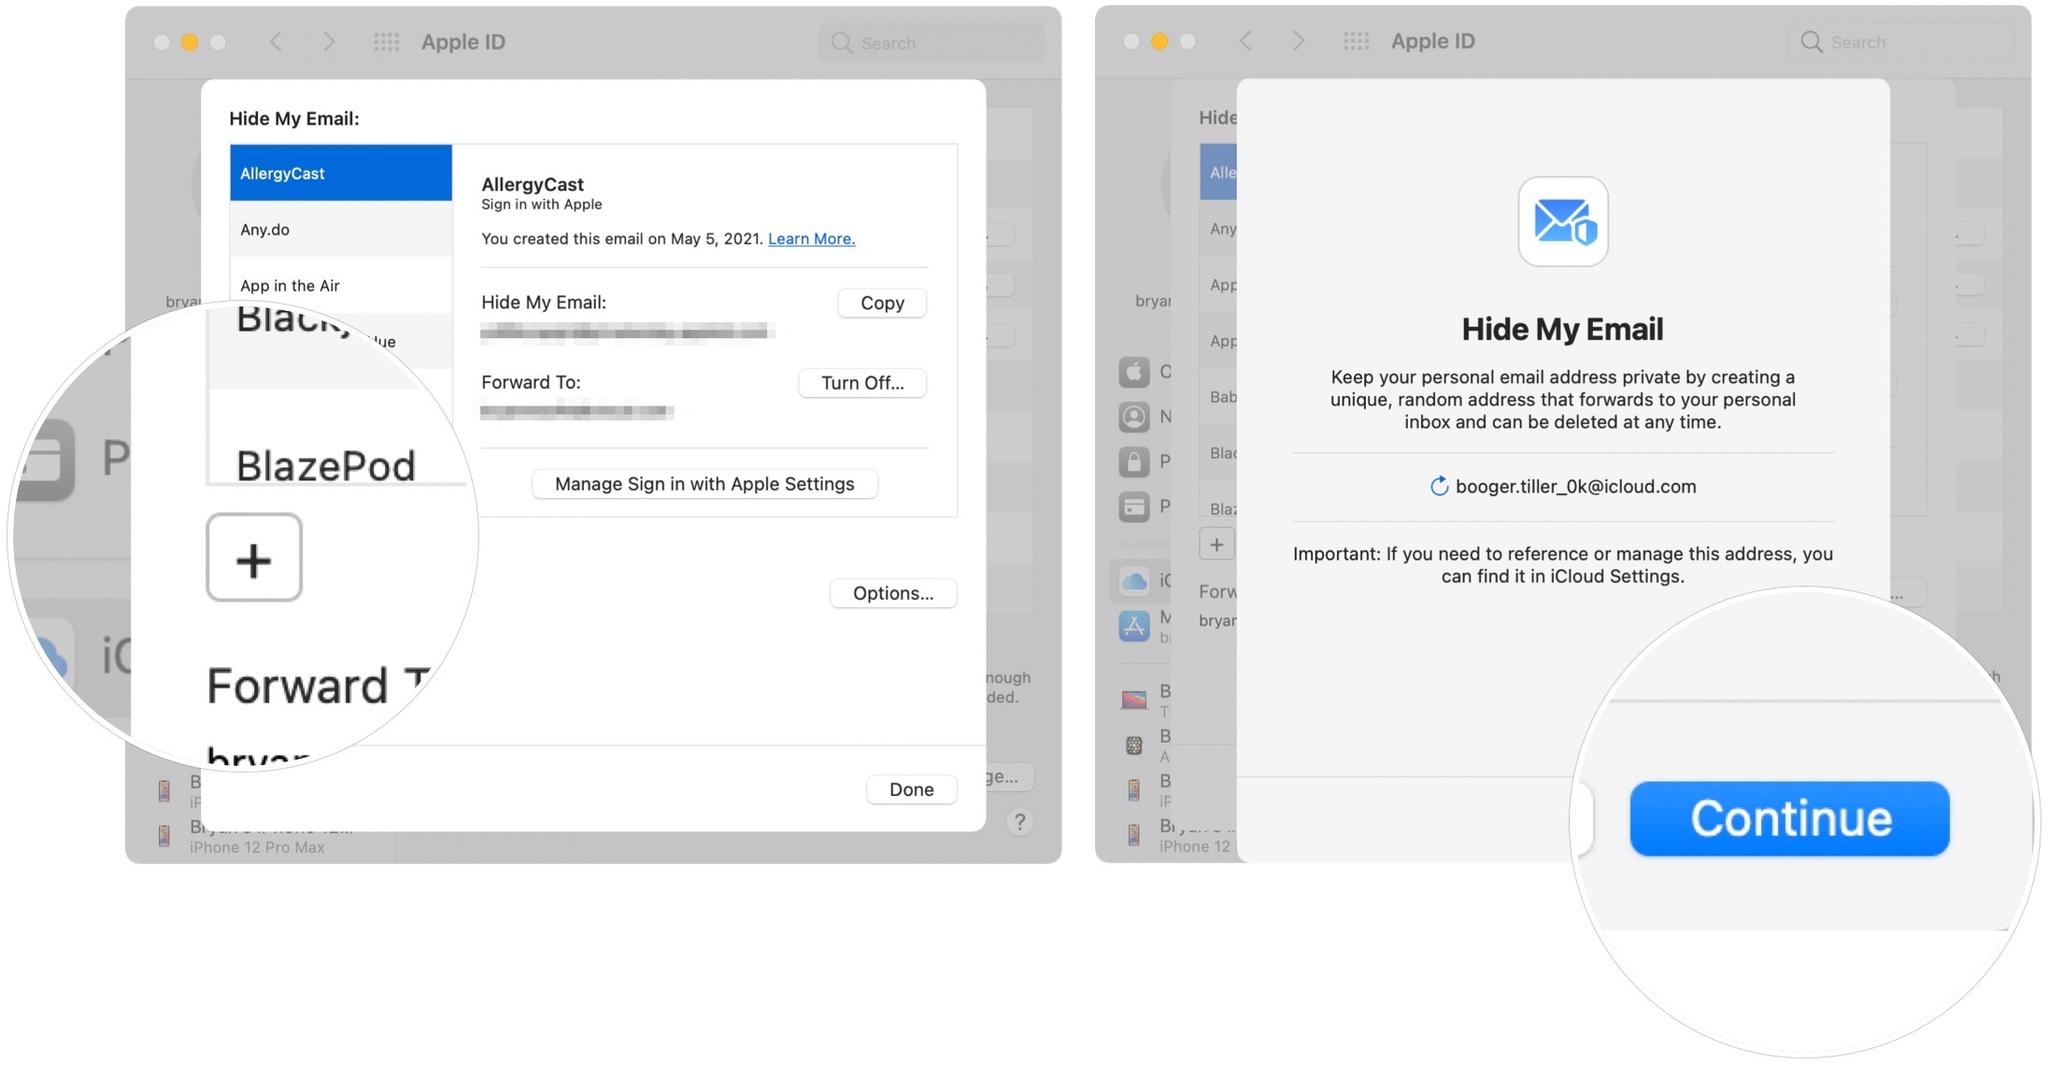
- Select the + to create a new random email address.
- Click Continue.
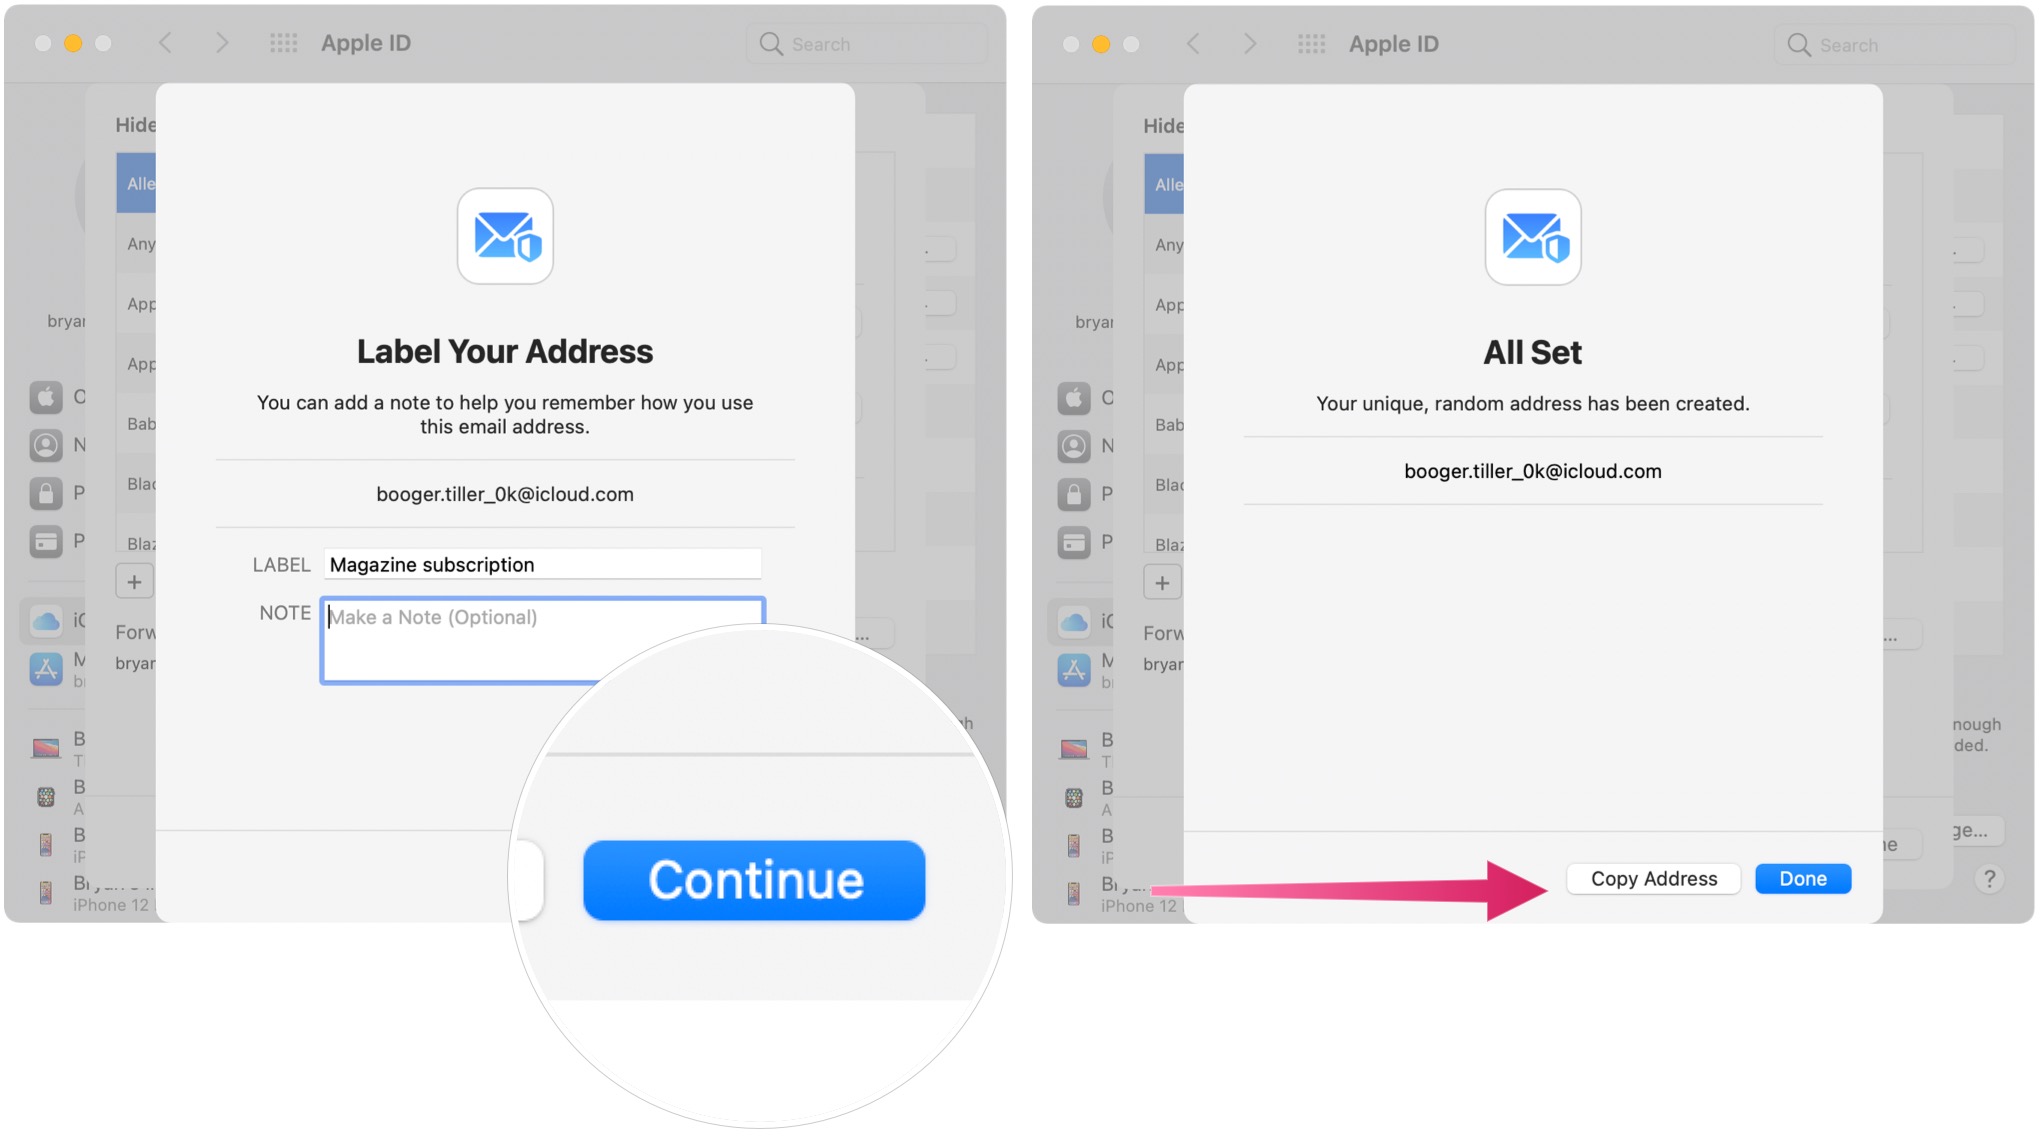
- Label the new email address and add a note, if necessary. Both are useful, so you know where you're using the random email.
- Click Continue.
- Choose Copy Address so you have it ready to go.
- Select Done.
That's it! Your new random email address is ready to go.
Using Hide My Email
Like any other email address, you can use this email across any Apple device, including iPhone, iPad, and Mac. If you haven't copied the email address or have forgotten it, you can follow these directions to retrieve it:
iMore offers spot-on advice and guidance from our team of experts, with decades of Apple device experience to lean on. Learn more with iMore!
- Choose System Preferences from the Mac Dock.
- Select Apple ID.
- Click iCloud.
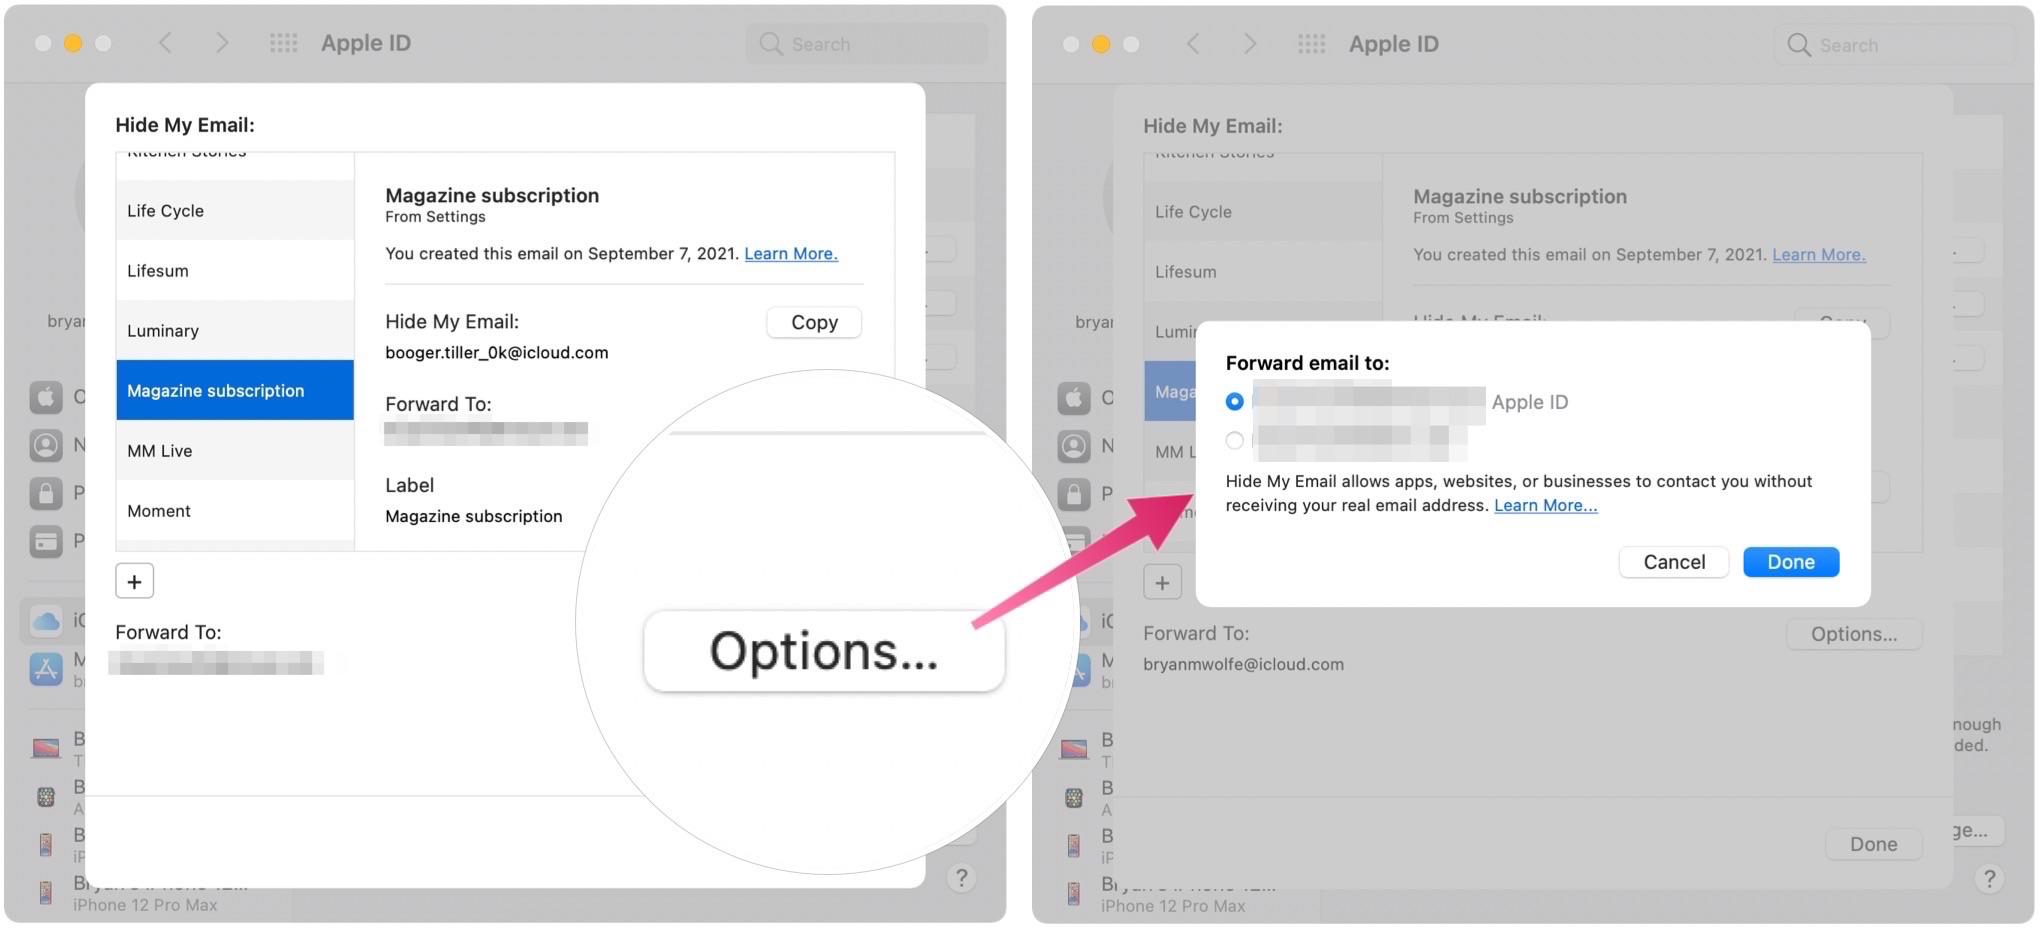
- Choose the Options... button to the right of Hide My Email.
- Choose the appropriate email under Hide My Email.
- Click Copy to copy the email for use elsewhere.
- Select Edit to edit the label you previously created.
- Choose Options to change the forwarding email, then select Done. You can only use an Apple-generated email.
Useful tool
As you can see, it's pretty easy to use the Hide My Email feature in macOS Monterey. Already a beneficial tool, it will be interesting to see how it develops in the coming years.

Bryan M. Wolfe has written about technology for over a decade on various websites, including TechRadar, AppAdvice, and many more. Before this, he worked in the technology field across different industries, including healthcare and education. He’s currently iMore’s lead on all things Mac and macOS, although he also loves covering iPhone, iPad, and Apple Watch. Bryan enjoys watching his favorite sports teams, traveling, and driving around his teenage daughter to her latest stage show, audition, or school event in his spare time. He also keeps busy walking his black and white cocker spaniel, Izzy, and trying new coffees and liquid grapes.
