How to use Touch ID on your iPhone or iPad
Make your iPhone or iPad your own by using Touch ID.
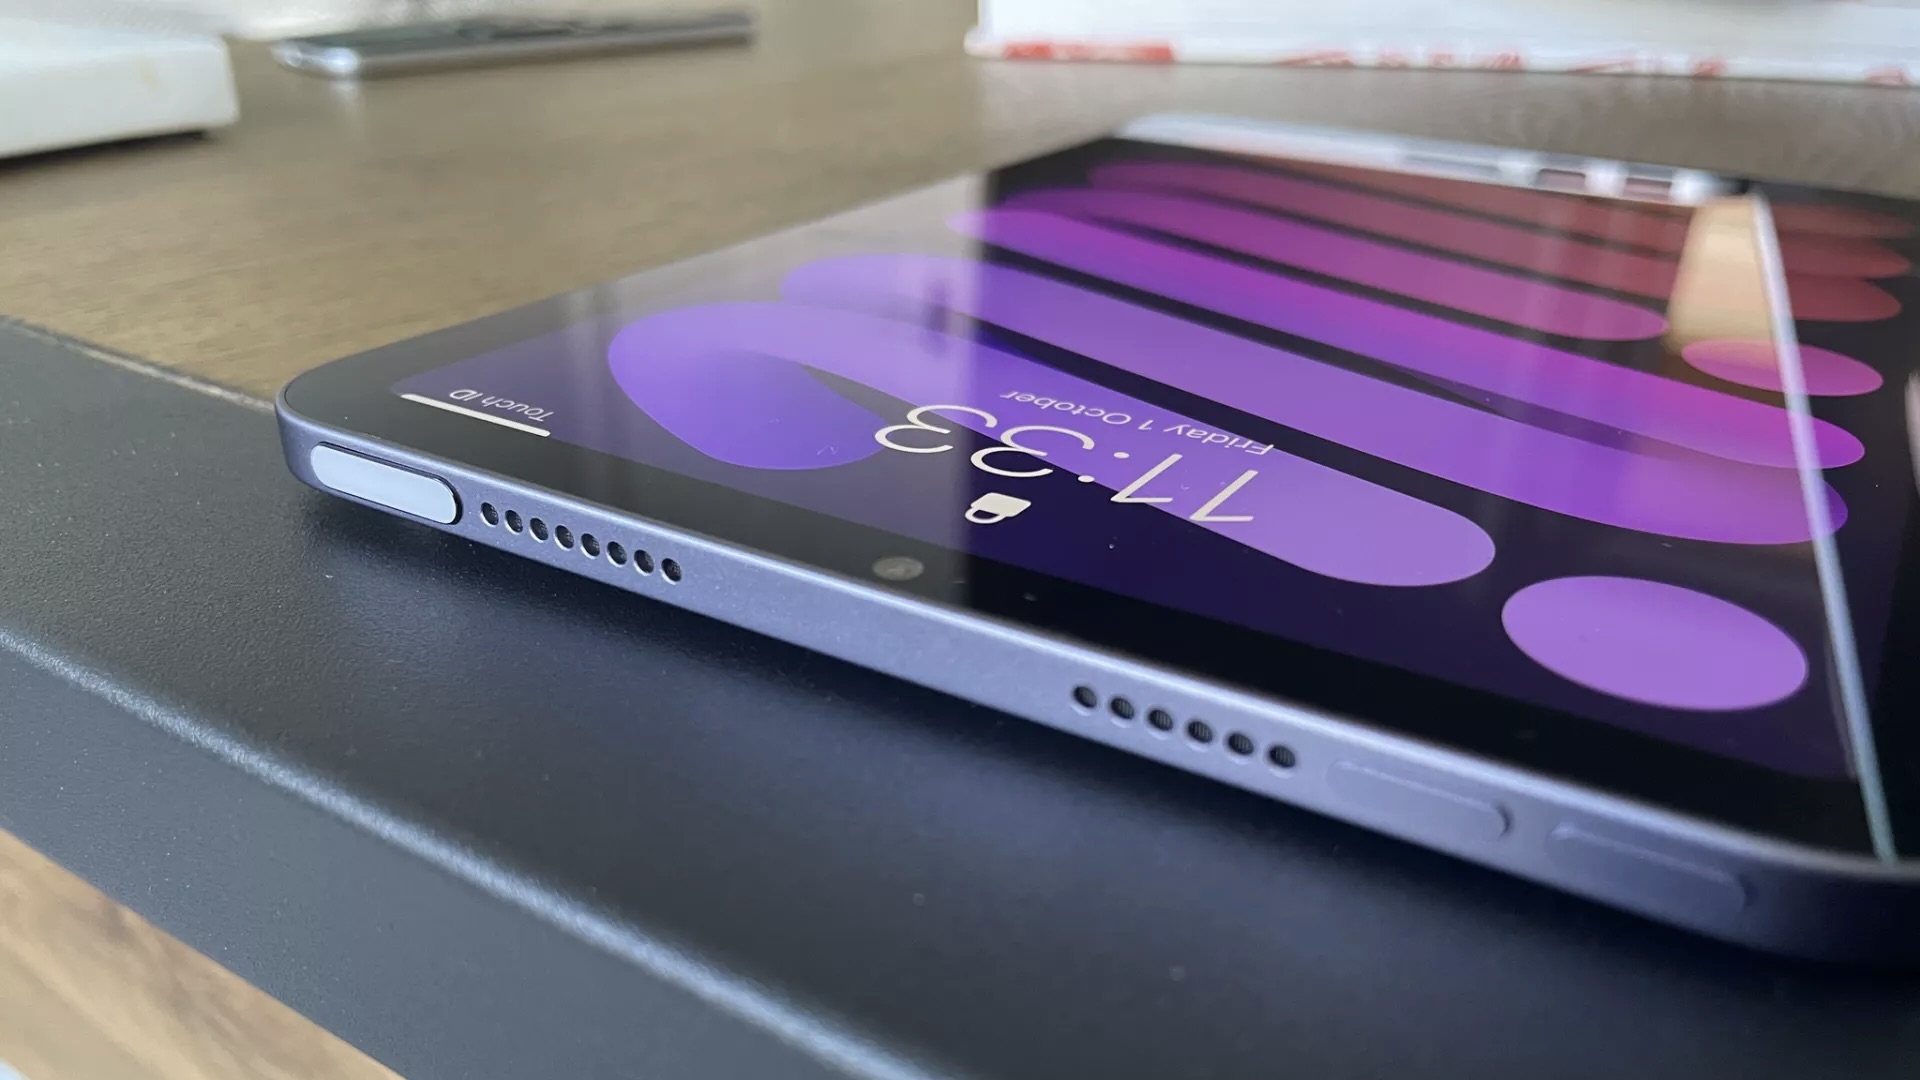
Many Apple devices now use Face ID for authentication purposes — but not all of them. There are still several of the best iPhones, iPads, and Macs that use Touch ID. Here's what you need to know about the authentication feature.
How to set up Touch ID on iPhone and iPad
You can register a fingerprint for Touch ID as part of the initial setup process on any new or restored iPhone or iPad. You can also set it up or add additional fingers at any time. The steps work on the best iPhone and best iPad models that support Touch ID.
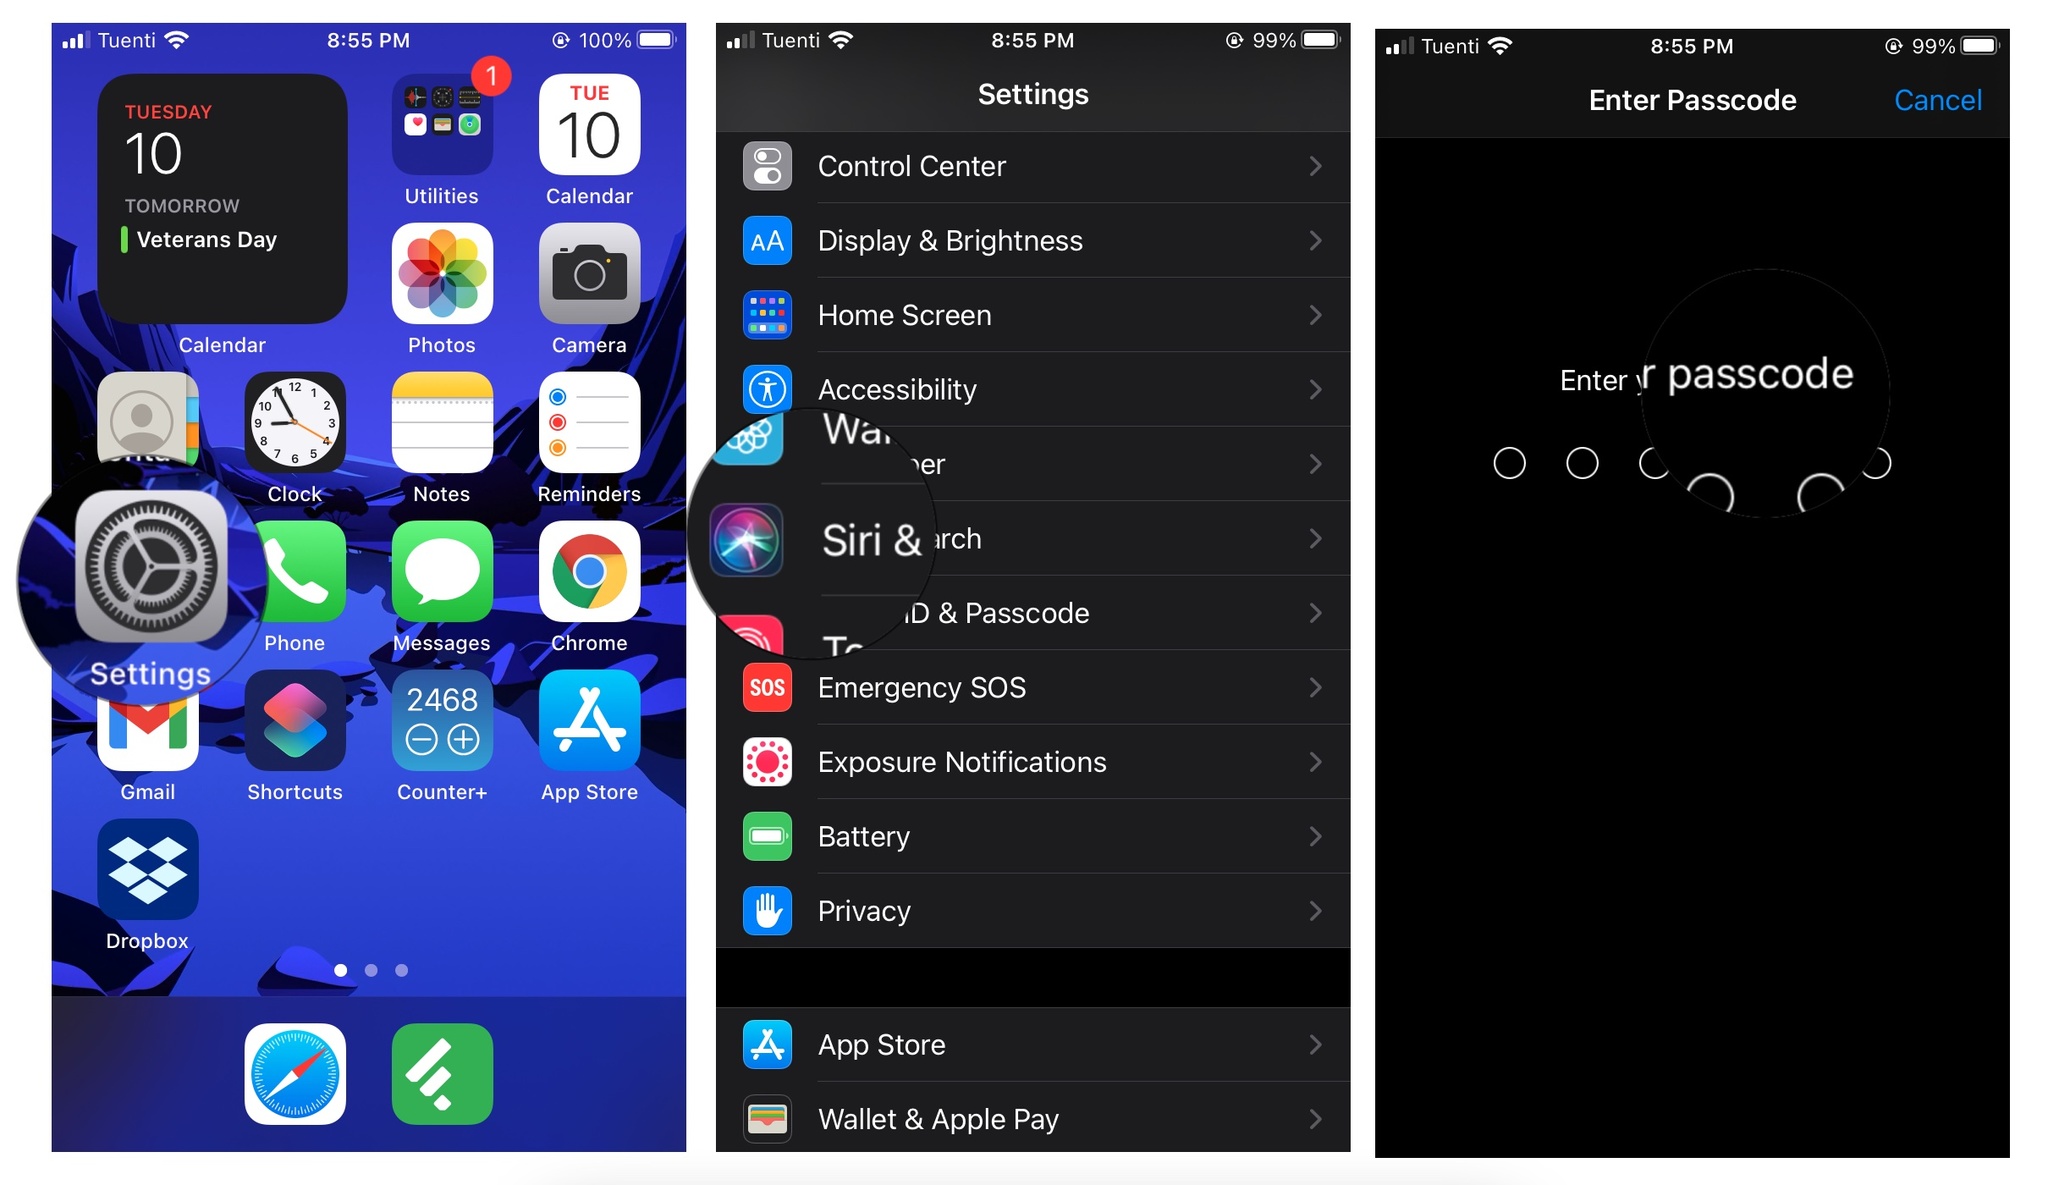
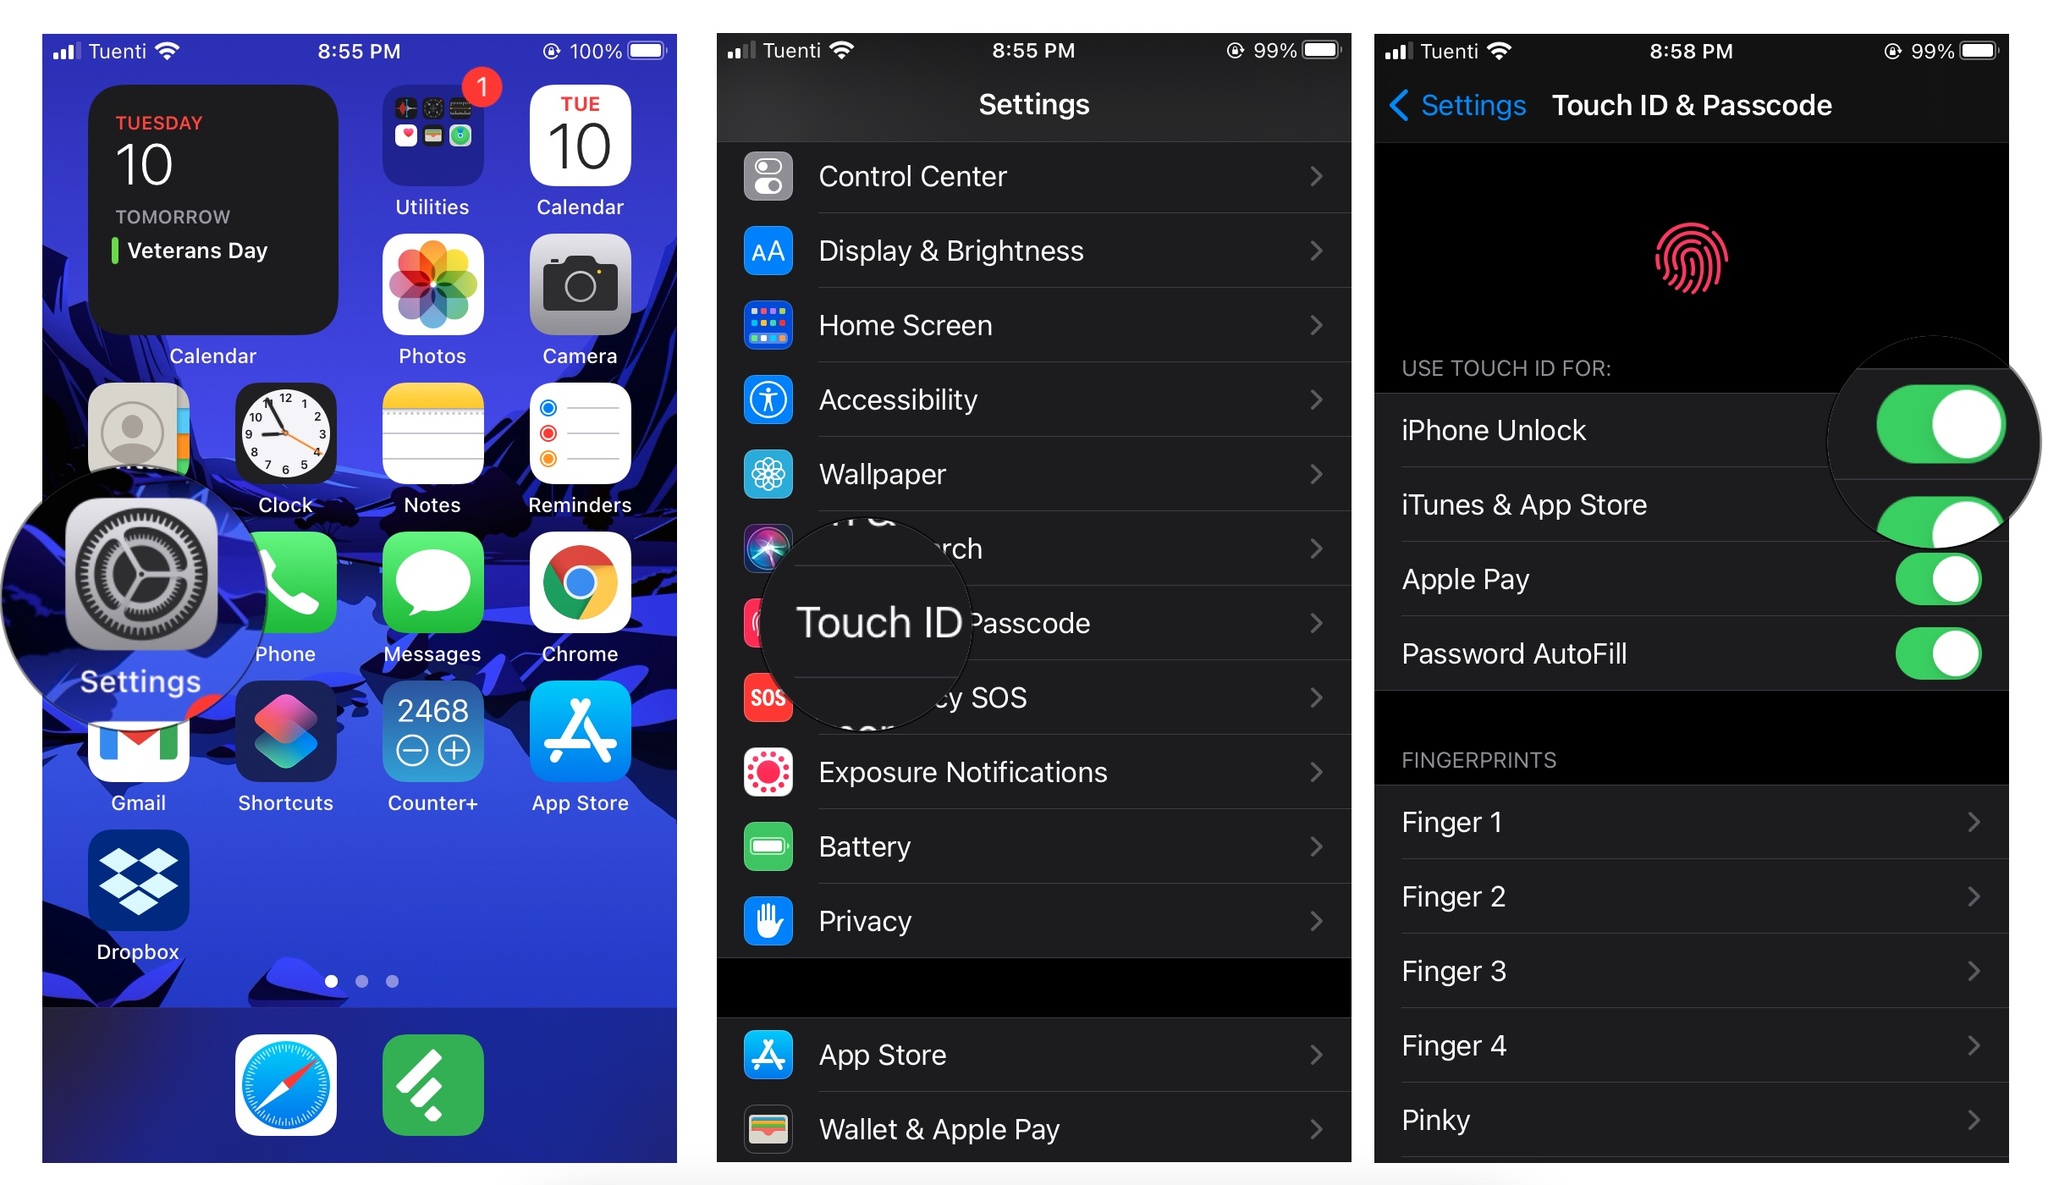
- Launch the Settings app from your Home screen.
- Tap on Touch ID & Passcode.
- Type in your passcode for authorization, if asked (Touch ID requires a passcode, so if you don't have one already, you'll be asked to create one).
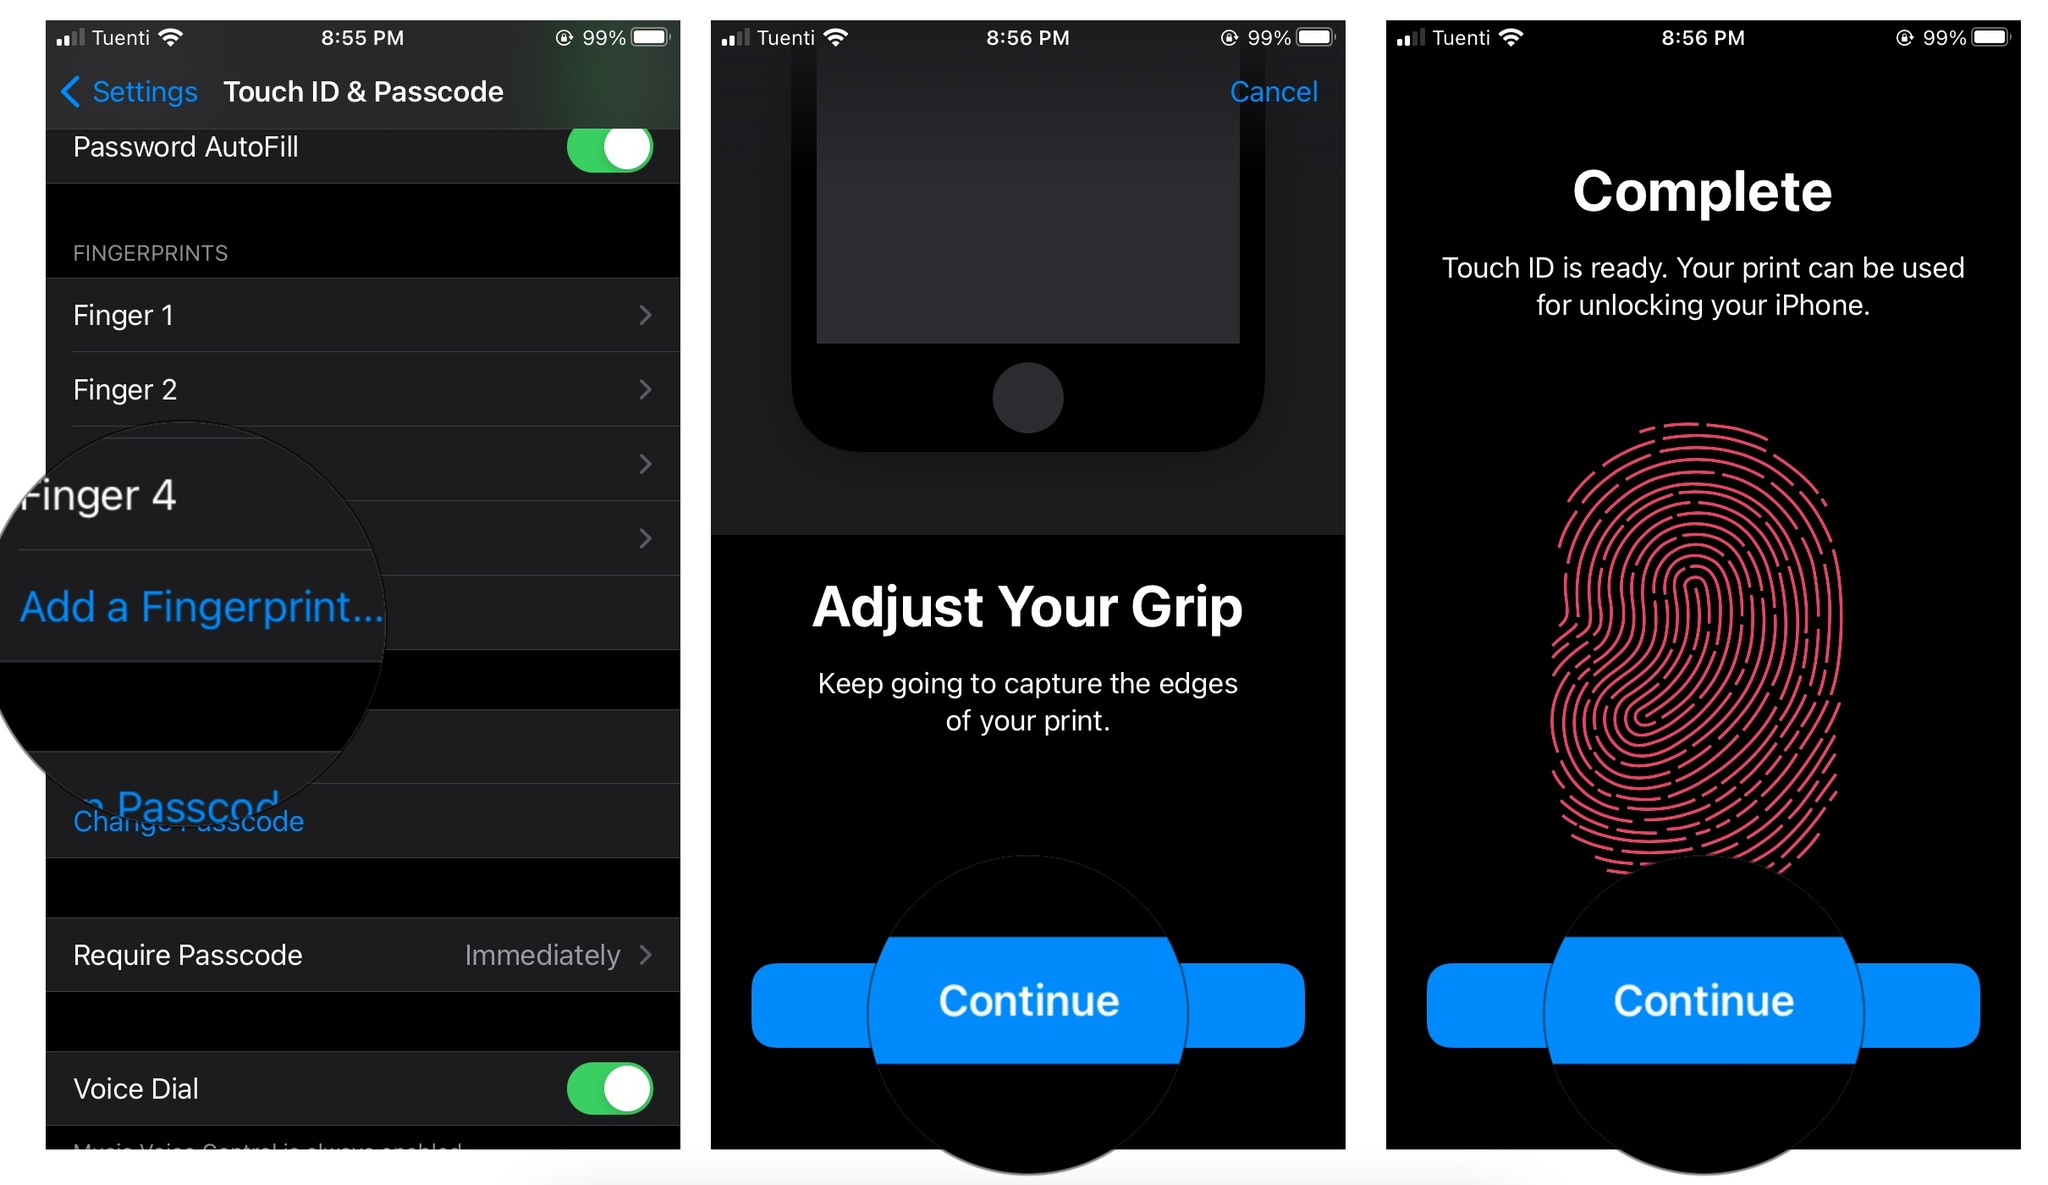
- Tap on the Add a Fingerprint button.
- Place the finger you want to register on the Home button and leave it there until you feel a buzz. If you're on the 2020 iPad Air, place your finger on the Power button.
- Lift your finger and place it back down. Repeat each time you feel a buzz.
- Tap continue when Touch ID alerts you that it has completed the first step and now requires peripheral data.
- Place the edges of the finger you want to register on the Home button or the Power button and leave it there until you feel a buzz.
- Lift your finger and place it back down. Repeat with a different edge until you've registered the entire surface of your finger.
- Tap Continue to finish.
Repeat for every other finger you want to add, up to five total. You can register any combination of your and other people's fingerprints, including family or staff. You can even temporarily register a travel-mate just in case of emergencies, without having to give them your passcode or password.
How to identify a Touch ID fingerprint
If you registered a fingerprint with Touch ID but don't remember which one is which — i.e., is Fingerprint 1 your right thumb or left index finger? — you can check and find out. That's how you can make sure you rename and delete the right ones in the future.
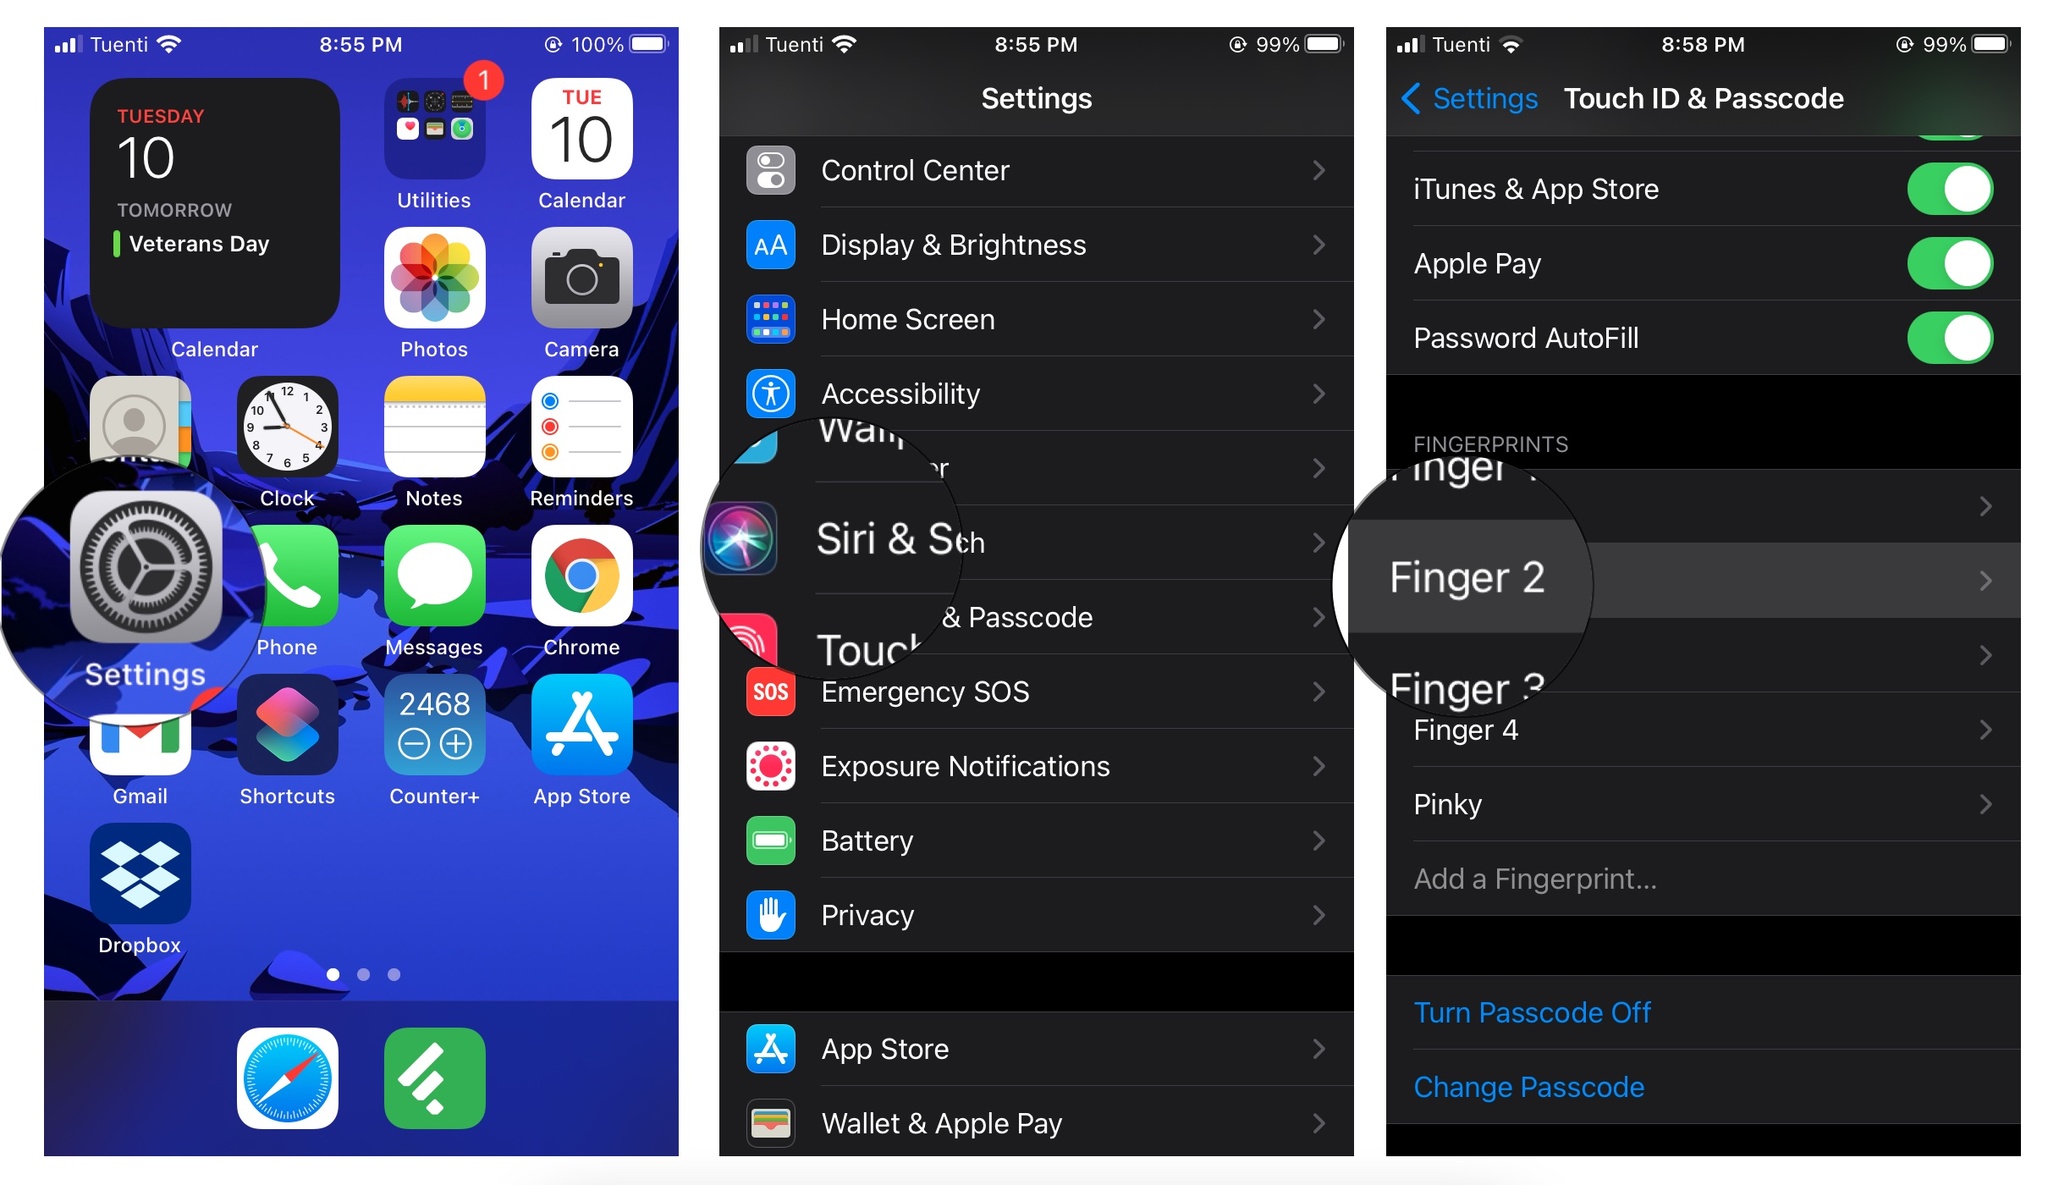
- Launch the Settings app.
- Tap on Touch ID & Passcode.
- Type in your passcode when asked.
- Scroll down to the Fingerprints section.
- Place your registered fingerprint on the Home button or the Power button.
- Look for the label that changes color from white to gray.
How to label a Touch ID fingerprint
Rather than identifying your fingerprints each time you need them for something, you can label them to make it simpler and faster to find the one you're looking for (and remember which and whose fingerprints are registered).
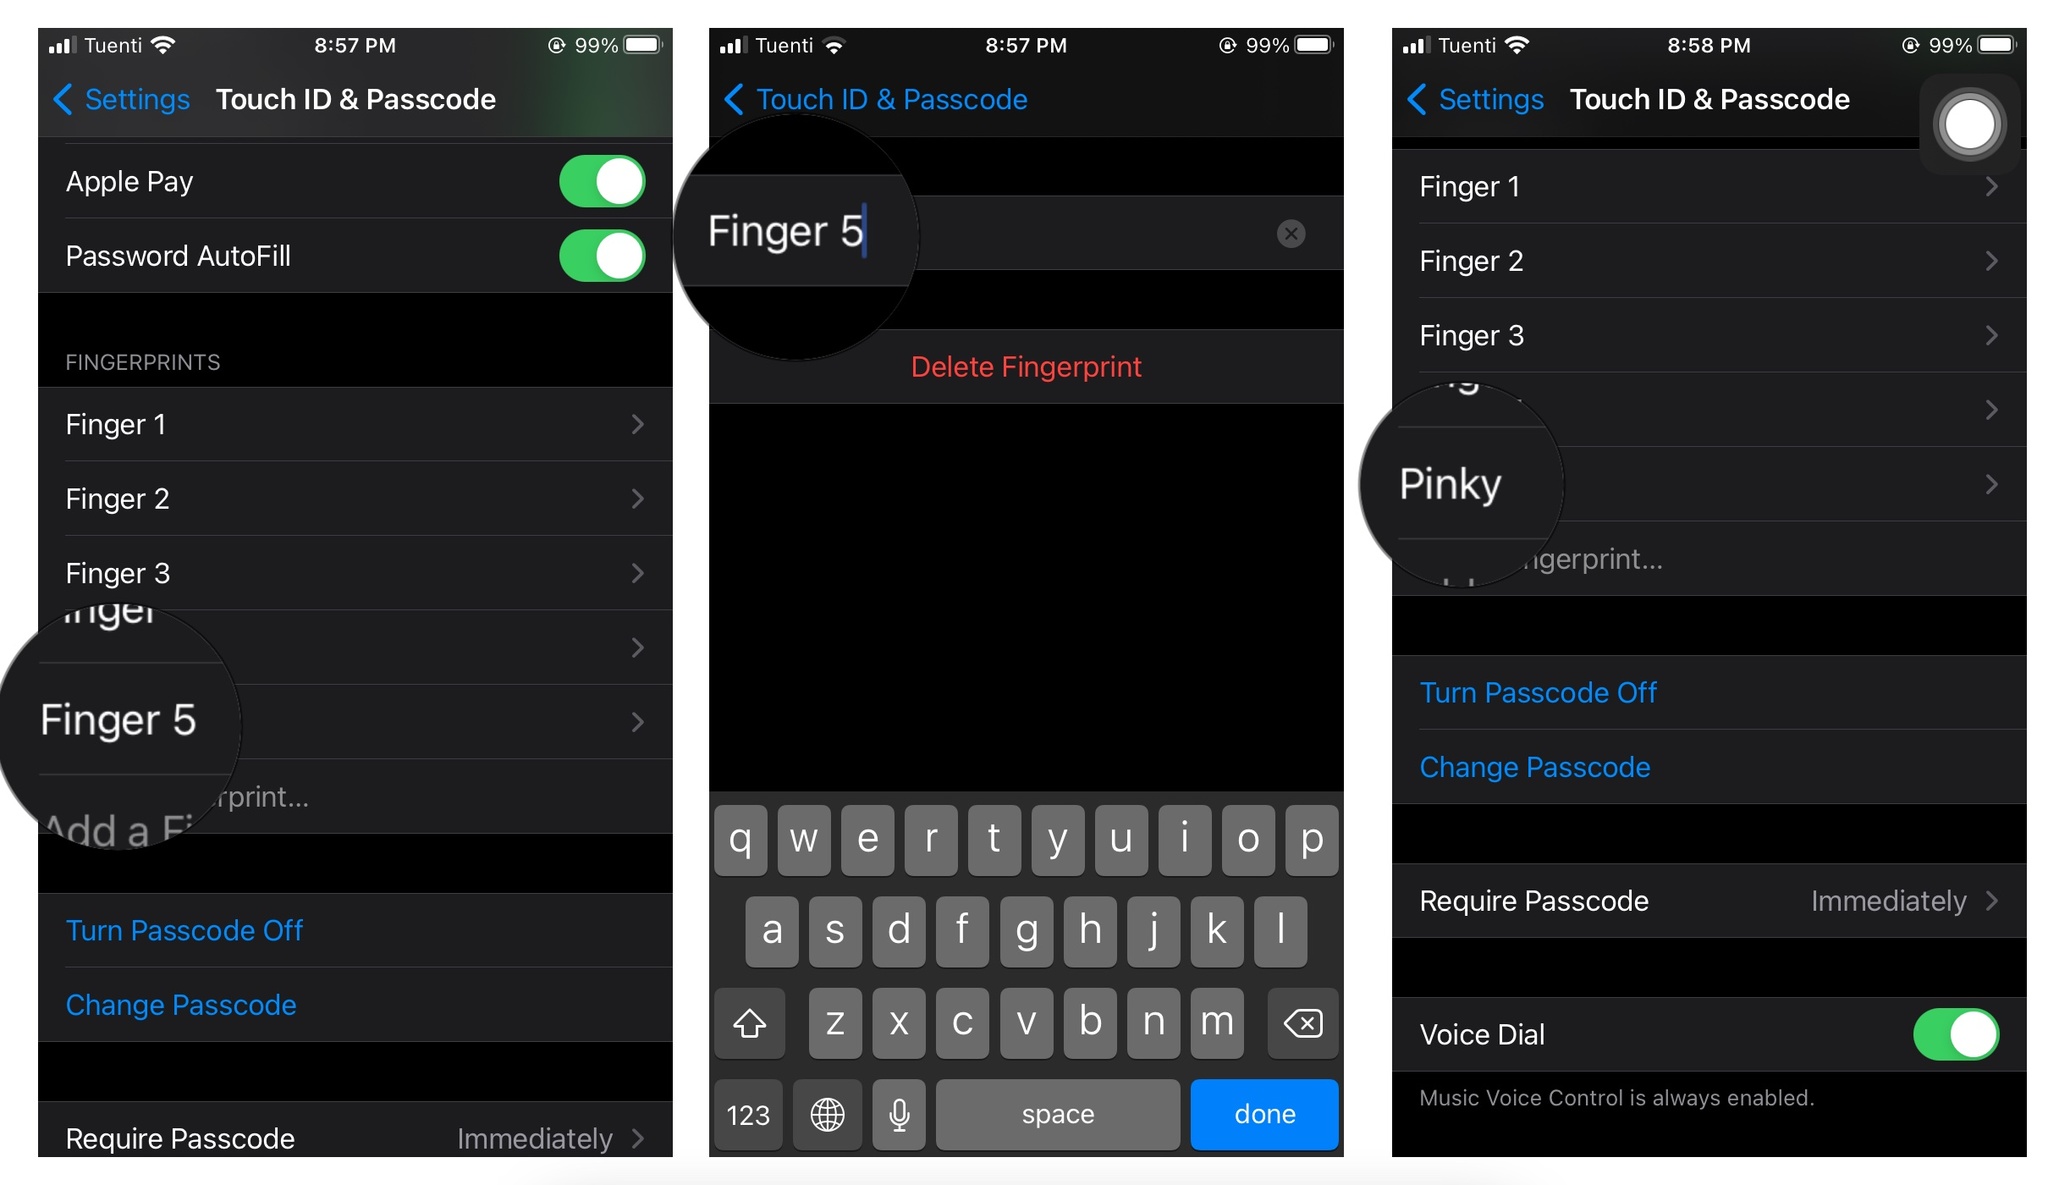
- Launch the Settings app.
- Tap on Touch ID & Passcode.
- Type in your passcode when asked.
- Tap on the Finger you want to rename.
- Type in a new, more recognizable name for your fingerprint (i.e., right thumb).
- Tap on the Touch ID & Passcode on the top right corner to go back.
Repeat steps 4-6 until all your fingerprints are labeled.
How to turn off Touch ID for the Lock screen, Apple Pay, or the iTunes and App Stores
Touch ID is meant as a convenience. If you prefer more security on your Lock screen, like a strong alphanumeric password, you can turn Touch ID off.
iMore offers spot-on advice and guidance from our team of experts, with decades of Apple device experience to lean on. Learn more with iMore!
- Launch the Settings app from your Home screen.
- Tap on Touch ID & Passcode.
- Enter your passcode when prompted.
- Switch iPhone/iPad Unlock, iTunes and App Store, Apple Pay, or Password AutoFill to Off.
How to delete a Touch ID fingerprint
If you have given someone fingerprint access to your device for an emergency or another reason and you don't need that person to have access anymore, it's a good idea to delete their fingerprint. Also, if a fingerprint becomes glitchy, you can remove it and redo it. That's because deleting Touch ID fingerprints is even easier than adding them!
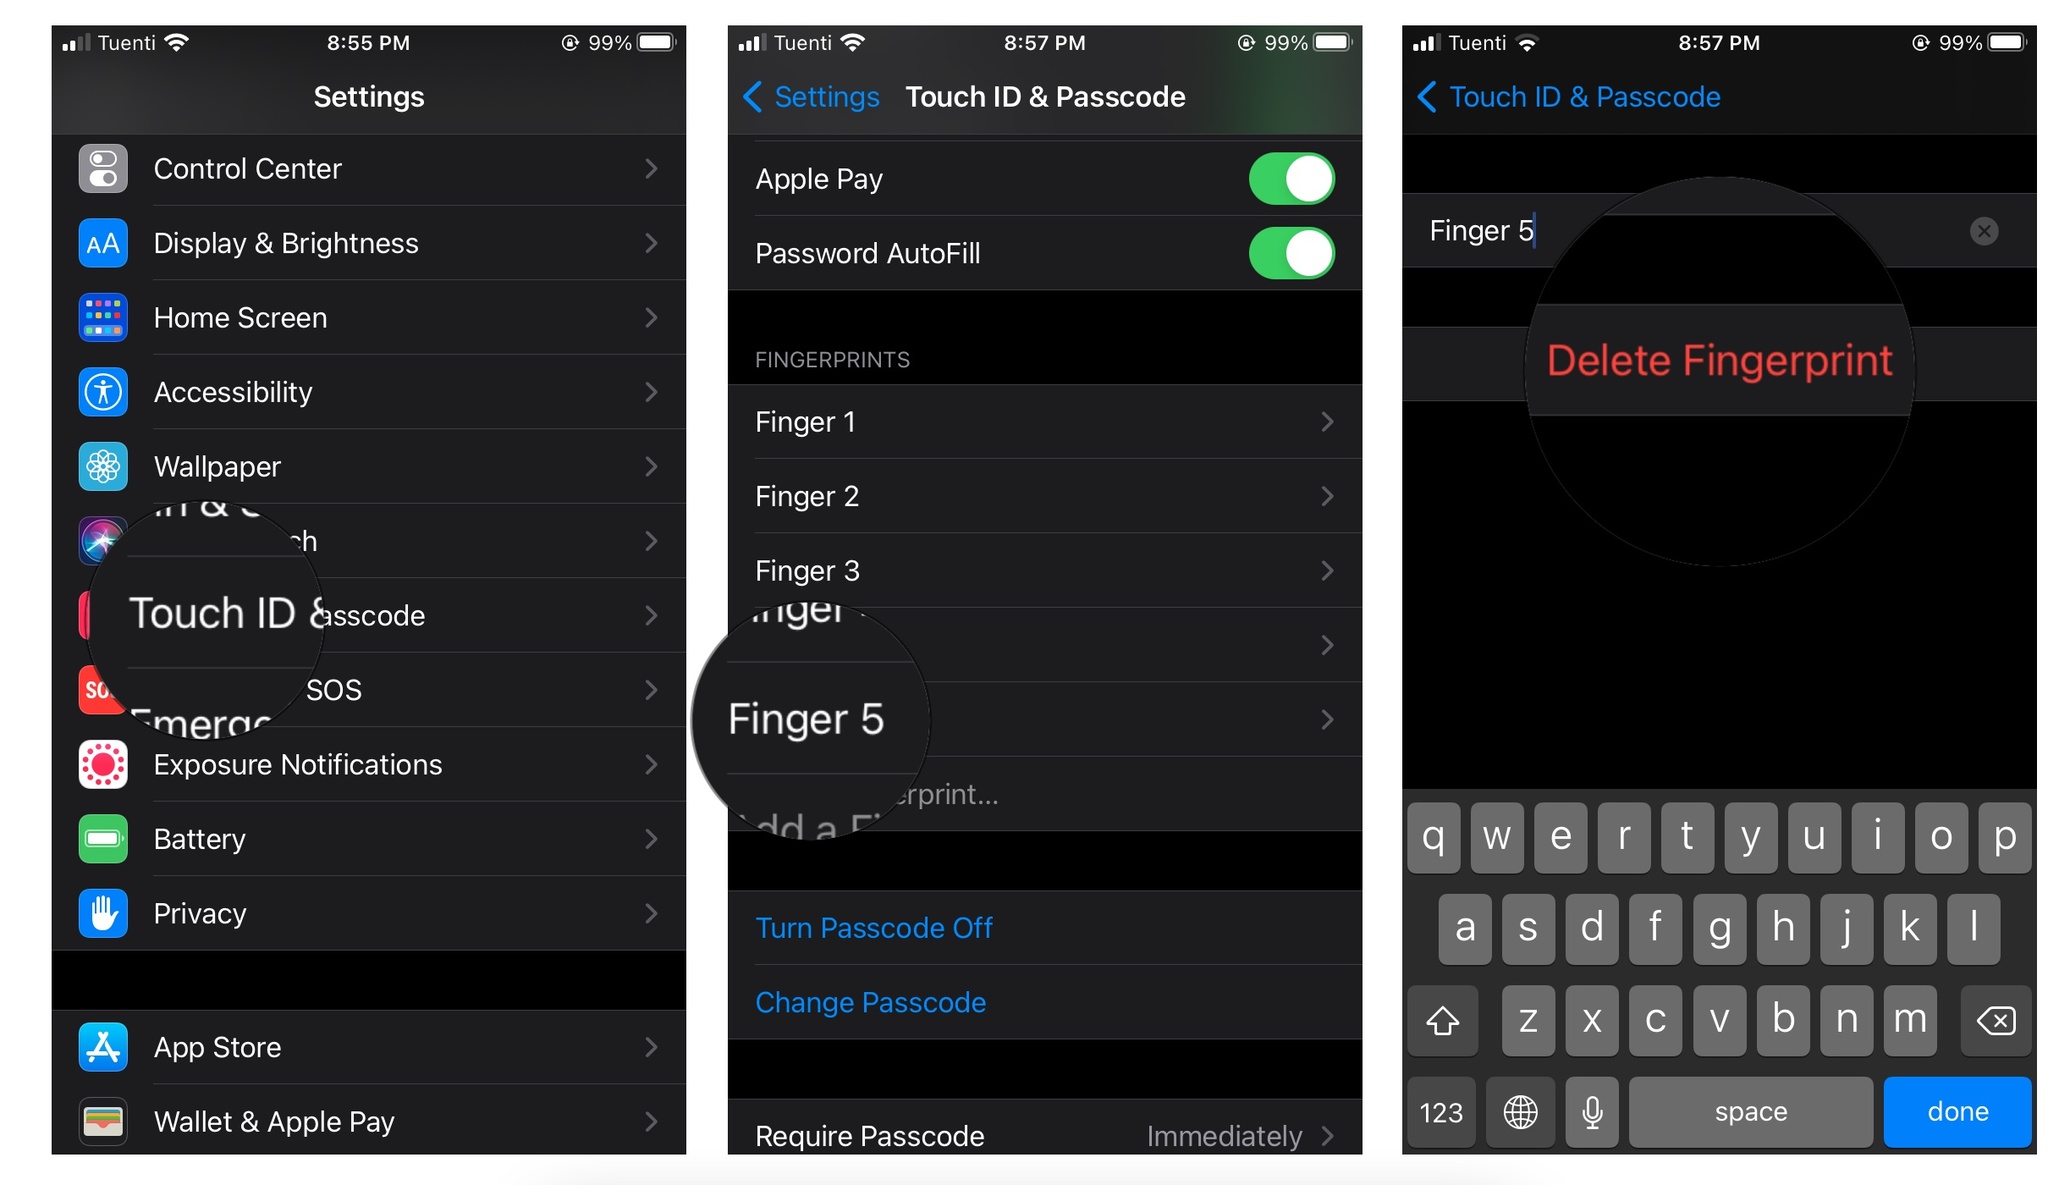
- Launch the Settings app on your Touch ID-capable device.
- Tap on Touch ID & Passcode.
- Type in your passcode when prompted.
- Tap on the fingerprint you want to delete.
- Tap on Delete Fingerprint.
- Tap on the Touch ID & Passcode on the top right corner to go back.
Repeat steps 4-6 for each fingerprint you want to delete.
Learn how to use Touch ID on Macbook
If you want to learn more about Touch ID on different devices, check out how to use Touch ID on your Macbook Air or Macbook Pro.
It's still here
Touch ID remains an authentication option for select iPhone and iPad users, such as those using the latest iPad, iPad mini, iPad Air and third-generation iPhone SE. Touch ID is also used on the latest Macbook Air, MacBook Pro, and 24-inch iMac. It's simple to use and secure. To get started, use the steps above.
Touch ID isn't working for you?
Our troubleshooting guide will help you if you're having any issues with Touch ID not working as expected. We've got the fix!

Bryan M. Wolfe has written about technology for over a decade on various websites, including TechRadar, AppAdvice, and many more. Before this, he worked in the technology field across different industries, including healthcare and education. He’s currently iMore’s lead on all things Mac and macOS, although he also loves covering iPhone, iPad, and Apple Watch. Bryan enjoys watching his favorite sports teams, traveling, and driving around his teenage daughter to her latest stage show, audition, or school event in his spare time. He also keeps busy walking his black and white cocker spaniel, Izzy, and trying new coffees and liquid grapes.
- Karen S FreemanContributor
