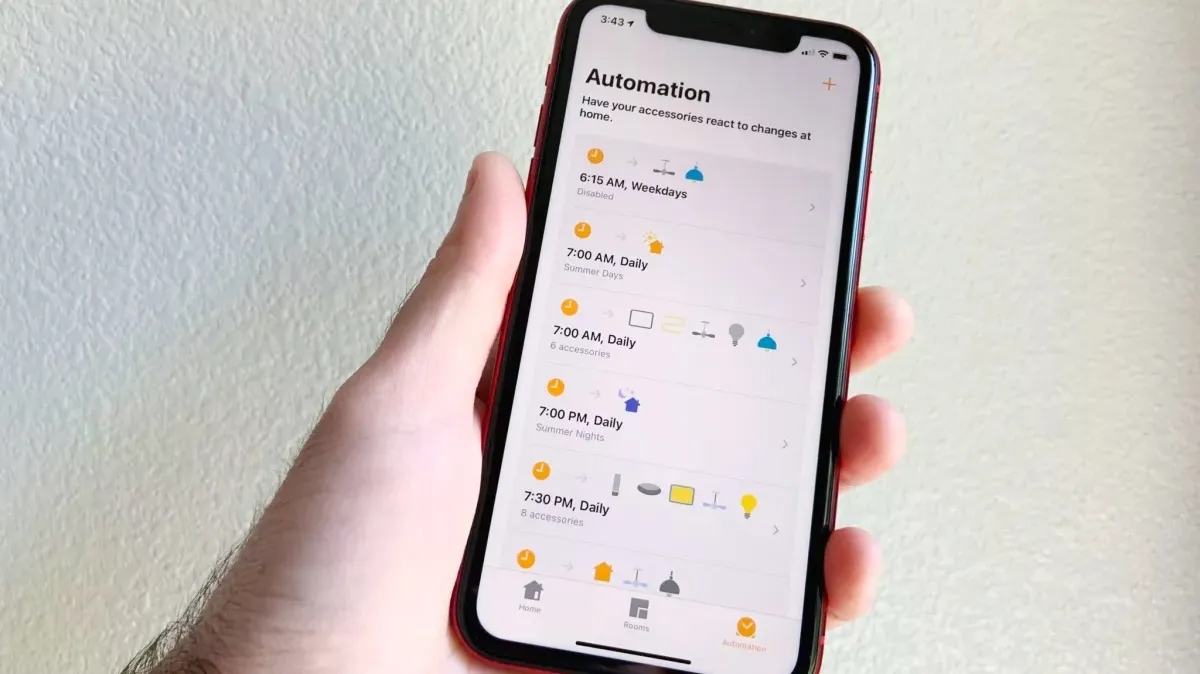
Source: Christopher Close / iMore
Controlling your HomeKit accessories via the Home app or your voice through Siri is definitely convenient, but to make your home truly smart, you need to know how to create automations. Through the Home app, you can set your HomeKit lights to turn on automatically when you open the door, at a certain time of day, or even when the HomeKit smoke detector alarm goes off.
It may sound a little daunting at first, but don't worry, they are actually really easy to set up. Here's how to create automations in the Home app.
How to create location automations in the Home app on iOS and iPadOS
Location-based automations utilize GPS and geofencing on your iPhone to determine when to start a series of events. Typically these automations are used for adjusting settings on a HomeKit thermostat, or locking a HomeKit door lock when you head out to work, so you never have to worry about the state of the home when you leave.
Location-based automations are not just limited to your iPhone though, they can be set to work with others that you have invited to your home. You can also use additional options to run automations only when the first person arrives to the home for the day, plus, you can even choose an entirely different location other than your home.
- Launch the Home App.
- Tap on Automation.
Tap the Add Button in the top right corner of the screen (looks like a plus sign).
Source: iMore
- Tap on either People Arrive or People Leave depending on your desired automation.
- Select When the automation should occur with a tap.
- Your options will vary depending on if you selected People Arrive or People Leave when creating the automation.
- Tap the i button to select whose location will be taken into consideration for the automation.
Tap Location to set a desired location such as Home or a work address.
Source: iMore
- Tap Time to set what times the automation will be active.
- Tap Next.
Choose which Accessories or Scenes you'd like to control with this automation with a tap.
Source: iMore
- Tap Next.
- Tap and hold on an Accessory to change the target state, such as brightness or off/on, then tap the X button.
- Tap Done.
- Tap Turn Off to set a time for the accessory to turn back off automatically if desired.
How to create time automations in the Home app on iOS and iPadOS
Time-based automations are a fantastic way to control the home automatically throughout the course of the day. The Home app makes it easy to turn the HomeKit light bulbs outside at preset times like sunset or at specific times like 8:15 P.M. daily. Time-based automations are not just about lights though, they work with HomeKit smart plugs, TVs, air conditioners, AirPlay 2 speakers, and even sprinkler controllers.
Combined with location and people options, your automations can be set to only run when you are actually at home, potentially saving you a little dough. The same also works in reverse, where you can set your lights to turn on at random times when you are not around to give the appearance that someone is home.
- Launch the Home App.
- Tap on Automation.
Tap the Add Button in the top right corner of the screen (looks like a plus sign).
Source: iMore
- Choose A Time of Day Occurs with a tap.
- Tap on a Preset Time like sunrise, or dial in a Specific Time.
Select the Specific Days that you want the automation to run by tapping on a day of the week under the repeat section.
Source: iMore
- Tap People to have the automation run when specific people are home or away.
- Tap Next.
Choose which Accessories or Scenes you'd like to control with this automation.
Source: iMore
- Tap Next.
- Tap and hold on an Accessory to change the target state, such as brightness or off/on, then tap the X button.
- Tap Done.
- Tap Turn Off to set a time for the accessory to turn back off automatically if desired.
How to create accessory automations in the Home app on iOS and iPadOS
Accessory-based automations are set into motion when a particular device, like a light, experiences a change. For example, you can create an automation that turns off a HomeKit ceiling fan automatically in the living room when lights are turned off.
The best part though is that these automations will run even if an accessory is changed via a physical switch on the wall, they are not just limited to times when the Home app or Siri is used.
- Launch the Home App.
- Tap on Automation.
Tap the Add Button in the top right corner of the screen (looks like a plus sign).
Source: iMore
- Tap An Accessory is Controlled.
- Select which Accessories will start the automation by tapping on each one.
Tap Next.
Source: iMore
- Choose the desired Accessory State for the automation, like Turn On, with a tap.
- Tap Time and set the specific times that you want the automation to be active.
Tap People to set location-based conditions for when the automation will run.
Source: iMore
- Tap Next.
- Tap on a Scene or Accessory that you wish to control when the automation runs.
Tap Next.
Source: iMore
- Tap and hold on an Accessory to change the target state, such as brightness or off/on.
- Tap the X button when you have set your desired state.
- Tap Done.
- Tap Turn Off to set a time for the accessory to turn back off automatically if desired.
How to create sensor automations in the Home app on iOS and iPadOS
Sensor-based automations, like accessory automations, come into play when a change in the environment occurs. Automations can be created with HomeKit devices like motion sensors, air quality sensors, contact sensors, smoke/co detectors, and more. This means that you can have a light turn red when the air quality in the home takes a dive, or having a speaker play an alarm sound when a window is opened.
Unfortunately, temperature and humidity sensors automations are not available through the Home app as of yet, but if you don't mind taking a deeper dive using a third-party HomeKit app, there are ways to use them too.
- Launch the Home App.
- Tap on Automation.
Tap the Add Button in the top right corner of the screen (looks like a plus sign).
Source: iMore
- Tap A Sensor Detects Something.
- Select which Accessories will start the automation by tapping on each one.
Tap Next.
Source: iMore
- Choose the desired Accessory State for the automation, like Turn On or Opens, with a tap.
- Tap Time and set the specific times that you want the automation to be active.
Tap People to set location-based conditions for when the automation will run.
Source: iMore
- Tap Next.
- Tap on a Scene or Accessory that you wish to control when the automation runs.
Tap Next.
Source: iMore
- Tap and hold on an Accessory to change the target state, such as brightness or off/on.
- Tap the X button when you have set your desired state.
- Tap Done.
- Tap Turn Off to set a time for the accessory to turn back off automatically if desired.
How to create location automations in the Home app on iOS 14 and iPadOS 14
Apple occasionally offers updates to iOS, iPadOS, watchOS, tvOS, and macOS as closed developer previews or public betas. While the betas contain new features, they also contain pre-release bugs that can prevent the normal use of your iPhone, iPad, Apple Watch, Apple TV, or Mac, and are not intended for everyday use on a primary device. That's why we strongly recommend staying away from developer previews unless you need them for software development, and using the public betas with caution. If you depend on your devices, wait for the final release.
Location-based automations utilize GPS and geofencing on your iPhone to determine when to start a series of events. Typically these automations are used for adjusting settings on a HomeKit thermostat, or locking a HomeKit door lock when you head out to work, so you never have to worry about the state of the home when you leave.
Location-based automations are not just limited to your iPhone though, they can be set to work with others that you have invited to your home. You can also use additional options to run automations only when the first person arrives to the home for the day, plus, you can even choose an entirely different location other than your home.
- Launch the Home App.
- Tap on Automation.
Tap the Add Button in the top right corner of the screen (looks like a plus sign).
Source: iMore
- Tap on either People Arrive or People Leave depending on your desired automation.
- Select When the automation should occur with a tap.
- Your options will vary depending on if you selected People Arrive or People Leave when creating the automation.
- Tap the i button to select whose location will be taken into consideration for the automation.
Tap Location to set a desired location such as Home or a work address.
Source: iMore
- Tap Time to set what times the automation will be active.
- Tap Next.
Choose which Accessories or Scenes you'd like to control with this automation with a tap.
Source: iMore
- Tap Next.
- Tap and hold on an Accessory to change the target state, such as brightness or off/on, then tap the X button.
- Tap Done.
- Tap Turn Off to set a time for the accessory to turn back off automatically if desired.
How to create time automations in the Home app on iOS 14 and iPadOS 14
Apple occasionally offers updates to iOS, iPadOS, watchOS, tvOS, and macOS as closed developer previews or public betas. While the betas contain new features, they also contain pre-release bugs that can prevent the normal use of your iPhone, iPad, Apple Watch, Apple TV, or Mac, and are not intended for everyday use on a primary device. That's why we strongly recommend staying away from developer previews unless you need them for software development, and using the public betas with caution. If you depend on your devices, wait for the final release.
Time-based automations are a fantastic way to control the home automatically throughout the course of the day. The Home app makes it easy to turn the HomeKit light bulbs outside at preset times like sunset or at specific times like 8:15 P.M. daily. Time-based automations are not just about lights though, they work with HomeKit smart plugs, TVs, air conditioners, AirPlay 2 speakers, and even sprinkler controllers.
Combined with location and people options, your automations can be set to only run when you are actually at home, potentially saving you a little dough. The same also works in reverse, where you can set your lights to turn on at random times when you are not around to give the appearance that someone is home.
- Launch the Home App.
- Tap on Automation.
Tap the Add Button in the top right corner of the screen (looks like a plus sign).
Source: iMore
- Choose A Time of Day Occurs with a tap.
- Tap on a Preset Time like sunrise, or dial in a Specific Time.
Select the Specific Days that you want the automation to run by tapping on a day of the week under the repeat section.
Source: iMore
- Tap People to have the automation run when specific people are home or away.
- Tap Next.
Choose which Accessories or Scenes you'd like to control with this automation.
Source: iMore
- Tap Next.
- Tap and hold on an Accessory to change the target state, such as brightness or off/on, then tap the X button.
- Tap Done.
- Tap Turn Off to set a time for the accessory to turn back off automatically if desired.
How to create accessory automations in the Home app on iOS 14 and iPadOS 14
Apple occasionally offers updates to iOS, iPadOS, watchOS, tvOS, and macOS as closed developer previews or public betas. While the betas contain new features, they also contain pre-release bugs that can prevent the normal use of your iPhone, iPad, Apple Watch, Apple TV, or Mac, and are not intended for everyday use on a primary device. That's why we strongly recommend staying away from developer previews unless you need them for software development, and using the public betas with caution. If you depend on your devices, wait for the final release.
Accessory-based automations are set into motion when a particular device, like a light, experiences a change. For example, you can create an automation that turns off a HomeKit ceiling fan automatically in the living room when lights are turned off.
The best part though is that these automations will run even if an accessory is changed via a physical switch on the wall, they are not just limited to times when the Home app or Siri is used.
- Launch the Home App.
- Tap on Automation.
Tap the Add Button in the top right corner of the screen (looks like a plus sign).
Source: iMore
- Tap An Accessory is Controlled.
- Select which Accessories will start the automation by tapping on each one.
Tap Next.
Source: iMore
- Choose the desired Accessory State for the automation, like Turn On, with a tap.
- Tap Time and set the specific times that you want the automation to be active.
Tap People to set location-based conditions for when the automation will run.
Source: iMore
- Tap Next.
- Tap on a Scene or Accessory that you wish to control when the automation runs.
Tap Next.
Source: iMore
- Tap and hold on an Accessory to change the target state, such as brightness or off/on.
- Tap the X button when you have set your desired state.
- Tap Done.
- Tap Turn Off to set a time for the accessory to turn back off automatically if desired.
How to create sensor automations in the Home app on iOS 14 and iPadOS 14
Apple occasionally offers updates to iOS, iPadOS, watchOS, tvOS, and macOS as closed developer previews or public betas. While the betas contain new features, they also contain pre-release bugs that can prevent the normal use of your iPhone, iPad, Apple Watch, Apple TV, or Mac, and are not intended for everyday use on a primary device. That's why we strongly recommend staying away from developer previews unless you need them for software development, and using the public betas with caution. If you depend on your devices, wait for the final release.
Sensor-based automations, like accessory automations, come into play when a change in the environment occurs. Automations can be created with HomeKit devices like motion sensors, air quality sensors, contact sensors, smoke/co detectors, and more. This means that you can have a light turn red when the air quality in the home takes a dive, or having a speaker play an alarm sound when a window is opened.
Unfortunately, temperature and humidity sensors automations are not available through the Home app as of yet, but if you don't mind taking a deeper dive using a third-party HomeKit app, there are ways to use them too.
- Launch the Home App.
- Tap on Automation.
Tap the Add Button in the top right corner of the screen (looks like a plus sign).
Source: iMore
- Tap A Sensor Detects Something.
- Select which Accessories will start the automation by tapping on each one.
Tap Next.
Source: iMore
- Choose the desired Accessory State for the automation, like Turn On or Opens, with a tap.
- Tap Time and set the specific times that you want the automation to be active.
Tap People to set location-based conditions for when the automation will run.
Source: iMore
- Tap Next.
- Tap on a Scene or Accessory that you wish to control when the automation runs.
Tap Next.
Source: iMore
- Tap and hold on an Accessory to change the target state, such as brightness or off/on.
- Tap the X button when you have set your desired state.
- Tap Done.
- Tap Turn Off to set a time for the accessory to turn back off automatically if desired.
What automations do you use?
Do you use automations in your HomeKit home? Have a couple of genius automations that you want to share? Did our guide inspire you to get started? Have some questions or need some help? Let us know in the comments below!
We may earn a commission for purchases using our links. Learn more.

Check out iMore's favorite gadgets and accessories from CES 2021
Another CES has come and gone, and now it's time to name our favorite products from the show. Here are iMore's favorite accessories that we saw come out of CES 2021.

Apple reportedly has new iMacs, a new display, and new Mac Pros coming
Apple is said to be working on all kinds of things, including something akin to the G4 Cube!

Review: Sonix Magnetic Link is a compelling MagSafe Charger alternative
Get that satisfying click for less with the Sonix Magnetic Link wireless charger for your iPhone 12 or 12 Pro.

These smoke and CO detectors work seamlessly with Siri and HomeKit
So you've automated your lighting, your blinds, your thermostat, your dog's feeding schedule, etc. What's left? Well, why not add some smarts to your smoke detector with these HomeKit-enabled options?