How to screenshot on your iPad or iPad Pro
Learning how to screenshot on your iPad or iPad Pro is easy when you know how.

Taking a screenshot on your iPad or iPad Pro is very useful, especially when combined with the Apple Pencil Pro's annotation skills.
Whether that's taking a quick snap of an email or an article to read again later, there are plenty of reasons to take screenshots on your iPad and we're going to show you exactly how to do it.
iPadOS 18 is set to release later this year and will bring Apple Intelligence to all of the best iPads. Apple Intelligence will be able to learn from the screenshots on your iPad to inform you throughout your daily life such as making event planning easier or knowing when you've got space in your calendar.
If you know how to take a screenshot on an iPhone then this guide should feel pretty familiar but it's always worth sharpening up your screenshot skills on an iPad as it differs from model to model.
Here's how to take screenshots on iPad or iPad Pro.
How to take a screenshot on an iPad without a Home button
If you're using one of Apple's modern iPad Air, iPad Pro, iPad mini, or the latest iPad 10th generation, you may be wondering how to take a screenshot without a Home button. Don't worry, Apple has thought of this and moved the functionality to the volume buttons. Here's how to take a screenshot on iPad models without a Home button.
- On the screen you want to capture, click the top button and either volume button at the same time.
- Quickly release both buttons.
The screen will flash white and you will hear the sound of the camera shutter clicking (if your sound is enabled). You will see a thumbnail temporarily appear in the lower-left corner of your screen if you've done this correctly. You can tap this thumbnail to view your screenshot, edit it, share it, or apply Instant Markup annotations.
iMore offers spot-on advice and guidance from our team of experts, with decades of Apple device experience to lean on. Learn more with iMore!
How to take a screenshot on an iPad with a Home button
If you are running an older iPad model such as the iPad 9th generation and still have a Home button at your disposal, this is used instead of a volume button for screenshotting purposes.
- On the screen you want to capture, click the top button and Home button at the same time.
- Quickly release both buttons.
As with the Home button-less iPad models, you'll see the screen flash white, hear the camera shutter sound, and notice a temporary thumbnail of your screenshot appear in the lower-left corner of your screen.
How to take a screenshot on an iPad with a swipe gesture
In iPadOS, Apple has implemented the ability to use your finger or Apple Pencil to take a screenshot, including turning full web pages into PDFs that you can immediately edit with Instant Markup tools. This works on all current models of Apple Pencil from the 2nd generation Apple Pencil to the USB-C Apple Pencil.
First, you'll need to make sure the feature is turned on. Here's how to do that.
- Open Settings.
- Tap Multitasking & Gestures.
- Turn on Swipe Finger from Corner if you wish to use your finger in addition to or instead of an Apple Pencil.
- Tap on Bottom Left Corner or Bottom Right Corner.
- Ensure Screenshot is selected for at least one of the corners.
Now you have this swipe-to-screenshot gesture set up, you can go ahead and use it. Here's how.
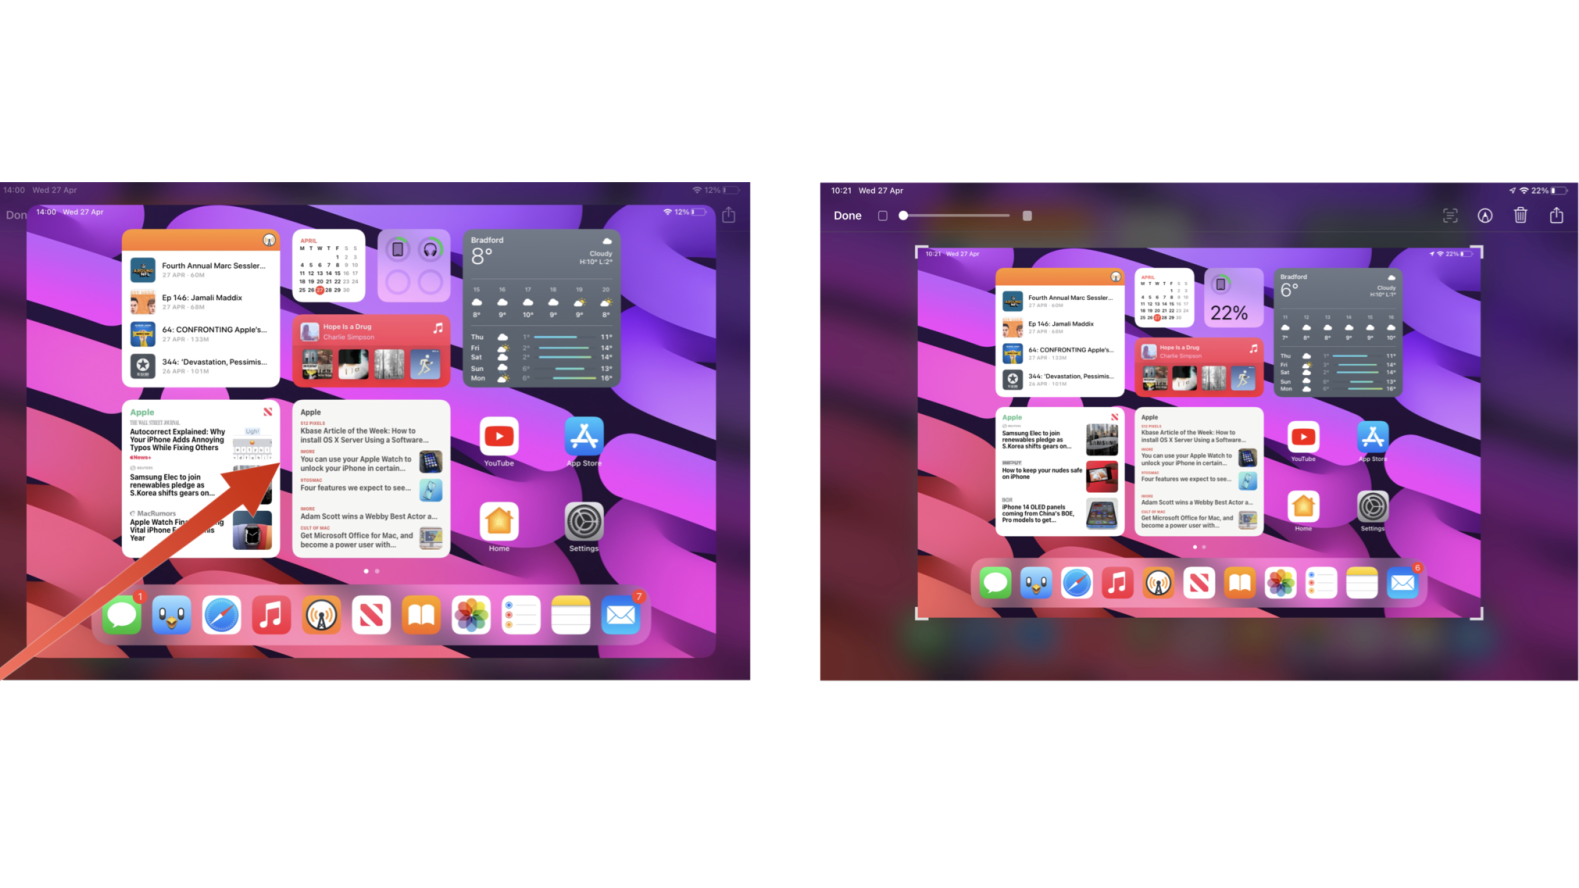
- On the screen you want to capture, place your finger or Apple Pencil in the bottom-left or bottom-right corner of the screen
- Drag the corner of the screen toward the center and let go.
- Complete any edits or markups you wish to make.
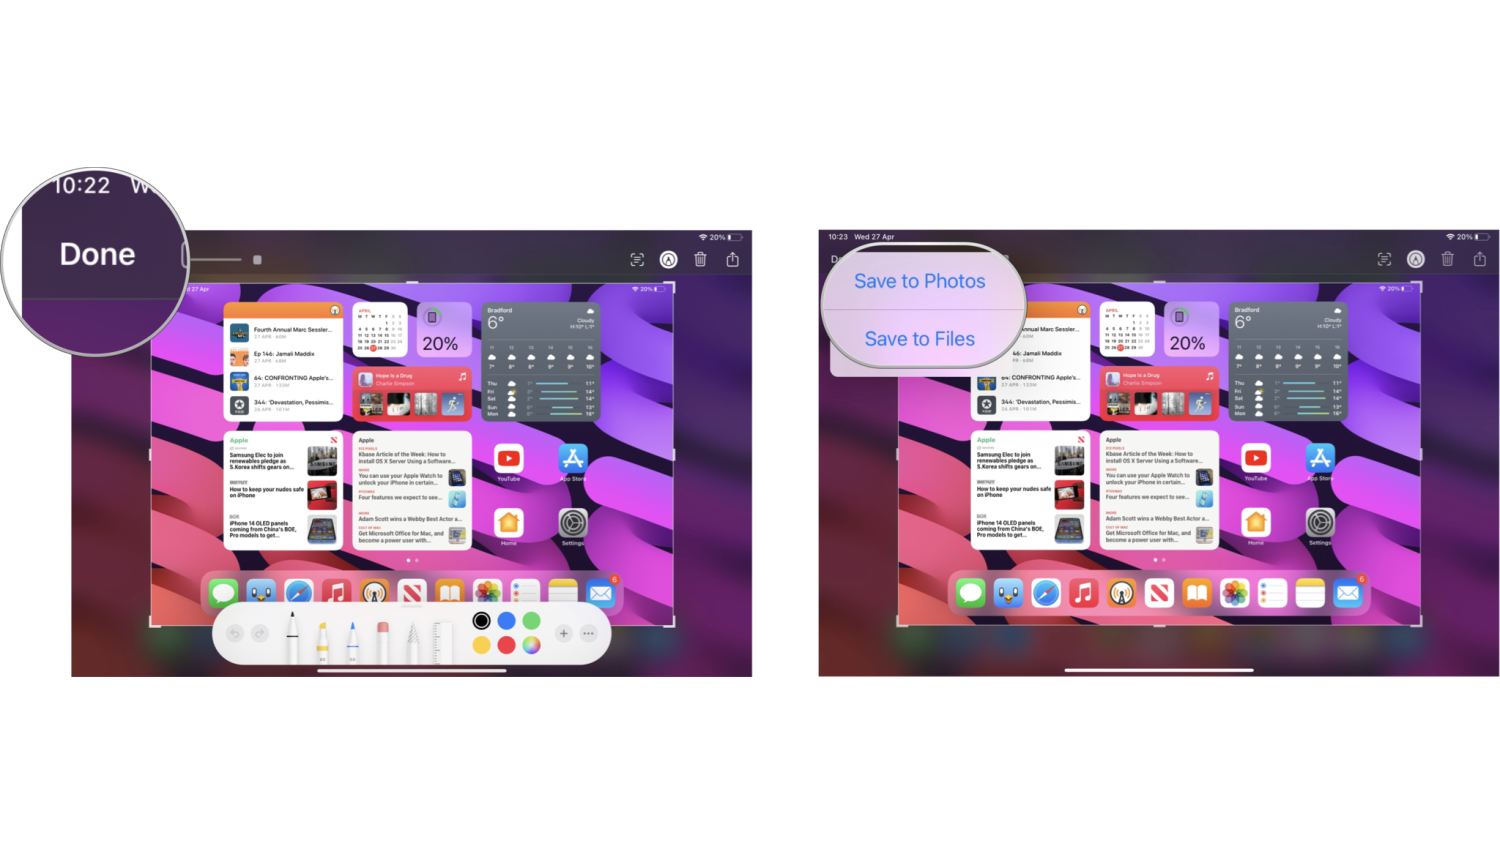
- Tap Done.
- Tap Save to Photos or Save to Files depending on where you want to save the screenshot.
How to find your screenshots on your iPad or iPad Pro
You can view your screenshots at any time in the Photos app and even edit, annotate, and share them from there.
- Launch the Photos app from your Home screen.
- Tap on the bar to the left of the Photos album.
- Tap on Screenshots.
You can also find your screenshots in the main Photos and Camera albums but you'll have to scroll through everything else as well.
One more thing..Snap and share
Taking screenshots on an iPad or iPad Pro is incredibly useful, especially when combined with an Apple Pencil. Once you master the skill, you'll find yourself taking screenshots all the time, annotating on top of text, and sending images to friends or work colleagues.
While the best iPhones tend to offer the same process across the board, it's a little frustrating that iPads have different methods. That's why it's important to learn how to take a screenshot from your iPad, no matter the age of your device or which buttons it has.
By now, you should be well versed in what to do so you can easily take screenshots of whatever appeals to you.
If you're new to the iPad world, you can check out our iPad beginner's guide to learn more about how to use your iPad to its best potential.
Adam Oram is a Senior Writer at iMore. He studied Media at Newcastle University and has been writing about technology since 2013. He previously worked as an Apple Genius and as a Deals Editor at Thrifter. His spare time is spent watching football (both kinds), playing Pokémon games, and eating vegan food. Follow him on Twitter at @adamoram.
- John-Anthony DisottoHow To Editor


