How to manage your iTunes account on your iPhone and iPad
All of your iTunes purchases are available on all of your supported devices, as long as you are signed into them with the same Apple ID. You can also automatically have all of those apps downloaded onto every other supported device that you own, too. Sometimes, that can get a little overwhelming and you may want to shut that down. Here's how to enable or disable automatic downloads and updates, and how to make changes to your payment information or unsubscribe to services.
- How to enable or disable automatic downloads on your iPhone and iPad
- How to enable or disable automatic updates on your iPhone and iPad
- How to switch iTunes accounts on your iPhone and iPad
- How to customize your iTunes account details on your iPhone and iPad
- How to deauthorize a device associated with your iTunes account
How to enable or disable automatic downloads on your iPhone and iPad
With automatic downloads, every app, eBook, audiobook, and song you download on one device will automatically download on all others with the feature enabled. It can be a huge time saver if you know you're going to want to use or access any of that content across multiple iOS devices.
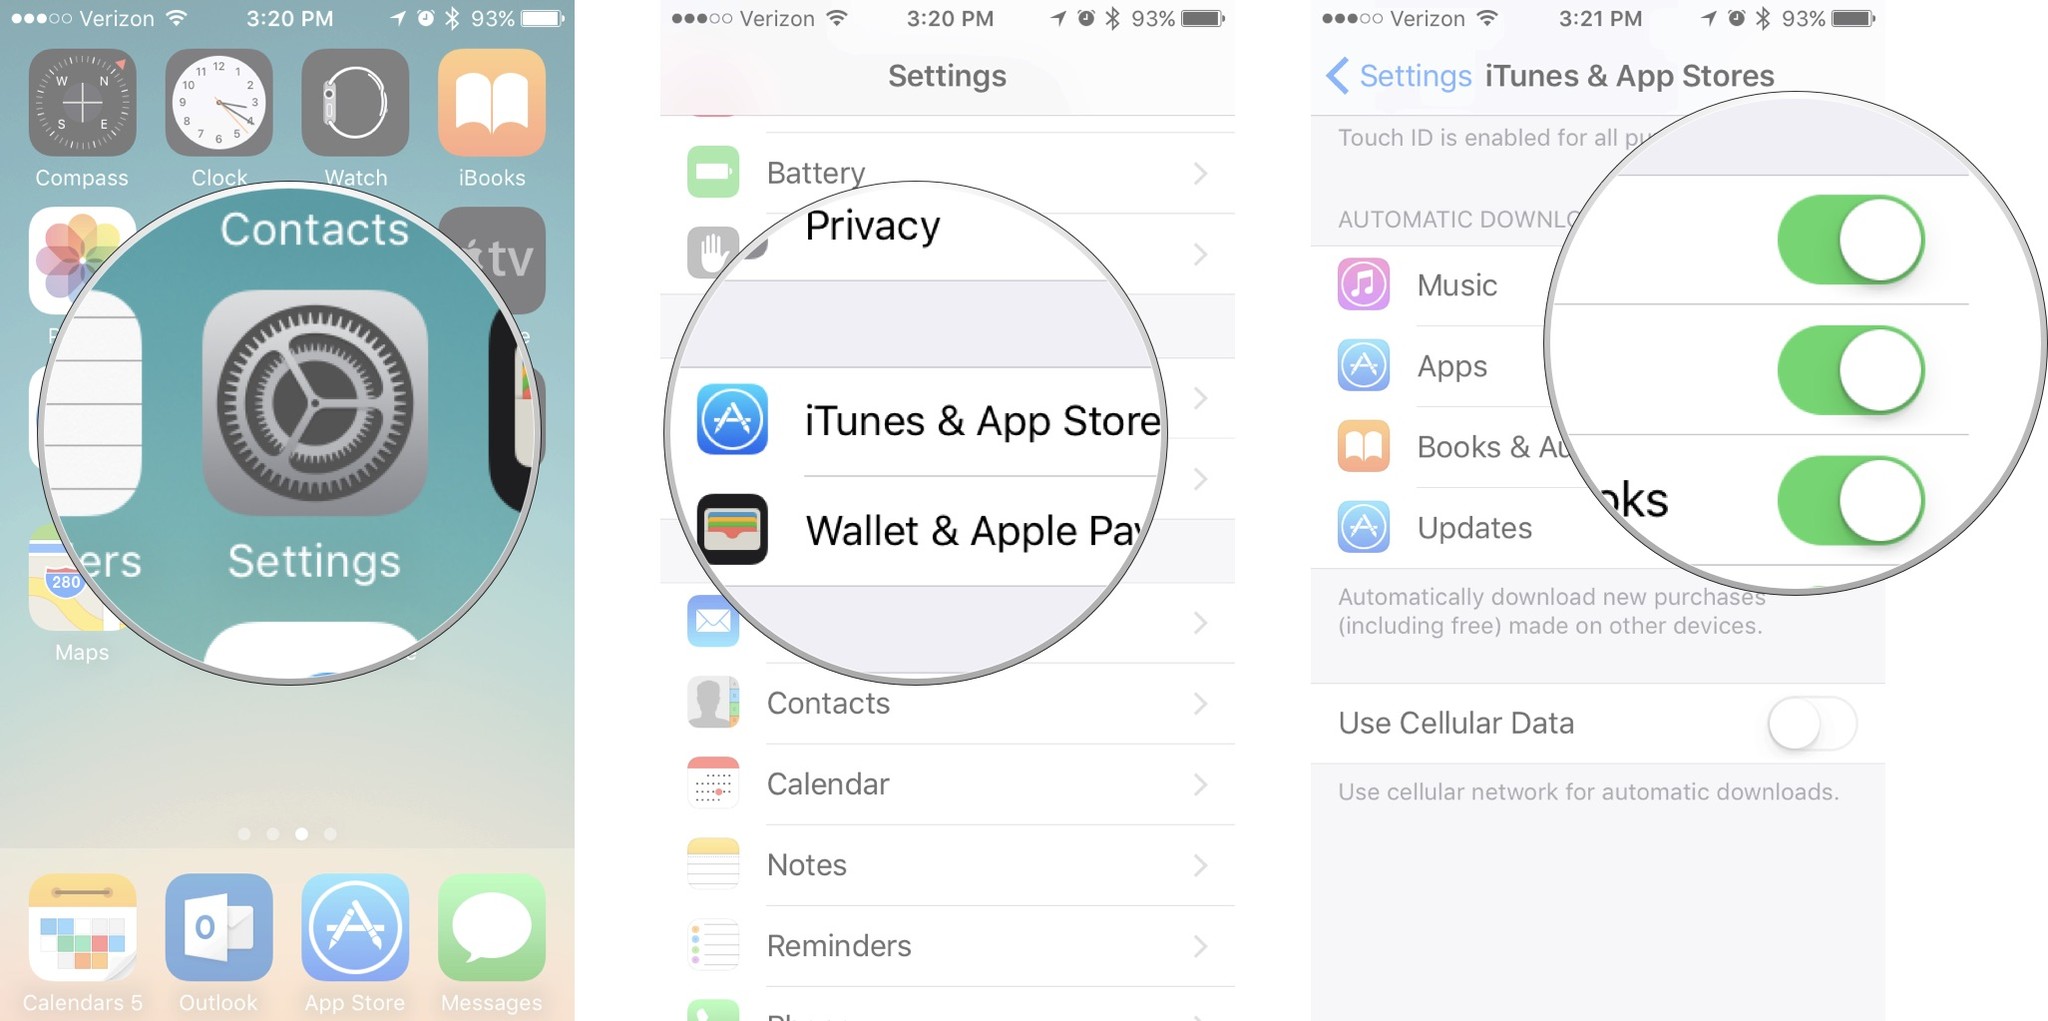
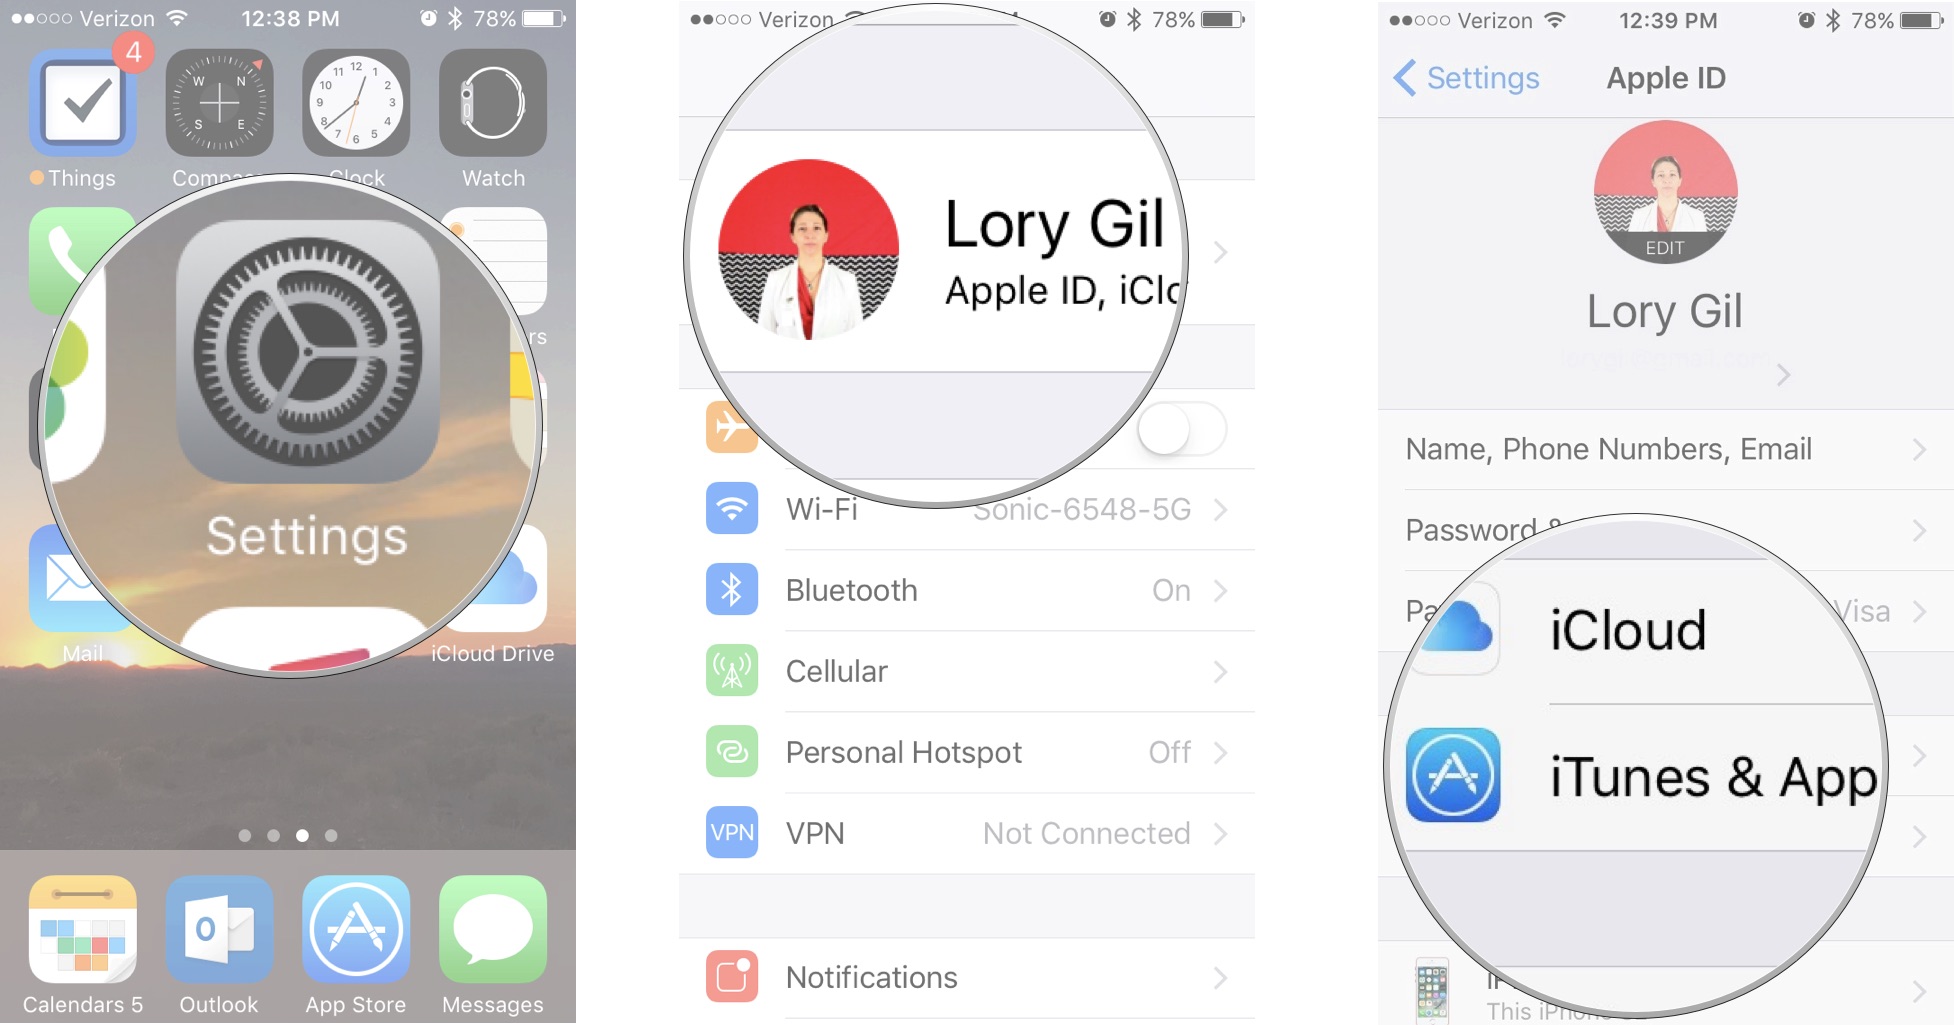
- Launch the Settings app on your iPhone or iPad.
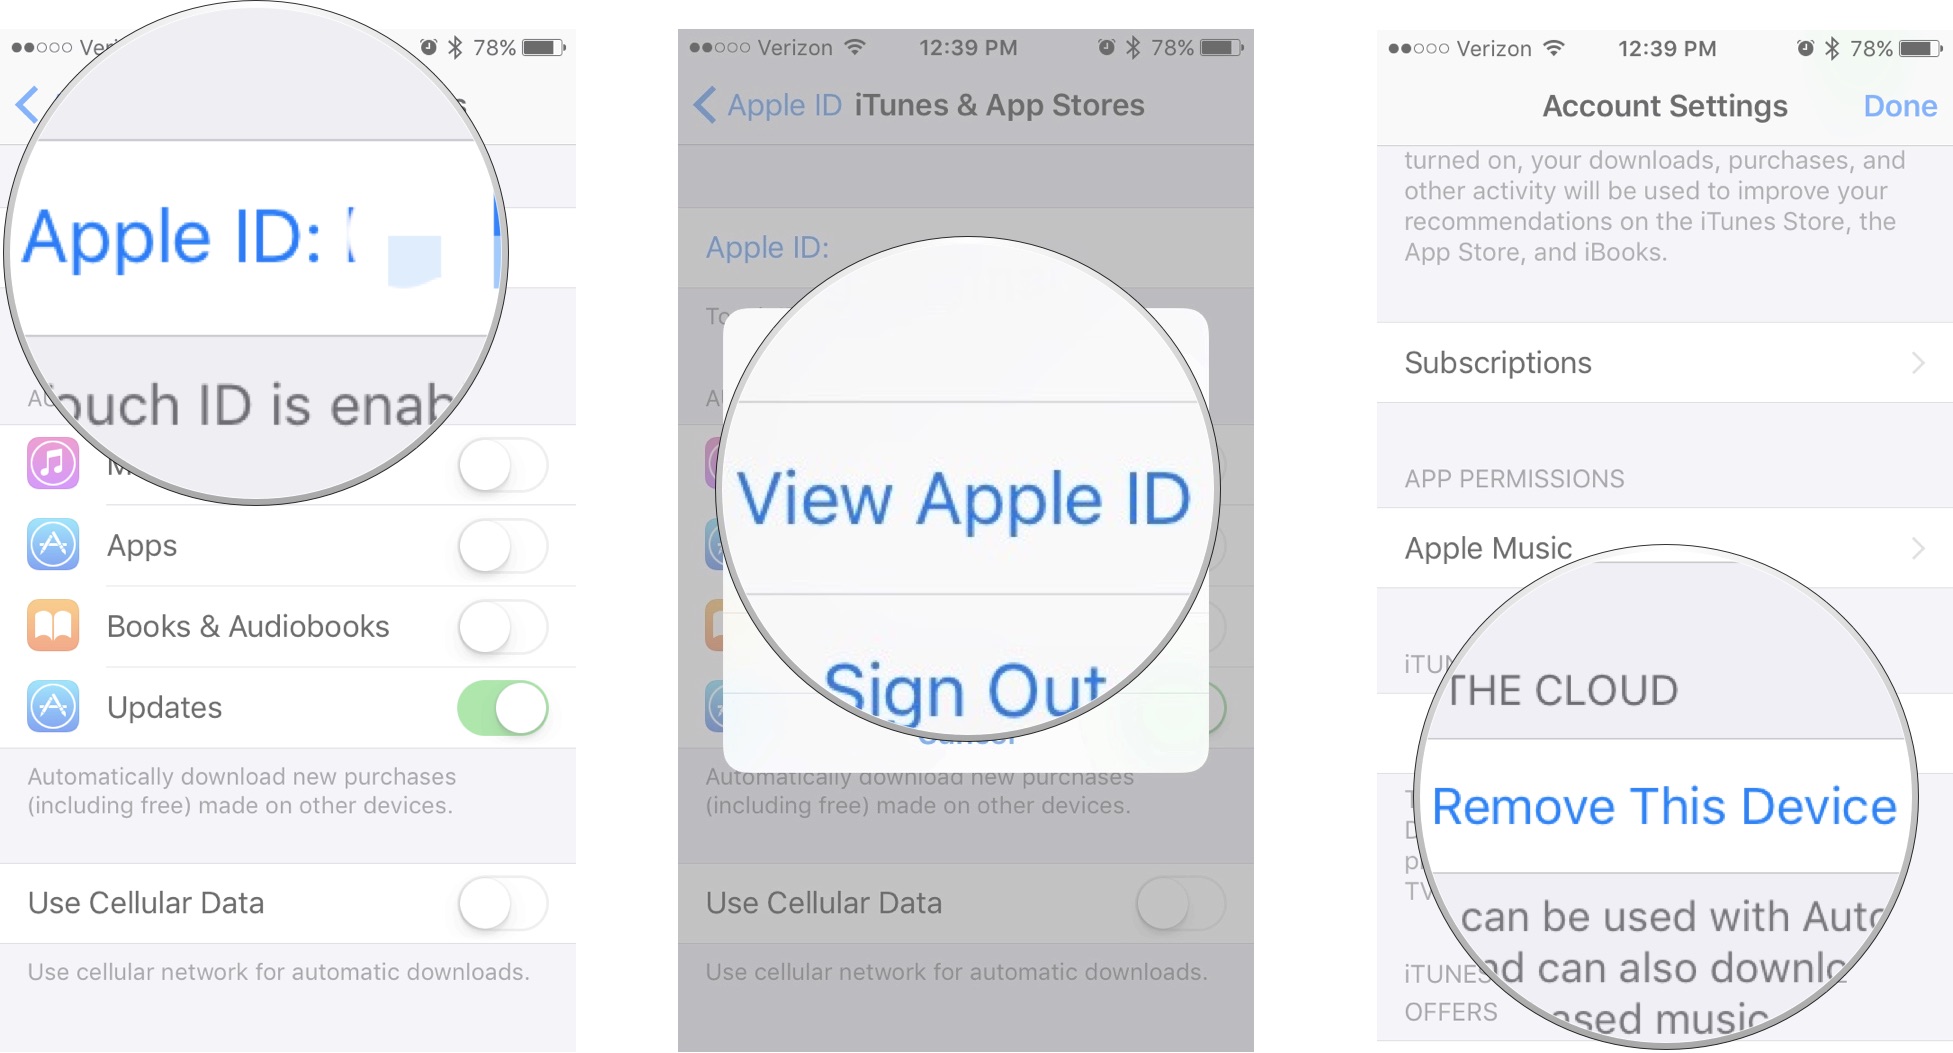
- Tap iTunes & App Stores.
- Toggle the Music, Apps, and Books & Audiobooks switch on.
You may not like the idea of all of your content just showing up on every other device, especially if one of them has less storage than the other. To disable automatic downloads, follow the same steps and toggle the switches off.
How to enable or disable automatic updates on your iPhone and iPad
Instead of manually updating each and every app that gets updated (which can really be time-consuming when there is a big iOS update), you can automatically download updates as they appear.
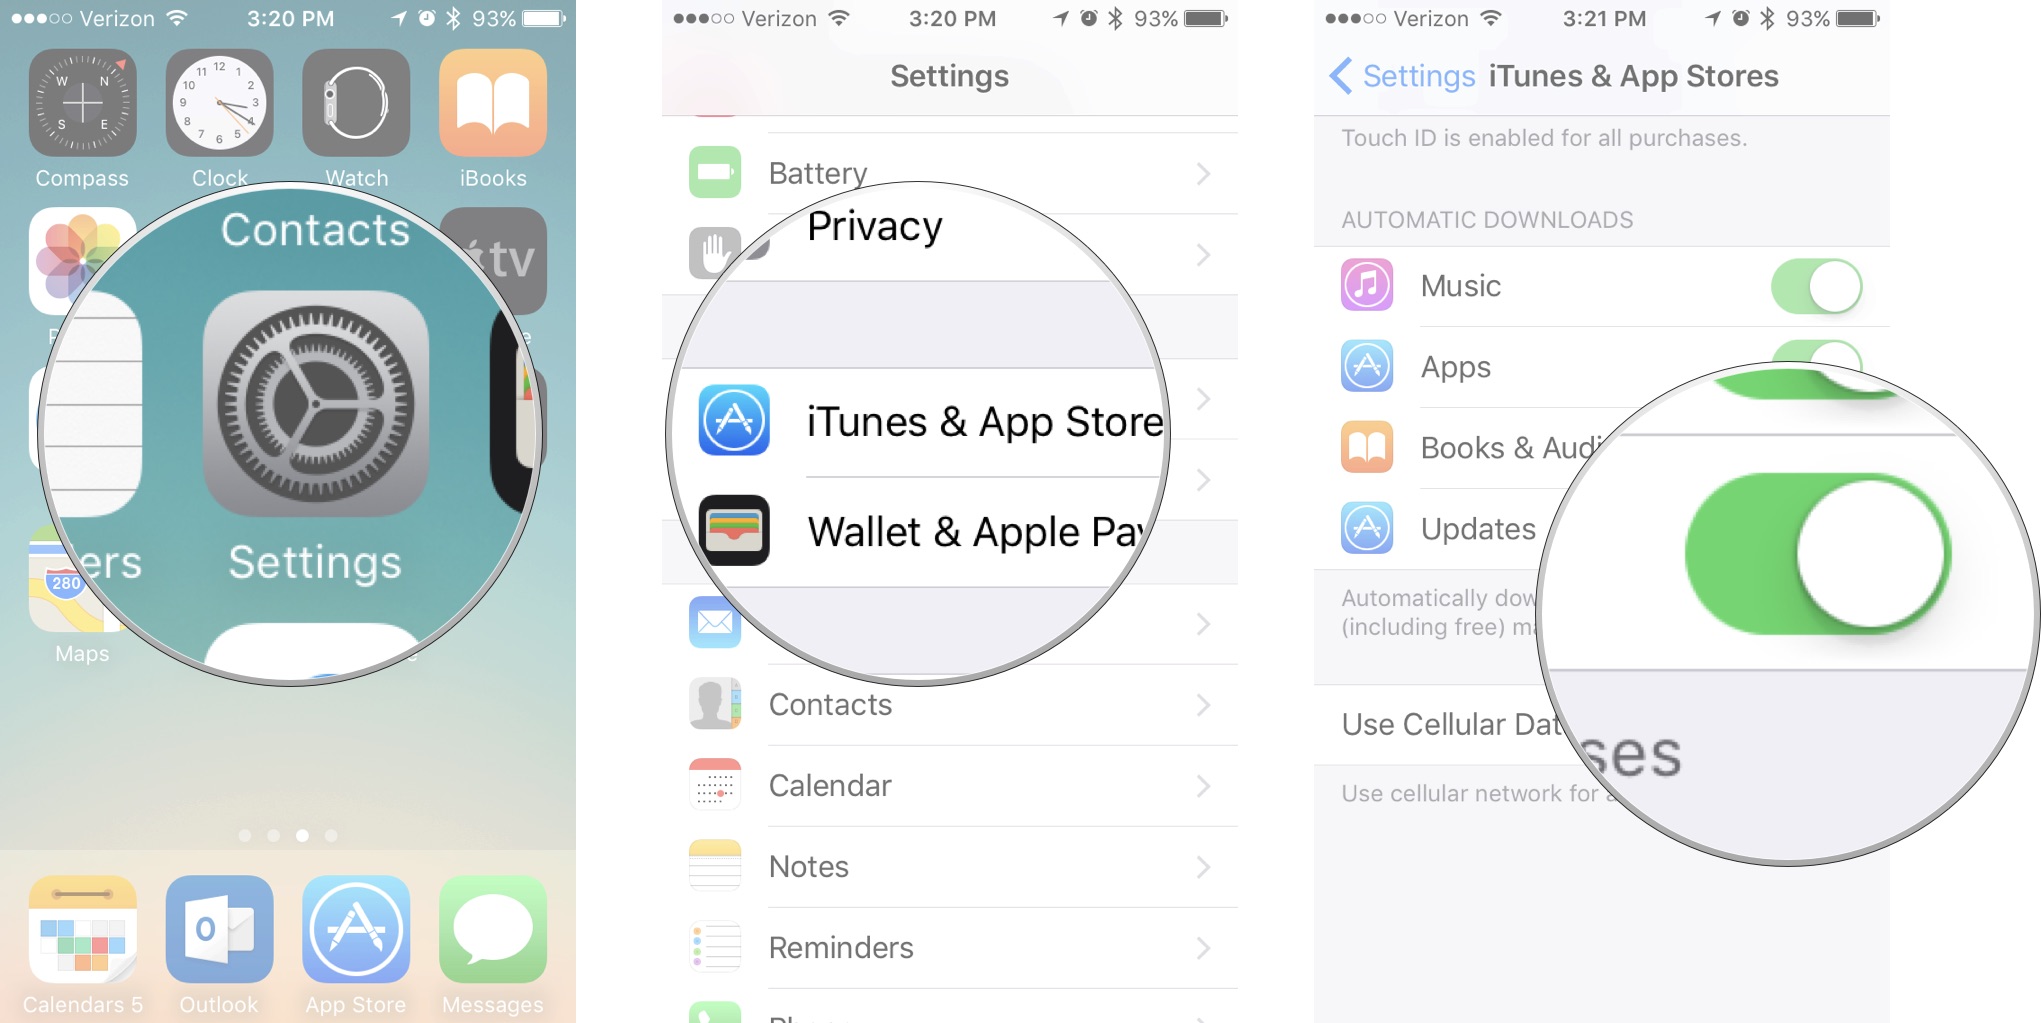
- Launch the Settings app on your iPhone or iPad.
- Tap iTunes & App Stores.
- Toggle the Updates switch on.
You may not want all of your apps to automatically update, especially if you're on an older version of iOS. Your favorite app might not support the version of iOS you're on. To disable automatic app updates, follow the same steps and toggle the switch off.
How to switch iTunes accounts on your iPhone and iPad
Most people are not going to need more than one iTunes account assigned to a single iPhone or iPad. That doesn't mean it isn't possible to do, though. You may work somewhere that the company wants you to use its account to download apps to your device, but you also want to use your own apps. If you need to switch between iTunes accounts, you can. Just remember that you'll have to switch back to the other account each time you need to update or download an app.
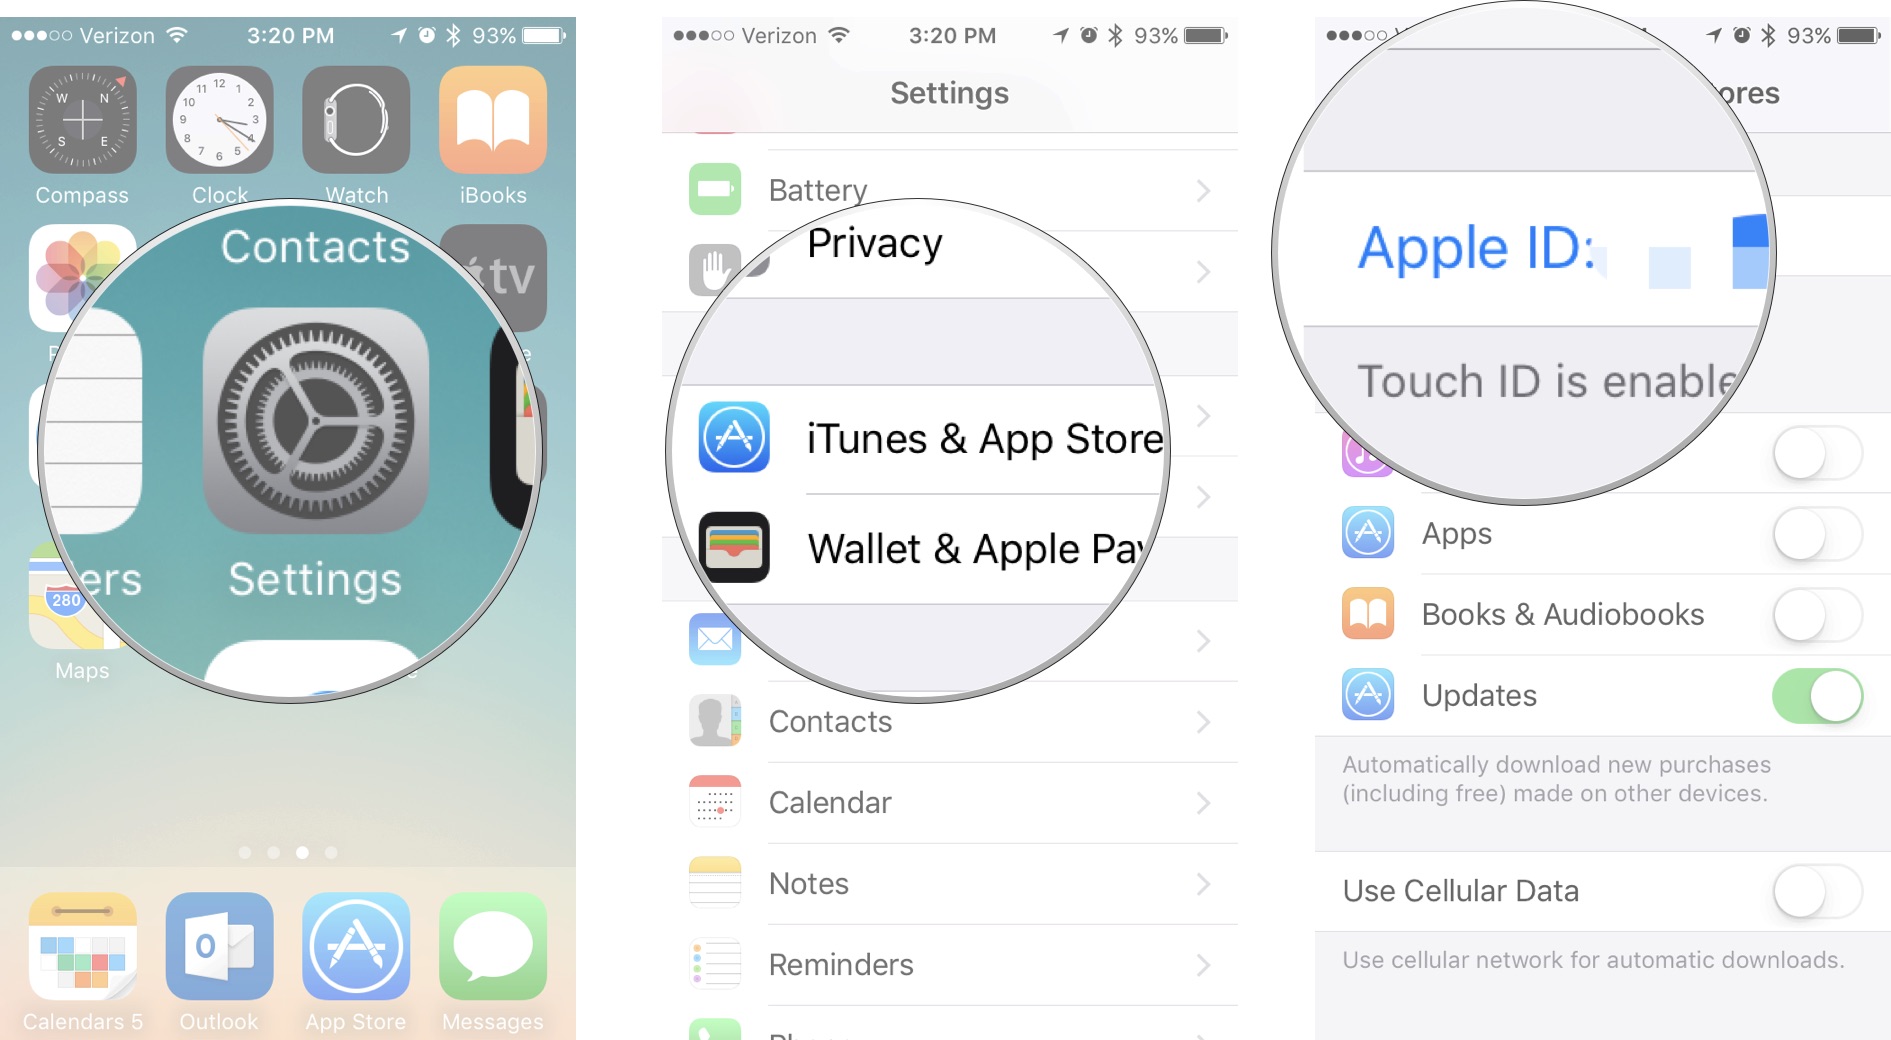
- Launch the Settings app on your iPhone or iPad.
- Tap iTunes & App Stores.
- Tap on your Apple ID.
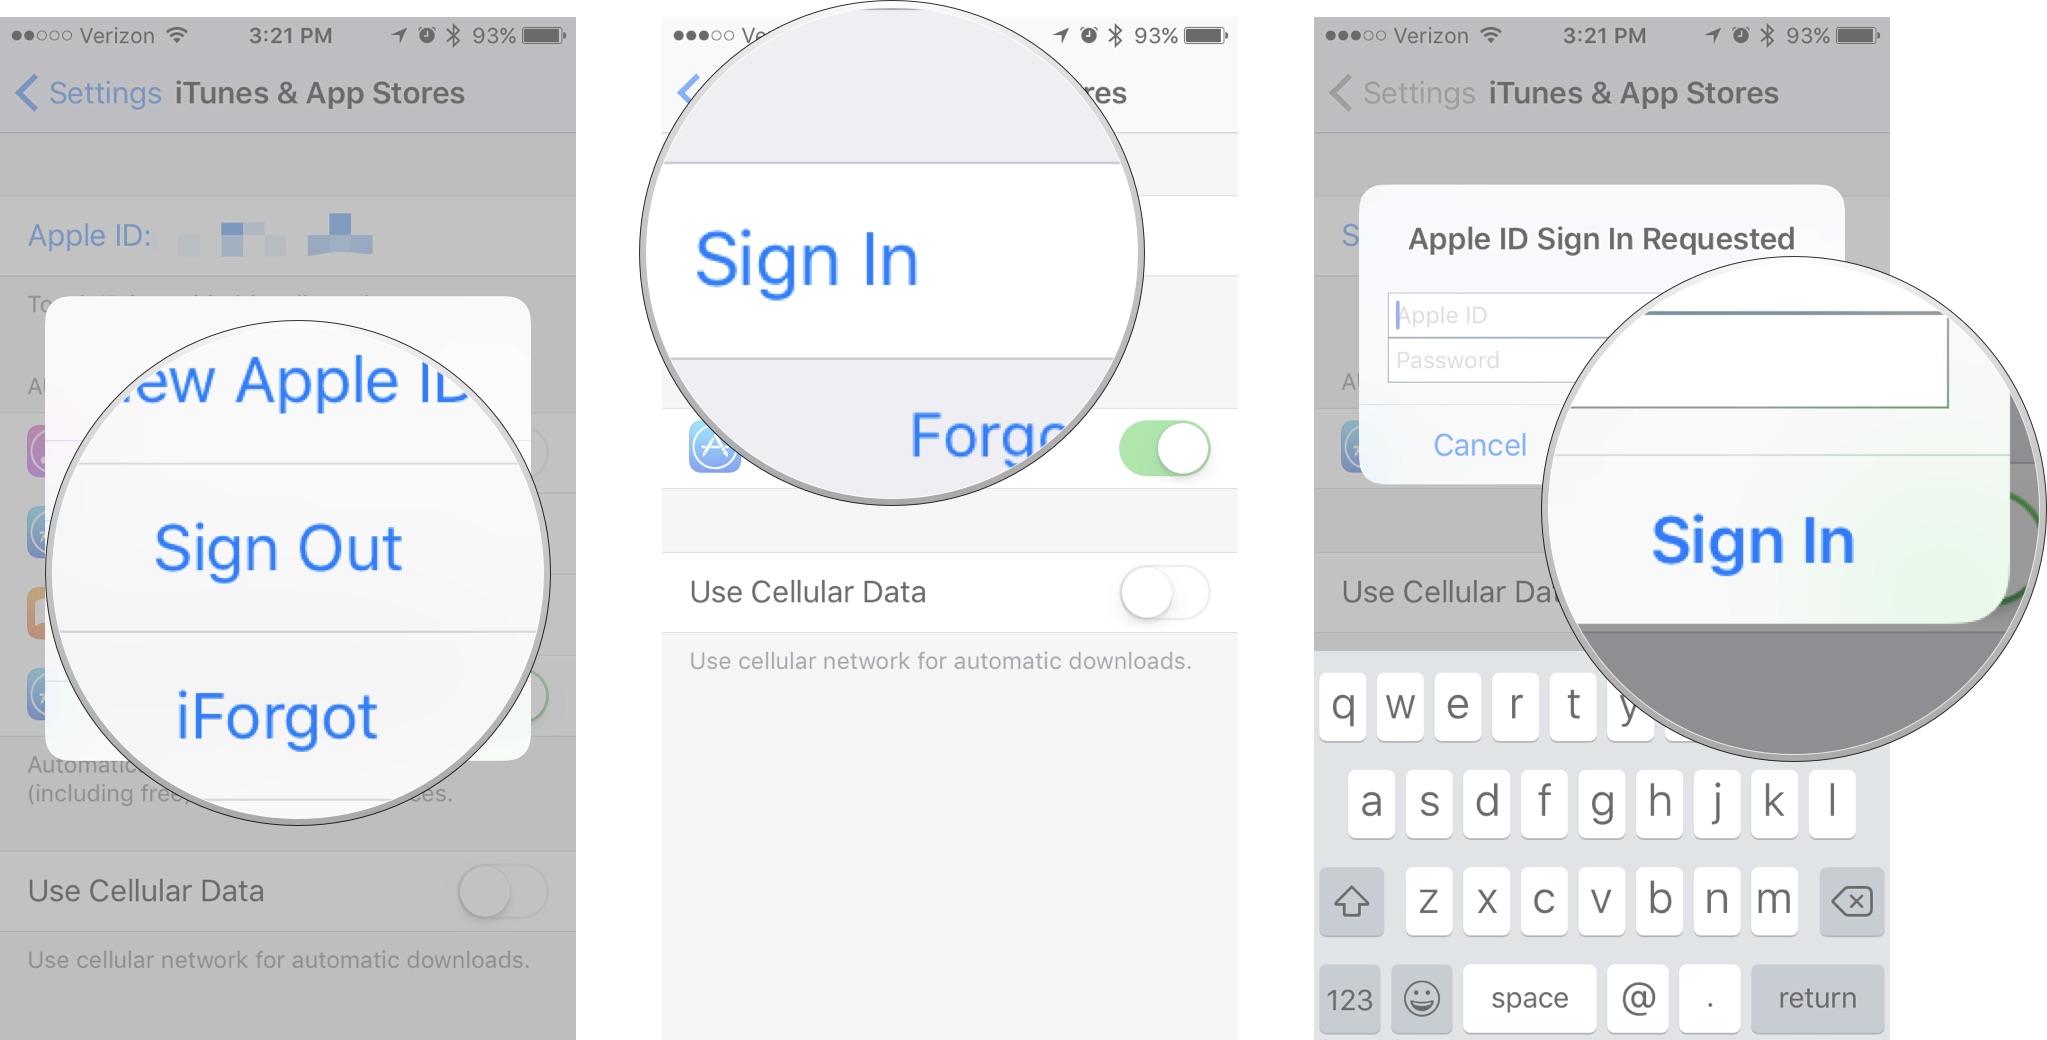
- Tap Sign Out.
- On the same screen, tap Sign In.
- Enter a different Apple ID and password.
- Tap Sign In. If the Apple ID has never been used in the iTunes Store, you'll be prompted to review your account information.
How to customize your iTunes account details on your iPhone and iPad
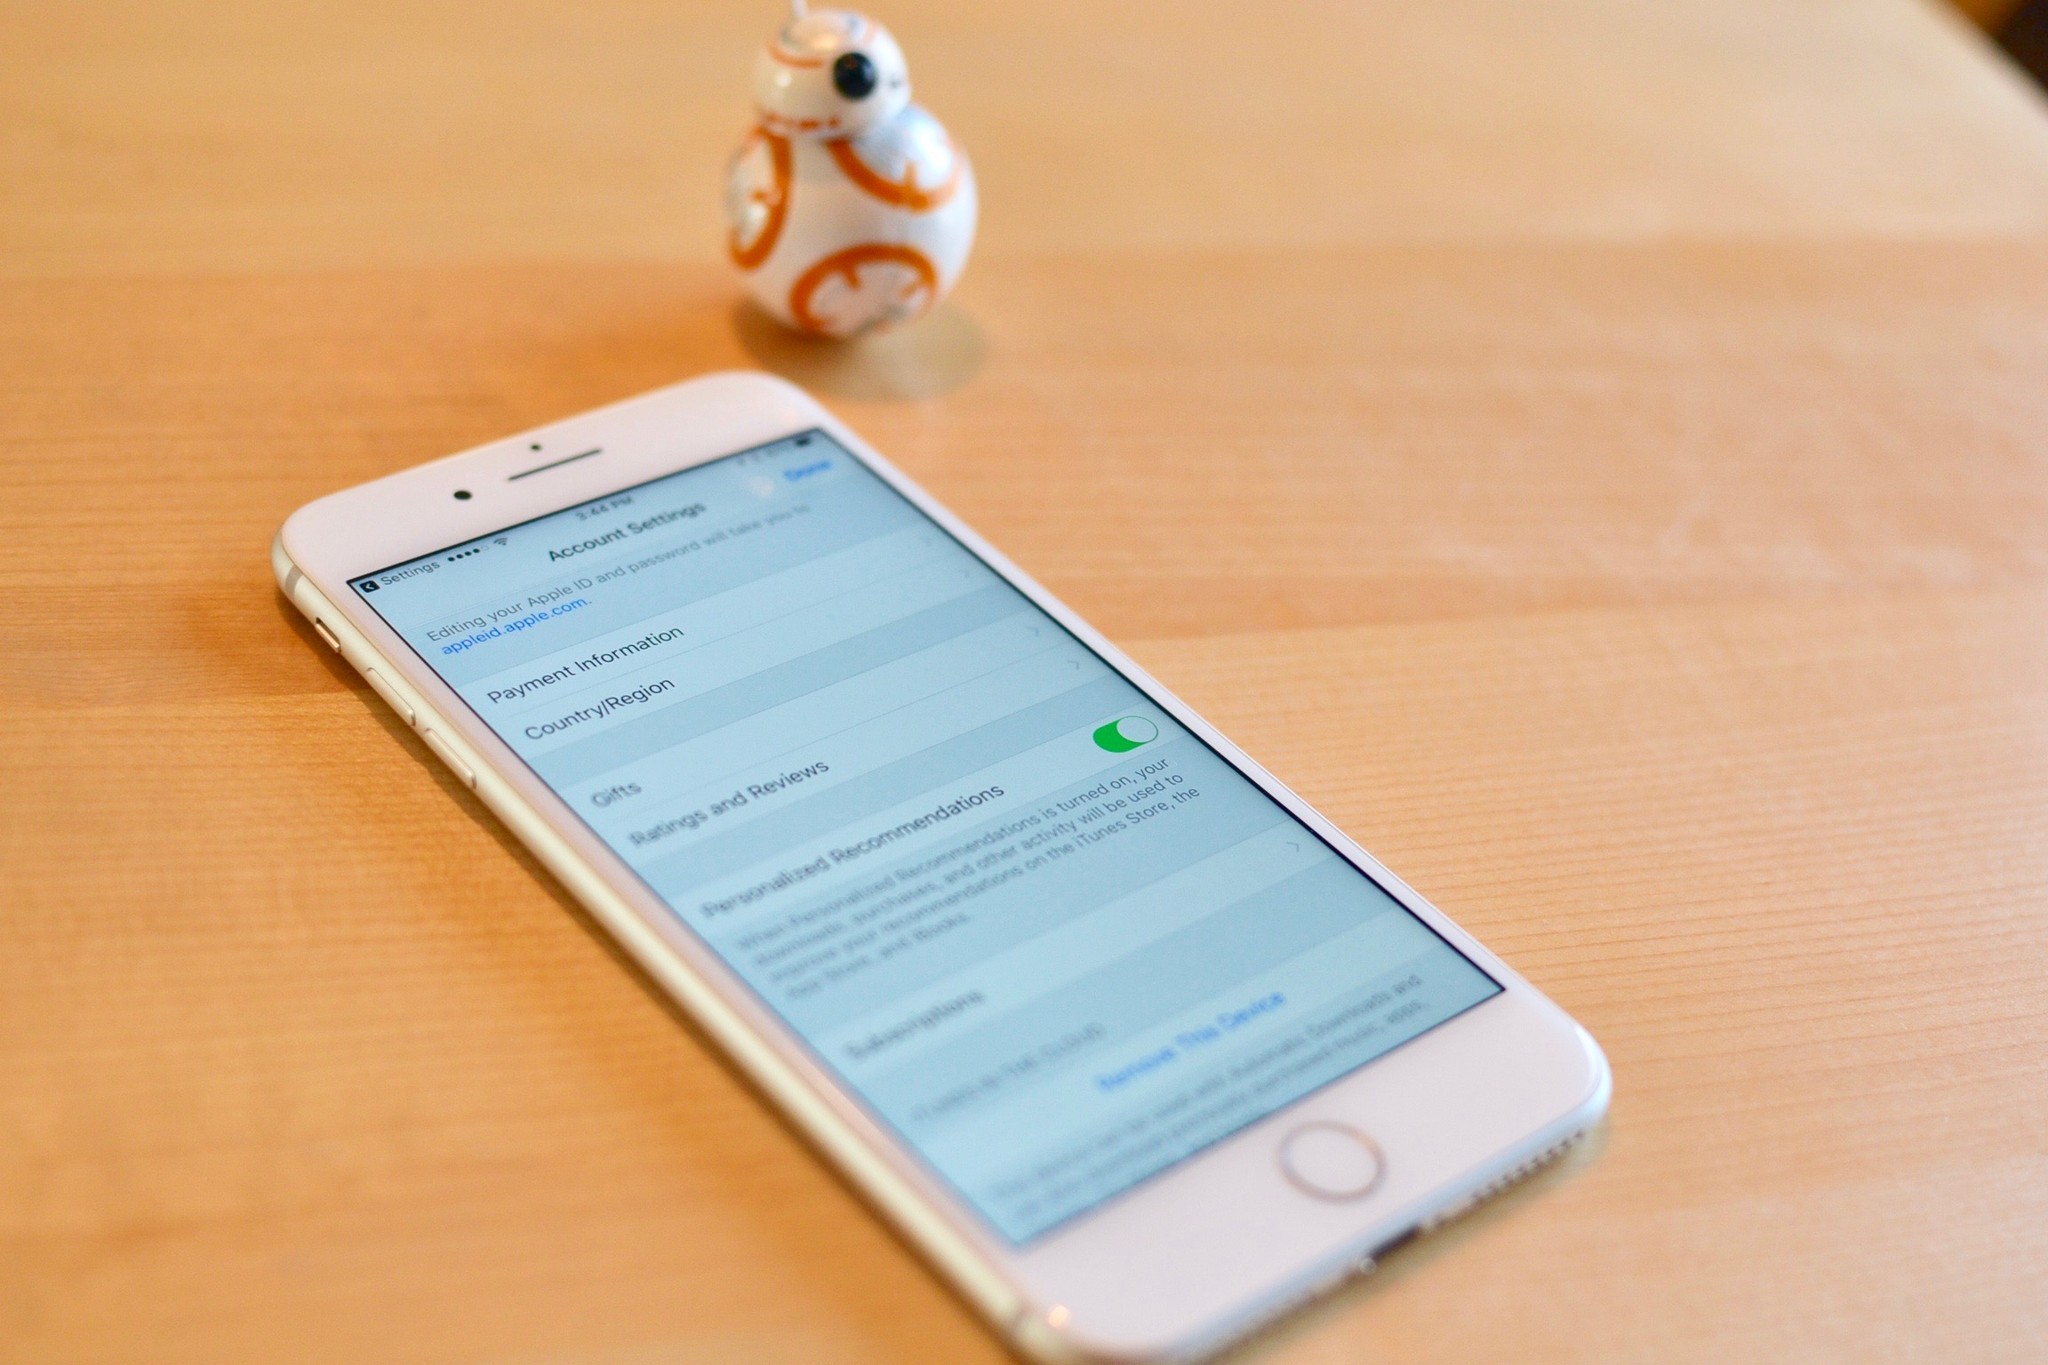
You may need to change your payment information, manage your subscriptions, or view your gifts and app store rating activities. You can access and change this information right on your iPhone or iPad. If you need to make changes to your Apple ID, you'll be redirected to appleid.apple.com. Otherwise, make the changes in the Settings app.
iMore offers spot-on advice and guidance from our team of experts, with decades of Apple device experience to lean on. Learn more with iMore!
- Launch the Settings app on your iPhone or iPad.
- Tap iTunes & App Stores.
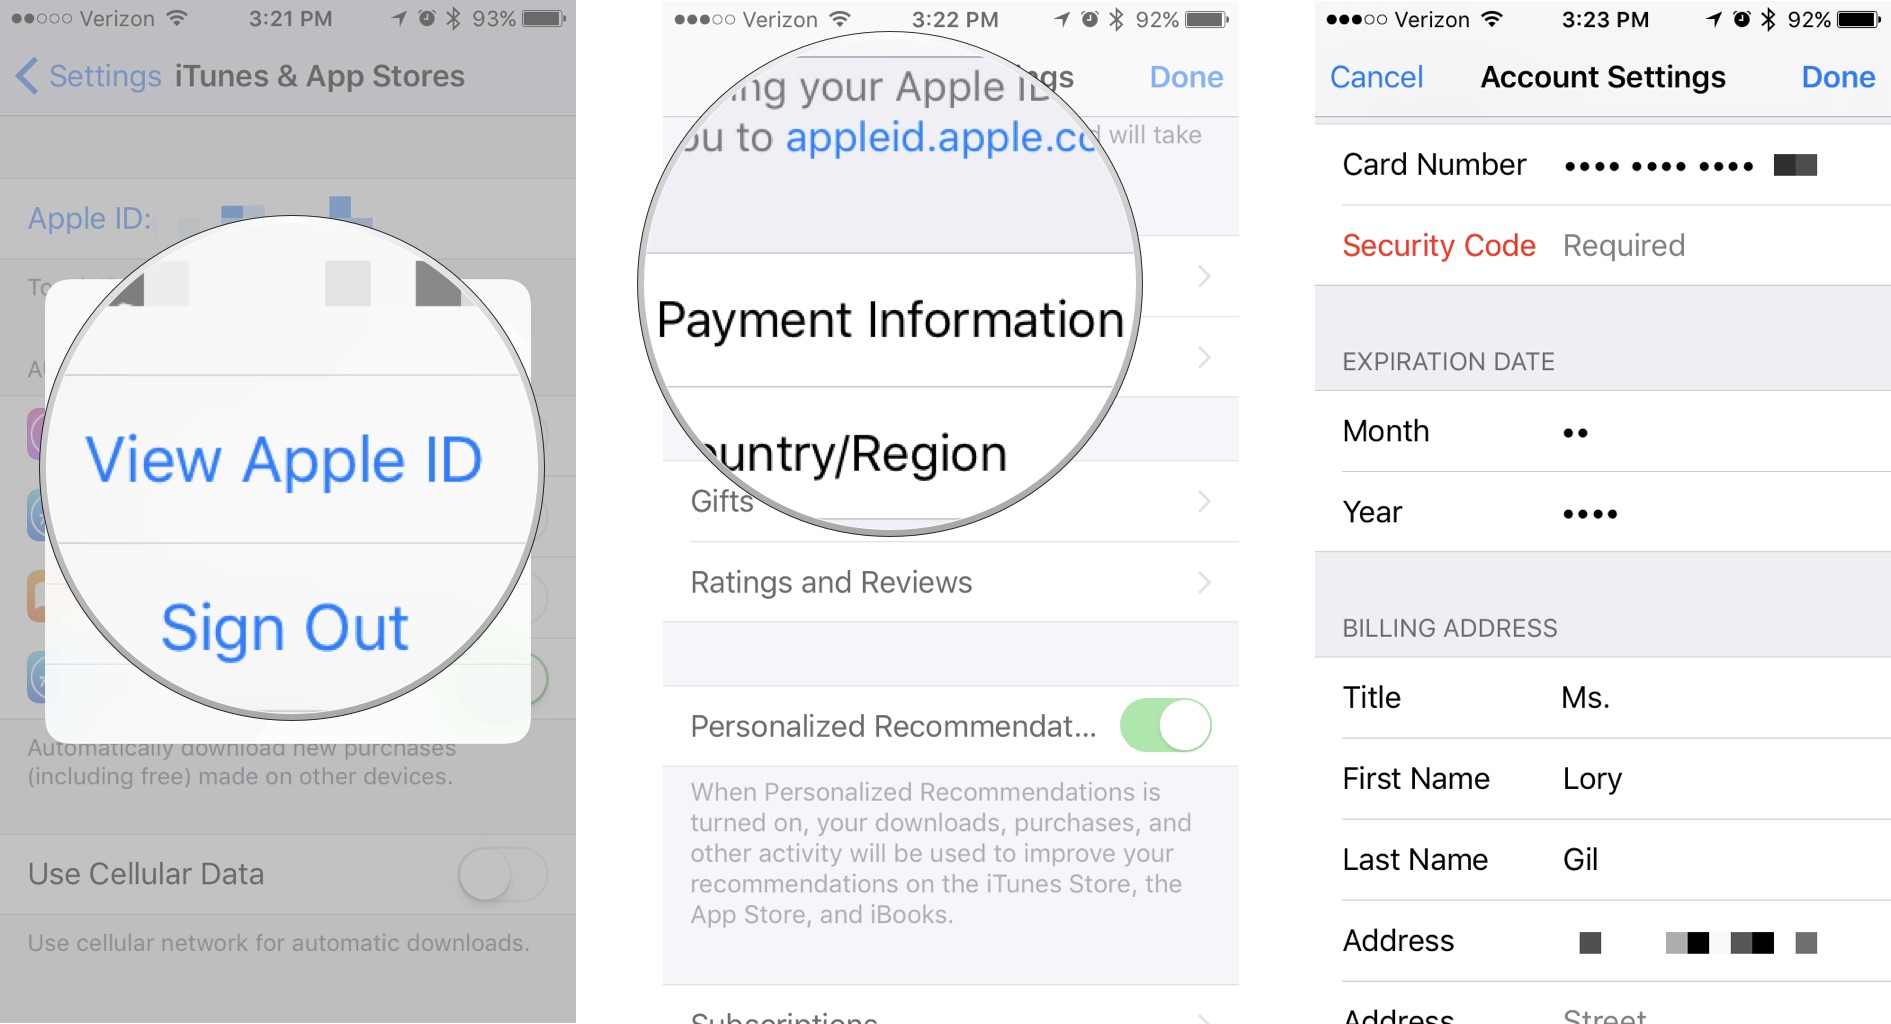
- Tap on your Apple ID.
- Tap View Apple ID.
- Tap Payment Information to change your billing address or credit card information.
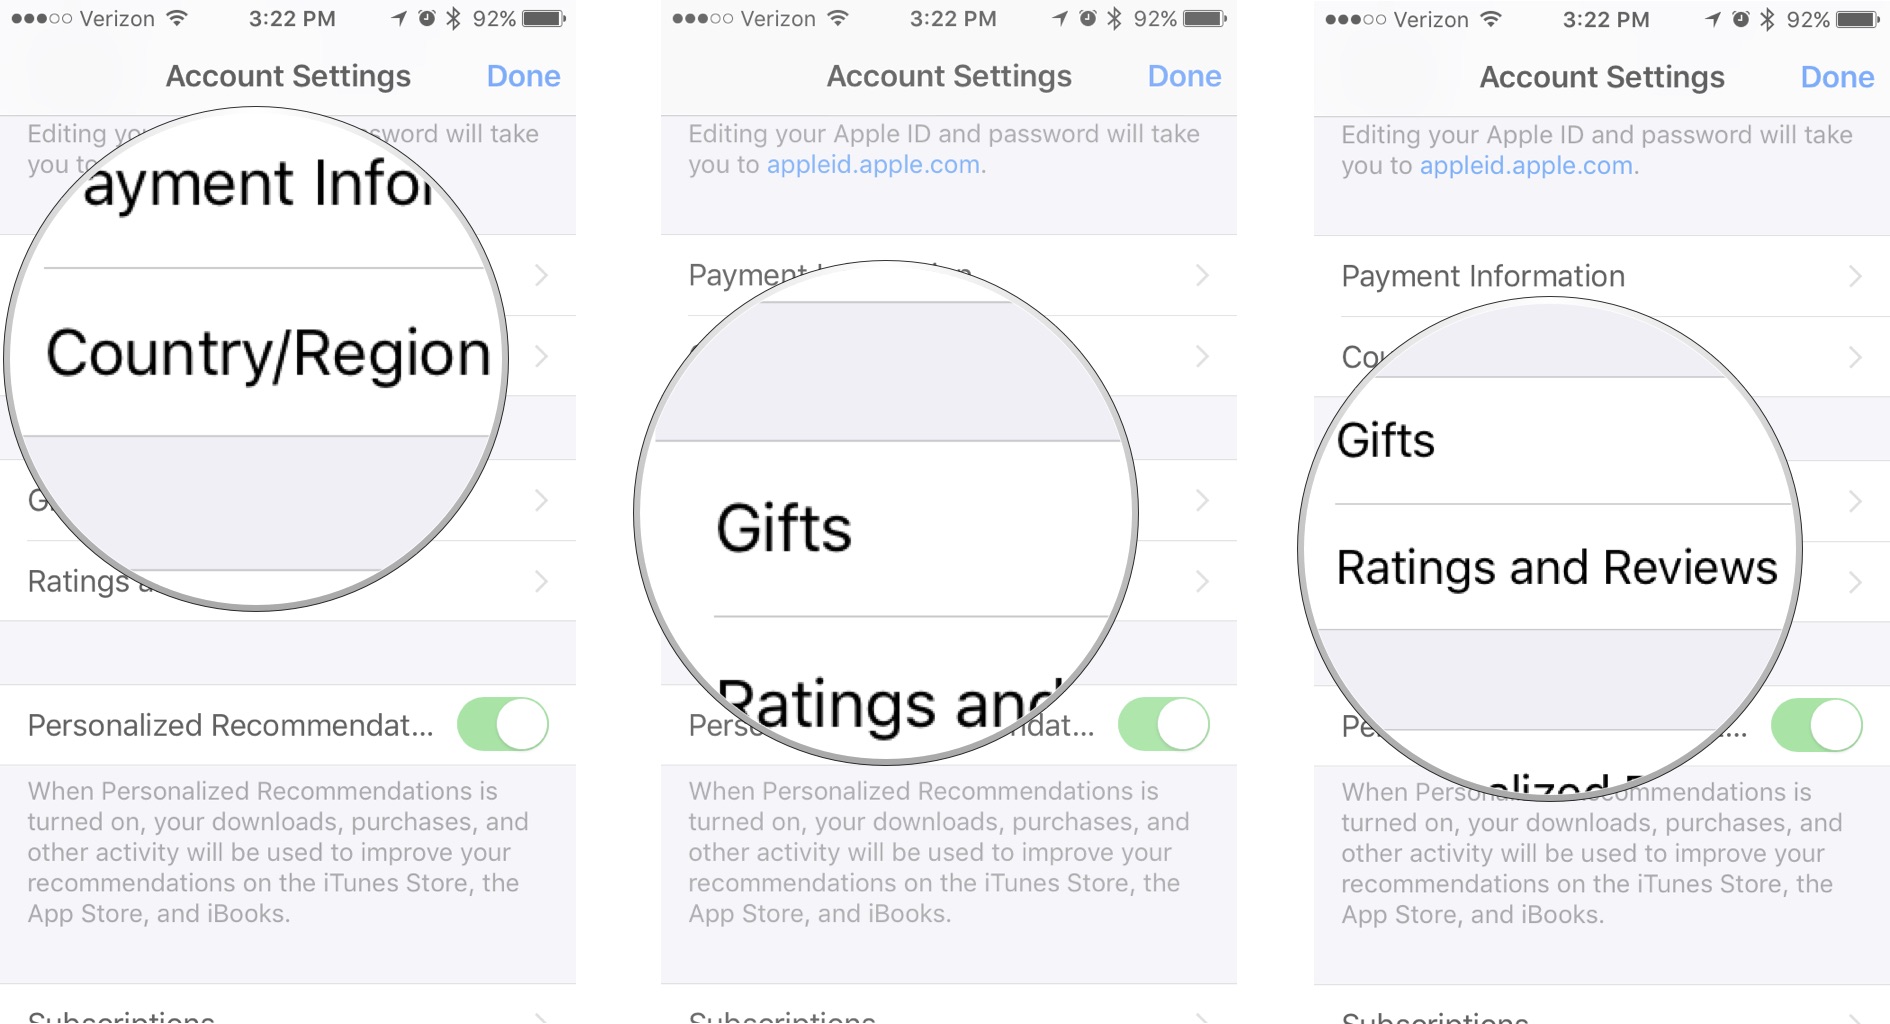
- Tap Country/Region to change your country or region. (Note: You can only change your country or region every 90 days. If you have an active iTunes Match or Apple Music subscription, you will be required to cancel it before you can change regions.)
- Tap Gifts to see who you've sent iTunes gifts to, including what you sent and when you sent them.
- Tap Ratings and Reviews to see which apps you've rated. You can swipe to the left to remove a rating or review for an app.
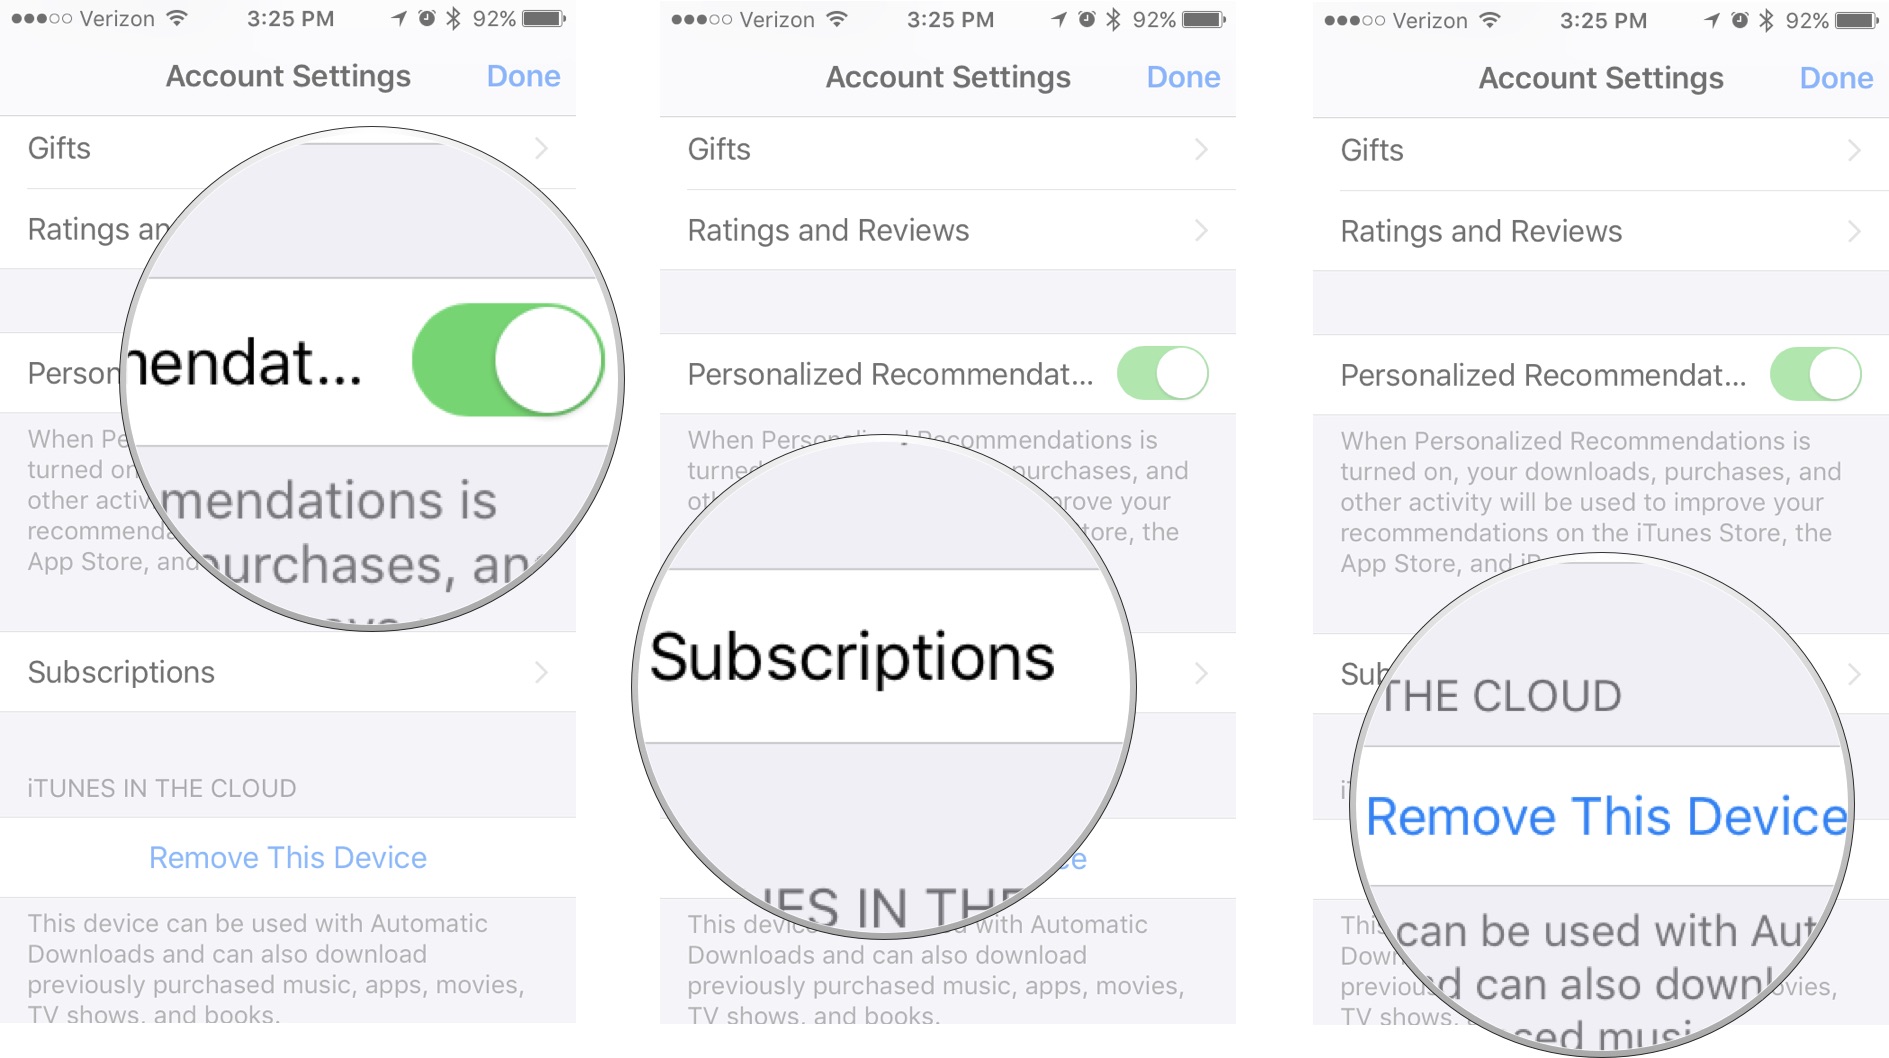
- Toggle the Personalized Recommendations switch on or off to enable or disable recommendations based on your iTunes store activities.
- Tap Subscriptions to manage your iTunes subscriptions.
- Tap Remove This Device to disconnect your account from having its content stored in iCloud (I don't recommend this, especially if you don't back up your device via iTunes).
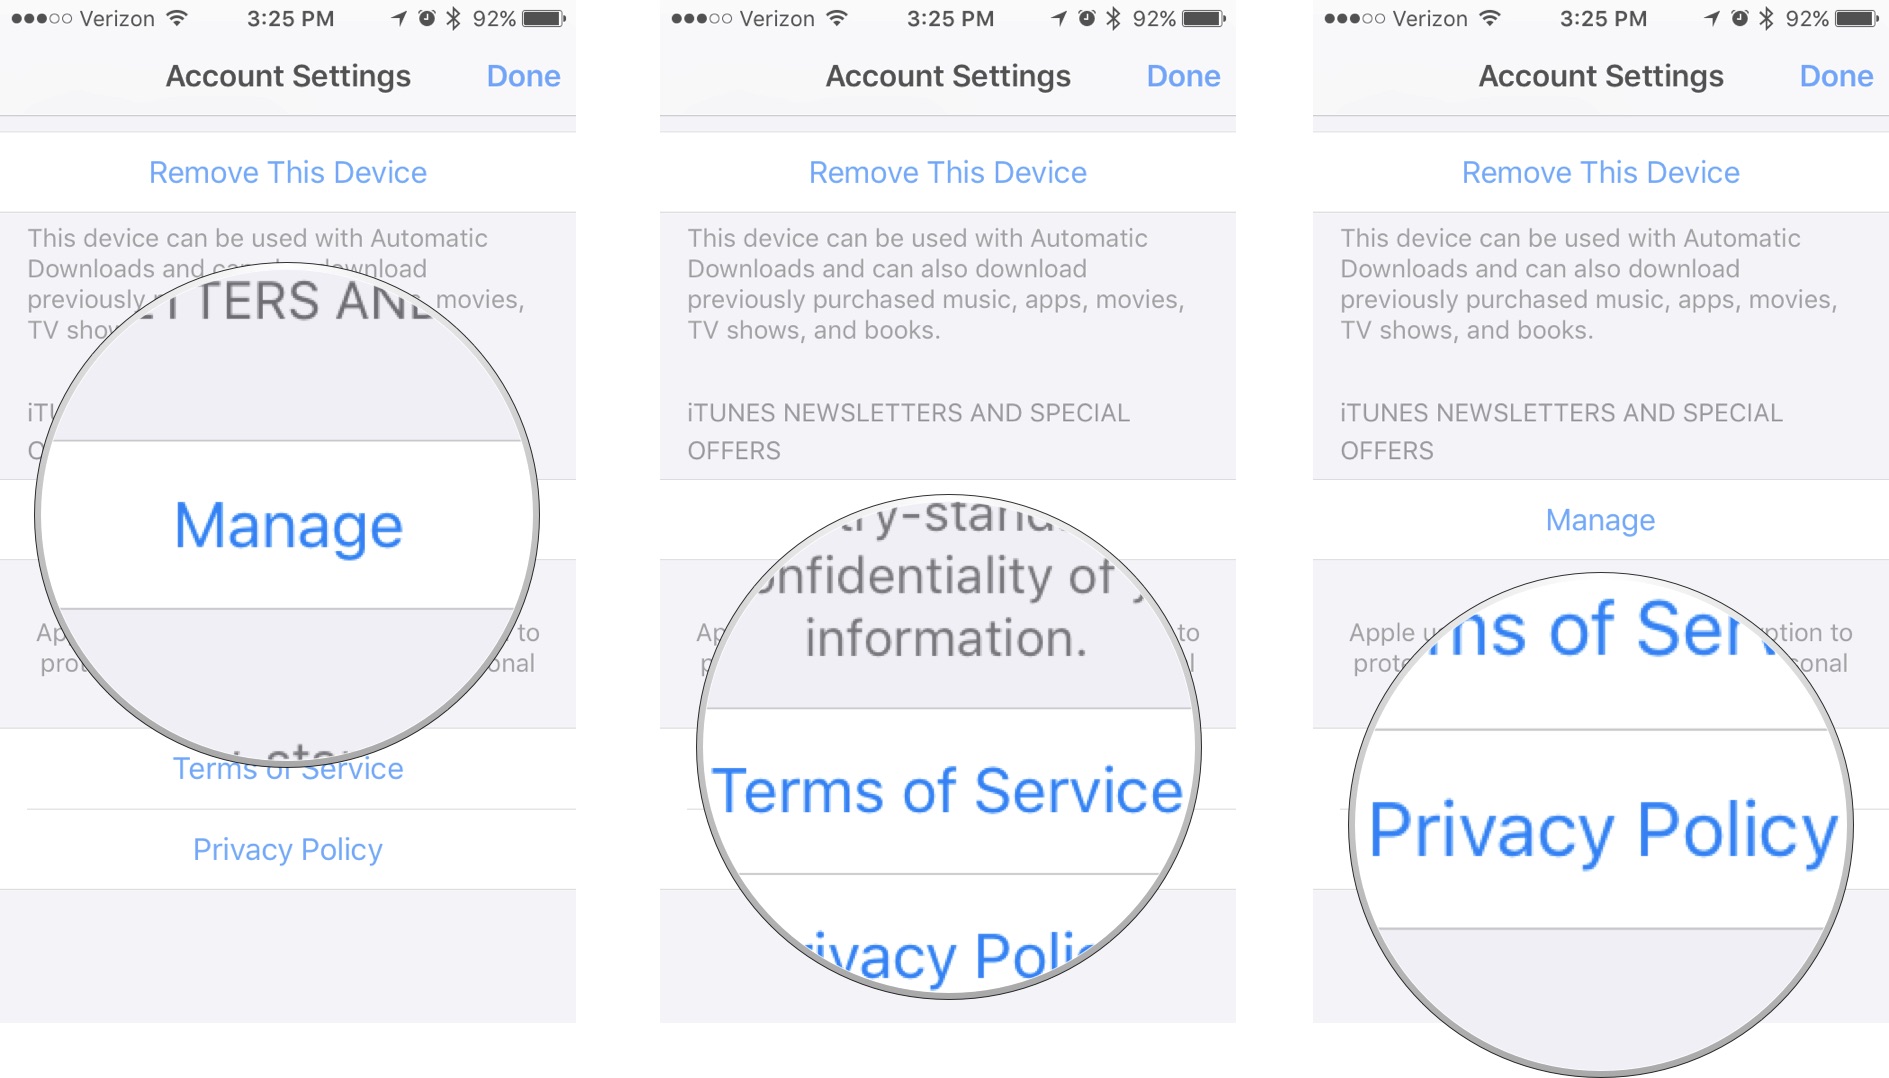
- Tap Manage to manage your iTunes newsletter and offers. This will direct you to appleid.apple.com.
- Tap Terms of Service to view your terms of service with Apple.
- Tap Privacy Policy to view Apple's privacy policy.
How to deauthorize a device associated with your iTunes account on iPhone and iPad
You can have up to 10 devices associated with your Apple ID and iTunes account. You'd be surprised at how fast you get up to 10 (I have 8 active devices). If you have an older device that you don't use anymore, you can de-authorize it, clearing up room for a new device you'd like to add.
You can't actually view a list of devices associated with your iTunes account on your iPhone or iPad. To see that, you'll have to log in via iTunes on your computer. You can, however, de-authorize an iPhone or iPad right on the device.
- Launch the Settings app on your iPhone or iPad.
- Tap your Apple ID banner.
- Tap iTunes & App Store.
- Tap your Apple ID.
- Tap View Apple ID
- Enter your password or use Touch ID to log into your account.
- Tap Remove This Device.
If you wish to re-enable the device, enable Automatic Downloads again or download a previously-purchased app.
Any questions?
Do you have any questions about managing your iTunes account? Put them in the comments and we'll help you out.
Updated September 2017: Made sure everything is up-to-date for iOS 11.
Lory is a renaissance woman, writing news, reviews, and how-to guides for iMore. She also fancies herself a bit of a rock star in her town and spends too much time reading comic books. If she's not typing away at her keyboard, you can probably find her at Disneyland or watching Star Wars (or both).
