
There's so much to consider when it comes to smart home tech that just getting started can be a pretty daunting task. However, if you're all-in on Apple gear for your day-to-day tech needs and are comfortable with iPhone, iPad, and Mac devices, then you can be pretty certain that HomeKit is the best ecosystem for your home.
Apple's system makes it easy to add devices and control them via the Home app and Siri voice commands. Still, what are the things to do first when getting started with HomeKit? Read on, and we'll help you figure that out.

What do you want to achieve with HomeKit?
So many areas of your home can be made smarter, but deciding what you want to achieve with HomeKit will be the first step on your smart home journey.
Do you want to set up a HomeKit security system or upgrade to smart lights? Do you want to be able to open your garage door as you arrive home or have a smart thermostat turn on the heating when your house drops below a certain temperature?
These things are all possible with HomeKit, but you need to answer some of these questions to dictate what devices you should equip your home with at first.
You also need to think about which areas of your home you want HomeKit devices in and if you want to be able to control your smart home devices while you're away from home.
Zone up your home

You can split your home into different rooms in the Home app, and it's advisable you do this before adding a lot of accessories as the app's interface soon becomes cluttered with icons if not. Plus, devices often default to similar names when first added to the app, meaning you can end up with several lights called Bulb, which makes it incredibly difficult to manage down the line.
If you know what types of devices you want to have set up, think about the rooms where each device, sensor, or hub will live. You'll want to make sure you have a corresponding room in the Home app. These can be added or removed at any time, but getting this step sorted out upfront can make organizing your accessories within the Home app much easier later.
At this time, it's probably worth adding family members to your Home, so you're not the sole person in charge of your smart home tech.
Get the appropriate HomeKit hubs
When you first start looking into HomeKit, you'll probably come across the term 'hub' a lot, and it's used for a couple of different things.
Firstly, some devices require an additional hub (or bridge, as they are technically known) to work with HomeKit. Philips Hue, for example, makes some of the most popular smart lighting devices, but they can't be controlled via the Home app or with Siri unless you have the Philips Hue Bridge set up — that's Philips' hub device. Similarly, affordable Aqara HomeKit sensors are perfect for dotting around your home, but they all communicate with your Apple devices via a hub such as Aqara's M2.

Be sure to read carefully any product's description to check whether a specific hub is needed. For example, if you only plan to buy one device from a brand and need to spend a considerable extra sum on the hub, it may make sense to go for an alternative option that does not require a hub. Conversely, if you plan to buy several devices from the same brand, getting the appropriate hub will be money well spent.
Over time, the requirement for standalone bridge devices is becoming less common. Hopefully, it will go away altogether for new devices once the Matter standard is widely adopted, but you'll need to be aware of hubs and bridges until then.
The other way you will see the word hub used is in terms of HomeKit hubs. One or more of these are necessary to control your HomeKit devices when away from your home's network. Fortunately, you can turn your Apple TV, iPad, or HomePod into a HomeKit hub quickly, meaning it's not an additional purchase if you are already invested in Apple gear.
Add your devices
Once you've figured out where your HomeKit tech will be used in your home, have organized your Home app in advance, and have figured out which devices and hubs you're going to need to buy, it's finally time to take the plunge.
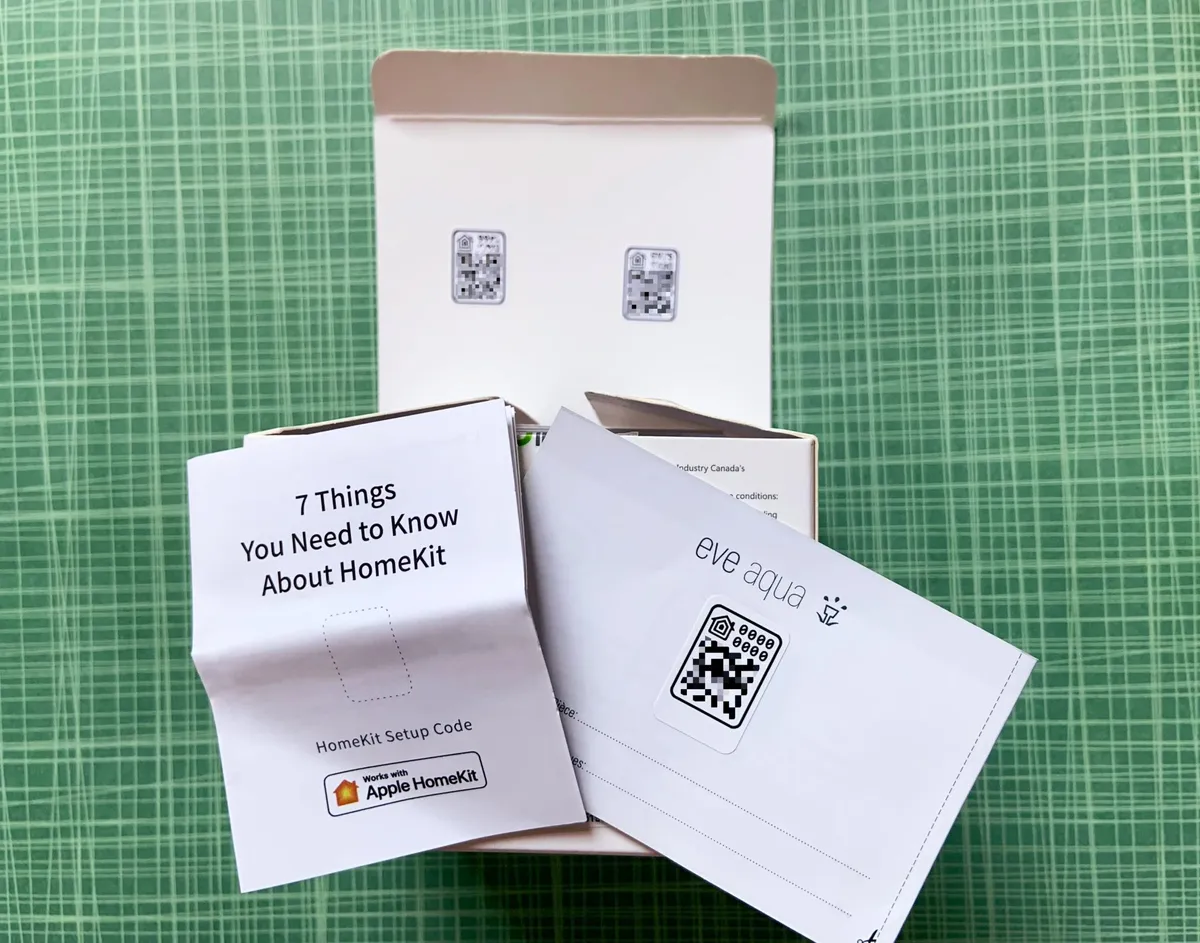
Adding devices to HomeKit is pretty straightforward. Most manufacturers will include a QR code label with each device that you can scan using the camera function in the Home app itself. The app then guides you through the rest of the pairing process, including naming the device and assigning it to a room in your home. It's advisable to start with the hub device if the product needs one.
For some devices, you may need to use the manufacturer's app to set the machine up for the first time before it becomes controllable in the Home app. Be sure to read any documentation that comes with the product carefully. Regardless, it's usually handy to have the manufacturer's app around for firmware updates and the like. Yep, you'll need to update your light bulbs from time to time if you start down the smart home rabbit hole.
Whichever way you add your HomeKit-compatible devices, you'll see their controls in the Home app for iPhone, iPad, and Mac while also being able to control them with your voice using Siri. Their current status will sync between the Home app and the manufacturer's app as well.
Set your favorite HomeKit devices
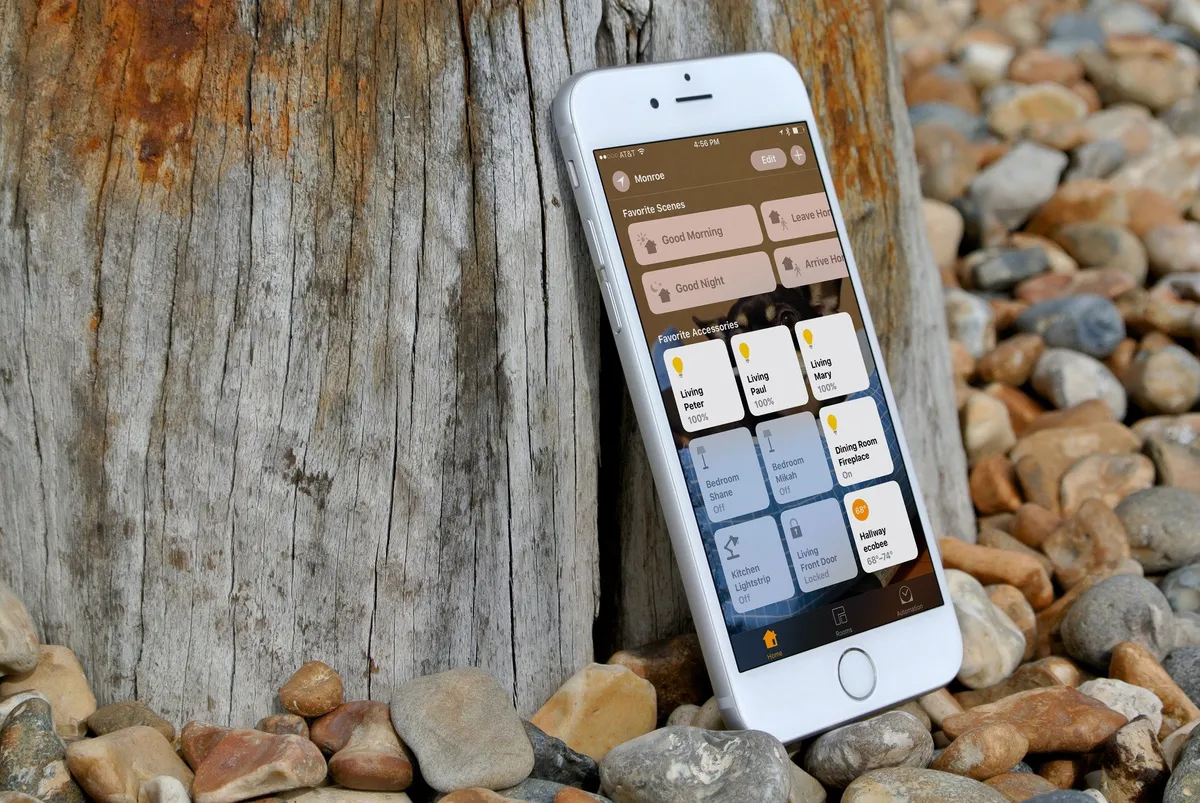
It may sound stupid (who has a favorite light bulb, really?), but setting favorites within the Home app can be helpful. Let's face it, some of the devices you add to HomeKit will be more important than others and require regular interaction. Others are more 'set it and forget it'-type devices.
When you declare devices as your favorites, the Home app can then have your most-used accessories at the ready, and they'll also appear in Control Center across your Apple devices. You'll even get quick access to these accessories via your Apple Watch.
Create some automations

One of the best things about having HomeKit devices is the ability to set up some routines and automations. That's when it feels like you're living in The Jetsons as things happen without the need to tap a button or bark an order.
There is a myriad of ways to automate your devices with triggers like the time of day, your location, a sensor being tripped, or an accessory's status, all able to set other devices in motion. We have a complete guide to creating HomeKit automations. Still, some straightforward examples include turning lights on or off with sunrise or sunset or cranking down the thermostat when you're away from home. These are entirely optional, of course, but they can take a lot of the manual work out of managing your home and smarten up your experience.

